ECO mode BUICK PARK AVENUE 1994 Owners Manual
[x] Cancel search | Manufacturer: BUICK, Model Year: 1994, Model line: PARK AVENUE, Model: BUICK PARK AVENUE 1994Pages: 324, PDF Size: 17.01 MB
Page 74 of 324
You can match a transmitter to as many different
vehicles as you own, provided they are equipped with
exactly the same model system. (General Motors offers
several different models of these systems on their
vehicles.) Each vehicle can have only two transmitters
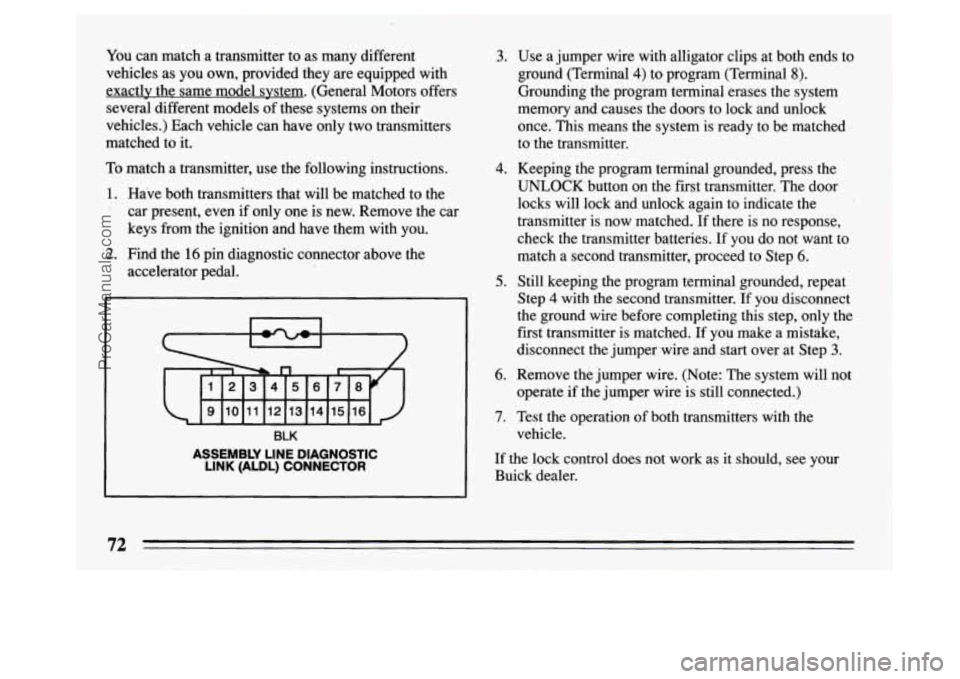
matched to it. 3. Use a jumper wire with alligator clips at both ends to
ground (Terminal
4) to program (Terminal 8).
Grounding the program terminal erases the system
memory and causes the doors to lock and unlock
once. This means the system is ready to be matched
to the transmitter.
To match a transmitter, use the following instructions.
1. Have both transmitters that will be matched to the
'. car present, even if only one is new. Remove the car
keys
from the ignition and have them with you.
2. Find the 16 pin diagnostic connector above the
accelerator pedal.
BLK
ASSEMBLY LINE DIAGNOSTIC LINK (ALDL) CONNECTOR
4. Keeping the program terminal grounded, press the
UNLOCK button on the first transmitter.
The door
locks will lock and unlock again to indicate the
transmitter is now matched.
If there is no response,
check the transmitter batteries.
If you do not want to
match
a second transmitter, proceed to Step 6.
5. Still keeping the program terminal grounded, repeat
Step
4 with the second transmitter. If you disconnect
the ground wire before completing this step, only the
first transmitter is matched. If you make a mistake,
disconnect the jumper wire and start over at Step
3.
6. Remove the jumper wire. (Note: The system will not
operate
if the jumper wire is still connected.)
7. Test the operation of both transmitters with the
vehicle.
If the lock control does not work as it should, see your
Buick dealer.
72
ProCarManuals.com
Page 139 of 324
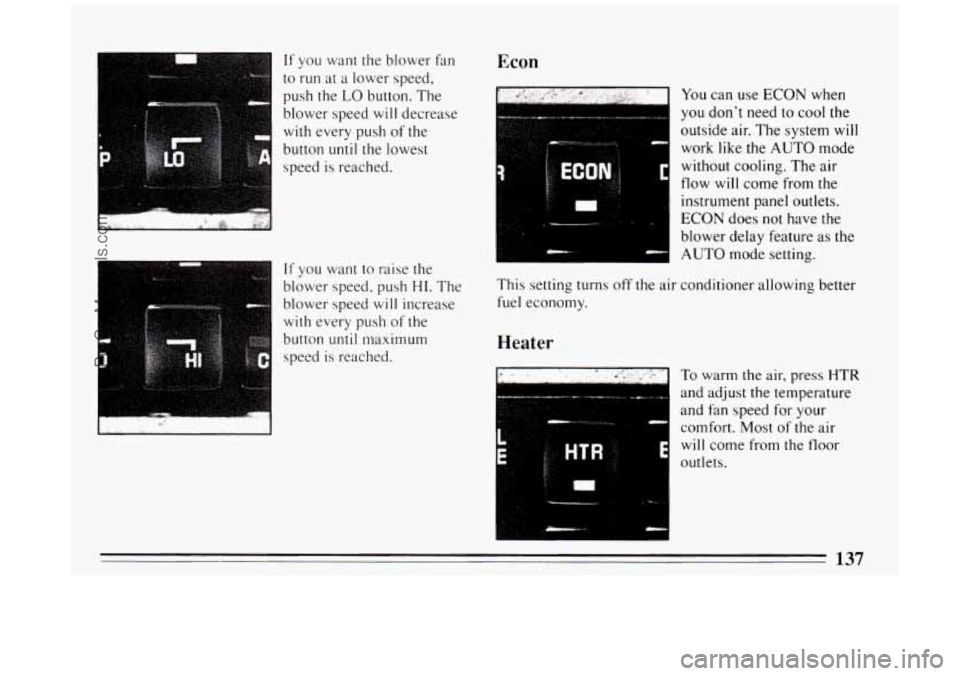
If you want the blower fan
to run at a lower speed,
push the
LO button. The
blower speed
will decrease
with every push of the
button
until the lowest
speed is reached.
If you want to raise the
blower speed, push
HI. The
blower speed
will increase
with every
push of the
button
until maximum
speed
is reached.
Econ
You can use ECON when
you don’t need to cool the
outside air. The system will
work like the AUTO mode
without cooling. The air
flow
will come from the
instrument panel outlets.
ECON does not have the
blower delay feature as
the
AUTO mode setting.
This setting turns off the air conditioner allowing better
fuel economy.
Heater
To warm the air, press mR
and adjust the temperature
and fan speed for your
comfort. Most of the air
will come from the floor
outlets.
137
ProCarManuals.com
Page 143 of 324
Max Vent
This setting provides maximum cooling with the least
amount
of work. MAX recirculates much of the air
inside
your vehicle so it maximizes your air
conditioner’s performance and fuel economy. Air is
directed through
the instrument panel outlets.
Norm
Use NORM for normal cooling on hot days. This setting
cools outside air and directs
it through the instrument
panel outlets.
Bi-Level
This setting is designed for use on sunny days when the
air is only moderately warm or cool. On days like these,
the sun may adequately warm your upper body, but your
lower body may not be warm enough.
The Bi-level setting directs vehicle air
in two ways.
Cool air
is directed toward your upper body through
instrument panel outlets, while slightly warmed air is
directed through the heater outlet at your feet. For
mild outside temperatures when little heating or
cooling is needed, use the VENT setting. Air
will flow
through the instrument panel outlets. ,Use the air outlets
to turn
on, adjust and turn off the air flow. Adjust the
temperature lever to the desired temperature.
Heater
When outside temperatures are cold, pressing the HTR
setting and adjusting the temperature lever
will send
warm air through
the floor outlets and some through the
defroster vents.
Defrost
The DEFROST setting directs most of the air flow
toward the windshield. Use defrost when you want
to
remove fog or ice from the windshield. When it’s 42°F
(6°C) or warmer, you’ll get cooled air.
ProCarManuals.com
Page 159 of 324
Disabling The Theft System
Press preset buttons 1 and 4, for 5 seconds with the
ignition “On” and radio power “Off’. The display
will show “SEC”, indicating the unit is in the secure
mode.
Press the SET button. The display will show “000”.
Enter the first three digits of the code following step
6 and 7 of the preceding directions. The display will
show the numbers as entered.
Press the BAND knob. The radio will display “000”.
Enter the second three digits of the code. The display
Press the BAND knob. If the display shows “---” ,
will show the numbers as entered.
the disabling sequence was successful. (The numbers
matched the user-selected code
or the factory
back-up code) and the
unit is in the UNSECURED
mode. If the display shows “SEC”, the disabling
sequence was unsuccessful and the numbers did not
match either
of the codes and the unit will remain in
the SECURED mode.
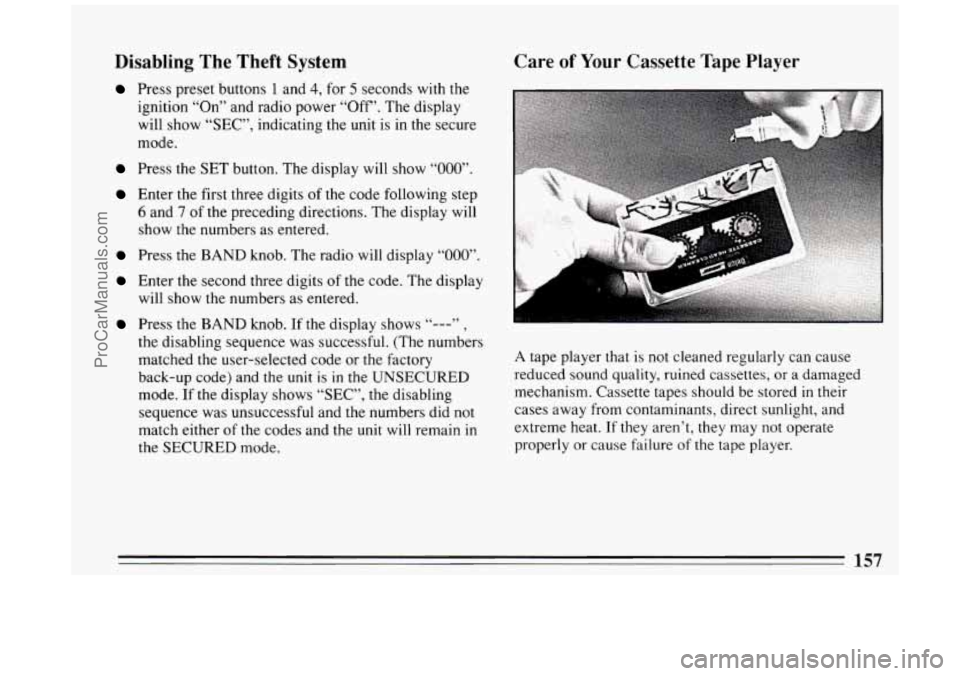
Care of Your Cassette Tape Player
A tape player that is not cleaned regularly can cause
reduced sound quality, ruined cassettes, or a damaged
mechanism. Cassette tapes should be stored
in their
cases away from contaminants, direct sunlight, and
extreme heat.
If they aren’t, they may not operate
properly or cause failure
of the tape player.
157
ProCarManuals.com
Page 289 of 324
Section A: Scheduled Maintenance
Services
Using Your Maintenance Schedules
This section tells you the maintenance services you
should have done and when you should schedule them.
Your Buick dealer knows your vehicle best and wants
you
to be happy with it. If you go to your dealer for your
service needs, you’ll know that GM-trained and
supported service people
will perform the work using
genuine GM parts.
These schedules are for vehicles that:
0
0
0
carry passengers and cargo within recommended
limits.
You will find these limits on your vehicle’s
Tire-Loading Information label. See “Loading Your
Vehicle”
in the Index.
are driven on reasonable road surfaces
within legal
driving limits.
use the recommended unleaded fuel. See “Fuel”
in
the Index.
Selecting the Right Schedule
First you’ll need to decide which of the two schedules is
right for your vehicle. Here’s how to decide which
schedule to follow:
Schedule I
Is any one of these true for your vehicle?
Most trips are less than 4 miles (6 km).
0 Most trips are less than 10 miles ( 16 km) when
outside temperatures are below freezing.
door-to-door delivery, or
in stop-and-go traffic).
0 The engine is at low speed most of the time (as in
You operate your vehicle in dusty areas.
You tow a trailer. (With some models, you should
never tow a trailer. See “Towing
a Trailer” in the
Index.)
If any one (or more) of these is true for your driving,
follow Schedule
I.
Schedule I1
Follow Schedule I1 only if none of the above conditions
is true.
287
ProCarManuals.com
Page 295 of 324
Inspect hoses and replace if they are cracked, swollen
or deteriorated. Tighten screw-type hose clamps.
Clean the outside of the radiator and air conditioning
condenser. Wash the pressure cap and neck.
To help ensure proper operation, we recommend a
pressure test of both the cooling system and the
pressure cap.
6.
Transaxle Service -- Change both the fluid and filter
every
15,000 miles (25 000 km) if the vehicle is
mainly driven under one or more
of these conditions:
In heavy city traffic where the outside
temperature regularly reaches
90°F (32°C) or
higher.
0 In hilly or mountainous terrain.
0 When doing frequent trailer towing. (With some
models, you shouldn’t ever tow a trailer. See
“Towing a Trailer”
in the Index.)
0 Uses such as found in taxi, police car or delivery
service.
If you do not use your vehicle under any of these
conditions, change both the fluid and filter every
100,000 miles ( 160 000 km).
7. Spark Plug Replacement* -- Replace spark plugs
with the proper type. See “Specifications Chart”
in
the Index.
8. Spark Plug Wire Inspection*-f -- Inspect for burns,
cracks or other damage. Check the boot
fit at the
distributor and at the spark plugs. Replace wires as
needed.
9. Supercharger Oil Check--Check oil every 30,000
(50 000km) or 36 months. Check oil level only on
cold engine. Add the proper synthetic oil. See
“Recommended Fluids and Lubricants” in the Index.
10. Air Cleaner Filter Replacement* -- Replace every
30,000 miles (50 000 km) or more often under dusty
conditions. Ask your dealer for the proper
replacement intervals for your driving conditions.
1 1. Fuel Tank, Cap and Lines Inspection*? -- Inspect
fuel tank, cap and lines (including fuel rails and
injection assembly) for damage or leaks. Inspect fuel
cap gasket for an even filler neck imprint or any
damage. Replace parts as needed. Periodic
replacement
of the fuel filter is not required.
* An Emission Control Service.
-f The US. Environmental Protection Agency or the California Air Resources Board has determined that the failure to perform this maintenance item will not nullify the
emission warranty or limit recall liability prior to the completion of vehicle useful life. General Motors. however. urges that all recommended maintenance services be
performed at the indicated intervals and the maintenance be recorded in “Section E:Maintenance Record”.
293
ProCarManuals.com