engine oil BUICK PARK AVENUE 1997 Owners Manual
[x] Cancel search | Manufacturer: BUICK, Model Year: 1997, Model line: PARK AVENUE, Model: BUICK PARK AVENUE 1997Pages: 420, PDF Size: 21.93 MB
Page 12 of 420
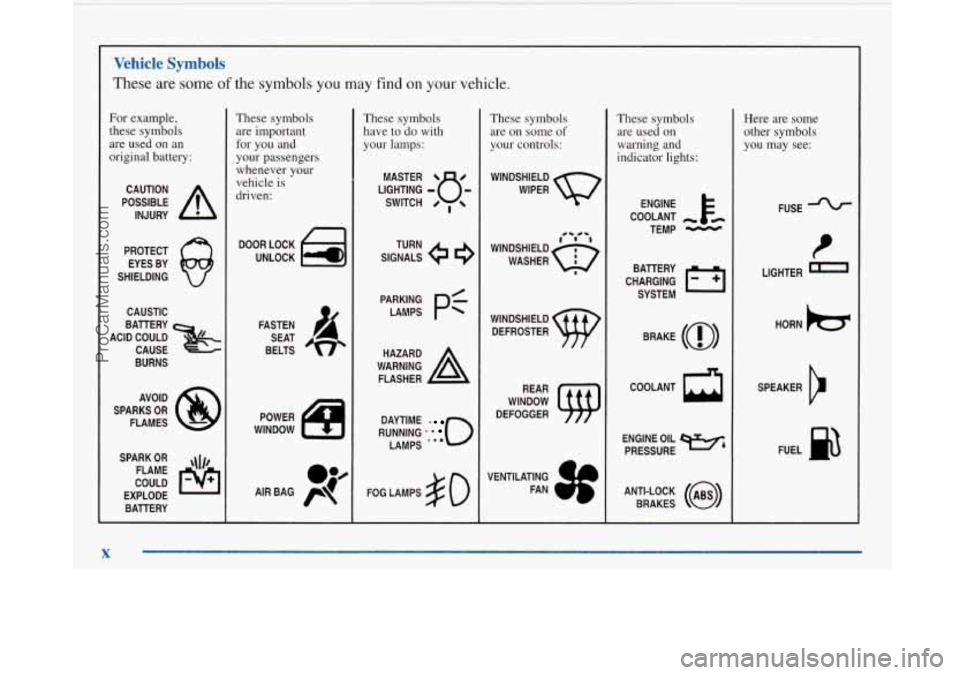
Vehicle Symbols
These are some of the symbols you may find on your vehicle.
For example,
these symbols
are used on an
original battery:
POSSIBLE A
CAUTION
INJURY
PROTECT EYES BY
SHIELDING
CAUSTIC
ACID COULD
&
BAllERY
CAUSE
BURNS
AVOID
SPARKS
OR
FLAMES
SPARK
OR ,\I/,
COULD FLAME
EXPLODE BAllERY
X
These symbols are important
for you and
your passengers
whenever your
vehicle is
driven:
DOOR LOCK
UNLOCK
FASTEN SEAT
BELTS
POWER
WINDOW
These symbols have to do with
your lamps:
SIGNALS 6
TURN
RUNNING
* ' 0
DAYTIME -
LAMPS .'*
FOG LAMPS $0
These symbols
are
on some of
your controls:
WINDSHIELD
WIPER
WINDSHIELD DEFROSTER
WINDOW
DEFOGGER
These symbols are used
on
warning and
indicator lights:
COOLANT -
TEMP -
CHARGING I-1
BAlTERY
SYSTEM
BRAKE
(a)
COOLANT a
ENGINE OIL e,
PRESSURE
ANTI-LOCK
(@)
BRAKES
Here are some
other symbols
you may see:
FUSE
LIGHTER
a
HORN )tr
SPEAKER
IJ
FUEL p3
1 I
ProCarManuals.com
Page 83 of 420
To Use the Coolant Heater
1. Turn off the engine.
2. Open the hood and unwrap the electrical cord.
3. Plug it into a normal, grounded 110-volt AC outlet.
Plugging the cord into an ungrounded outlet
could cause an electrical shock.
Also, the wrong
kind of extension cord could overheat and cause
a fire. You could be seriously injured. Plug the
cord into
a properly grounded three-prong
110-volt
AC outlet. If the cord won’t reach, use a
heavy-duty three-prong extension cord rated for
at least 15 amps.
4. Before starting the engine, be sure to unplug
and store the cord as it was before to keep it away
from moving engine parts. If you don’t, it could
be damaged. How long should
you keep the coolant heater plugged
in? The answer depends on the outside temperature, the
lund
of oil you have, and some other things. Instead of
trying to list everything here, we ask that you contact
your Buick dealer in the area where you’ll be parking
your vehicle. The dealer can give you the best advice
for
that particular area.
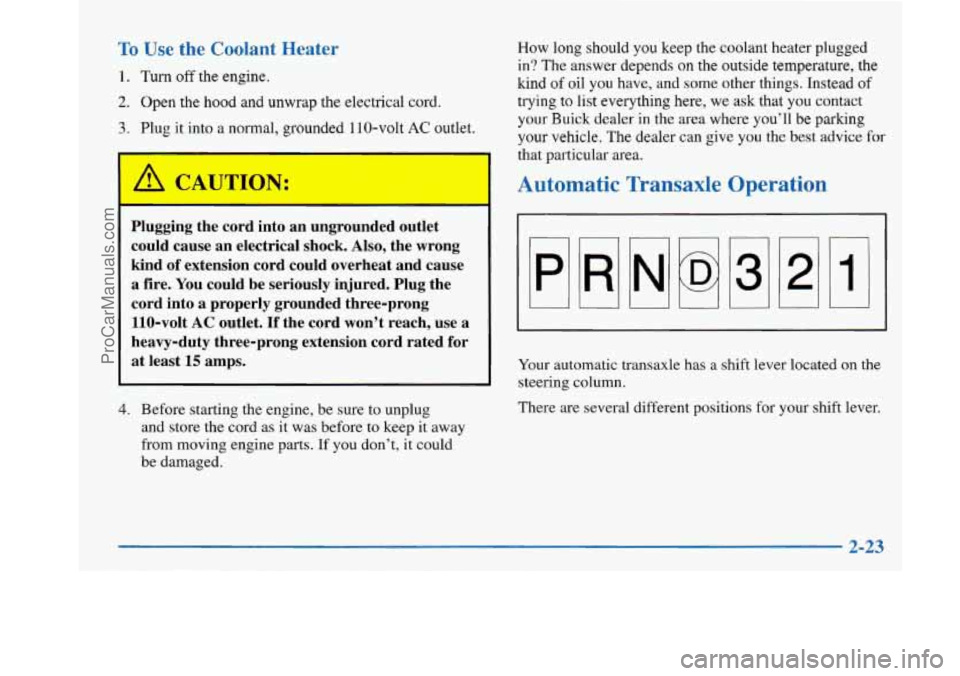
Automatic Transaxle Operation
Your automatic transaxle has a shift lever located on the
steering column.
There are several different positions for your shift lever.
2-23
ProCarManuals.com
Page 140 of 420
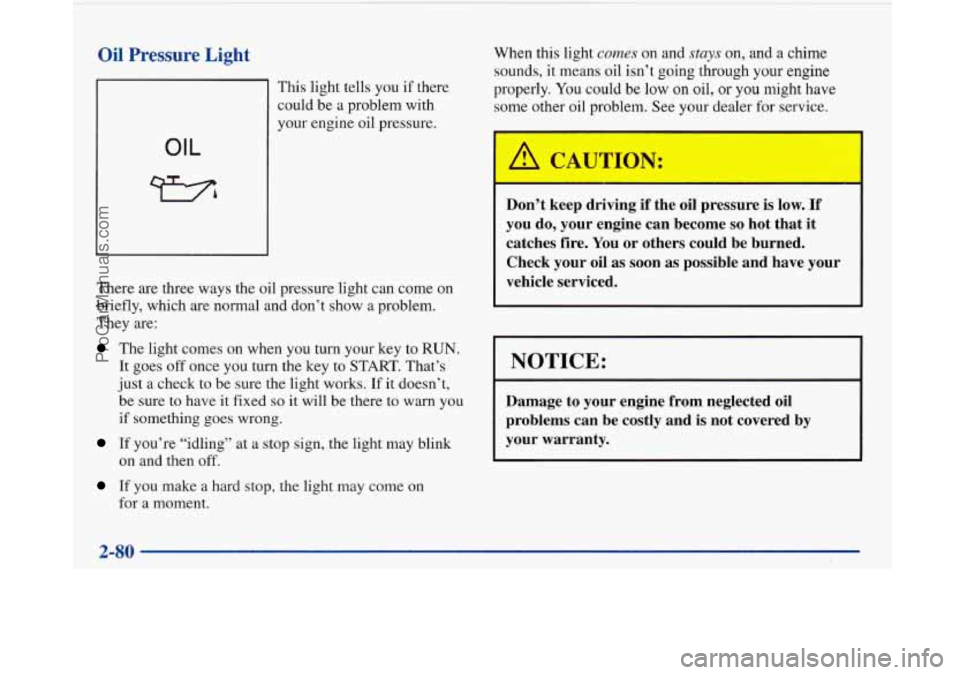
Oil Pressure Light
OIL
This light tells you if there
could be a problem with
your engine oil pressure.
There are three ways the oil pressure light can come on
briefly, which are normal and don’t show a problem.
They are:
The light comes on when you turn your key to RUN.
It goes off once you turn the key to START. That’s
just a check to be sure the light works. If
it doesn’t,
be sure to have
it fixed so it will be there to warn you
if something goes wrong.
If you’re “idling” at a stop sign, the light may blink
on and then off.
If you make a hard stop, the light may come on
for a moment.
When this light comes on and stays on, and a chime
sounds, it means oil isn’t
going through your engine
properly. You could
be low on oil, or you might have
some other oil problem. See your dealer for service.
Don’t keep driving if the oil pressure is
low. If
you do, your engine can become so hot that it
catches fire. You or others could be burned.
Check your oil as soon as possible and have your
vehicle serviced.
I NOTICE:
Damage to your engine from neglected oil
problems can be costly and
is not covered by
your warranty.
2-80
ProCarManuals.com
Page 146 of 420

ODO/TRIP
When this button is pressed, the display will show the
total mileage, and Trip
1 or Trip 2 miles. Trip 1 and
Trip
2 will display the miles traveled since the last reset.
To reset the trip odometer, press the ODO/TRIP button
until the trip miles are shown in the DIC display, then
press the RESET button. The trip odometer will now
accumulate miles until the next reset.
FUEL INFO
Average Fuel Economy:
Press the FUEL button until
the display shows FUEL ECONOMY AVERAGE.
Average fuel economy is viewed as a long term
approximation of your overall driving and driving
conditions. To learn the average fuel economy from a
new starting point, press the RESET button while the
average fuel economy is displayed in the DIC.
Instantaneous Fuel Economy: Press the FUEL button
until the display shows FUEL ECONOMY INST.
Instantaneous fuel economy varies with your driving
conditions, such as acceleration, braking and the grade
of
the road being traveled. The RESET button does not
function in this mode.
Fuel Range: Press the FUEL button until the display
shows FUEL RANGE. The fuel range will calculate the
remaining distance you can drive without refueling. This
calculation is based on the average fuel economy for the
last
25 miles driven, and the fuel remaining in the fuel
tank. The
RESET button does not function in this mode.
Fuel Used: Press the FUEL button until the display
shows FUEL USED. This display will show you how
much fuel has been used since the last reset. To learn
how much fuel is used from a new starting point, press
the RESET button while the fuel used is displayed in
the DIC.
GAGES
Oil Pressure:
Press the GAGES button until OIL
PRESSURE appears in the display. If there are no
problems detected with the oil pressure, the display will
show OIL PRESSURE NORMAL. If a low oil pressure
condition
is detected, the display will show OIL
PRESSURE LOW. If you see the OIL PRESSURE
LOW message, you could be low on oil or your oil is
not going through the engine properly. See your dealer
for service.
2-86
ProCarManuals.com
Page 147 of 420
Coolant Temperature: Press the GAGES button until
COOLANT TEMP appears in the display. If there are no
problems detected with the temperature, COOLANT
TEMP NORMAL will appear
in the display. If the
temperature is too high, COOLANT TEMP HOT will
appear in the display. If you see the COOLANT TEMP
HOT message, your engine is overheated. You should
pull off the road, stop your vehicle and turn off your
engine as soon as possible. This manual explains what to
do. See “Engine Overheating” in the Index.
Battery Volts: Press the GAGES button until the
display shows BATTERY STATE.
If the voltage is
normal the display will show BATTERY STATE
NORMAL.
If the voltage drops below 10.5 volts, the
display will show BATTERY STATE LOW. If the
voltage is above
16 volts, the display will show
BATTERY STATE HIGH. If the display shows the high
or low message, you need to have your battery checked.
Oil Life Index: Press the GAGES button until OIL
LIFE INDEX appears in the display. The OIL LIFE
INDEX NORMAL display will show an estimate of
the oil’s remaining useful life. When the oil life index
is less than
lo%, the display will show OIL LIFE INDEX CHANGE
OIL. When you have the oil
changed according to the maintenance schedule (see
“Maintenance Schedule” in the Index), you will have
to reset the oil life index. To do this, press and hold the
RESET button for more than five seconds while the oil
life index is being displayed on the DIC. The oil life
will change to
100%.
Tire Pressure Status: Press the GAGES button
until TIRE PRESSURE appears in the display.
TIRE
PRESSURE NORMAL is displayed when the Check
Tire Pressure System believes your vehicle’s tire
pressures are normal. If a potential tire pressure
problem is detected, the display will show TIRE
PRESSURE LOW: CHECK TIRES.
If you see the
TIRE PRESSURE LOW: CHECK TIRES message, you
should stop as soon as you can and check all your tires
for damage. (If a tire is flat, see “If a Tire Goes Flat”
in
the Index.) Also check the tire pressure in all four tires
as soon as you can. See “Inflation
- Tire Pressure” and
“Check Tire Pressure System”
in the Index.
There are times when you will have to reset (calibrate)
the Check Tire Pressure System. See “Check Tire
Pressure System” in the Index.
2-87
ProCarManuals.com
Page 148 of 420
Warnings and Messages
Other messages or warnings may appear in the DIC
display such as:
WINDSHIELD WASHER FLUID LOW
0 ENG COOLANT LOW - CHECK LEVEL
ENGINE OIL LOW - CHECK LEVEL
CHANGE ENGINE OIL SOON
CHECK TIRE PRESSURES
TRACTION CONTROL SYSTEM ACTIVE
DOOR AJAR
TRUNK AJAR
Pressing any
of the DIC buttons will remove the above
messages or warnings from the DIC display.
Driver Information Center
Personal Choice Programming
The DIC can be used to program personal choice
features available with your vehicle, such as memory
seats, memory door locks, security feedback, delayed
locking and perimeter lighting. See “Personal Choice
Features” in the Index.
The DIC is used to program the personal choices of
two drivers. The driver’s are recognized by DRIVER
#1
and DRIVER #2. You will let the DIC know which
driver you are by using your Remote Keyless Entry
transmitter or by pressing the appropriate memory
seat control button located on the driver’s door. The
remote transmitter was pre-programmed to belong
to
DRIVER #1 or DRIVER #2.
The last driver number remembered by the DIC will show
on the display each time the UNLOCK button on the same
transmitter is pressed, and the ignition is turned on.
When you press UNLOCK on your transmitter, the DIC
will automatically change driver numbers and the
vehicle will recall the personal choice settings that were
last made to correspond to your transmitter.
ProCarManuals.com
Page 211 of 420
Once you are moving on the freeway, make certain you
allow a reasonable following distance. Expect to move
slightly slower at night.
When you want to leave the freeway, move to the proper
lane well in advance. If you miss your exit, do not,
under any circumstances, stop and back up. Drive on to
the next exit.
The exit ramp can be curved, sometimes quite sharply.
The exit speed is usually posted.
Reduce your speed according to your speedometer, not
to your sense of motion. After driving for any distance
at higher speeds, you may tend to think you
are going
slower than you actually are.
Before Leaving on a Long Trip
Make sure you’re ready. Try to be well rested. If you
must start when you’re not fresh
-- such as after a day’s
work
-- don’t plan to make too many miles that first part
of the journey. Wear comfortable clothing and shoes you
can easily drive in. Is
your vehicle ready for a long trip? If you keep it
serviced and maintained, it’s ready to go. If it needs
service, have it done before starting out. Of course,
you’ll find experienced and able service experts in
Buick dealerships all across North America. They’ll be
ready and willing to help if you need it.
Here are some things you can check before a trip:
0
0
0
0
0
0
0
Windshield Washer Fluid: Is the reservoir full?
Are all windows clean inside and outside?
Wiper Blades: Are they in good shape?
Fuel, Engine Oil, Other Fluids: Have you checked
all levels?
Lamps: Are they all working? Are the lenses clean?
Tires: They are vitally important to a safe,
trouble-free trip. Is the tread good enough for
long-distance driving? Are the tires all inflated to the
recommended pressure?
Weather Forecasts: What’s the weather outlook
along your route? Should you delay your trip a short
time to avoid a major storm system?
Maps: Do you have up-to-date maps?
4-23
ProCarManuals.com
Page 226 of 420
Driving On Grades
Reduce speed and shift to a lower gear before you start
down a long or steep downgrade.
If you don’t shift
down, you might have to use your brakes
so much that
they would get hot and no longer work well.
On a long uphill grade, shift down to
THIRD (3) and
reduce your speed to around
45 mph (70 km/h) to reduce
the possibility of engine and transaxle overheating.
Parking on Hills
You really should not park your vehicle, with a trailer
attached, on a hill. If something goes wrong, your rig
could start to move. People can be injured, and both
your vehicle and the trailer can be damaged.
But if you ever have to park your rig on a hill, here’s
how to do it:
1. Apply your regular brakes, but don’t shift into
2. Have someone place chocks under the trailer wheels.
3. When the wheel chocks are in place, release the
regular brakes until the chocks absorb the load.
4. Reapply the regular brakes. Then apply your parking
brake, and then shift to PARK (P).
5. Release the regular brakes.
PARK (P) yet.
When You Are Ready to Leave After
Parking
on a Hill
1. Apply your regular brakes and hold the pedal down
while you:
Start your engine;
Shift into a gear; and
0 Release the parking brake.
2. Let up on the brake pedal.
3. Drive slowly until the trailer is clear of the chocks.
4. Stop and have someone pick up and store the chocks.
Maintenance When Trailer Towing
Your vehicle will need service more often when you’re
pulling a trailer. See the Maintenance Schedule for more
on this. Things that
are especially important in trailer
operation are automatic transaxle fluid (don’t overfill),
engine oil, belts, cooling system and brake adjustment.
Each of these is covered in this manual, and the Index
will help you find them quickly. If you’re trailering, it’\
s
a good idea to review these sections before you start
your trip.
Check periodically to see that all hitch nuts and bolts
are tight.
ProCarManuals.com
Page 242 of 420
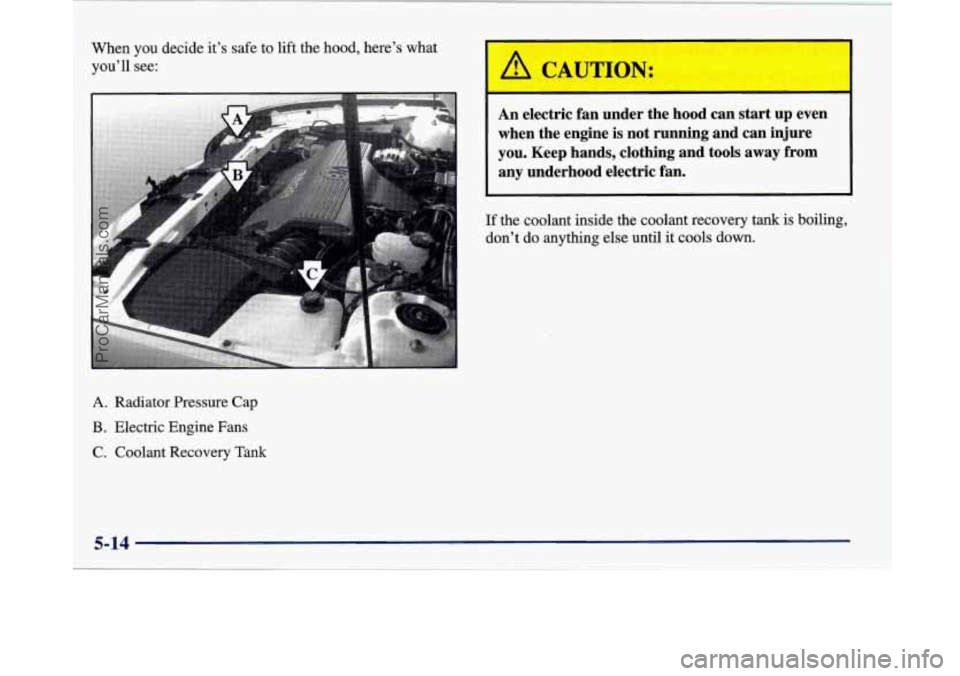
When you decide it's safe to lift the hood, here's what
you'll see:
A. Radiator Pressure Cap
B. Electric Engine Fans
C. Coolant Recovery
Tank
A CAUTION:
An electric fan under the hood can start up even
when the engine is not running and can injure
you. Keep hands, clothing and tools away from
any underhood electric fan.
If the coolant inside the coolant recovery tank is boiling,
don't do anything else until it cools down.
5-14
ProCarManuals.com
Page 244 of 420
How to Add Coolant to the Coolant
Recovery Tank
If you haven’t found a problem yet, but the coolant
level isn’t at or above the
FULL COLD mark, add a
50/50 mixture of clean water (preferably distilled) and
DEX-COOL@ (silicate-free) antifreeze at the coolant
recovery tank. (See “Engine Coolant” in the Index for
more information.)
Adding only plain water to your cooling system
can be dangerous. Plain water, or some other
liquid like alcohol, can boil before the proper
coolant mix
will. Your vehicle’s coolant warning
system is set for the proper coolant mix. With
plain water or the wrong mix, your engine could
get too hot but you wouldn’t get the overheat
warning. Your engine could catch fire and you or
others could be burned. Use a
50/50 mix of clean
water and
DEX-COOL@ coolant.
I NOTICE:
In cold weather, water can freeze and crack the
engine, radiator, heater core and other parts.
Use the recommended coolant and the proper
coolant mix.
ProCarManuals.com