wheel torque BUICK PARK AVENUE 1997 Owners Manual
[x] Cancel search | Manufacturer: BUICK, Model Year: 1997, Model line: PARK AVENUE, Model: BUICK PARK AVENUE 1997Pages: 420, PDF Size: 21.93 MB
Page 257 of 420
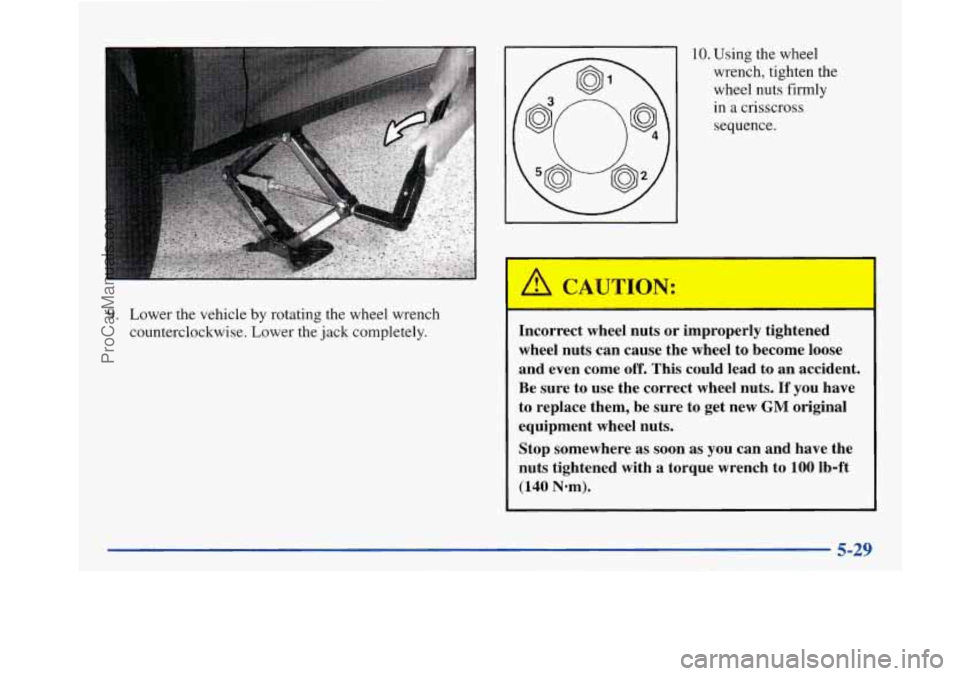
9. Lower the vehicle by rotating the wheel wrench
counterclockwise. Lower the jack completely.
10. Using the wheel
wrench, tighten the
wheel nuts firmly
in a crisscross
sequence.
A CAUTION:
- - I
Incorrect wheel nuts or improperly tightened
wheel nuts can cause the wheel to become loose
and even come off.
This could lead to an accident.
Be sure to use the correct wheel nuts.
If you have
to replace them, be sure to get new
GM original
equipment wheel nuts.
Stop somewhere as soon as you can and have the
nuts tightened with
a torque wrench to 100 lb-ft
(140 Nom).
5-29
ProCarManuals.com
Page 258 of 420
NOTICE:
Improperly tightened wheel nuts can lead to
brake pulsation and rotor damage.
To avoid
expensive brake repairs, evenly tighten the wheel
nuts in the proper sequence and to the proper
torque specification.
Don’t try to put a wheel cover on your compact spare
tire. It won’t fit. Store the wheel cover
in the trunk
until you have the flat tire repaired or replaced.
NOTICE:
Wheel covers won’t fit on your compact spare. If
you try to put a wheel cover on your compact
spare, you could damage the cover or the spare.
Storing the Flat Tire and Tools
L!b, CAUTION: I
Storing a jack, a tire or other equipment in the
passenger compartment
of the vehicle could
cause injury. In
a sudden stop or collision, loose
equipment could strike someone. Store all these
in the proper place.
After you’ve put the compact spare tire on your vehicle,
you’ll need
to store the flat tire in your trunk. Use the
following procedure to secure the flat tire in the trunk.
5-30
~
ProCarManuals.com
Page 297 of 420
Some driving conditions or climates may cause a brake
squeal when the brakes are first applied or lightly
applied. This does not mean something is wrong with
your brakes.
Properly torqued wheel nuts are necessary to help
prevent brake pulsation. When tires are rotated, inspect
brake pads for wear and evenly torque wheel nuts in the
proper sequence to GM specifications.
Your rear drum brakes don’t have wear indicators, but if
you ever hear a rear brake rubbing noise, have the rear
brake linings inspected.
Also, the rear brake drums should
be removed and inspected each time the tires
are removed
for rotation
or changing. When you have the front brakes
replaced, have the rear brakes inspected, too.
Brake linings should always be replaced as complete
axle sets.
See “Brake System Inspection’’ in Section
7 of this
manual under Part
C “Periodic Maintenance
Inspections”.
Brake Pedal Travel
See your dealer if the brake pedal does not return to
normal height, or if there is a rapid increase in pedal
travel. This could be a sign of brake trouble.
Brake Adjustment
Every time you apply the brakes, with or without the
vehicle moving, your brakes adjust for wear.
Replacing Brake System Parts
The braking system on a modern vehicle is complex. Its
many parts have to be of top quality and work well
together
if the vehicle is to have really good braking.
Your vehicle was designed and tested with top-quality
GM brake parts. When you replace parts of your braking
system
-- for example, when your brake linings wear
down and you have to have new ones put in
-- be sure
you get new approved GM replacement parts.
If you
don’t, your brakes may no longer work properly. For
example, if someone puts in brake linings that are wrong
for your vehicle, the balance between your front and
rear brakes can change
-- for the worse. The braking
performance you’ve come to expect can change in many
other ways if someone puts in the wrong replacement
brake parts.
6-33
ProCarManuals.com
Page 315 of 420
After the tires have been rotated, adjust the front and rear
inflation pressures as shown on the Tire-Loading
Information label. Make certain that
all wheel nuts are
properly tightened. See “Wheel Nut Torque”
in the Index.
When It’s Time for New Tires
Rust or dirt on a wheel, or on the parts to which
it is fastened, can make wheel nuts become loose
after a time. The wheel could come off and cause
an accident. When you change a wheel, remove
any rust or dirt from places where the wheel
attaches to the vehicle. In an emergency, you can
use a cloth or a paper towel to do this; but be
sure to use a scraper or wire brush later, if you
need to, to get all the rust or dirt off. (See
“Changing a Flat Tire” in the Index.)
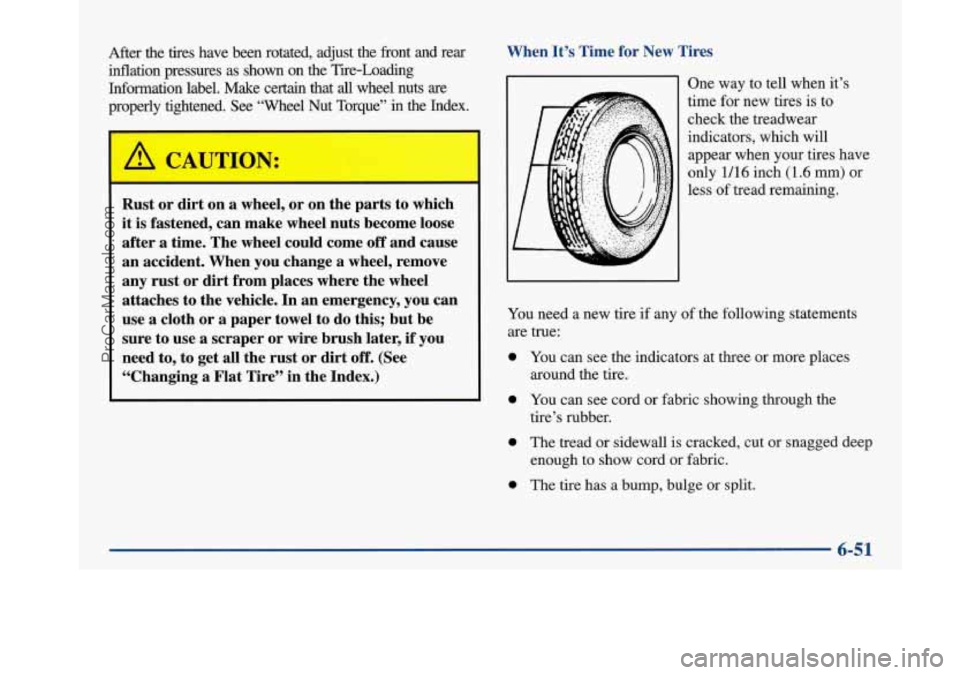
One way to tell when it’s
time for new tires is to
check the treadwear
indicators, which will appear when your tires have
only
1/16 inch (1.6 mm) or
less
of tread remaining.
You need a new tire if any of the following statements
are true:
0 You can see the indicators at three or more places
0 You can see cord or fabric showing through the
around
the tire.
tire’s rubber.
0 The tread or sidewall is cracked, cut or snagged deep
enough to show cord
or fabric.
0 The tire has a bump, bulge or split.
6-51
ProCarManuals.com
Page 340 of 420
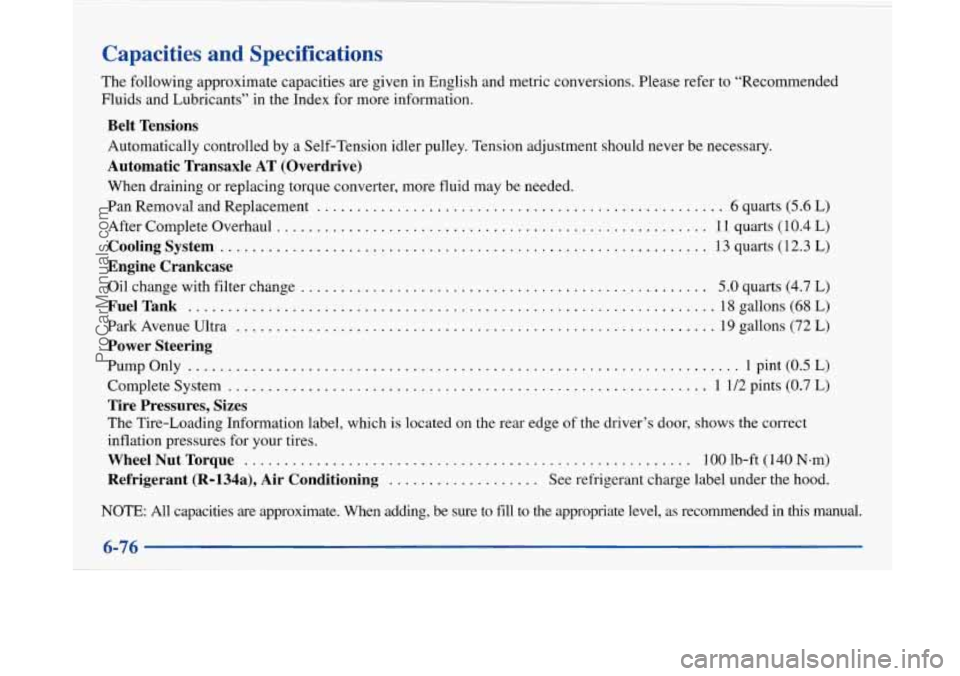
Capacities and Specifications
The following approximate capacities are given in English and metric conversions. Please refer to “Recommended
Fluids and Lubricants” in the Index for more information.
Belt Tensions
Automatically controlled by a Self-Tension idler pulley. Tension adjustment should never be necessary.
Automatic Transaxle AT (Overdrive)
When draining or replacing torque converter, more fluid may be needed.
Pan Removal and Replacement
................................................... 6 quarts (5.6 L)
After Complete Overhaul
...................................................... 11 quarts (10.4 L)
Cooling System ............................................................. 13 quarts (12.3 L)
Oil change with filter change ................................................... 5.0 quarts (4.7 L)
Park Avenue Ultra
............................................................ 19 gallons (72 L)
Engine Crankcase
FuelTank
......................,...........................................18gall\
ons (68L)
Power Steering
PumpOnly .....................................................................lpi\
nt (0.5L)
Tire Pressures, Sizes
The Tire-Loading Information label, which is located on the rear edge of the driver’s door, shows the correct
inflation pressures for your tires.
WheelNutTorque ........................................................ lOOlb-ft(140N~m)
Complete System
............................................................ 1
1/2 pints (0.7 L)
Refrigerant (R-l34a), Air Conditioning ................... See refrigerant charge label under the hood.
NOTE: All capacities are approximate. When adding, be sure to \
fill to the appropriate level, as recommended
in this manual.
ProCarManuals.com
Page 416 of 420
!
Tires (Continued)
Traction
.................................... 6-53
Treadwear
................................... 6-53
Uniform Quality Grading
....................... 6-53
Wear Indicators
.............................. 6-5 1
Wheel Replacement ........................... 6-54
When It’s Time for New
....................... 6-5 1
Top Strap
..................................... 1-36
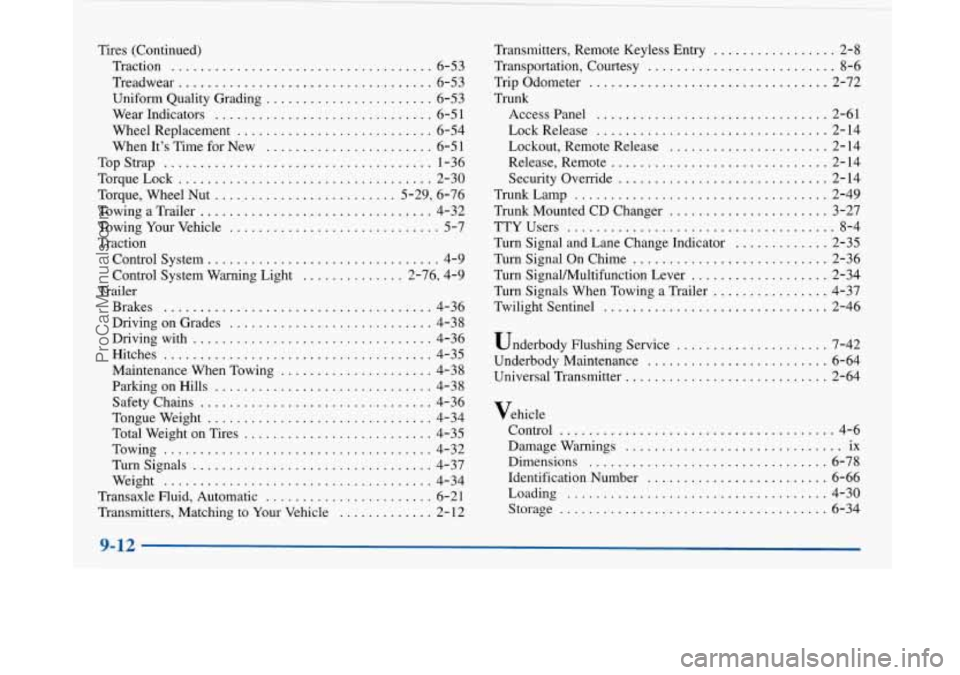
Torque. Wheel Nut
......................... 5-29. 6-76
Towing a Trailer
................................ 4-32
Towing Your Vehicle
............................. 5-7
Traction
Control System
................................ 4-9
Control System Warning Light
.............. 2.76. 4.9
Brakes
..................................... 4-36
Driving on Grades
............................ 4-38
Drivingwith
................................. 4-36
Hitches
..................................... 4-35
Maintenance When Towing
..................... 4-38
Parkingonfills
.............................. 4-38
Safety Chains
................................ 4-36
Tongueweight
............................... 4-34
Total Weight on Tires
.......................... 4-35
Towing
..................................... 4-32
Turnsignals
................................. 4-37
Weight
..................................... 4-34
Transaxle Fluid. Automatic
....................... 6-21
Transmitters. Matching to Your Vehicle
............. 2- 12
TorqueLock
................................... 2-30
Trailer Transmitters.
Remote Keyless Entry
................. 2-8
Transportation. Courtesy
.......................... 8-6
Trip Odometer
................................. 2-72
Trunk Accesspanel
................................ 2-61
LockRelease
................................ 2-14
Lockout. Remote Release
...................... 2-14
Release. Remote
.............................. 2-14
Security Override
............................. 2-14
TrunkLamp
................................... 2-49
Trunk Mounted CD Changer
...................... 3-27
TTY Users
..................................... 8-4
Turn Signal and Lane Change Indicator
............. 2-35
Turn Signal On Chime
........................... 2-36
Turn SignaVMultifunction Lever
................... 2-34
Turn Signals When Towing a Trailer
................ 4-37
Twilight Sentinel
............................... 2-46
Underbody Flushing Service
..................... 7-42
Underbody Maintenance
......................... 6-64
Universal Transmitter
............................ 2-64
Vehicle Control
...................................... 4-6
Dimensions
................................. 6-78
Identification Number
......................... 6-66
Loading
.................................... 4-30
Storage
..................................... 6-34
Damage Warnings
.............................. ix
9-12
ProCarManuals.com
Page 417 of 420
Ventilation System ............................... 3-6
Visor Vanity Mirror. Illuminated
................... 2-62
Visors. Sun
.................................... 2-62
Voltage Indicator
............................... 2-74
warning Devices
............................... 5-2
Warning Lights. Gages and Indicators
............... 2-73
Warranty Information
............................. 8-8
Washer Fluid. Windshield
........................ 6-29
Washing Your Vehicle
........................... 6-61
Weatherstrips
.................................. 6-60
Wheel Alignment
.................................. 6-54
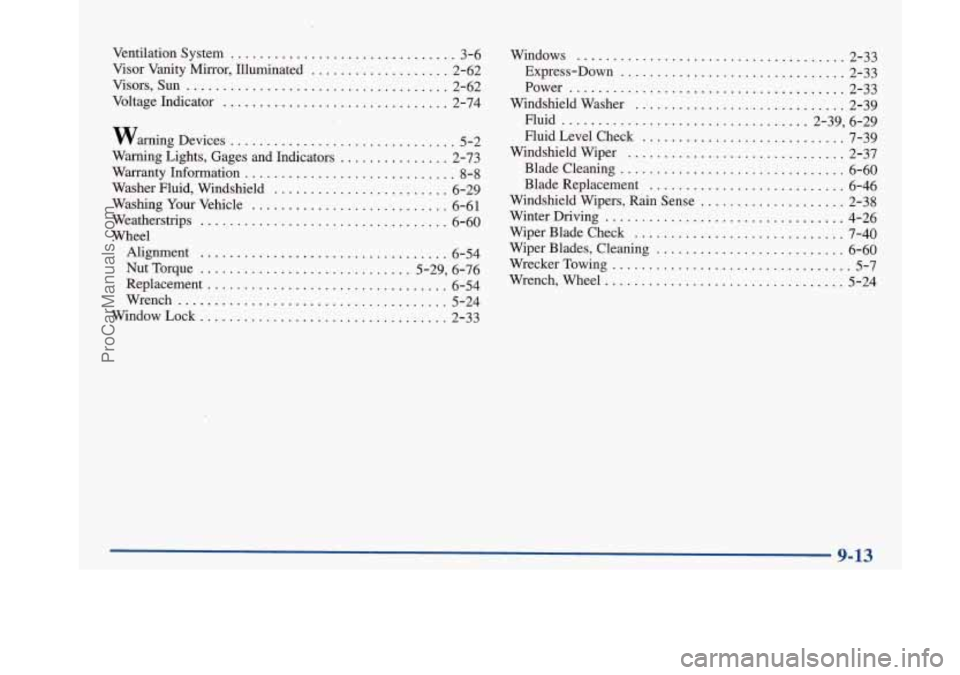
Nut Torque
............................. 5-29, 6-76
Replacement
................................. 6-54
Wrench
..................................... 5-24
WindowLock
.................................. 2-33 Windows
..................................... 2-33
Express-Down
............................... 2-33
Power
...................................... 2-33
Windshield Washer
............................. 2-39
Fluid
.................................. 2-39, 6-29
Fluid Level Check
............................ 7-39
Windshield Wiper
.............................. 2-37
Bladecleaning
............................... 6-60
Blade Replacement
........................... 6-46
Windshield Wipers, Rain Sense
.................... 2-38
Winter Driving
................................. 4-26
Wiper Blade Check
............................. 7-40
Wiper Blades, Cleaning
.......................... 6-60
WreckerTowing
................................. 5-7
Wrench, Wheel
................................. 5-24
9-13
ProCarManuals.com