headlamp BUICK PARK AVENUE 2003 User Guide
[x] Cancel search | Manufacturer: BUICK, Model Year: 2003, Model line: PARK AVENUE, Model: BUICK PARK AVENUE 2003Pages: 372, PDF Size: 2.8 MB
Page 130 of 372
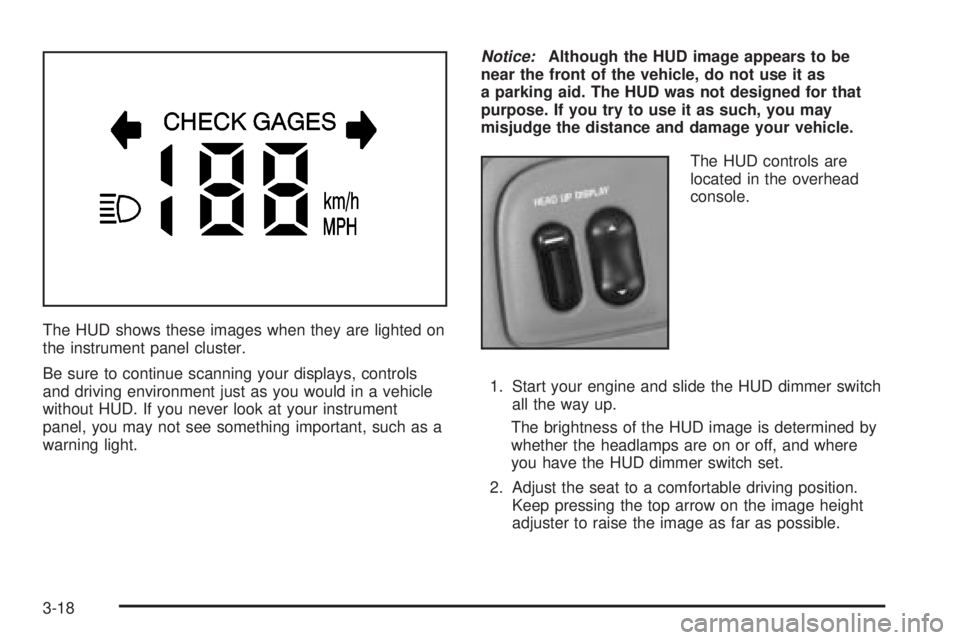
The HUD shows these images when they are lighted on
the instrument panel cluster.
Be sure to continue scanning your displays, controls
and driving environment just as you would in a vehicle
without HUD. If you never look at your instrument
panel, you may not see something important, such as a
warning light.
Notice:Although the HUD image appears to be
near the front of the vehicle, do not use it as
a parking aid. The HUD was not designed for that
purpose. If you try to use it as such, you may
misjudge the distance and damage your vehicle.
The HUD controls are
located in the overhead
console.
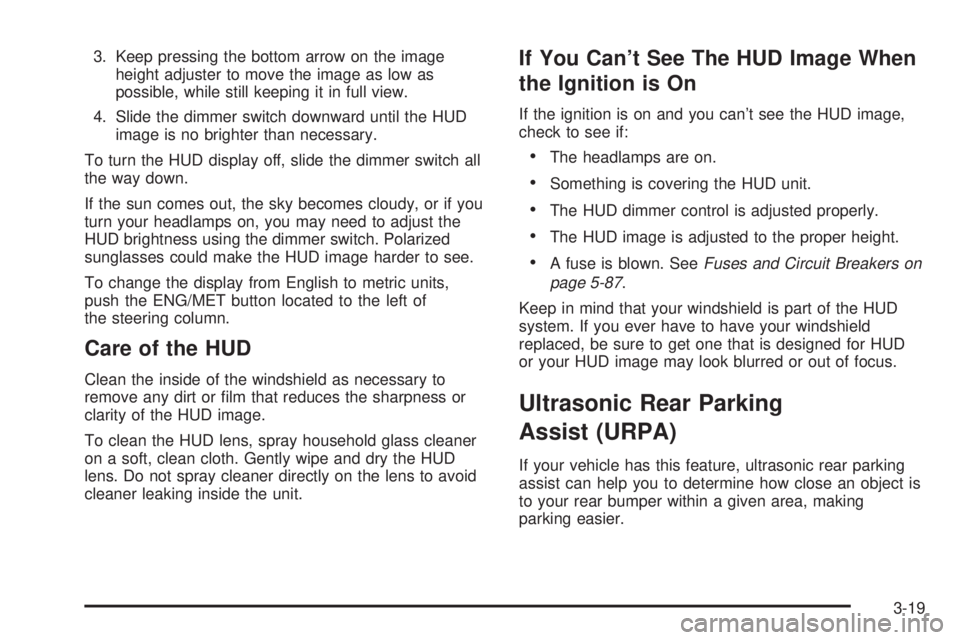
1. Start your engine and slide the HUD dimmer switch
all the way up.
The brightness of the HUD image is determined by
whether the headlamps are on or off, and where
you have the HUD dimmer switch set.
2. Adjust the seat to a comfortable driving position.
Keep pressing the top arrow on the image height
adjuster to raise the image as far as possible.
3-18
Page 131 of 372
3. Keep pressing the bottom arrow on the image
height adjuster to move the image as low as
possible, while still keeping it in full view.
4. Slide the dimmer switch downward until the HUD
image is no brighter than necessary.
To turn the HUD display off, slide the dimmer switch all
the way down.
If the sun comes out, the sky becomes cloudy, or if you
turn your headlamps on, you may need to adjust the
HUD brightness using the dimmer switch. Polarized
sunglasses could make the HUD image harder to see.
To change the display from English to metric units,
push the ENG/MET button located to the left of
the steering column.
Care of the HUD
Clean the inside of the windshield as necessary to
remove any dirt or ®lm that reduces the sharpness or
clarity of the HUD image.
To clean the HUD lens, spray household glass cleaner
on a soft, clean cloth. Gently wipe and dry the HUD
lens. Do not spray cleaner directly on the lens to avoid
cleaner leaking inside the unit.
If You Can't See The HUD Image When
the Ignition is On
If the ignition is on and you can't see the HUD image,
check to see if:
·The headlamps are on.
·Something is covering the HUD unit.
·The HUD dimmer control is adjusted properly.
·The HUD image is adjusted to the proper height.
·A fuse is blown. SeeFuses and Circuit Breakers on
page 5-87
.
Keep in mind that your windshield is part of the HUD
system. If you ever have to have your windshield
replaced, be sure to get one that is designed for HUD
or your HUD image may look blurred or out of focus.
Ultrasonic Rear Parking
Assist (URPA)
If your vehicle has this feature, ultrasonic rear parking
assist can help you to determine how close an object is
to your rear bumper within a given area, making
parking easier.
3-19
Page 197 of 372
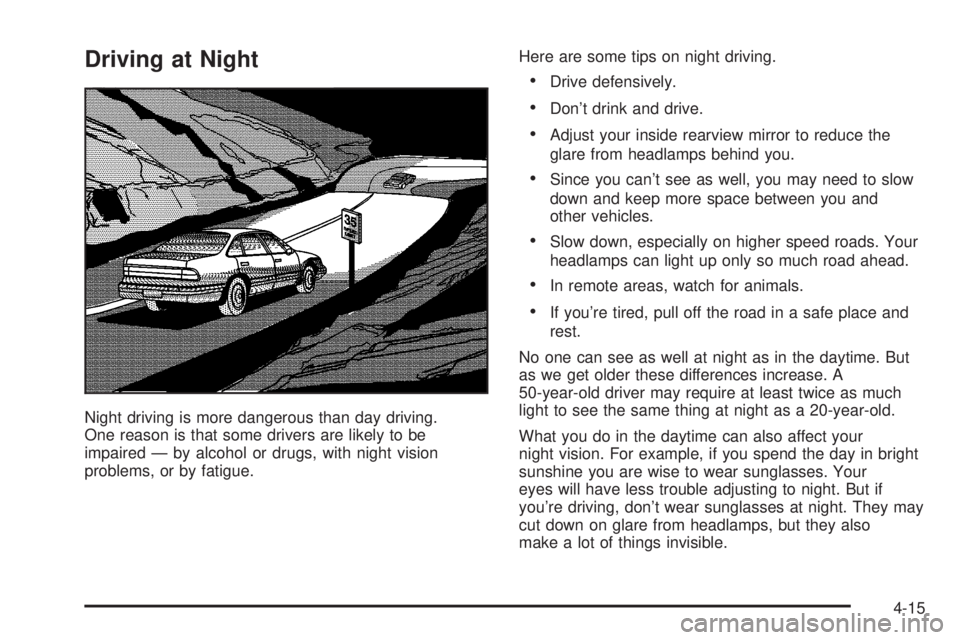
Driving at Night
Night driving is more dangerous than day driving.
One reason is that some drivers are likely to be
impaired Ð by alcohol or drugs, with night vision
problems, or by fatigue.Here are some tips on night driving.
·Drive defensively.
·Don't drink and drive.
·Adjust your inside rearview mirror to reduce the
glare from headlamps behind you.
·Since you can't see as well, you may need to slow
down and keep more space between you and
other vehicles.
·Slow down, especially on higher speed roads. Your
headlamps can light up only so much road ahead.
·In remote areas, watch for animals.
·If you're tired, pull off the road in a safe place and
rest.
No one can see as well at night as in the daytime. But
as we get older these differences increase. A
50-year-old driver may require at least twice as much
light to see the same thing at night as a 20-year-old.
What you do in the daytime can also affect your
night vision. For example, if you spend the day in bright
sunshine you are wise to wear sunglasses. Your
eyes will have less trouble adjusting to night. But if
you're driving, don't wear sunglasses at night. They may
cut down on glare from headlamps, but they also
make a lot of things invisible.
4-15
Page 198 of 372
You can be temporarily blinded by approaching
headlamps. It can take a second or two, or even several
seconds, for your eyes to readjust to the dark. When
you are faced with severe glare (as from a driver
who doesn't lower the high beams, or a vehicle with
misaimed headlamps), slow down a little. Avoid staring
directly into the approaching headlamps.
Keep your windshield and all the glass on your vehicle
clean Ð inside and out. Glare at night is made much
worse by dirt on the glass. Even the inside of the glass
can build up a ®lm caused by dust. Dirty glass makes
lights dazzle and ¯ash more than clean glass would,
making the pupils of your eyes contract repeatedly.
Remember that your headlamps light up far less of a
roadway when you are in a turn or curve. Keep
your eyes moving; that way, it's easier to pick out dimly
lighted objects. Just as your headlamps should be
checked regularly for proper aim, so should your eyes
be examined regularly. Some drivers suffer from
night blindness Ð the inability to see in dim light Ð and
aren't even aware of it.Driving in Rain and on Wet Roads
Rain and wet roads can mean driving trouble. On a wet
road, you can't stop, accelerate or turn as well
because your tire-to-road traction isn't as good as on
dry roads. And, if your tires don't have much tread left,
you'll get even less traction. It's always wise to go
slower and be cautious if rain starts to fall while you are
driving. The surface may get wet suddenly when your
re¯exes are tuned for driving on dry pavement.
4-16
Page 209 of 372
·Put on extra clothing or wrap a blanket around you.
If you have no blankets or extra clothing, make
body insulators from newspapers, burlap bags, rags,
¯oor mats ± anything you can wrap around
yourself or tuck under your clothing to keep warm.
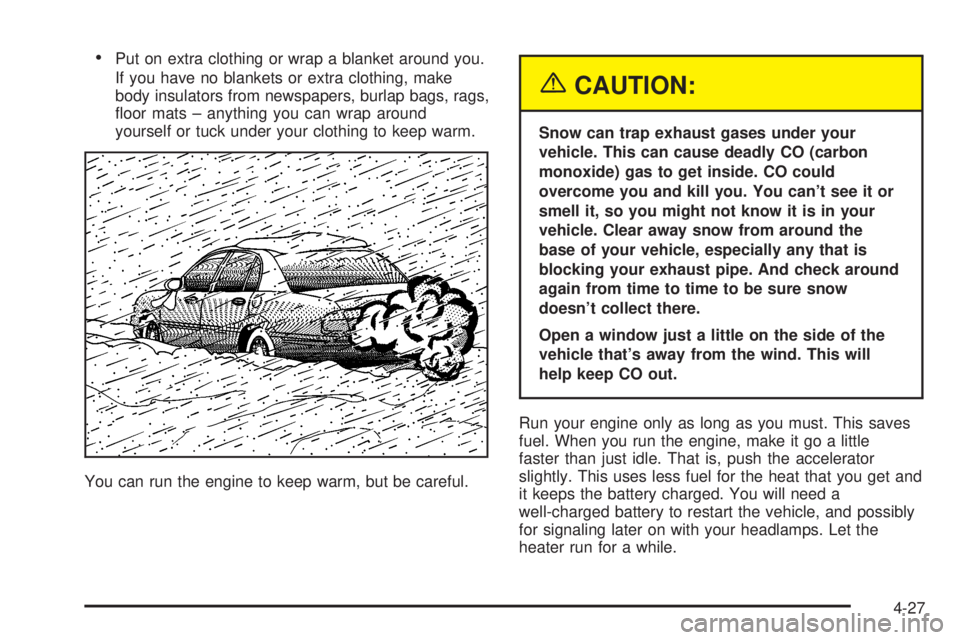
You can run the engine to keep warm, but be careful.
{CAUTION:
Snow can trap exhaust gases under your
vehicle. This can cause deadly CO (carbon
monoxide) gas to get inside. CO could
overcome you and kill you. You can't see it or
smell it, so you might not know it is in your
vehicle. Clear away snow from around the
base of your vehicle, especially any that is
blocking your exhaust pipe. And check around
again from time to time to be sure snow
doesn't collect there.
Open a window just a little on the side of the
vehicle that's away from the wind. This will
help keep CO out.
Run your engine only as long as you must. This saves
fuel. When you run the engine, make it go a little
faster than just idle. That is, push the accelerator
slightly. This uses less fuel for the heat that you get and
it keeps the battery charged. You will need a
well-charged battery to restart the vehicle, and possibly
for signaling later on with your headlamps. Let the
heater run for a while.
4-27
Page 221 of 372
Service............................................................5-3
Doing Your Own Service Work.........................5-3
Adding Equipment to the Outside of
Your Vehicle..............................................5-4
Fuel................................................................5-4
Gasoline Octane............................................5-4
Gasoline Speci®cations....................................5-5
California Fuel...............................................5-5
Additives.......................................................5-6
Fuels in Foreign Countries...............................5-6
Filling Your Tank............................................5-7
Filling a Portable Fuel Container.......................5-9
Checking Things Under
the Hood....................................................5-10
Hood Release..............................................5-10
Engine Compartment Overview.......................5-12
Engine Oil...................................................5-14
Supercharger Oil..........................................5-19
Engine Air Cleaner/Filter................................5-20
Automatic Transaxle Fluid..............................5-22
Engine Coolant.............................................5-24
Radiator Pressure Cap..................................5-27
Engine Overheating.......................................5-27
Cooling System............................................5-30
Power Steering Fluid.....................................5-38Windshield Washer Fluid................................5-38
Brakes........................................................5-40
Battery........................................................5-42
Jump Starting...............................................5-43
Headlamp Aiming...........................................5-47
Bulb Replacement..........................................5-49
Halogen Bulbs..............................................5-49
Headlamps..................................................5-50
Front Turn Signal Lamps...............................5-52
Rear Turn Signal, Stoplamps and
Back-Up Lamps........................................5-52
Rear Quarter Panel Turn Signal and
Stoplamps................................................5-56
Replacement Bulbs.......................................5-57
Windshield Wiper Blade Replacement..............5-58
Tires..............................................................5-59
In¯ation Ð Tire Pressure...............................5-59
Check Tire Pressure System..........................5-60
Tire Inspection and Rotation...........................5-62
When It Is Time for New Tires.......................5-63
Buying New Tires.........................................5-64
Uniform Tire Quality Grading..........................5-65
Wheel Alignment and Tire Balance..................5-66
Wheel Replacement......................................5-66
Section 5 Service and Appearance Care
5-1
Page 267 of 372
11. Try to start the vehicle that had the dead battery. If it
won't start after a few tries, it probably needs service.
Notice:Damage to your vehicle may result from
electrical shorting if jumper cables are removed
incorrectly. To prevent electrical shorting, take care
that the cables don't touch each other or any
other metal. The repairs wouldn't be covered by
your warranty.
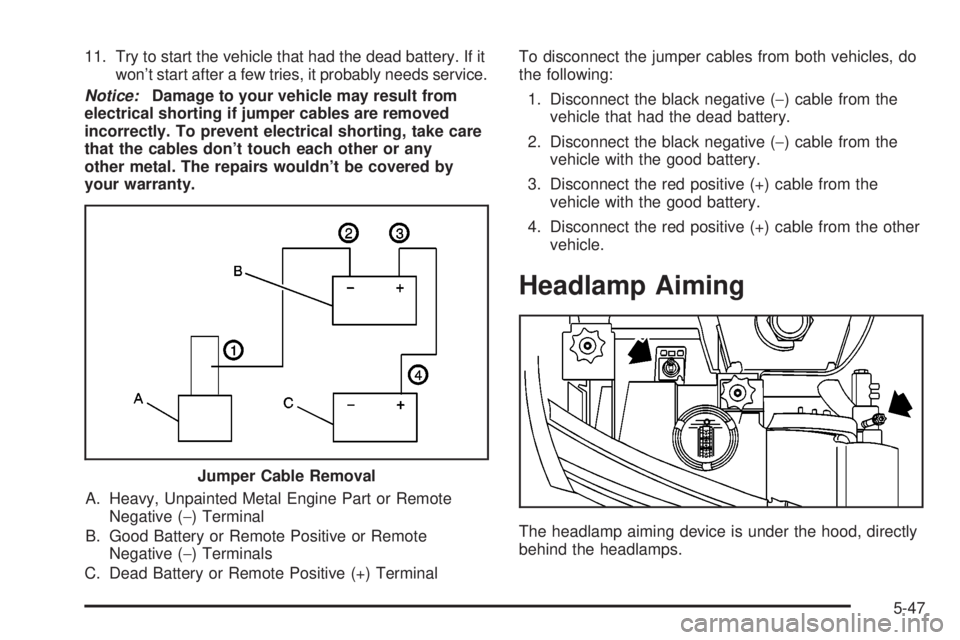
A. Heavy, Unpainted Metal Engine Part or Remote
Negative (-) Terminal
B. Good Battery or Remote Positive or Remote
Negative (-) Terminals
C. Dead Battery or Remote Positive (+) TerminalTo disconnect the jumper cables from both vehicles, do
the following:
1. Disconnect the black negative (-) cable from the
vehicle that had the dead battery.
2. Disconnect the black negative (-) cable from the
vehicle with the good battery.
3. Disconnect the red positive (+) cable from the
vehicle with the good battery.
4. Disconnect the red positive (+) cable from the other
vehicle.
Headlamp Aiming
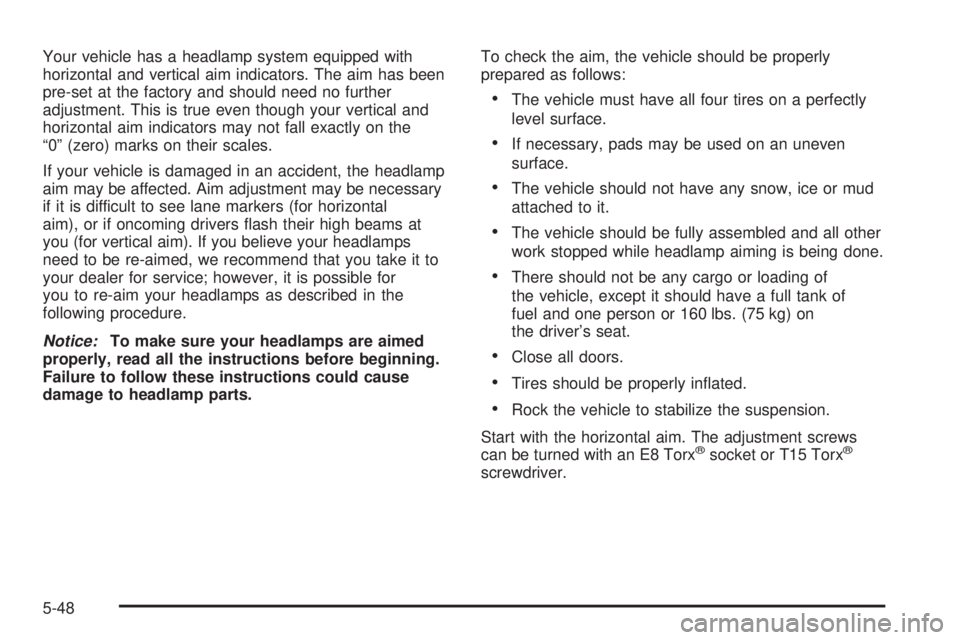
The headlamp aiming device is under the hood, directly
behind the headlamps. Jumper Cable Removal
5-47
Page 268 of 372
Your vehicle has a headlamp system equipped with
horizontal and vertical aim indicators. The aim has been
pre-set at the factory and should need no further
adjustment. This is true even though your vertical and
horizontal aim indicators may not fall exactly on the
ª0º (zero) marks on their scales.
If your vehicle is damaged in an accident, the headlamp
aim may be affected. Aim adjustment may be necessary
if it is difficult to see lane markers (for horizontal
aim), or if oncoming drivers ¯ash their high beams at
you (for vertical aim). If you believe your headlamps
need to be re-aimed, we recommend that you take it to
your dealer for service; however, it is possible for
you to re-aim your headlamps as described in the
following procedure.
Notice:To make sure your headlamps are aimed
properly, read all the instructions before beginning.
Failure to follow these instructions could cause
damage to headlamp parts.To check the aim, the vehicle should be properly
prepared as follows:
·The vehicle must have all four tires on a perfectly
level surface.
·If necessary, pads may be used on an uneven
surface.
·The vehicle should not have any snow, ice or mud
attached to it.
·The vehicle should be fully assembled and all other
work stopped while headlamp aiming is being done.
·There should not be any cargo or loading of
the vehicle, except it should have a full tank of
fuel and one person or 160 lbs. (75 kg) on
the driver's seat.
·Close all doors.
·Tires should be properly in¯ated.
·Rock the vehicle to stabilize the suspension.
Start with the horizontal aim. The adjustment screws
can be turned with an E8 Torx
žsocket or T15 Torxž
screwdriver.
5-48
Page 270 of 372
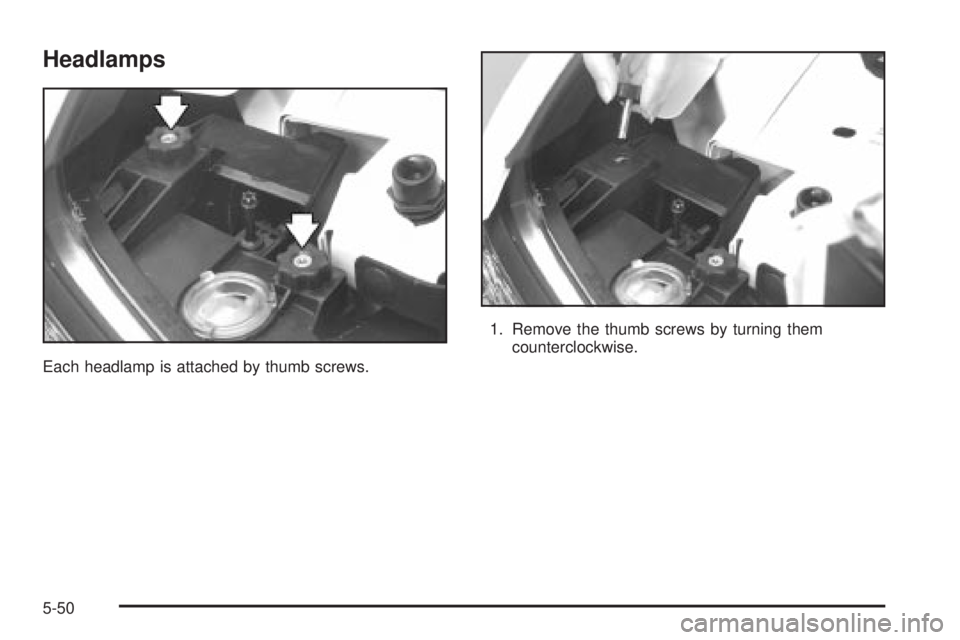
Headlamps
Each headlamp is attached by thumb screws.1. Remove the thumb screws by turning them
counterclockwise.
5-50
Page 271 of 372
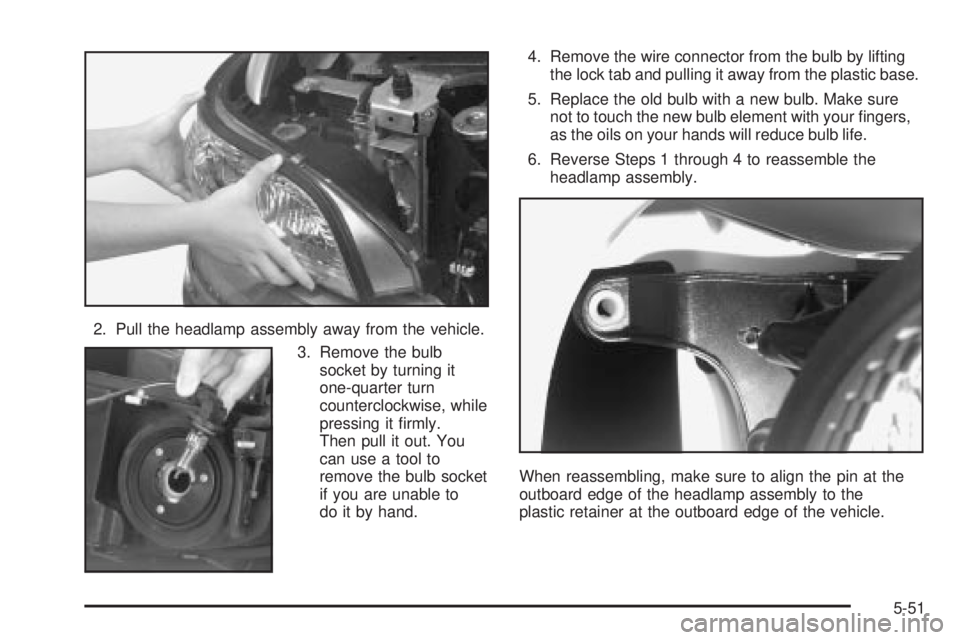
2. Pull the headlamp assembly away from the vehicle.
3. Remove the bulb
socket by turning it
one-quarter turn
counterclockwise, while
pressing it ®rmly.
Then pull it out. You
can use a tool to
remove the bulb socket
if you are unable to
do it by hand.4. Remove the wire connector from the bulb by lifting
the lock tab and pulling it away from the plastic base.
5. Replace the old bulb with a new bulb. Make sure
not to touch the new bulb element with your ®ngers,
as the oils on your hands will reduce bulb life.
6. Reverse Steps 1 through 4 to reassemble the
headlamp assembly.
When reassembling, make sure to align the pin at the
outboard edge of the headlamp assembly to the
plastic retainer at the outboard edge of the vehicle.
5-51