CD player BUICK PARK AVENUE 2003 Owner's Manual
[x] Cancel search | Manufacturer: BUICK, Model Year: 2003, Model line: PARK AVENUE, Model: BUICK PARK AVENUE 2003Pages: 372, PDF Size: 2.8 MB
Page 113 of 372
Instrument Panel Overview...............................3-2
Hazard Warning Flashers................................3-4
Other Warning Devices...................................3-4
Horn.............................................................3-5
Tilt Wheel.....................................................3-5
Turn Signal/Multifunction Lever.........................3-5
Exterior Lamps.............................................3-12
Interior Lamps..............................................3-14
Head-Up Display (HUD).................................3-17
Ultrasonic Rear Parking Assist (URPA)............3-19
Accessory Power Outlets...............................3-21
Ashtrays and Cigarette Lighter........................3-22
Climate Controls............................................3-22
Dual Automatic Climate Control System...........3-22
Outlet Adjustment.........................................3-26
Passenger Compartment Air Filter...................3-27
Steering Wheel Climate Controls.....................3-28
Climate Controls Personalization.....................3-28
Warning Lights, Gages and Indicators.............3-29
Instrument Panel Cluster................................3-30
Speedometer and Odometer...........................3-32
Tachometer.................................................3-32
Safety Belt Reminder Light.............................3-33
Air Bag Readiness Light................................3-33
Battery Warning Light....................................3-34
Brake System Warning Light..........................3-34Anti-Lock Brake System Warning Light.............3-36
Traction Control System (TCS) Warning Light . . .3-36
Engine Coolant Temperature Gage..................3-37
Malfunction Indicator Lamp.............................3-37
Oil Pressure Light.........................................3-40
Security Light...............................................3-41
Cruise Control Light......................................3-41
Service Vehicle Soon Light............................3-41
Fuel Gage...................................................3-42
Driver Information Center (DIC).......................3-43
DIC Controls and Displays.............................3-43
DIC Warnings and Messages.........................3-45
DIC Vehicle Personalization............................3-46
Audio System(s).............................................3-51
Setting the Time...........................................3-52
Radio with Cassette......................................3-52
Radio with Cassette and CD..........................3-56
Trunk-Mounted CD Changer...........................3-62
Personal Choice Radio Controls......................3-65
Theft-Deterrent Feature..................................3-66
Audio Steering Wheel Controls.......................3-68
Understanding Radio Reception......................3-68
Care of Your Cassette Tape Player.................3-69
Care of Your CDs.........................................3-70
Care of Your CD Player................................3-70
Heated Backlite Antenna................................3-70
Section 3 Instrument Panel
3-1
Page 163 of 372
You can also program this feature to recall your
memory seat position or the exit seat position.
·Memory Position: Choose ON when the SEAT
RECALL choice appears, and then choose
MEMORY when the RECALL POSITION choice
appears.
·Exit Position: Choose ON when the SEAT RECALL
choice appears, then choose EXIT when the
RECALL POSITION choice appears and your seat
will move to the stored exit position. The seat
will also move when you enter the vehicle after
unlocking it with a remote keyless entry transmitter.
This will allow for easy entry as well.
For more information on this feature, see
Memory Seat
and Mirrors on page 2-46.
Window Lock Out
The number of passenger windows locked out by the
WINDOW LOCK button can be programmed through the
DIC.
If you choose ALL PASS, all three passenger window
switches will be inactive when the WINDOW LOCK
button is enabled.
If you choose REAR, only the two rear passenger
window switches will be locked out when the WINDOW
LOCK button is enabled.To change modes do the following:
1. Move the arrow on the display between ALL PASS
and REAR by pressing the ENG/MET button.
2. Once you have made your selection, press the
RESET button. Your choice will be retained in
memory.
For more information on this feature, see ªWindow Lock
Outº under
Power Windows on page 2-16.
Audio System(s)
Notice:Before you add any sound equipment to
your vehicle ± like a tape player, CB radio, mobile
telephone or two-way radio ± be sure you can
add what you want. If you can, it's very important to
do it properly. Added sound equipment may
interfere with the operation of your vehicle's engine,
radio or other systems, and even damage them.
Your vehicle's systems may interfere with the
operation of sound equipment that has been added
improperly.
So, before adding sound equipment, check with
your dealer and be sure to check federal rules
covering mobile radio and telephone units.
3-51
Page 166 of 372
Setting the Tone (Bass/Treble)
BASS:Press this knob lightly so it extends. Turn the
knob to increase or to decrease bass.
TREB (Treble):Press this knob lightly so it extends.
Turn the knob to increase or to decrease treble. If
a station is weak or noisy, you may want to decrease
the treble.
Return these knobs to their stored positions when
you're not using them.
TONE:Press this button to choose bass and treble
equalization settings designed for country/western, jazz,
talk, pop, and classical stations.
To return the bass and treble to the manual mode,
press either TONE, BASS, or TREB until MANUAL
appears. See ªSetting Preset Stationsº listed previously
to program the auto tone feature.
Adjusting the Speakers (Balance/Fade)
BAL (Balance):Press this knob lightly so it extends.
Turn the knob to move the sound toward the left or the
right speakers. The middle position balances the
sound between the speakers.FADE:Press this knob lightly so it extends. Turn the
knob to move the sound toward the front or the
rear speakers. The middle position balances the sound
between the speakers.
Return these knobs to their stored positions when
you're not using them.
Playing a Cassette Tape
The longer side with the tape visible should face to the
right. If the ignition and the radio are on, the tape
can be inserted and will begin playing. If you hear
nothing or hear a garbled sound, the tape may not be in
squarely. Press EJECT to remove the tape and start
over.
While the tape is playing, use the VOLUME, SEEK,
FADE, BAL, BASS and TREB controls just as you do for
the radio. Other controls may have different functions
when a tape is inserted. The display will show an arrow
to show which side of the tape is playing.
If you want to insert a tape while the ignition or radio is
off, ®rst press EJECT or RECALL. Cassette tape
adapter kits for portable compact disc players will work
in your cassette tape player.
Your tape bias is set automatically.
3-54
Page 168 of 372
Cassette Tape Messages
E (Error):If this message and a number appears while
trying to play a cassette tape, it could be for one of
the following reasons:
·E10:The tape is tight and the player can't turn the
tape hubs. Remove the tape. Hold the tape with
the open end down and try to turn the right
hub counterclockwise with a pencil. Turn the tape
over and repeat. If the hubs do not turn easily, your
tape may be damaged and should not be used in
the player. Try a new tape to make sure your player
is working properly.
·E11:The tape is broken. Try a new tape.
CLN (Clean):If this message appears on the display,
the cassette tape player needs to be cleaned. It will
still play tapes, but you should clean it as soon as
possible to prevent damage to the tapes and player.
See
Care of Your Cassette Tape Player on page 3-69.
If any error occurs repeatedly or if an error can not
be corrected, contact your dealership. If your radio
displays an error number, write it down and provide it to
your dealership when reporting the problem.
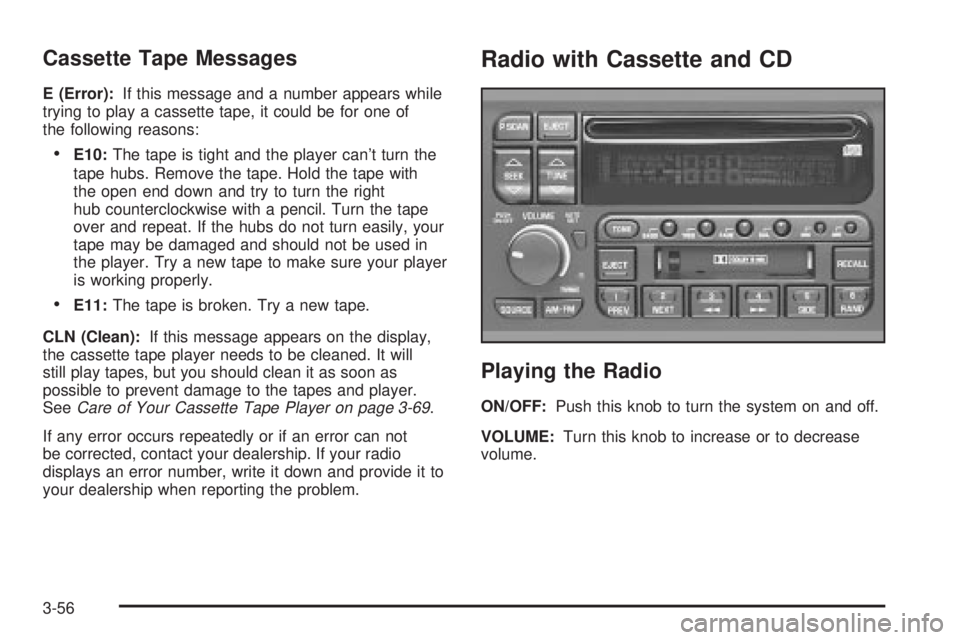
Radio with Cassette and CD
Playing the Radio
ON/OFF:Push this knob to turn the system on and off.
VOLUME:Turn this knob to increase or to decrease
volume.
3-56
Page 172 of 372
Cassette Tape Messages
E (Error):If this message and a number appears while
trying to play a cassette tape, it could be for one of
the following reasons:
·E10:The tape is tight and the player can't turn the
tape hubs. Remove the tape. Hold the tape with
the open end down and try to turn the right
hub counterclockwise with a pencil. Turn the tape
over and repeat. If the hubs do not turn easily, your
tape may be damaged and should not be used in
the player. Try a new tape to make sure your player
is working properly.
·E11:The tape is broken. Try a new tape.
CLN (Clean):If this message appears on the display,
the cassette tape player needs to be cleaned. It will
still play tapes, but you should clean it as soon as
possible to prevent damage to the tapes and player.
See
Care of Your Cassette Tape Player on page 3-69.
If any error occurs repeatedly or if an error can not
be corrected, contact your dealership. If your radio
displays an error number, write it down and provide it to
your dealership when reporting the problem.
Playing a Compact Disc
Insert a disc partway into the slot, label side up. The
player will pull it in. The disc should begin playing. If you
want to insert a CD while the ignition or the radio is
off, ®rst press EJECT or RECALL.
If you turn off the ignition or radio with a disc in the
player, it will stay in the player. When you turn on the
ignition or system, the disc will start playing where
it stopped, if it was the last selected audio source.
Also, as a protection feature, if a CD is ejected and left
in the player, it will be pulled back in the player with
the ignition on or off.
The integral CD player can play the smaller 8 cm single
discs with an adapter ring. Full-size compact discs
and the smaller discs are loaded in the same manner.
If playing a CD-R the sound quality may be reduced due
to CD-R quality, the method of recording, the quality
of the music that has been recorded, and the way the
CD-R has been handled. You may experience an
increase in skipping, difficulty in ®nding tracks, and/or
difficulty in loading and ejecting. If these problems occur
try a known good CD.
Do not add paper labels to discs, they could get caught
in the CD player.
3-60
Page 173 of 372
Do not play 3 inch discs without a standard
adapter disc.
If an error appears on the display, see ªCompact Disc
Messagesº later in this section.
1 PREV (Previous):Press this pushbutton to go to the
start of the current track, if more than eight seconds
have played. If you hold this pushbutton or press it more
than once, the player will continue moving back
through the disc.
2 NEXT:Press this pushbutton to go to the next track.
If you hold this pushbutton or press it more than
once, the player will continue moving forward through
the disc.
3
r(Reverse):Press and hold this pushbutton to
quickly reverse within a track. You will hear sound at a
reduced level. Release it to play the passage.
4
[(Forward):Press and hold this pushbutton to
quickly advance within a track. You will hear sound at a
reduced level. Release it to play the passage.6 RAND (Random):Press this pushbutton to hear the
tracks in random, rather than sequential, order.
Press it again to turn off random play.
RECALL:Press this button to see which track is
playing. Press it again within ®ve seconds to see how
long it has been playing. To change what is normally
shown on the display (track or elapsed time), press this
button until you see the display you want, then hold
this button until the display ¯ashes.
AM-FM:Press this button to listen to the radio when a
CD is playing.
SOURCE:Press this button to play a cassette tape or
a CD when listening to the radio. TAPE SIDE and
an arrow will appear on the display. If this button is
pressed again, the system will go to disc play; CD PLAY
will appear on the display.wSEEKx:Press the up or the down arrow to go to
the previous or to the next track on the CD.
EJECT:Press this button, located next to the CD slot,
to stop a CD when it is playing and to remove a CD
when it is not playing. Eject may be activated with the
radio off.
3-61
Page 174 of 372
Compact Disc Messages
E (Error):If you're driving on a very rough road or if it's
very hot, the disc may not play and an E and a
number may appear on the display. When the road
becomes smooth or the temperature returns to normal,
the disc should play. If the disc comes out, it could
be for one of the following reasons:
·E20:The disc is upside down, dirty, scratched,
or wet.
·E20:There's too much moisture in the air. Wait
about an hour and try again.
·E20:There may have been a problem while
burning the CD.
·E20:The label may be caught in the CD player.
If the CD is not playing correctly, for any other reason,
try a known good CD.
If any error occurs repeatedly or if an error can not be
corrected, contact your dealer. If your radio displays
an error number, write it down and provide it to
your dealer when reporting the problem.
Trunk-Mounted CD Changer
With the optional compact disc changer, you can play
up to 12 discs continuously. Normal size discs may
be played using the trays supplied in the magazine.
The small discs (8 cm) can be played only with specially
designed trays.
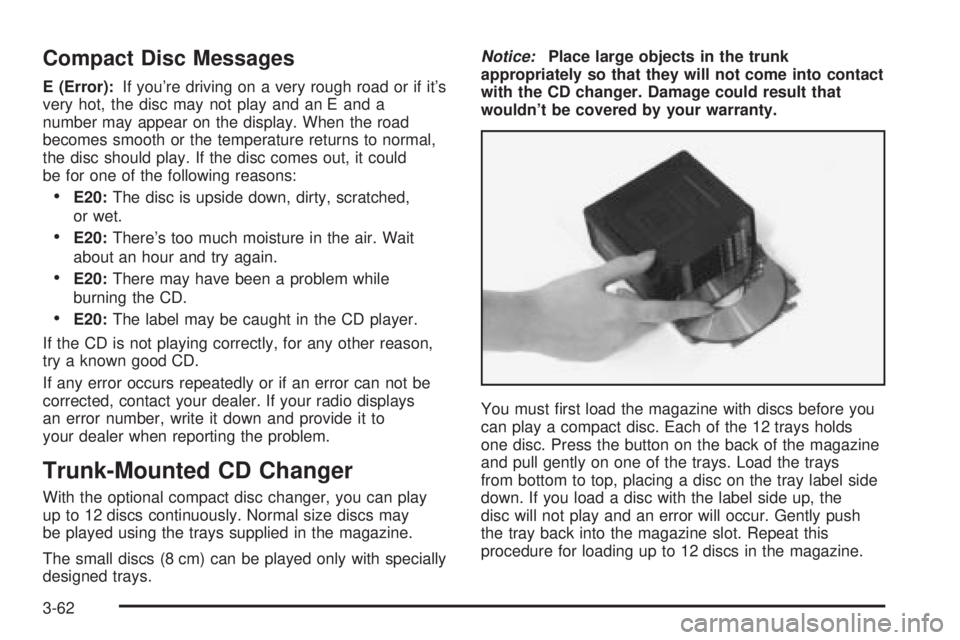
Notice:Place large objects in the trunk
appropriately so that they will not come into contact
with the CD changer. Damage could result that
wouldn't be covered by your warranty.
You must ®rst load the magazine with discs before you
can play a compact disc. Each of the 12 trays holds
one disc. Press the button on the back of the magazine
and pull gently on one of the trays. Load the trays
from bottom to top, placing a disc on the tray label side
down. If you load a disc with the label side up, the
disc will not play and an error will occur. Gently push
the tray back into the magazine slot. Repeat this
procedure for loading up to 12 discs in the magazine.
3-62
Page 175 of 372
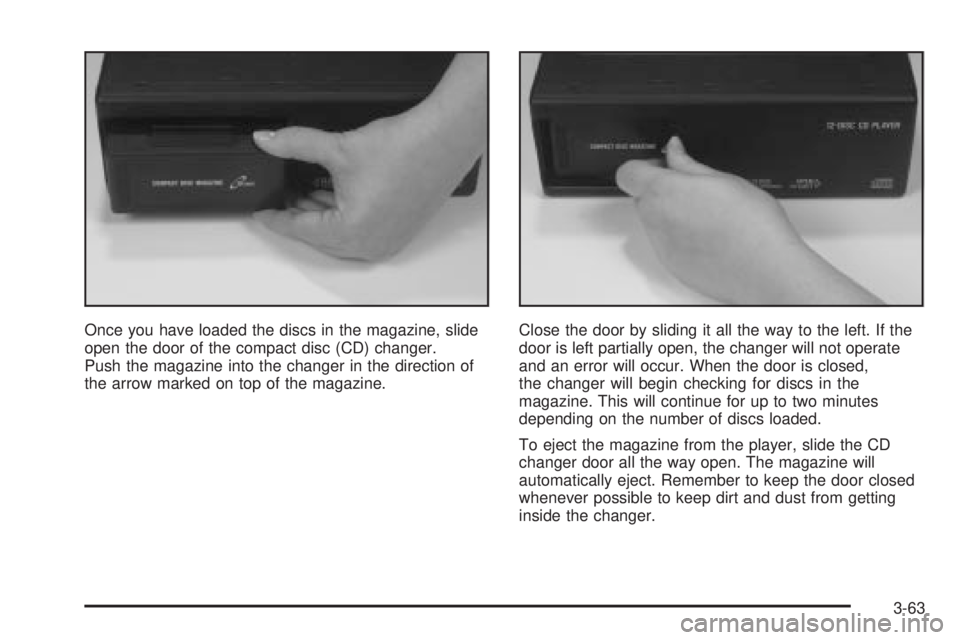
Once you have loaded the discs in the magazine, slide
open the door of the compact disc (CD) changer.
Push the magazine into the changer in the direction of
the arrow marked on top of the magazine.Close the door by sliding it all the way to the left. If the
door is left partially open, the changer will not operate
and an error will occur. When the door is closed,
the changer will begin checking for discs in the
magazine. This will continue for up to two minutes
depending on the number of discs loaded.
To eject the magazine from the player, slide the CD
changer door all the way open. The magazine will
automatically eject. Remember to keep the door closed
whenever possible to keep dirt and dust from getting
inside the changer.
3-63
Page 176 of 372
All of the CD functions are controlled by the radio
buttons except for ejecting the magazine. Whenever a
CD magazine with discs is loaded in the changer,
CHNGR will appear on the radio display. If the CD
changer is checking the magazine for CDs, CHNGR will
¯ash on the display until the changer is ready to play.
When a CD begins playing, the disc and track number
will be displayed. The disc numbers are listed on
the front of the magazine.
Playing a Compact Disc
If an error appears on the display, see ªCompact Disc
Messagesº later in this section.
1 PREV (Previous):Press this pushbutton to go to the
start of the current track, if more than eight seconds
have played. If you hold this button or press it more than
once, the player will continue moving back through
the disc to the previous track.
2 NEXT:Press this pushbutton to go to the next track
on the disc. If you hold this button or press it more
than once, the player will continue moving forward
through the disc to the next track.
3
r(Reverse):Press and hold this pushbutton to
quickly reverse within a track. Release it to play
the passage. You will hear sound at a reduced level.
4
[(Forward):Press and hold this pushbutton
to quickly advance within a track. Release it to play the
passage. You will hear sound at a reduced level.5 SIDE:Press this pushbutton to select the next disc in
the magazine. Each time you press this button, the
disc number on the radio display will go to that of the
next available CD. If a CD cannot be played, its number
will be skipped when selecting discs while using
this button.
6 RAND (Random):Press this pushbutton to enter the
random play mode. RAND will appear on the display.
While in this mode, tracks and discs will be played
in random, rather than sequential, order. Press
this button again to turn off the random feature and
return to normal operation.
RECALL:Press this button to see what track is
currently playing. Press it again within ®ve seconds to
see how long the track has been playing. EL TM
will appear on the display when in elapsed time mode.
When a new track starts to play, the track number
will also appear. Press this button a third time and the
time of day will be displayed.
AM-FM:Press AM-FM to listen to the radio when a CD
is playing.
SOURCE:Press this button to play a CD if you have a
magazine loaded in the changer when listening to
the radio. You can also press this button to switch
between a cassette tape, CD or the CD changer if all
three are loaded.
3-64
Page 177 of 372
Compact Disc Changer Errors
E (Error):If this message and a number appear on the
display, an error has occurred and the compact disc
temporarily cannot play.
The CD changer will send an error message to the
receiver to indicate:
·E30:Disc Loaded Incorrectly (Label Side Up)
·E34:CD Changer Door Open (Completely close the
door to restore normal operation.)
·E35:CD Changer Cartridge Empty (Try the
magazine again with a disc loaded on one of
the trays.)
If the error occurred while trying to play a CD in the
compact disc player or changer, the following conditions
may have caused the error:
·You're driving on a very rough road. When the road
becomes smoother, the disc should play.
·The disc is dirty, scratched, wet or upside down.
·The air is very humid. If so, wait about an hour and
try again.
If any error occurs repeatedly or if an error cannot be
corrected, contact your dealership. If your radio displays
an error number other than the error codes listed
previously, write it down and provide it to your dealership
when reporting the problem.
Personal Choice Radio Controls
If your vehicle has this feature it will enable two drivers
to store and recall personal settings for radio presets,
last tuned station, volume, tone, and audio source
(radio, cassette, or CD).
The memory buttons 1 and 2 for this feature are located
on the driver's door panel and correspond to the
numbers 1 and 2 found on the back of each remote
keyless entry transmitter.
To recall audio sources, press the unlock button on the
remote keyless entry transmitter and turn the ignition
on. The source last listened to will be recalled for
the identi®ed driver 1 or 2.
To program this feature, do the following:
1. Set all radio preferences. For more information see
ªSetting Preset Stationsº and ªSetting the Toneº
listed for your particular radio.
2. Locate the memory buttons on the driver's door
panel.
3. Press one of the memory buttons 1 or 2 until you
hear two beeps. The beeps con®rm that your
selection has been saved and can now be recalled.
Follow these steps each time you want to change the
stored settings.
3-65