climate control BUICK PARK AVENUE 2003 Owner's Manual
[x] Cancel search | Manufacturer: BUICK, Model Year: 2003, Model line: PARK AVENUE, Model: BUICK PARK AVENUE 2003Pages: 372, PDF Size: 2.8 MB
Page 1 of 372
Seats and Restraint Systems........................... 1-1
Front Seats
............................................... 1-2
Safety Belts
.............................................. 1-6
Child Restraints
.......................................1-27
Air Bag Systems
......................................1-48
Restraint System Check
............................1-56
Features and Controls..................................... 2-1
Keys
........................................................ 2-3
Doors and Locks
....................................... 2-9
Windows
.................................................2-15
Theft-Deterrent Systems
............................2-17
Starting and Operating Your Vehicle
...........2-21
Mirrors
....................................................2-33
OnStar
žSystem
......................................2-37
HomeLinkžTransmitter
.............................2-39
Storage Areas
.........................................2-42
Sunroof
..................................................2-45
Vehicle Personalization
.............................2-46
Instrument Panel............................................. 3-1
Instrument Panel Overview
.......................... 3-2
Climate Controls
......................................3-22
Warning Lights, Gages and Indicators
.........3-29
Driver Information Center (DIC)
..................3-43
Audio System(s)
.......................................3-51Driving Your Vehicle....................................... 4-1
Your Driving, the Road, and Your Vehicle
..... 4-2
Towing
...................................................4-29
Service and Appearance Care.......................... 5-1
Service
..................................................... 5-3
Fuel
......................................................... 5-4
Checking Things Under the Hood
...............5-10
Headlamp Aiming
.....................................5-47
Bulb Replacement
....................................5-49
Windshield Wiper Blade Replacement
.........5-58
Tires
......................................................5-59
Appearance Care
.....................................5-78
Vehicle Identi®cation
.................................5-86
Electrical System
......................................5-86
Capacities and Speci®cations
.....................5-96
Normal Maintenance Replacement Parts
......5-97
Maintenance Schedule..................................... 6-1
Maintenance Schedule
................................ 6-2
Customer Assistance Information.................... 7-1
Customer Assistance Information
.................. 7-2
Reporting Safety Defects
............................ 7-8
Index................................................................ 1
2003 Buick Park Avenue Owner ManualM
Page 4 of 372
Vehicle Damage Warnings
Also, in this book you will ®nd these notices:
Notice:These mean there is something that could
damage your vehicle.
A notice will tell you about something that can damage
your vehicle. Many times, this damage would not be
covered by your warranty, and it could be costly. But the
notice will tell you what to do to help avoid the
damage.
When you read other manuals, you might see
CAUTION and NOTICE warnings in different colors or in
different words.
You'll also see warning labels on your vehicle. They use
the same words, CAUTION or NOTICE.
Vehicle Symbols
Your vehicle has components and labels that use
symbols instead of text. Symbols, used on your vehicle,
are shown along with the text describing the operation
or information relating to a speci®c component, control,
message, gage or indicator.
If you need help ®guring out a speci®c name of a
component, gage or indicator, reference the
following topics:
·Seats and Restraint Systems in Section 1
·Features and Controls in Section 2
·Instrument Panel Overview in Section 3
·Climate Controls in Section 3
·Warning Lights, Gages and Indicators in Section 3
·Audio System(s) in Section 3
·Engine Compartment Overview in Section 5
iv
Page 9 of 372
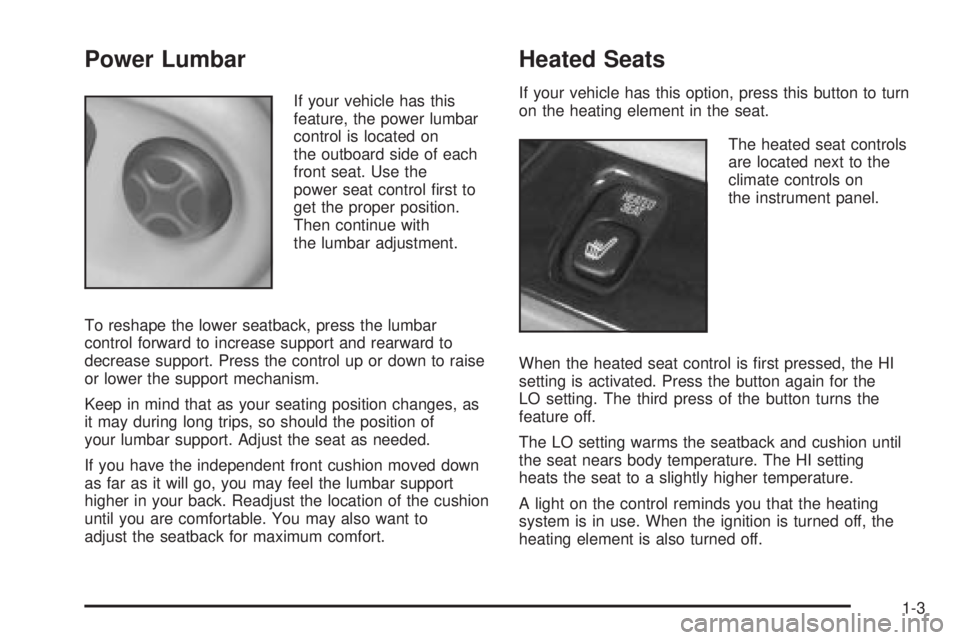
Power Lumbar
If your vehicle has this
feature, the power lumbar
control is located on
the outboard side of each
front seat. Use the
power seat control ®rst to
get the proper position.
Then continue with
the lumbar adjustment.
To reshape the lower seatback, press the lumbar
control forward to increase support and rearward to
decrease support. Press the control up or down to raise
or lower the support mechanism.
Keep in mind that as your seating position changes, as
it may during long trips, so should the position of
your lumbar support. Adjust the seat as needed.
If you have the independent front cushion moved down
as far as it will go, you may feel the lumbar support
higher in your back. Readjust the location of the cushion
until you are comfortable. You may also want to
adjust the seatback for maximum comfort.
Heated Seats
If your vehicle has this option, press this button to turn
on the heating element in the seat.
The heated seat controls
are located next to the
climate controls on
the instrument panel.
When the heated seat control is ®rst pressed, the HI
setting is activated. Press the button again for the
LO setting. The third press of the button turns the
feature off.
The LO setting warms the seatback and cushion until
the seat nears body temperature. The HI setting
heats the seat to a slightly higher temperature.
A light on the control reminds you that the heating
system is in use. When the ignition is turned off, the
heating element is also turned off.
1-3
Page 70 of 372
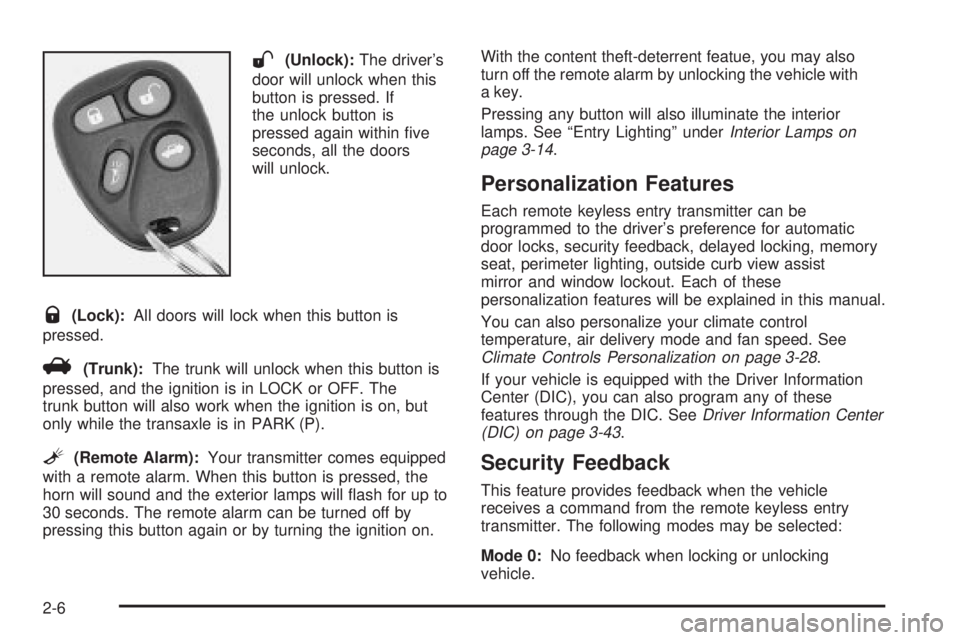
W(Unlock):The driver's
door will unlock when this
button is pressed. If
the unlock button is
pressed again within ®ve
seconds, all the doors
will unlock.
Q(Lock):All doors will lock when this button is
pressed.
V(Trunk):The trunk will unlock when this button is
pressed, and the ignition is in LOCK or OFF. The
trunk button will also work when the ignition is on, but
only while the transaxle is in PARK (P).
L(Remote Alarm):Your transmitter comes equipped
with a remote alarm. When this button is pressed, the
horn will sound and the exterior lamps will ¯ash for up to
30 seconds. The remote alarm can be turned off by
pressing this button again or by turning the ignition on.With the content theft-deterrent featue, you may also
turn off the remote alarm by unlocking the vehicle with
a key.
Pressing any button will also illuminate the interior
lamps. See ªEntry Lightingº under
Interior Lamps on
page 3-14.
Personalization Features
Each remote keyless entry transmitter can be
programmed to the driver's preference for automatic
door locks, security feedback, delayed locking, memory
seat, perimeter lighting, outside curb view assist
mirror and window lockout. Each of these
personalization features will be explained in this manual.
You can also personalize your climate control
temperature, air delivery mode and fan speed. See
Climate Controls Personalization on page 3-28.
If your vehicle is equipped with the Driver Information
Center (DIC), you can also program any of these
features through the DIC. See
Driver Information Center
(DIC) on page 3-43.
Security Feedback
This feature provides feedback when the vehicle
receives a command from the remote keyless entry
transmitter. The following modes may be selected:
Mode 0:No feedback when locking or unlocking
vehicle.
2-6
Page 77 of 372
If you don't cancel the security lock feature, adults or
older children who ride in the rear seat won't be able to
open the rear door from the inside. You should let
adults and older children know how these security locks
work, and how to cancel the locks.
To cancel the rear door lock, do the following:
1. Unlock and open the door from the outside.
2. Move the lever all the way to the unlock symbol.
3. Do the same for the other rear door.
The rear door locks will now work normally.
Lockout Protection
The power door locks will not work if the key is left in
the ignition and the driver's door is open. You can
override this feature by holding the power door lock
switch on the driver's door for more than three seconds.
Leaving Your Vehicle
If you are leaving the vehicle, take the keys, open the
door and set the locks from the inside, then get out and
close the door.
Trunk
{CAUTION:
It can be dangerous to drive with the trunk lid
open because carbon monoxide (CO) gas can
come into your vehicle. You can't see or smell
CO. It can cause unconsciousness and even
death. If you must drive with the trunk lid open
or if electrical wiring or other cable
connections must pass through the seal
between the body and the trunk lid:
·Make sure all other windows are shut.·Turn the fan on your heating or cooling
system to its highest speed and select the
control setting that will force outside air
into your vehicle. See ªClimate Control
Systemº in the Index.
·If you have air outlets on or under the
instrument panel, open them all the way.
See ªEngine Exhaustº in the Index.
Trunk Lock Release
To unlock the trunk from the outside, insert the master
key and turn it.
2-13
Page 96 of 372
Running Your Engine While You
Are Parked
It's better not to park with the engine running. But if you
ever have to, here are some things to know.
{CAUTION:
Idling the engine with the climate control
system off could allow dangerous exhaust into
your vehicle. See the earlier Caution under
ªEngine Exhaust.º
Also, idling in a closed-in place can let deadly
carbon monoxide (CO) into your vehicle even if
the climate control fan is at the highest setting.
One place this can happen is a garage.
Exhaust Ð with CO Ð can come in easily.
NEVER park in a garage with the engine
running.
Another closed-in place can be a blizzard. See
ªWinter Drivingº in the Index.
{CAUTION:
It can be dangerous to get out of your vehicle
if the shift lever is not fully in PARK (P) with
the parking brake ®rmly set. Your vehicle can
roll. Do not leave your vehicle when the engine
is running unless you have to. If you have left
the engine running, the vehicle can move
suddenly. You or others could be injured. To
be sure your vehicle will not move, even when
you are on fairly level ground, always set your
parking brake and move the shift lever to
PARK (P).
Follow the proper steps to be sure your vehicle won't
move. See
Shifting Into Park (P) on page 2-28.
If you are parking on a hill and if you're pulling a trailer,
also see
Towing a Trailer on page 4-32.
2-32
Page 101 of 372
Outside Convex Mirror
Your passenger's side mirror is convex. A convex
mirror's surface is curved so you can see more from the
driver's seat.
{CAUTION:
A convex mirror can make things (like other
vehicles) look farther away than they really are.
If you cut too sharply into the right lane, you
could hit a vehicle on your right. Check your
inside mirror or glance over your shoulder
before changing lanes.
Outside Automatic Dimming
Heated Mirror
If you have this feature, the driver's side outside
rearview mirror will adjust for the glare of headlamps
behind you. This feature is controlled using the on and
off settings on the automatic dimming rearview mirror.
See ªAutomatic Dimming Rearview Mirrorº or ªAutomatic
Dimming Rearview Mirror with Compassº earlier in
this section.If you have this feature, the left and right outside mirrors
are also heated when you activate the rear window
defogger. See ªRear Window Defoggerº under
Dual Automatic Climate Control System on page 3-22.
Both outside mirrors can be folded forward or rearward.
In the rearward position, they will fold ¯ush with the
vehicle. This feature is particularly useful in automatic
car washes.
OnStaržSystem
Your vehicle may have this feature. OnStaržuses
global positioning system (GPS) satellite technology,
wireless communications, and state of the art call
centers to provide you with a wide range of safety,
security, information and convenience services.
A complete OnStar
žuser's guide and the terms and
conditions of the OnStaržSubscription Service
Agreement are included in your OnStarž-equipped
vehicle's glove box literature.
2-37
Page 110 of 372
Open:Press and hold the switch rearward to the ®rst
position to open the glass panel and sunshade. The
sunshade can also be opened manually.
Comfort Stop:Press and release the switch rearward
to the second position to express open the glass
panel to the comfort stop position. The comfort stop
position is designed to help reduce noise and make
passengers more comfortable.
Express Open:When the glass panel is express
opening, pressing the switch in any direction will stop it
in a partially-opened position. The glass panel may
be fully opened by pressing the switch rearward again.
If you press and hold the switch in the express open
position for more than one and a half seconds, the
express open operation will be overridden and
the sunroof will operate manually.
Close:To close the glass panel, press and hold the
switch forward. As the glass panel reaches the closed
position, it will open slightly toward the vent position and
then drop down to the closed position to provide a
better seal. The sunshade must be closed manually.
Vent:Once the sunroof is closed, it can be opened to
the vent position by pushing the switch upward. To
close the glass panel, pull the switch downward. The
sunshade must be opened and closed manually for vent
operation.Vehicle Personalization
Memory Seat and Mirrors
If your vehicle has this
feature, the controls are
located on the driver's door
panel, and are used to
program and recall
memory settings for the
driver's seating, outside
mirror positions and
climate controls. See
Climate Controls
Personalization on
page 3-28
for more
information.
To save your seat and mirror positions into memory,
use the following procedure:
1. First identify the DRIVER # on the Driver Information
Center (DIC) by pressing the MEMORY button
1 or 2 or by pressing the unlock button on the
remote keyless entry transmitter. See
Driver
Information Center (DIC) on page 3-43.
2-46
Page 113 of 372
Instrument Panel Overview...............................3-2
Hazard Warning Flashers................................3-4
Other Warning Devices...................................3-4
Horn.............................................................3-5
Tilt Wheel.....................................................3-5
Turn Signal/Multifunction Lever.........................3-5
Exterior Lamps.............................................3-12
Interior Lamps..............................................3-14
Head-Up Display (HUD).................................3-17
Ultrasonic Rear Parking Assist (URPA)............3-19
Accessory Power Outlets...............................3-21
Ashtrays and Cigarette Lighter........................3-22
Climate Controls............................................3-22
Dual Automatic Climate Control System...........3-22
Outlet Adjustment.........................................3-26
Passenger Compartment Air Filter...................3-27
Steering Wheel Climate Controls.....................3-28
Climate Controls Personalization.....................3-28
Warning Lights, Gages and Indicators.............3-29
Instrument Panel Cluster................................3-30
Speedometer and Odometer...........................3-32
Tachometer.................................................3-32
Safety Belt Reminder Light.............................3-33
Air Bag Readiness Light................................3-33
Battery Warning Light....................................3-34
Brake System Warning Light..........................3-34Anti-Lock Brake System Warning Light.............3-36
Traction Control System (TCS) Warning Light . . .3-36
Engine Coolant Temperature Gage..................3-37
Malfunction Indicator Lamp.............................3-37
Oil Pressure Light.........................................3-40
Security Light...............................................3-41
Cruise Control Light......................................3-41
Service Vehicle Soon Light............................3-41
Fuel Gage...................................................3-42
Driver Information Center (DIC).......................3-43
DIC Controls and Displays.............................3-43
DIC Warnings and Messages.........................3-45
DIC Vehicle Personalization............................3-46
Audio System(s).............................................3-51
Setting the Time...........................................3-52
Radio with Cassette......................................3-52
Radio with Cassette and CD..........................3-56
Trunk-Mounted CD Changer...........................3-62
Personal Choice Radio Controls......................3-65
Theft-Deterrent Feature..................................3-66
Audio Steering Wheel Controls.......................3-68
Understanding Radio Reception......................3-68
Care of Your Cassette Tape Player.................3-69
Care of Your CDs.........................................3-70
Care of Your CD Player................................3-70
Heated Backlite Antenna................................3-70
Section 3 Instrument Panel
3-1
Page 115 of 372
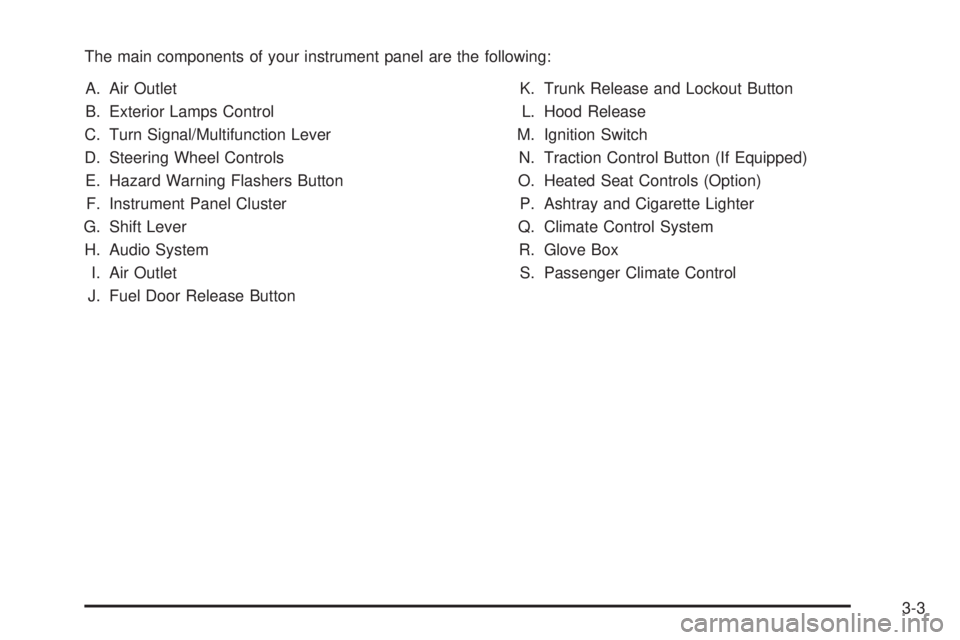
The main components of your instrument panel are the following:
A. Air Outlet
B. Exterior Lamps Control
C. Turn Signal/Multifunction Lever
D. Steering Wheel Controls
E. Hazard Warning Flashers Button
F. Instrument Panel Cluster
G. Shift Lever
H. Audio System
I. Air Outlet
J. Fuel Door Release ButtonK. Trunk Release and Lockout Button
L. Hood Release
M. Ignition Switch
N. Traction Control Button (If Equipped)
O. Heated Seat Controls (Option)
P. Ashtray and Cigarette Lighter
Q. Climate Control System
R. Glove Box
S. Passenger Climate Control
3-3