warning lights BUICK PARK AVENUE 2003 Owner's Manual
[x] Cancel search | Manufacturer: BUICK, Model Year: 2003, Model line: PARK AVENUE, Model: BUICK PARK AVENUE 2003Pages: 372, PDF Size: 2.8 MB
Page 1 of 372
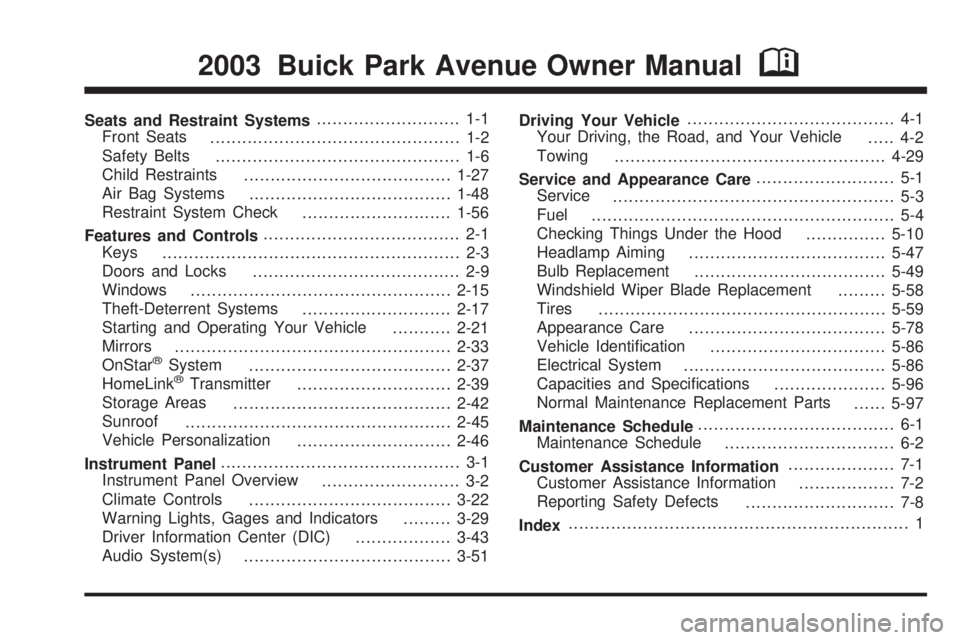
Seats and Restraint Systems........................... 1-1
Front Seats
............................................... 1-2
Safety Belts
.............................................. 1-6
Child Restraints
.......................................1-27
Air Bag Systems
......................................1-48
Restraint System Check
............................1-56
Features and Controls..................................... 2-1
Keys
........................................................ 2-3
Doors and Locks
....................................... 2-9
Windows
.................................................2-15
Theft-Deterrent Systems
............................2-17
Starting and Operating Your Vehicle
...........2-21
Mirrors
....................................................2-33
OnStar
žSystem
......................................2-37
HomeLinkžTransmitter
.............................2-39
Storage Areas
.........................................2-42
Sunroof
..................................................2-45
Vehicle Personalization
.............................2-46
Instrument Panel............................................. 3-1
Instrument Panel Overview
.......................... 3-2
Climate Controls
......................................3-22
Warning Lights, Gages and Indicators
.........3-29
Driver Information Center (DIC)
..................3-43
Audio System(s)
.......................................3-51Driving Your Vehicle....................................... 4-1
Your Driving, the Road, and Your Vehicle
..... 4-2
Towing
...................................................4-29
Service and Appearance Care.......................... 5-1
Service
..................................................... 5-3
Fuel
......................................................... 5-4
Checking Things Under the Hood
...............5-10
Headlamp Aiming
.....................................5-47
Bulb Replacement
....................................5-49
Windshield Wiper Blade Replacement
.........5-58
Tires
......................................................5-59
Appearance Care
.....................................5-78
Vehicle Identi®cation
.................................5-86
Electrical System
......................................5-86
Capacities and Speci®cations
.....................5-96
Normal Maintenance Replacement Parts
......5-97
Maintenance Schedule..................................... 6-1
Maintenance Schedule
................................ 6-2
Customer Assistance Information.................... 7-1
Customer Assistance Information
.................. 7-2
Reporting Safety Defects
............................ 7-8
Index................................................................ 1
2003 Buick Park Avenue Owner ManualM
Page 4 of 372
Vehicle Damage Warnings
Also, in this book you will ®nd these notices:
Notice:These mean there is something that could
damage your vehicle.
A notice will tell you about something that can damage
your vehicle. Many times, this damage would not be
covered by your warranty, and it could be costly. But the
notice will tell you what to do to help avoid the
damage.
When you read other manuals, you might see
CAUTION and NOTICE warnings in different colors or in
different words.
You'll also see warning labels on your vehicle. They use
the same words, CAUTION or NOTICE.
Vehicle Symbols
Your vehicle has components and labels that use
symbols instead of text. Symbols, used on your vehicle,
are shown along with the text describing the operation
or information relating to a speci®c component, control,
message, gage or indicator.
If you need help ®guring out a speci®c name of a
component, gage or indicator, reference the
following topics:
·Seats and Restraint Systems in Section 1
·Features and Controls in Section 2
·Instrument Panel Overview in Section 3
·Climate Controls in Section 3
·Warning Lights, Gages and Indicators in Section 3
·Audio System(s) in Section 3
·Engine Compartment Overview in Section 5
iv
Page 86 of 372
Notice:If your key seems stuck in LOCK and you
can't turn it, be sure you are using the correct key; if
so, is it all the way in? If it is, then turn the steering
wheel left and right while you turn the key hard.
Turn the key only with your hand. Using a tool
to force it could break the key or the ignition switch.
If none of these works, then your vehicle needs
service.
C (OFF):This position lets you turn off the engine but
still turn the steering wheel. It doesn't lock the
steering wheel like LOCK and it doesn't send any power
to the accessories. The instrument panel cluster will
remain powered in OFF to illuminate the gear shift
indicator. The cluster will also activate the parking brake
light when the parking brake is set. Use OFF if you
must have your vehicle in motion while the engine is not
running.
D (RUN):This is the position that the switch returns to
after you start your engine and release the ignition
key. This is the position for driving. Even when
the engine is not running, you can use RUN to operate
your electrical accessories and to display some
instrument panel warning lights.
E (START):This position starts your engine. When the
engine starts, release the ignition key. The switch
will return to RUN for normal driving.Key Reminder Warning
If you leave your key in the ignition, with the engine off,
you will hear a warning chime when you open the
driver's door.
Retained Accessory Power (RAP)
After you turn the ignition off and remove the key, you
will still have power to such accessories as the
radio, sunroof (option) and power windows for up to
10 minutes. Power is stopped if you open a door.
Starting Your Engine
Move your shift lever to PARK (P) or NEUTRAL (N).
Your engine won't start in any other position ± that's a
safety feature. To restart when you're already moving,
use NEUTRAL (N) only.
Notice:Don't try to shift to PARK (P) if your
vehicle is moving. If you do, you could damage the
transaxle. Shift to PARK (P) only when your
vehicle is stopped.
1. With your foot off the accelerator pedal, turn your
ignition key to START. When the engine starts, let
go of the key. The idle speed will go down as
your engine gets warm.
2-22
Page 113 of 372
Instrument Panel Overview...............................3-2
Hazard Warning Flashers................................3-4
Other Warning Devices...................................3-4
Horn.............................................................3-5
Tilt Wheel.....................................................3-5
Turn Signal/Multifunction Lever.........................3-5
Exterior Lamps.............................................3-12
Interior Lamps..............................................3-14
Head-Up Display (HUD).................................3-17
Ultrasonic Rear Parking Assist (URPA)............3-19
Accessory Power Outlets...............................3-21
Ashtrays and Cigarette Lighter........................3-22
Climate Controls............................................3-22
Dual Automatic Climate Control System...........3-22
Outlet Adjustment.........................................3-26
Passenger Compartment Air Filter...................3-27
Steering Wheel Climate Controls.....................3-28
Climate Controls Personalization.....................3-28
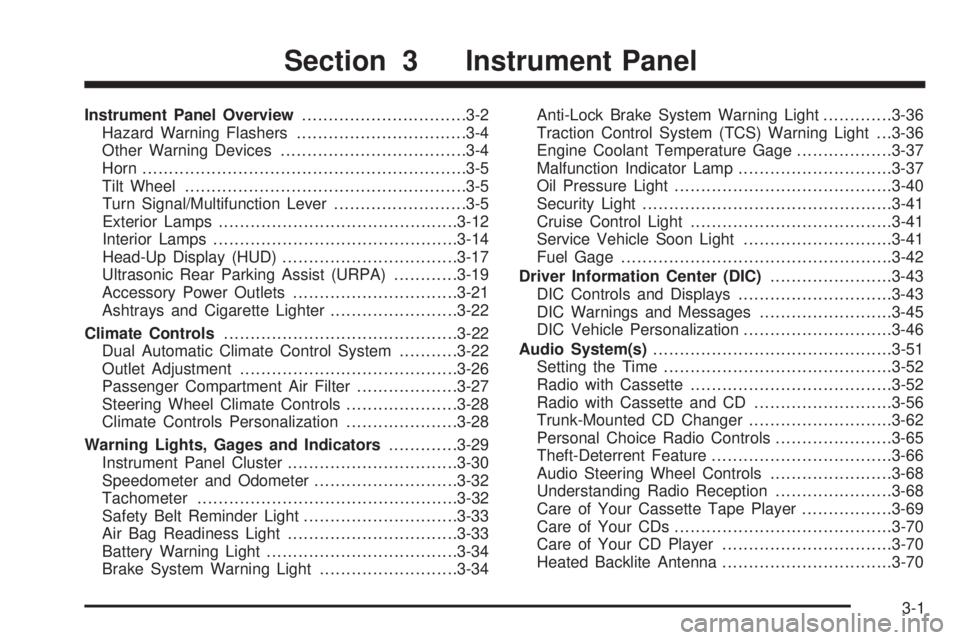
Warning Lights, Gages and Indicators.............3-29
Instrument Panel Cluster................................3-30
Speedometer and Odometer...........................3-32
Tachometer.................................................3-32
Safety Belt Reminder Light.............................3-33
Air Bag Readiness Light................................3-33
Battery Warning Light....................................3-34
Brake System Warning Light..........................3-34Anti-Lock Brake System Warning Light.............3-36
Traction Control System (TCS) Warning Light . . .3-36
Engine Coolant Temperature Gage..................3-37
Malfunction Indicator Lamp.............................3-37
Oil Pressure Light.........................................3-40
Security Light...............................................3-41
Cruise Control Light......................................3-41
Service Vehicle Soon Light............................3-41
Fuel Gage...................................................3-42
Driver Information Center (DIC).......................3-43
DIC Controls and Displays.............................3-43
DIC Warnings and Messages.........................3-45
DIC Vehicle Personalization............................3-46
Audio System(s).............................................3-51
Setting the Time...........................................3-52
Radio with Cassette......................................3-52
Radio with Cassette and CD..........................3-56
Trunk-Mounted CD Changer...........................3-62
Personal Choice Radio Controls......................3-65
Theft-Deterrent Feature..................................3-66
Audio Steering Wheel Controls.......................3-68
Understanding Radio Reception......................3-68
Care of Your Cassette Tape Player.................3-69
Care of Your CDs.........................................3-70
Care of Your CD Player................................3-70
Heated Backlite Antenna................................3-70
Section 3 Instrument Panel
3-1
Page 124 of 372
Exterior Lamps
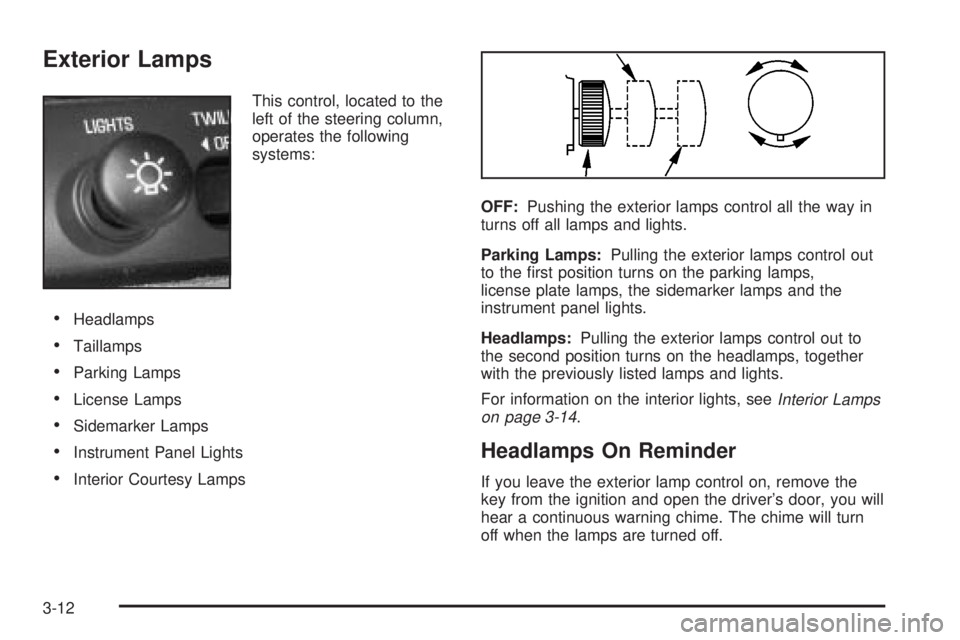
This control, located to the
left of the steering column,
operates the following
systems:
·Headlamps
·Taillamps
·Parking Lamps
·License Lamps
·Sidemarker Lamps
·Instrument Panel Lights
·Interior Courtesy LampsOFF:Pushing the exterior lamps control all the way in
turns off all lamps and lights.
Parking Lamps:Pulling the exterior lamps control out
to the ®rst position turns on the parking lamps,
license plate lamps, the sidemarker lamps and the
instrument panel lights.
Headlamps:Pulling the exterior lamps control out to
the second position turns on the headlamps, together
with the previously listed lamps and lights.
For information on the interior lights, see
Interior Lamps
on page 3-14.
Headlamps On Reminder
If you leave the exterior lamp control on, remove the
key from the ignition and open the driver's door, you will
hear a continuous warning chime. The chime will turn
off when the lamps are turned off.
3-12
Page 141 of 372
To recall the climate control settings last stored on your
transmitter, press the unlock button on your remote
keyless entry transmitter and put the ignition in
ACCESSORY or RUN. The settings will be recalled.
Warning Lights, Gages and
Indicators
This part describes the warning lights and gages that
may be on your vehicle. The pictures will help you
locate them.
Warning lights and gages can signal that something is
wrong before it becomes serious enough to cause
an expensive repair or replacement. Paying attention to
your warning lights and gages could also save you
or others from injury.
Warning lights come on when there may be or is a
problem with one of your vehicle's functions. As you will
see in the details on the next few pages, some
warning lights come on brie¯y when you start the
engine just to let you know they're working. If you are
familiar with this section, you should not be alarmed
when this happens.Gages can indicate when there may be or is a problem
with one of your vehicle's functions. Often gages
and warning lights work together to let you know when
there's a problem with your vehicle.
When one of the warning lights comes on and stays on
when you are driving, or when one of the gages
shows there may be a problem, check the section that
tells you what to do about it. Please follow this
manual's advice. Waiting to do repairs can be costly ±
and even dangerous. So please get to know your
warning lights and gages. They're a big help.
Your vehicle may also have a DIC that works along with
the warning lights and gages. See
Driver Information
Center (DIC) on page 3-43.
3-29
Page 142 of 372
Instrument Panel Cluster
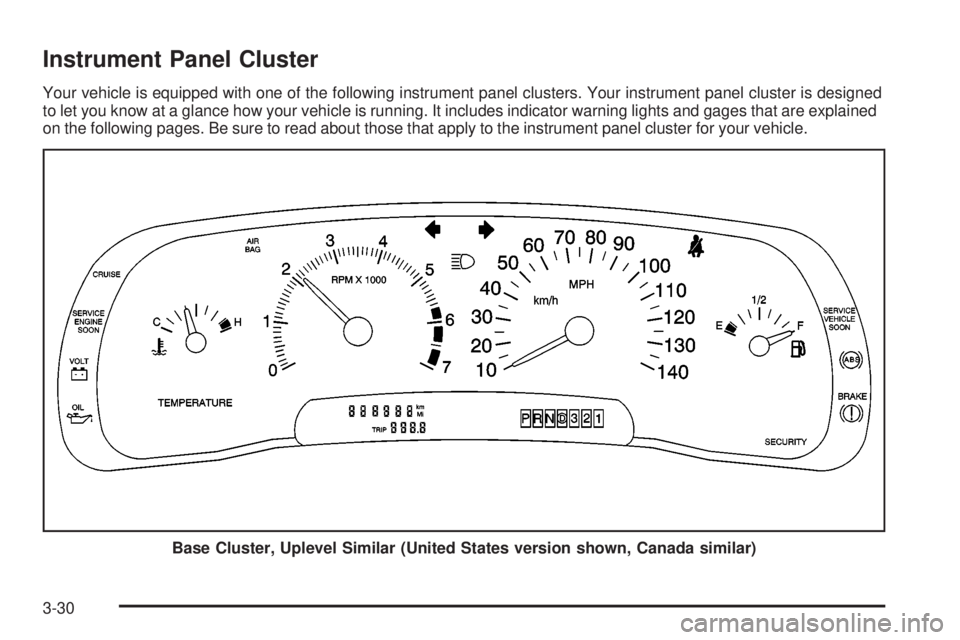
Your vehicle is equipped with one of the following instrument panel clusters. Your instrument panel cluster is designed
to let you know at a glance how your vehicle is running. It includes indicator warning lights and gages that are explained
on the following pages. Be sure to read about those that apply to the instrument panel cluster for your vehicle.
Base Cluster, Uplevel Similar (United States version shown, Canada similar)
3-30
Page 219 of 372
Your vehicle has bulb warning lights. When you plug a
trailer lighting system into your vehicle's lighting
system, its bulb warning lights may not let you know if
one of your lamps goes out. So, when you have a trailer
lighting system plugged in, be sure to check your
vehicle and trailer lamps from time to time to be sure
they're all working. Once you disconnect the trailer
lamps, the bulb warning lights again can tell you if one
of your vehicle lamps is out.
Driving On Grades
Reduce speed and shift to a lower gearbeforeyou start
down a long or steep downgrade. If you don't shift
down, you might have to use your brakes so much that
they would get hot and no longer work well.
On a long uphill grade, shift to THIRD (3) and reduce
your speed to around 45 mph (70 km/h) to reduce
the possibility of engine and transaxle overheating.
Parking on Hills
{CAUTION:
You really should not park your vehicle, with a
trailer attached, on a hill. If something goes
wrong, your rig could start to move. People
can be injured, and both your vehicle and the
trailer can be damaged.
But if you ever have to park your rig on a hill, here's
how to do it:
1. Apply your regular brakes, but don't shift into
PARK (P) yet.
2. Have someone place chocks behind the trailer
wheels.
3. When the wheel chocks are in place, release the
regular brakes until the chocks absorb the load.
4. Reapply the regular brakes. Then apply your
parking brake, and then shift to PARK (P).
5. Release the regular brakes.
4-37
Page 245 of 372
A 50/50 mixture of clean, drinkable water and
DEX-COOLžwill:
·Give freezing protection down to-34ÉF (-37ÉC).
·Give boiling protection up to 265ÉF (129ÉC).
·Protect against rust and corrosion.
·Help keep the proper engine temperature.
·Let the warning lights and gages work as
they should.
Notice:When adding coolant, it is important that
you use only DEX-COOLž(silicate-free) coolant.
If coolant other than DEX-COOLžis added to
the system, premature engine, heater core or
radiator corrosion may result. In addition, the engine
coolant will require change sooner -- at 30,000 miles
(50,000 km) or 24 months, whichever occurs ®rst.
Damage caused by the use of coolant other
than DEX-COOL
žis not covered by your new vehicle
warranty.
What to Use
Use a mixture of one-halfclean, drinkable waterand
one-half DEX-COOLžcoolant which won't damage
aluminum parts. If you use this coolant mixture you don't
need to add anything else.
{CAUTION:
Adding only plain water to your cooling
system can be dangerous. Plain water, or
some other liquid such as alcohol, can boil
before the proper coolant mixture will. Your
vehicle's coolant warning system is set for the
proper coolant mixture. With plain water or the
wrong mixture, your engine could get too hot
but you would not get the overheat warning.
Your engine could catch ®re and you or others
could be burned. Use a 50/50 mixture of clean,
drinkable water and DEX-COOL
žcoolant.
Notice:If you use an improper coolant mixture,
your engine could overheat and be badly damaged.
The repair cost wouldn't be covered by your
warranty. Too much water in the mixture can freeze
and crack the engine, radiator, heater core and
other parts.
If you have to add coolant more than four times a year,
have your dealer check your cooling system.
Notice:If you use the proper coolant, you don't
have to add extra inhibitors or additives which claim
to improve the system. These can be harmful.
5-25
Page 372 of 372
W
Warning Lights, Gages and Indicators................3-29
Warnings.......................................................3-45
DIC Warnings and Messages........................3-45
Hazard Warning Flashers............................... 3-4
Other Warning Devices.................................. 3-4
Safety and Symbols......................................... iii
Vehicle Damage.............................................. iv
Washing Your Vehicle......................................5-82
Weatherstrip Lubrication...................................6-20
Weight of the Trailer Tongue.............................4-34
Weight of the Trailer........................................4-33
What Kind of Engine Oil to Use........................5-15
What Kind of Oil to Use..................................5-19
What to Do with Used Oil................................5-18
What to Use..........................................5-25, 5-38
Wheels..........................................................5-66
Alignment and Tire Balance..........................5-66
Replacement...............................................5-66
When to Add Engine Oil..................................5-15
When to Change Engine Oil (Vehicles
With the GM Oil Life System)........................5-17
When to Change Engine Oil (Vehicles
Without the GM Oil Life System)...................5-17When to Check and Change............................5-22
When to Check Power Steering Fluid................5-38
When to Check......................................5-19, 5-60
When to Inspect the Engine Air
Cleaner/Filter..............................................5-20
When You Are Ready to Leave After
Parking on a Hill.........................................4-38
Where to Put the Restraint...............................1-36
Why Safety Belts Work..................................... 1-7
Window Lock Out...................................2-16, 3-51
Windows.......................................................2-15
Power........................................................2-16
Windshield Washer Fluid Level Check................6-19
Windshield Washer........................................... 3-8
Fluid..........................................................5-38
Windshield Wiper............................................5-58
Blade Replacement......................................5-58
Windshield Wipers............................................ 3-7
Winter Driving................................................4-24
Wiper Blade Check.........................................6-20
Y
Your Vehicle and the Environment....................... 6-2
16