BUICK PARK AVENUE 2004 Owner's Manual
PARK AVENUE 2004
BUICK
BUICK
https://www.carmanualsonline.info/img/43/35389/w960_35389-0.png
BUICK PARK AVENUE 2004 Owner's Manual
Trending: towing, transmission, center console, turn signal bulb, manual radio set, cruise control, ad blue
Page 291 of 410
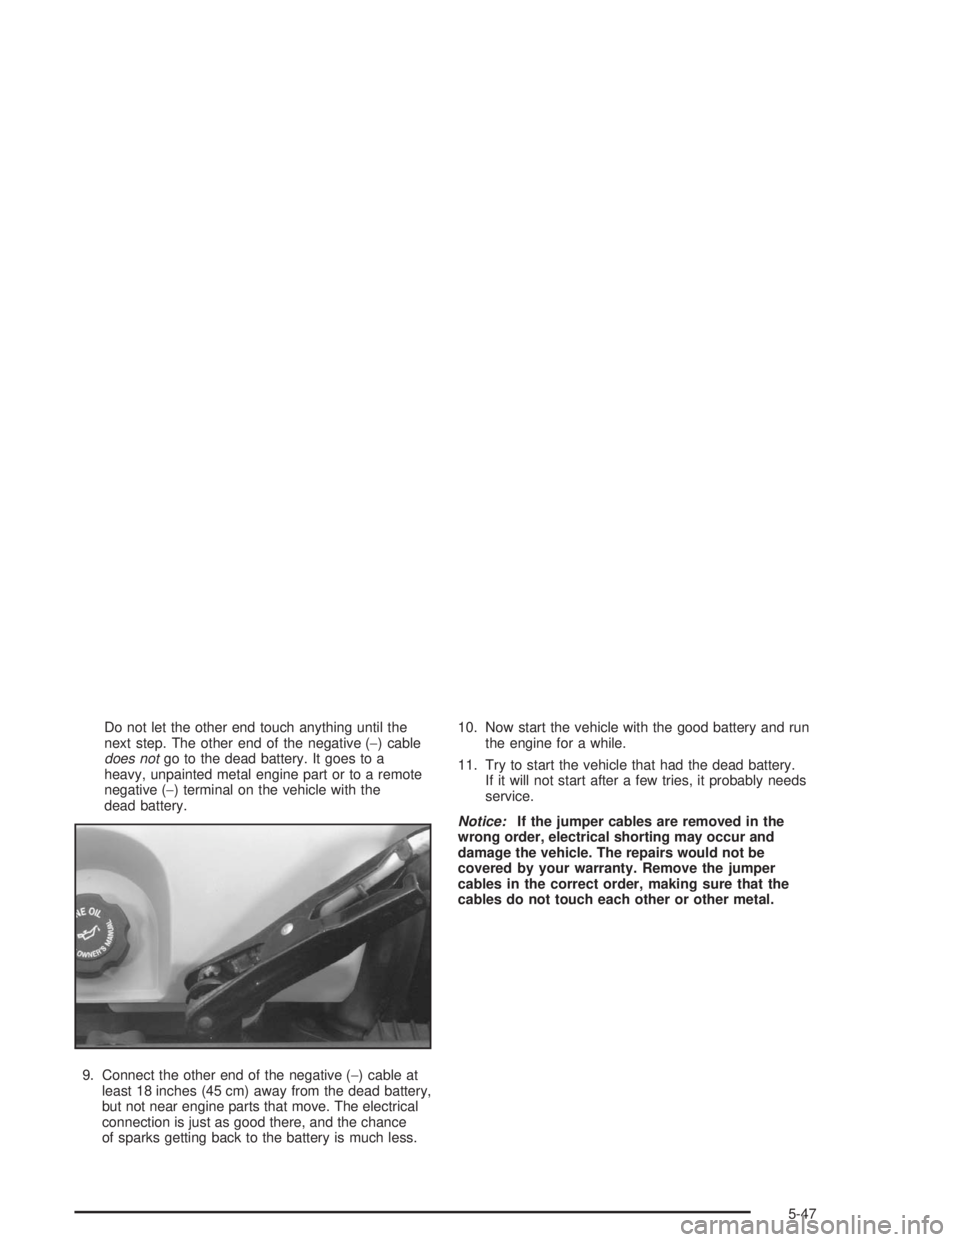
Do not let the other end touch anything until the
next step. The other end of the negative (−) cable
does notgo to the dead battery. It goes to a
heavy, unpainted metal engine part or to a remote
negative (−) terminal on the vehicle with the
dead battery.
9. Connect the other end of the negative (−) cable at
least 18 inches (45 cm) away from the dead battery,
but not near engine parts that move. The electrical
connection is just as good there, and the chance
of sparks getting back to the battery is much less.10. Now start the vehicle with the good battery and run
the engine for a while.
11. Try to start the vehicle that had the dead battery.
If it will not start after a few tries, it probably needs
service.
Notice:If the jumper cables are removed in the
wrong order, electrical shorting may occur and
damage the vehicle. The repairs would not be
covered by your warranty. Remove the jumper
cables in the correct order, making sure that the
cables do not touch each other or other metal.
5-47
Page 292 of 410
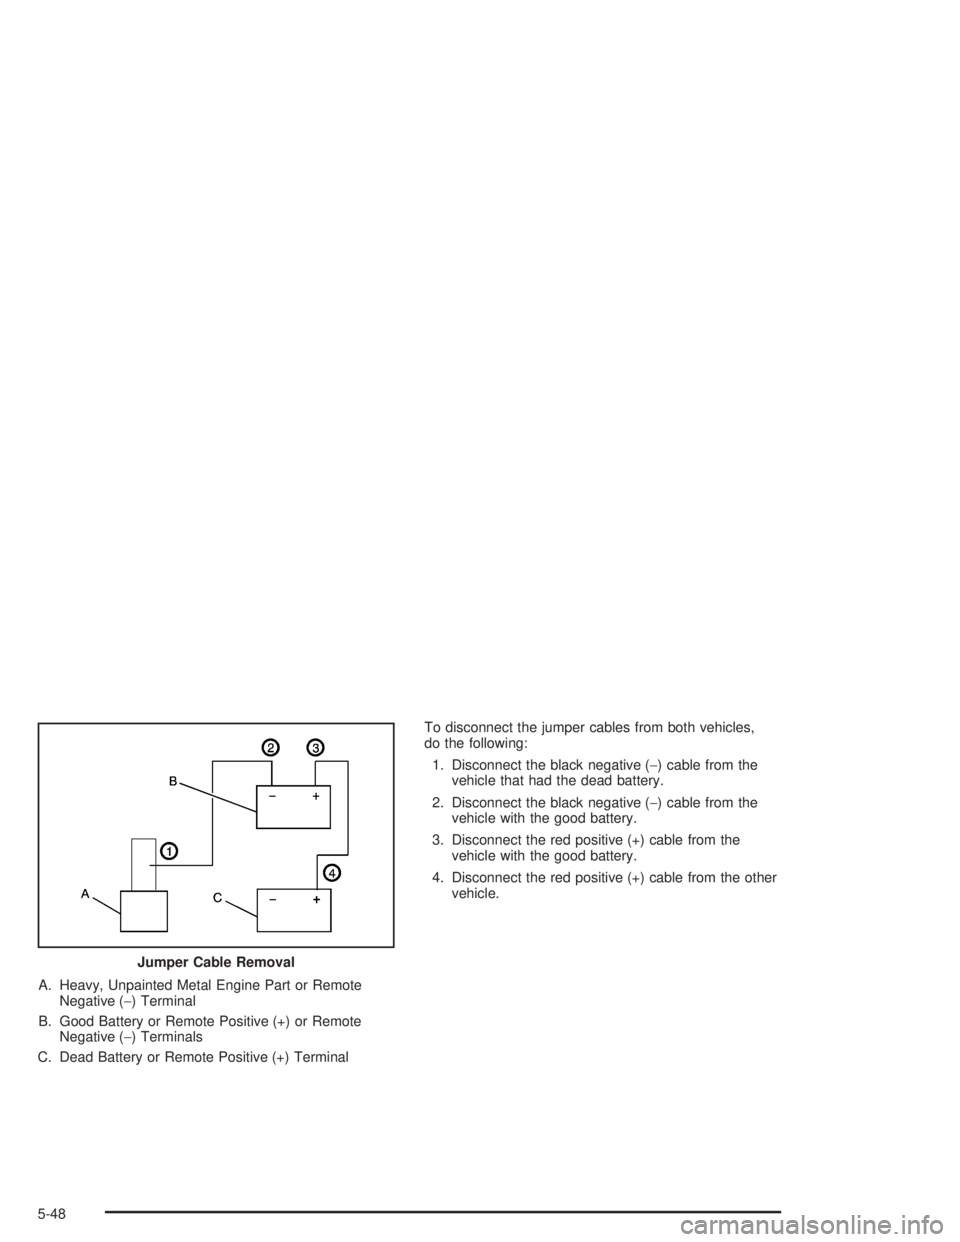
A. Heavy, Unpainted Metal Engine Part or Remote
Negative (−) Terminal
B. Good Battery or Remote Positive (+) or Remote
Negative (−) Terminals
C. Dead Battery or Remote Positive (+) TerminalTo disconnect the jumper cables from both vehicles,
do the following:
1. Disconnect the black negative (−) cable from the
vehicle that had the dead battery.
2. Disconnect the black negative (−) cable from the
vehicle with the good battery.
3. Disconnect the red positive (+) cable from the
vehicle with the good battery.
4. Disconnect the red positive (+) cable from the other
vehicle.
Jumper Cable Removal
5-48
Page 293 of 410
Headlamp Aiming
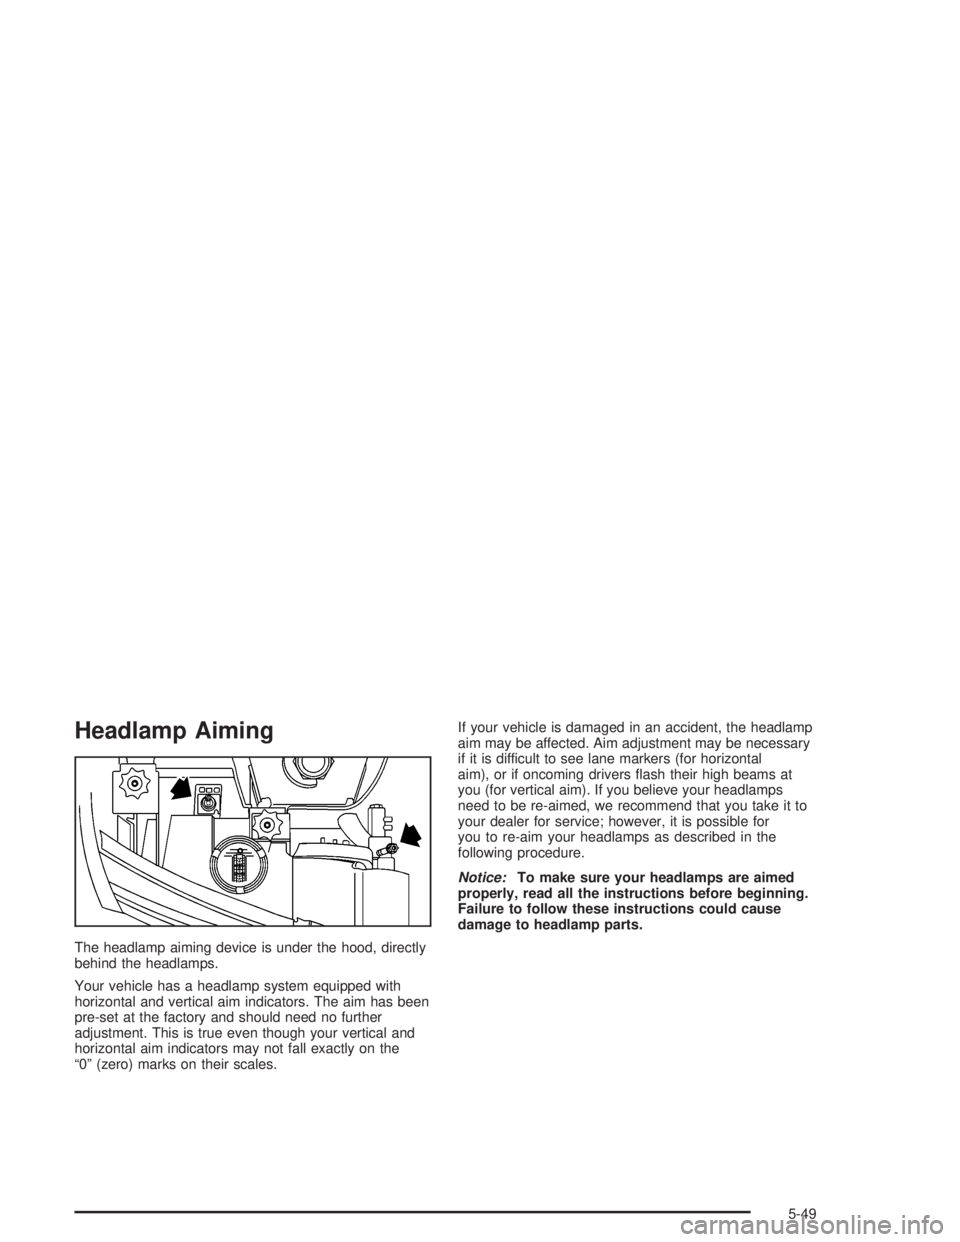
The headlamp aiming device is under the hood, directly
behind the headlamps.
Your vehicle has a headlamp system equipped with
horizontal and vertical aim indicators. The aim has been
pre-set at the factory and should need no further
adjustment. This is true even though your vertical and
horizontal aim indicators may not fall exactly on the
“0” (zero) marks on their scales.If your vehicle is damaged in an accident, the headlamp
aim may be affected. Aim adjustment may be necessary
if it is difficult to see lane markers (for horizontal
aim), or if oncoming drivers �ash their high beams at
you (for vertical aim). If you believe your headlamps
need to be re-aimed, we recommend that you take it to
your dealer for service; however, it is possible for
you to re-aim your headlamps as described in the
following procedure.
Notice:To make sure your headlamps are aimed
properly, read all the instructions before beginning.
Failure to follow these instructions could cause
damage to headlamp parts.
5-49
Page 294 of 410
To check the aim, the vehicle should be properly
prepared as follows:
The vehicle must have all four tires on a perfectly
level surface.
If necessary, pads may be used on an uneven
surface.
The vehicle should not have any snow, ice or mud
attached to it.
The vehicle should be fully assembled and all other
work stopped while headlamp aiming is being done.
There should not be any cargo or loading of the
vehicle, except it should have a full tank of fuel and
one person or 160 lbs (75 kg) on the driver’s seat.
Close all doors.
Tires should be properly in�ated.
Rock the vehicle to stabilize the suspension.
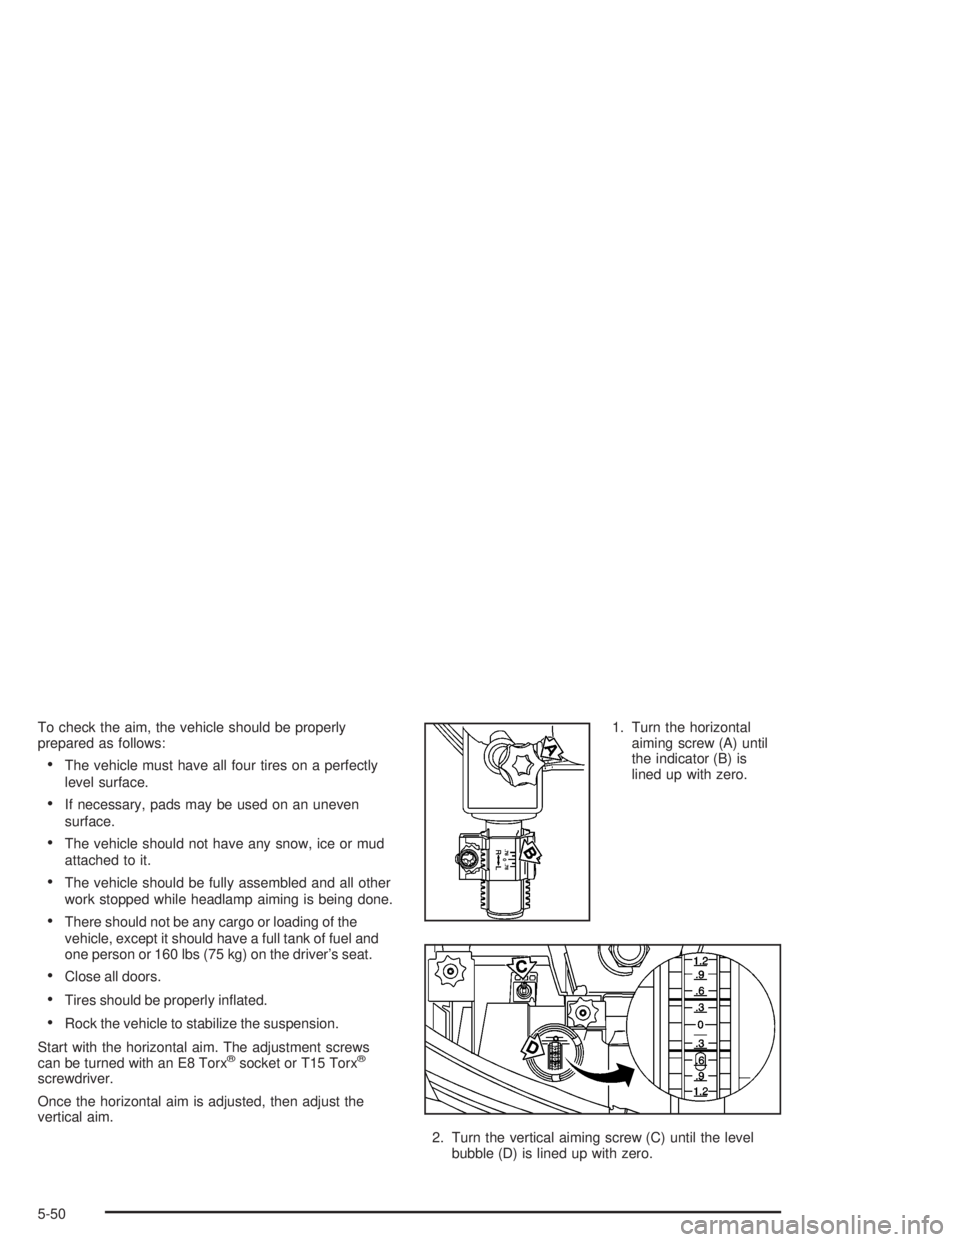
Start with the horizontal aim. The adjustment screws
can be turned with an E8 Torx
®socket or T15 Torx®
screwdriver.
Once the horizontal aim is adjusted, then adjust the
vertical aim.1. Turn the horizontal
aiming screw (A) until
the indicator (B) is
lined up with zero.
2. Turn the vertical aiming screw (C) until the level
bubble (D) is lined up with zero.
5-50
Page 295 of 410
Bulb Replacement
For the type of bulb to use, seeReplacement Bulbs on
page 5-60.
For any bulb changing procedure not listed in this
section, contact your dealer.
Halogen Bulbs
{CAUTION:
Halogen bulbs have pressurized gas inside and
can burst if you drop or scratch the bulb. You or
others could be injured. Be sure to read and
follow the instructions on the bulb package.
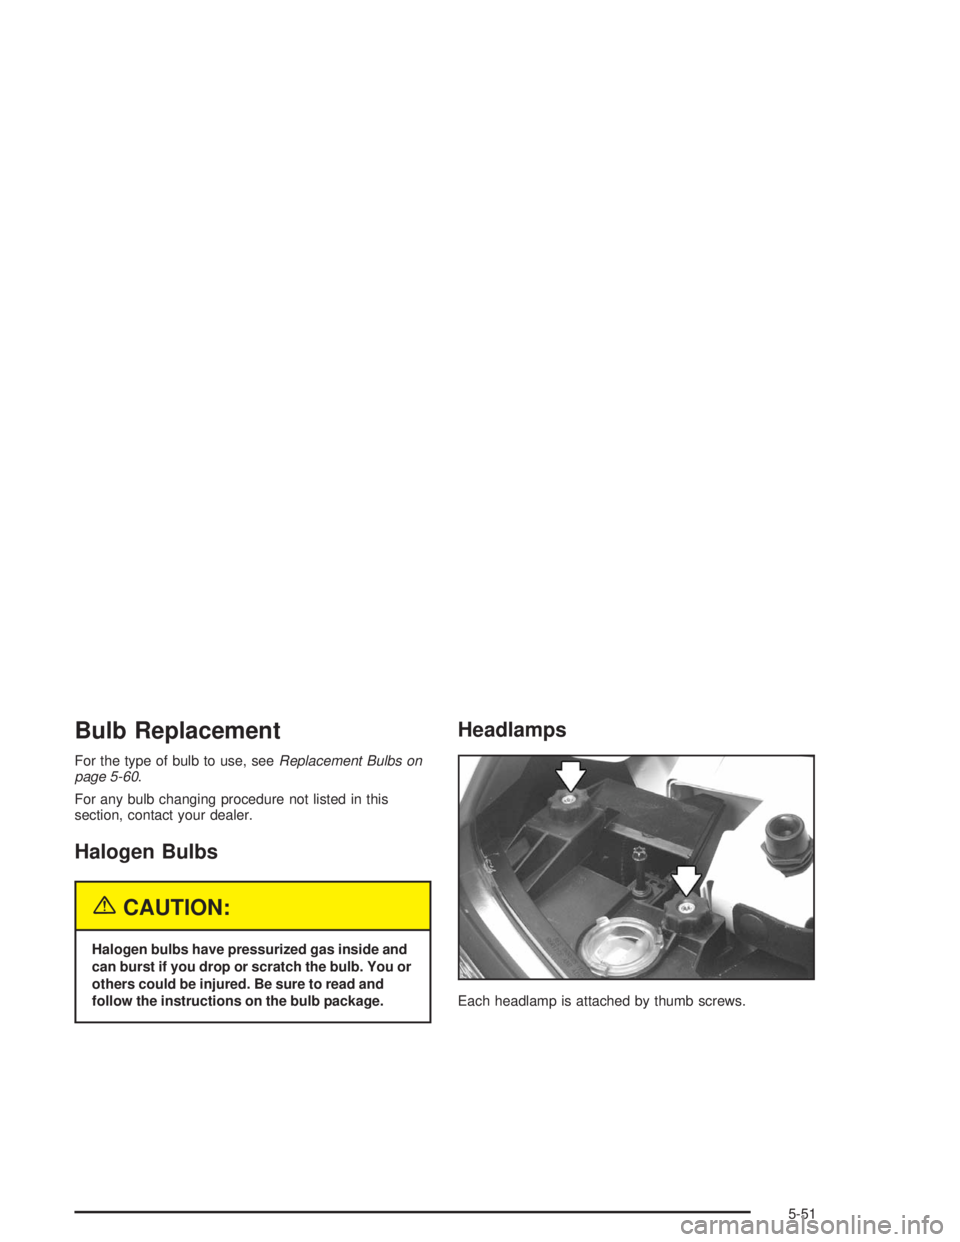
Headlamps
Each headlamp is attached by thumb screws.
5-51
Page 296 of 410
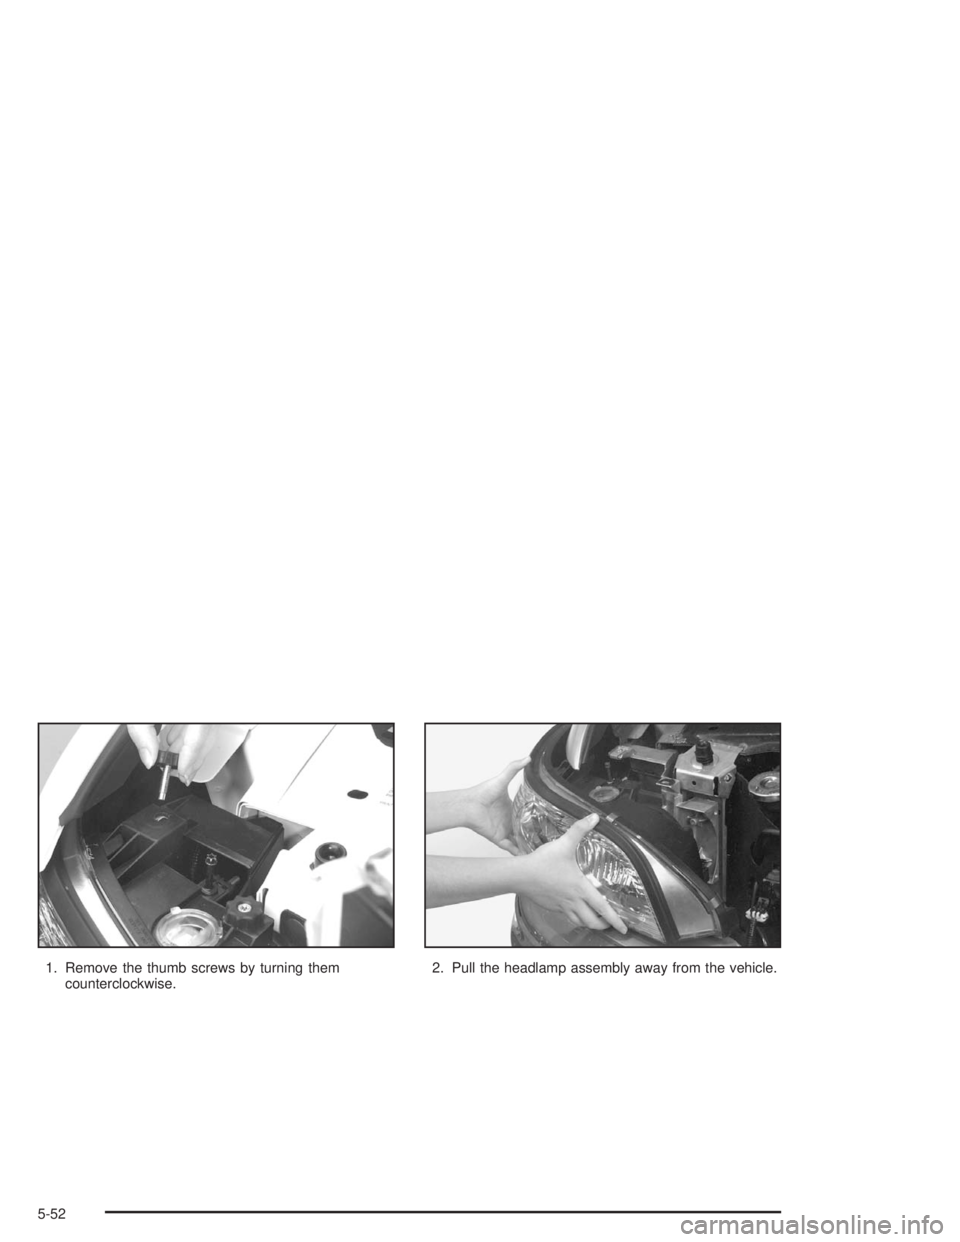
1. Remove the thumb screws by turning them
counterclockwise.2. Pull the headlamp assembly away from the vehicle.
5-52
Page 297 of 410
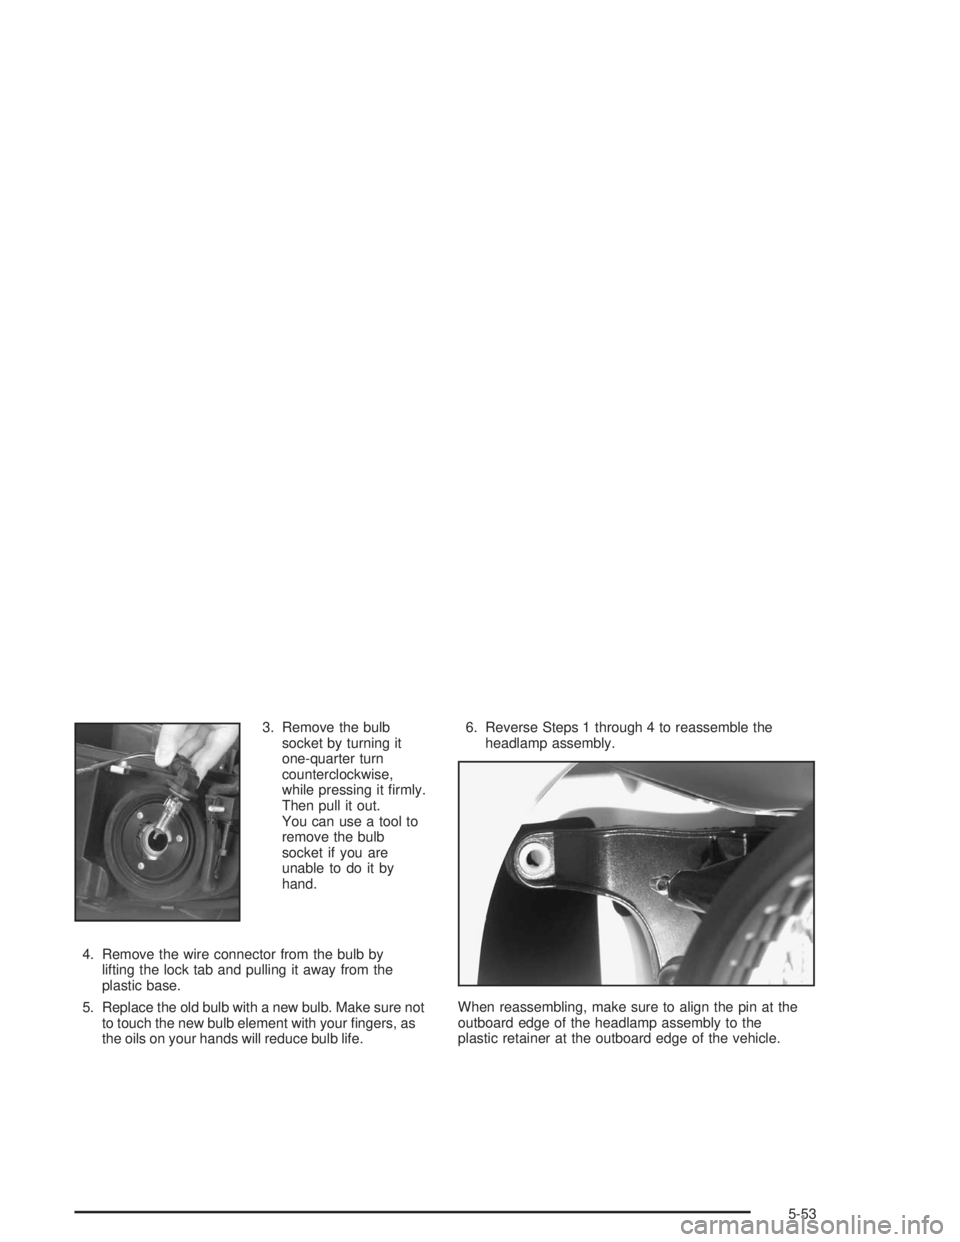
3. Remove the bulb
socket by turning it
one-quarter turn
counterclockwise,
while pressing it �rmly.
Then pull it out.
You can use a tool to
remove the bulb
socket if you are
unable to do it by
hand.
4. Remove the wire connector from the bulb by
lifting the lock tab and pulling it away from the
plastic base.
5. Replace the old bulb with a new bulb. Make sure not
to touch the new bulb element with your �ngers, as
the oils on your hands will reduce bulb life.6. Reverse Steps 1 through 4 to reassemble the
headlamp assembly.
When reassembling, make sure to align the pin at the
outboard edge of the headlamp assembly to the
plastic retainer at the outboard edge of the vehicle.
5-53
Page 298 of 410
Front Turn Signal Lamps
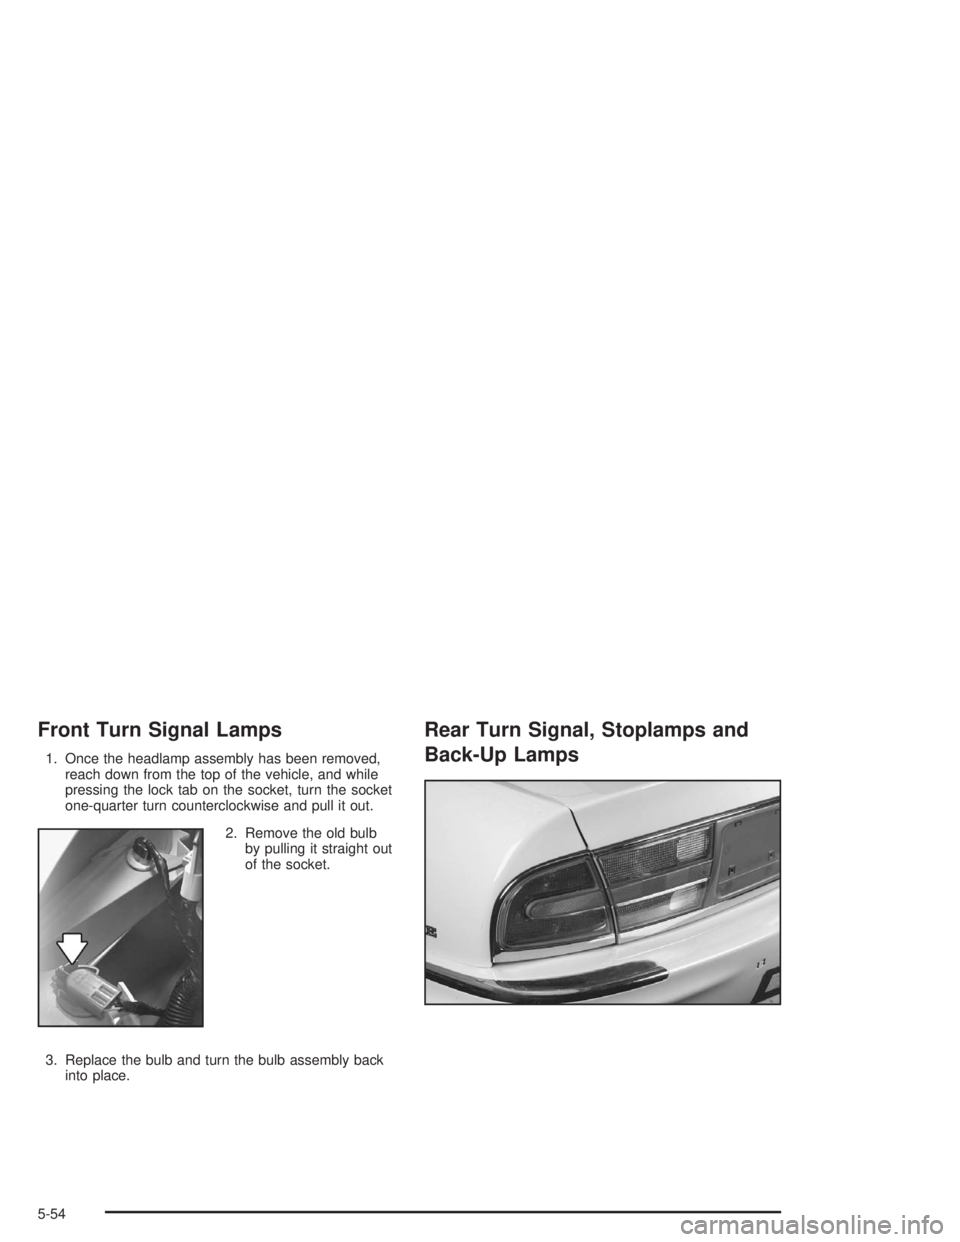
1. Once the headlamp assembly has been removed,
reach down from the top of the vehicle, and while
pressing the lock tab on the socket, turn the socket
one-quarter turn counterclockwise and pull it out.
2. Remove the old bulb
by pulling it straight out
of the socket.
3. Replace the bulb and turn the bulb assembly back
into place.
Rear Turn Signal, Stoplamps and
Back-Up Lamps
5-54
Page 299 of 410
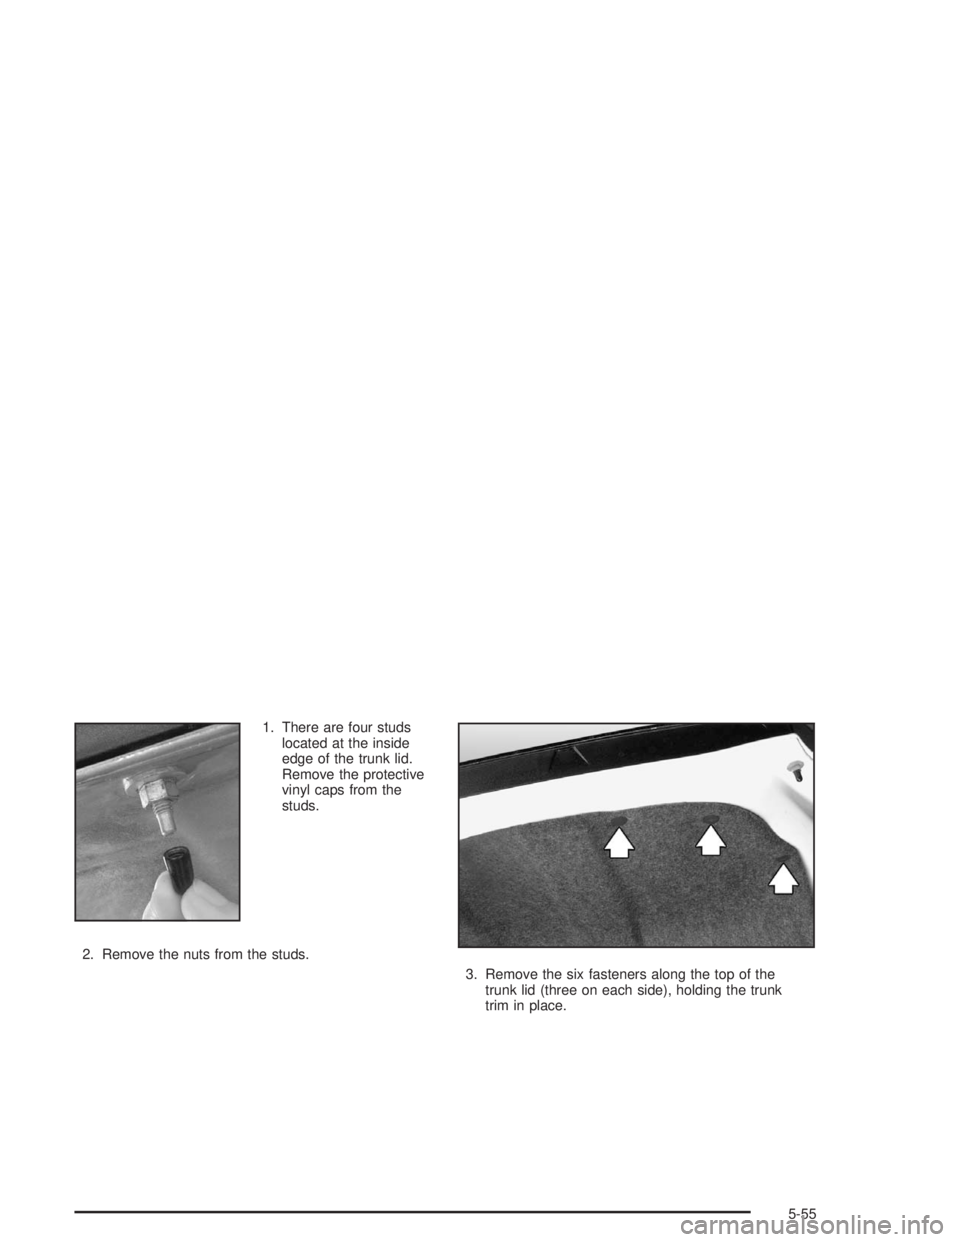
1. There are four studs
located at the inside
edge of the trunk lid.
Remove the protective
vinyl caps from the
studs.
2. Remove the nuts from the studs.
3. Remove the six fasteners along the top of the
trunk lid (three on each side), holding the trunk
trim in place.
5-55
Page 300 of 410
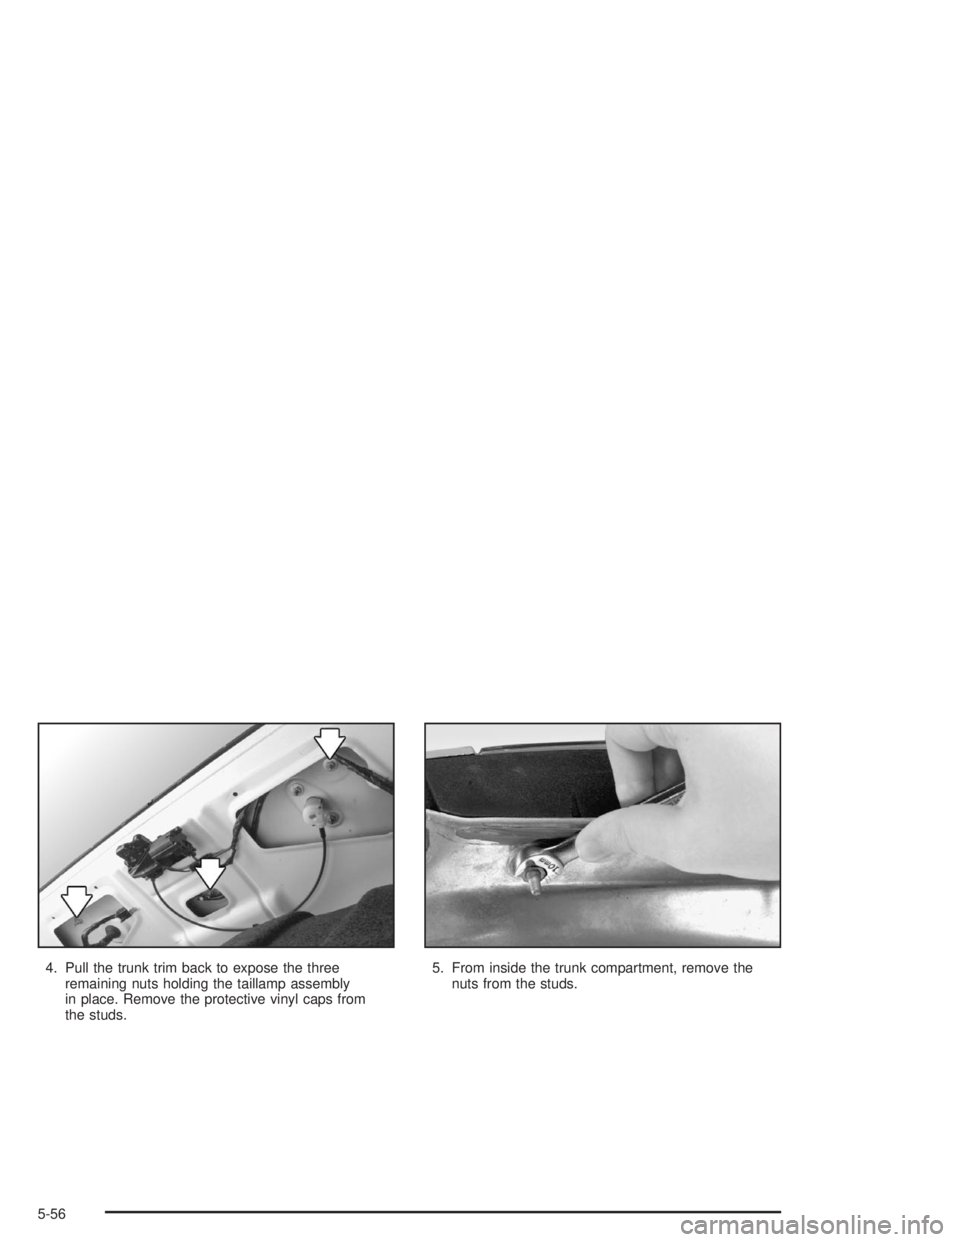
4. Pull the trunk trim back to expose the three
remaining nuts holding the taillamp assembly
in place. Remove the protective vinyl caps from
the studs.5. From inside the trunk compartment, remove the
nuts from the studs.
5-56
Trending: wheel size, washer fluid, wipers, winter tires, brake light, coolant temperature, oil additives

