check engine BUICK RAINIER 2006 Owner's Manual
[x] Cancel search | Manufacturer: BUICK, Model Year: 2006, Model line: RAINIER, Model: BUICK RAINIER 2006Pages: 470, PDF Size: 2.72 MB
Page 87 of 470
Passlock®
Your vehicle is equipped with the
Passlock®theft-deterrent system.
Passlock®is a passive theft-deterrent system that
enables fuel if the ignition lock cylinder is turned with
a valid key. If a correct key is not used or the ignition
lock cylinder is tampered with, the fuel system is
disabled and the vehicle will not start.
During normal operation, the security light will turn off
approximately �ve seconds after the key is turned
to RUN.
If the engine stalls and the security light �ashes, wait
about 10 minutes until the light stops �ashing before
trying to restart the engine. Remember to release
the key from START as soon as the engine starts.
If the engine does not start after three tries, the vehicle
needs service.
If the engine is running and the security light comes on,
you will be able to restart the engine if you turn the
engine off. However, your Passlock
®system is
not working properly and must be serviced by your
dealer. Your vehicle is not protected by Passlock
®
at this time. You may also want to check the fuse.
SeeFuses and Circuit Breakers on page 5-95.
See your dealer for service.
In an emergency, call the GM Roadside Assistance
Center. SeeRoadside Assistance Program on page 7-6.
Starting and Operating
Your Vehicle
New Vehicle Break-In
Notice:Your vehicle does not need an elaborate
break-in. But it will perform better in the long run if
you follow these guidelines:
Keep your speed at 55 mph (88 km/h) or less for
the �rst 500 miles (805 km).
Do not drive at any one constant speed, fast or
slow, for the �rst 500 miles (805 km). Do not
make full-throttle starts. Avoid downshifting to
brake, or slow, the vehicle.
Avoid making hard stops for the �rst 200 miles
(322 km) or so. During this time your new brake
linings are not yet broken in. Hard stops with new
linings can mean premature wear and earlier
replacement. Follow this breaking-in guideline
every time you get new brake linings.
Do not tow a trailer during break-in. SeeTowing
a Trailer on page 4-52for the trailer towing
capabilities of your vehicle and more
information.
Following break-in, engine speed and load can be
gradually increased.
2-17
Page 89 of 470
Starting the Engine
Move your shift lever to PARK (P) or NEUTRAL (N).
Your engine will not start in any other position — that is
a safety feature. To restart when you are already
moving, use NEUTRAL (N) only.
Notice:Do not try to shift to PARK (P) if your
vehicle is moving. If you do, you could damage the
transmission. Shift to PARK (P) only when your
vehicle is stopped.
1. With your foot off the accelerator pedal, turn the
ignition key to START. When the engine starts,
let go of the key. The idle speed will go down as
your engine gets warm.
Notice:Holding your key in START for longer than
15 seconds at a time will cause your battery to
be drained much sooner. And the excessive heat
can damage your starter motor. Wait about
15 seconds between each try to help avoid draining
your battery or damaging your starter.
2. If it does not start within 10 seconds, push the
accelerator pedal all the way to the �oor, while
you hold the ignition key in START. When
the engine starts, let go of the key and let up on the
accelerator pedal. Wait about 15 seconds between
each try.When starting your engine in very cold weather
(below 0°F or−18°C), do this:
1. With your foot off the accelerator pedal, turn the
ignition key to START and hold it there up to
15 seconds. When the engine starts, let go of
the key.
2. If your engine still will not start, or starts but then
stops, it could be �ooded with too much gasoline.
Try pushing your accelerator pedal all the way to the
�oor and holding it there as you hold the key in
START for about three seconds. When the engine
starts, let go of the key and accelerator. If the
vehicle starts brie�y but then stops again, do the
same thing, but this time keep the pedal down
for �ve or six seconds. This clears the extra
gasoline from the engine.
Notice:Your engine is designed to work with the
electronics in your vehicle. If you add electrical
parts or accessories, you could change the way the
engine operates. Before adding electrical equipment,
check with your dealer. If you do not, your engine
might not perform properly. Any resulting damage
would not be covered by your vehicle’s warranty.
2-19
Page 124 of 470
Malfunction Indicator Lamp.............................3-36
Oil Pressure Gage........................................3-38
Security Light...............................................3-39
Cruise Control Light......................................3-39
Reduced Engine Power Light.........................3-40
Highbeam On Light.......................................3-40
Service All-Wheel Drive Light.........................3-41
Check Gages Warning Light...........................3-41
Gate Ajar Light.............................................3-41
Fuel Gage...................................................3-42
Low Fuel Warning Light.................................3-42
Check Gas Cap Light....................................3-42
Driver Information Center (DIC).......................3-43
DIC Operation and Displays...........................3-44
DIC Warnings and Messages.........................3-47
DIC Vehicle Customization.............................3-52Audio System(s).............................................3-58
Setting the Time...........................................3-59
Radio with CD (Base)...................................3-60
Radio with CD (MP3)....................................3-70
Radio with Cassette and CD..........................3-85
Radio with Six-Disc CD.................................3-99
Navigation/Radio System..............................3-113
Rear Seat Entertainment System...................3-113
Rear Seat Audio (RSA)................................3-124
Theft-Deterrent Feature................................3-126
Audio Steering Wheel Controls......................3-126
Radio Reception.........................................3-127
Care of the Cassette Tape Player.................3-128
Care of Your CDs and DVDs........................3-129
Care of the CD and DVD Player...................3-129
Fixed Mast Antenna....................................3-130
XM™ Satellite Radio Antenna System............3-130
Chime Level Adjustment...............................3-130
Section 3 Instrument Panel
3-2
Page 147 of 470

Warning Lights, Gages,
and Indicators
This part describes the warning lights and gages that
may be on your vehicle. The pictures will help you
locate them.
Warning lights and gages can signal that something is
wrong before it becomes serious enough to cause
an expensive repair or replacement. Paying attention
to your warning lights and gages could also save you or
others from injury.
Warning lights come on when there may be or is a
problem with one of your vehicle’s functions. As you
will see in the details on the next few pages, some
warning lights come on brie�y when you start the engine
just to let you know they’re working. If you are familiar
with this section, you should not be alarmed when
this happens.Gages can indicate when there may be or is a problem
with one of your vehicle’s functions. Often gages
and warning lights work together to let you know when
there’s a problem with your vehicle.
When one of the warning lights comes on and stays
on when you are driving, or when one of the gages
shows there may be a problem, check the section that
tells you what to do about it. Please follow this
manual’s advice.
Waiting to do repairs can be costly — and even
dangerous. So please get to know your warning lights
and gages. They’re a big help.
Your vehicle may also have a Driver Information
Center (DIC) that works along with the warning lights
and gages. SeeDriver Information Center (DIC)
on page 3-43.
3-25
Page 149 of 470
Speedometer and Odometer
Your speedometer lets you see your speed in both
miles per hour (mph) and kilometers per hour (km/h).
Your odometer shows how far your vehicle has
been driven, in either miles (used in the United States)
or kilometers (used in Canada).
The odometer mileage can be checked without the
vehicle running. Simply press the trip stem located on
the instrument panel cluster.
You may wonder what happens if your vehicle needs
a new odometer installed. The new one will be set to
the correct mileage total of the old odometer.
Trip Odometer
The trip odometer can tell you how far your vehicle
has been driven since you last set the trip odometer
to zero.
Your vehicle’s odometer works together with the Driver
Information Center (DIC). You can set a Trip A and
Trip B odometer. See “Trip Information” underDIC
Operation and Displays on page 3-44.
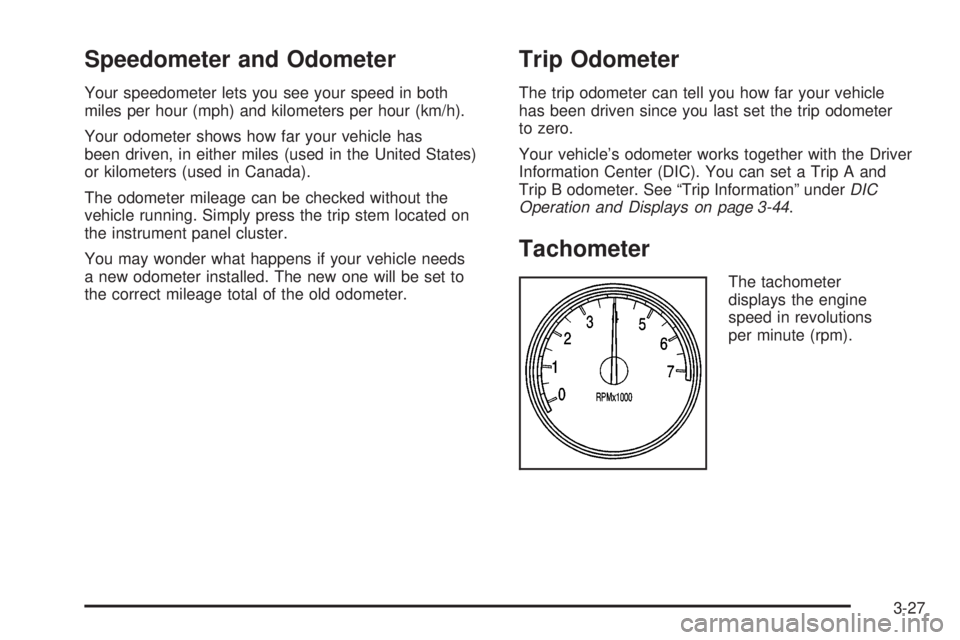
Tachometer
The tachometer
displays the engine
speed in revolutions
per minute (rpm).
3-27
Page 154 of 470

Charging System Light
The charging system light
will come on brie�y when
you turn on the ignition,
but the engine is not
running, as a check to
show you it is working.
It should go out once the engine is running. If it stays
on, or comes on while you are driving, you may have
a problem with the charging system. It could indicate
that you have problems with a generator drive belt,
or another electrical problem. Have it checked
right away. Driving while this light is on could drain
your battery.
If you must drive a short distance with the light on,
be certain to turn off all your accessories, such as
the radio and air conditioner.
Voltmeter Gage
When your engine is not
running, but the ignition
is in RUN, this gage shows
your battery’s state of
charge in DC volts.
When the engine is running, the gage shows the
condition of the charging system. Readings between
the low and high warning zones indicate the normal
operating range.
Readings in the low warning zone may occur when a
large number of electrical accessories are operating
in the vehicle and the engine is left idling for an
extended period. This condition is normal since the
charging system is not able to provide full power
at engine idle. As engine speeds are increased, this
condition should correct itself as higher engine speeds
allow the charging system to create maximum power.
You can only drive for a short time with the reading
in either warning zone. If you must drive, turn off
all unnecessary accessories.
Readings in either warning zone indicate a possible
problem in the electrical system. Have the vehicle
serviced as soon as possible.
3-32
Page 158 of 470

Malfunction Indicator Lamp
Check Engine Light
Your vehicle is equipped
with a computer which
monitors operation of the
fuel, ignition, and emission
control systems.
This system is called OBD II (On-Board
Diagnostics-Second Generation) and is intended to
assure that emissions are at acceptable levels for
the life of the vehicle, helping to produce a cleaner
environment. The check engine light comes on to
indicate that there is a problem and service is required.
Malfunctions often will be indicated by the system
before any problem is apparent. This may prevent more
serious damage to your vehicle. This system is also
designed to assist your service technician in correctly
diagnosing any malfunction.
Notice:If you keep driving your vehicle with this
light on, after awhile, your emission controls
may not work as well, your fuel economy may
not be as good, and your engine may not run as
smoothly. This could lead to costly repairs that
may not be covered by your warranty.Notice:Modi�cations made to the engine,
transmission, exhaust, intake, or fuel system of
your vehicle or the replacement of the original tires
with other than those of the same Tire Performance
Criteria (TPC) can affect your vehicle’s emission
controls and may cause this light to come on.
Modi�cations to these systems could lead to costly
repairs not covered by your warranty. This may
also result in a failure to pass a required Emission
Inspection/Maintenance test. SeeAccessories
and Modifications on page 5-3.
This light should come on, as a check to show you
it is working, when the ignition is on and the engine
is not running. If the light does not come on, have
it repaired. This light will also come on during a
malfunction in one of two ways:
Light Flashing— A mis�re condition has been
detected. A mis�re increases vehicle emissions
and may damage the emission control system
on your vehicle. Diagnosis and service may
be required.
Light On Steady— An emission control system
malfunction has been detected on your vehicle.
Diagnosis and service may be required.
3-36
Page 159 of 470

If the Light is Flashing
The following may prevent more serious damage
to your vehicle:
Reducing vehicle speed
Avoiding hard accelerations
Avoiding steep uphill grades
If you are towing a trailer, reduce the amount
of cargo being hauled as soon as it is possible
If the light stops �ashing and remains on steady, see
“If the Light Is On Steady” following.
If the light continues to �ash, when it is safe to do
so, stop the vehicle. Find a safe place to park your
vehicle. Turn the key off, wait at least 10 seconds and
restart the engine. If the light remains on steady, see
“If the Light Is On Steady” following. If the light is
still �ashing, follow the previous steps, and see your
dealer for service as soon as possible.
If the Light Is On Steady
You may be able to correct the emission system
malfunction by considering the following:
Did you recently put fuel into your vehicle?
If so, reinstall the fuel cap, making sure to fully
install the cap. SeeFilling the Tank on page 5-8.
The diagnostic system can determine if the fuel
cap has been left off or improperly installed.A loose or missing fuel cap will allow fuel to evaporate
into the atmosphere. A few driving trips with the cap
properly installed should turn the light off.
Did you just drive through a deep puddle of water?
If so, your electrical system may be wet. The condition
will usually be corrected when the electrical system
dries out. A few driving trips should turn the light off.
Have you recently changed brands of fuel?
If so, be sure to fuel your vehicle with quality fuel. See
Gasoline Octane on page 5-5. Poor fuel quality will
cause your engine not to run as efficiently as designed.
You may notice this as stalling after start-up, stalling
when you put the vehicle into gear, mis�ring, hesitation
on acceleration, or stumbling on acceleration. (These
conditions may go away once the engine is warmed up.)
This will be detected by the system and cause the
light to turn on.
If you experience one or more of these conditions,
change the fuel brand you use. It will require at least
one full tank of the proper fuel to turn the light off.
If none of the above steps have made the light turn off,
your dealer can check the vehicle. Your dealer has
the proper test equipment and diagnostic tools to �x
any mechanical or electrical problems that may
have developed.
3-37
Page 160 of 470
Emissions Inspection and
Maintenance Programs
Some state/provincial and local governments have
or may begin programs to inspect the emission
control equipment on your vehicle. Failure to pass
this inspection could prevent you from getting a
vehicle registration.
Here are some things you need to know to help
your vehicle pass an inspection:
Your vehicle will not pass this inspection if the
check engine light is on or not working properly.
Your vehicle will not pass this inspection if the
OBD (on-board diagnostic) system determines that
critical emission control systems have not been
completely diagnosed by the system. The vehicle
would be considered not ready for inspection.
This can happen if you have recently replaced your
battery or if your battery has run down. The diagnostic
system is designed to evaluate critical emission
control systems during normal driving. This may take
several days of routine driving. If you have done this
and your vehicle still does not pass the inspection
for lack of OBD system readiness, your GM dealer
can prepare the vehicle for inspection.
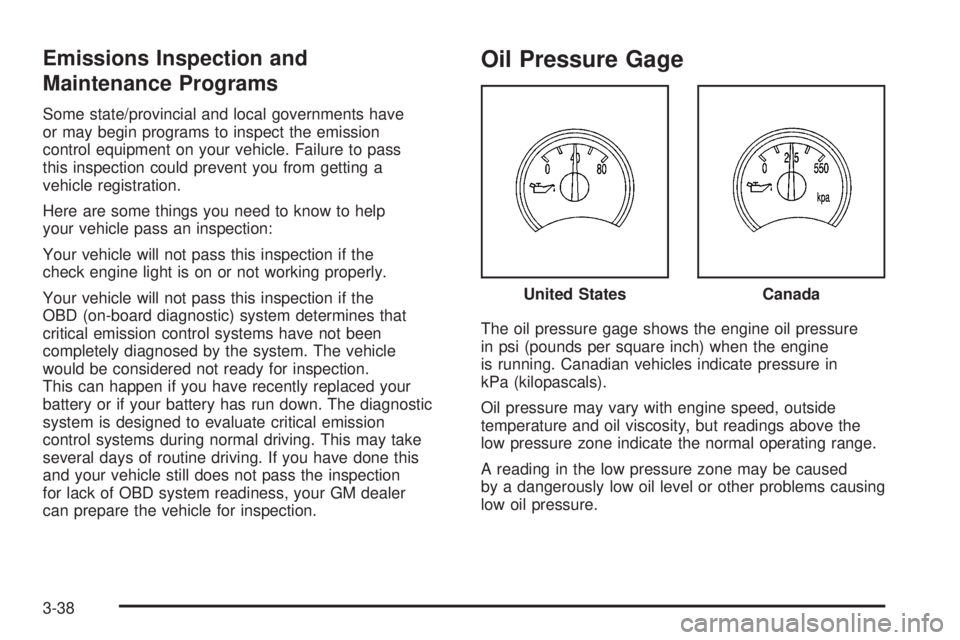
Oil Pressure Gage
The oil pressure gage shows the engine oil pressure
in psi (pounds per square inch) when the engine
is running. Canadian vehicles indicate pressure in
kPa (kilopascals).
Oil pressure may vary with engine speed, outside
temperature and oil viscosity, but readings above the
low pressure zone indicate the normal operating range.
A reading in the low pressure zone may be caused
by a dangerously low oil level or other problems causing
low oil pressure.United States
Canada
3-38
Page 161 of 470

{CAUTION:
Do not keep driving if the oil pressure is low.
If you do, your engine can become so hot that
it catches �re. You or others could be burned.
Check your oil as soon as possible and have
your vehicle serviced.
Notice:Lack of proper engine oil maintenance
may damage the engine. The repairs would not
be covered by your warranty. Always follow
the maintenance schedule in this manual for
changing engine oil.
Security Light
This light will come on
brie�y when you turn the
key toward START.The light will stay on until the engine starts. If the light
�ashes, the Passlock
®system has entered a tamper
mode. If the vehicle fails to start, seePasslock®
on page 2-17.
If the light comes on continuously while driving and
stays on, there may be a problem with the Passlock
®
system. Your vehicle will not be protected by Passlock®,
and you should see your dealer.
Also, seeContent Theft-Deterrent on page 2-15for
additional information regarding the security light.
Cruise Control Light
If equipped, the cruise
control light appears
whenever you set your
cruise control.
SeeCruise Control on page 3-11for more information.
3-39