display BUICK RANDEZVOUS 2004 Owner's Manual
[x] Cancel search | Manufacturer: BUICK, Model Year: 2004, Model line: RANDEZVOUS, Model: BUICK RANDEZVOUS 2004Pages: 486, PDF Size: 3.18 MB
Page 110 of 486
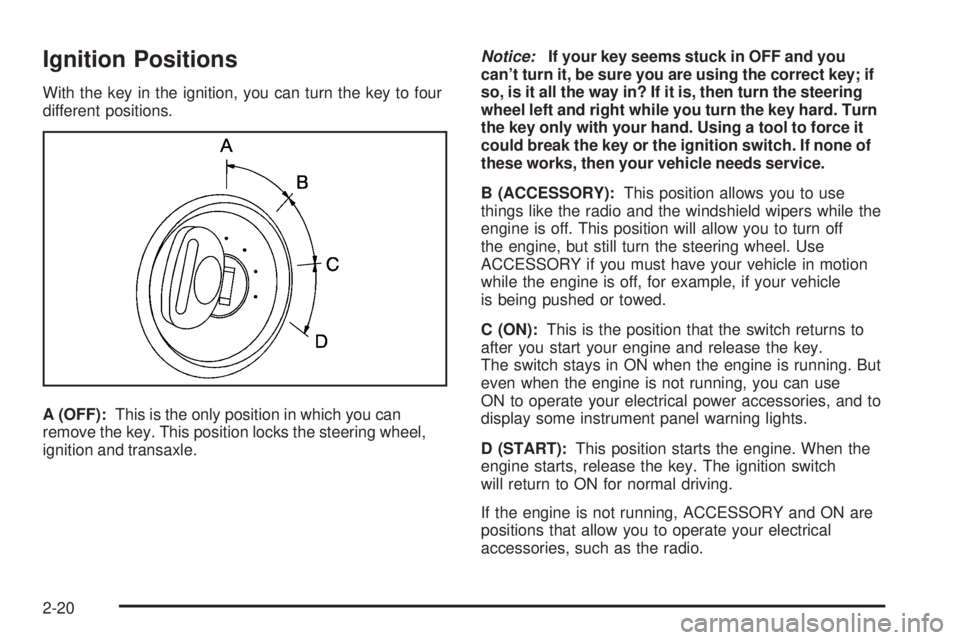
Ignition Positions
With the key in the ignition, you can turn the key to four
different positions.
A (OFF):This is the only position in which you can
remove the key. This position locks the steering wheel,
ignition and transaxle.Notice:If your key seems stuck in OFF and you
can’t turn it, be sure you are using the correct key; if
so, is it all the way in? If it is, then turn the steering
wheel left and right while you turn the key hard. Turn
the key only with your hand. Using a tool to force it
could break the key or the ignition switch. If none of
these works, then your vehicle needs service.
B (ACCESSORY):This position allows you to use
things like the radio and the windshield wipers while the
engine is off. This position will allow you to turn off
the engine, but still turn the steering wheel. Use
ACCESSORY if you must have your vehicle in motion
while the engine is off, for example, if your vehicle
is being pushed or towed.
C (ON):This is the position that the switch returns to
after you start your engine and release the key.
The switch stays in ON when the engine is running. But
even when the engine is not running, you can use
ON to operate your electrical power accessories, and to
display some instrument panel warning lights.
D (START):This position starts the engine. When the
engine starts, release the key. The ignition switch
will return to ON for normal driving.
If the engine is not running, ACCESSORY and ON are
positions that allow you to operate your electrical
accessories, such as the radio.
2-20
Page 141 of 486
Instrument Panel Overview...............................3-4
Hazard Warning Flashers................................3-6
Other Warning Devices...................................3-7
Horn.............................................................3-7
Tilt Wheel.....................................................3-7
Turn Signal/Multifunction Lever.........................3-8
Exterior Lamps.............................................3-14
Interior Lamps..............................................3-16
Instrument Panel Switchbank..........................3-21
Head-Up Display (HUD).................................3-21
Ultrasonic Rear Parking Assist (URPA)..............3-24
Accessory Power Outlets...............................3-27
Ashtrays and Cigarette Lighter........................3-28
Climate Controls............................................3-28
Climate Control System.................................3-28
Dual Climate Control System..........................3-32
Dual Automatic Climate Control System...........3-35
Outlet Adjustment.........................................3-38
Warning Lights, Gages and Indicators.............3-39
Instrument Panel Cluster................................3-40
Speedometer and Odometer...........................3-41
Tachometer.................................................3-42
Safety Belt Reminder Light.............................3-43Air Bag Readiness Light................................3-43
Brake System Warning Light..........................3-44
Anti-Lock Brake System Warning Light.............3-45
Traction Control System (TCS) Warning Light . . .3-45
Engine Coolant Temperature Gage..................3-46
Malfunction Indicator Lamp.............................3-46
Fuel Gage...................................................3-49
Message Center.............................................3-50
Service Traction System Warning Message......3-50
Traction Active Message................................3-51
Engine Coolant Temperature Warning
Message..................................................3-51
Charging System Indicator Message................3-52
Low Oil Pressure Message............................3-52
Change Engine Oil Message..........................3-53
Low Tire Message........................................3-54
Door Ajar Warning Message...........................3-54
Rear Hatch Ajar Warning Message..................3-54
PASS-Key
®III Security Message....................3-55
All-Wheel Drive Disable Warning Message.......3-55
Low Washer Fluid Warning Message...............3-56
Low Fuel Warning Message...........................3-56
Low Brake Fluid Warning Message.................3-57
Section 3 Instrument Panel
3-1
Page 142 of 486
Service Vehicle Soon Message.......................3-57
Program Mode Message................................3-58
Remote Keyless Entry Transmitter Battery Low
Warning Message......................................3-58
Parking Lamp Warning Message.....................3-59
Highbeam Out Warning Message....................3-59
Driver Information Center (DIC).......................3-60
DIC Controls and Displays.............................3-62
DIC Vehicle Personalization............................3-64
Audio System(s).............................................3-73
Setting the Time...........................................3-73
Radio with CD..............................................3-74
Radio with Cassette and CD..........................3-85
Radio with Six-Disc CD.................................3-98Navigation/Radio System..............................3-112
Rear Seat Entertainment System...................3-113
Rear Seat Audio (RSA)................................3-126
Theft-Deterrent Feature................................3-128
Audio Steering Wheel Controls......................3-129
DVD Distortion............................................3-129
Understanding Radio Reception....................3-130
Care of Your Cassette Tape Player...............3-130
Care of Your CDs and DVDs........................3-131
Care of Your CD and DVD Player.................3-131
Cleaning Your DVD Player...........................3-131
Integrated Windshield Antenna......................3-132
XM™ Satellite Radio Antenna System
(48 Contiguous US States)........................3-132
Section 3 Instrument Panel
3-2
Page 145 of 486

The main components of the instrument panel are the
following:
A. Exterior/Interior Lamps Control. SeeExterior Lamps
on page 3-14andInterior Lamps on page 3-16.
B. Turn Signal/Multifunction Lever. SeeTurn
Signal/Multifunction Lever on page 3-8.
C. Hazard Warning Flasher Switch. SeeHazard
Warning Flashers on page 3-6.
D. Instrument Panel Cluster. SeeInstrument Panel
Cluster on page 3-40.
E. Shift Lever. SeeAutomatic Transaxle Operation on
page 2-23.
F. Instrument Panel Outlets. SeeOutlet Adjustment on
page 3-38.
G. Audio System. SeeAudio System(s) on page 3-73.
H. Audio Steering Wheel Controls. SeeAudio
Steering Wheel Controls on page 3-129.
I. Head-Up Display Switch and Driver Information
Center (DIC) Controls. SeeHead-Up Display (HUD)
on page 3-21andDIC Controls and Displays on
page 3-62.J. Hood Release. SeeHood Release on page 5-11.
K. Ignition Switch. SeeIgnition Positions on page 2-20.
L. Climate Controls. SeeClimate Control System on
page 3-28,Dual Climate Control System on
page 3-32orDual Automatic Climate Control System
on page 3-35.
M. Instrument Panel Switchbank. SeeInstrument Panel
Switchbank on page 3-21.
N. Front Armrest Storage. SeeFront Armrest Storage
Area on page 2-40.
O. Ashtray/Cigarette Lighter/Accessory Power
Outlet/Cell Phone Storage/Purse
Storage/Cupholders. SeeAshtrays and Cigarette
Lighter on page 3-28,Accessory Power Outlets on
page 3-27,Cell Phone Storage Area on page 2-39,
Floor Console Storage Area on page 2-40and
Cupholder(s) on page 2-39.
P. Floor Console Fuse Block. SeeFuses and Circuit
Breakers on page 5-109.
Q. Glove Box. SeeGlove Box on page 2-39.
3-5
Page 148 of 486
Turn Signal/Multifunction Lever
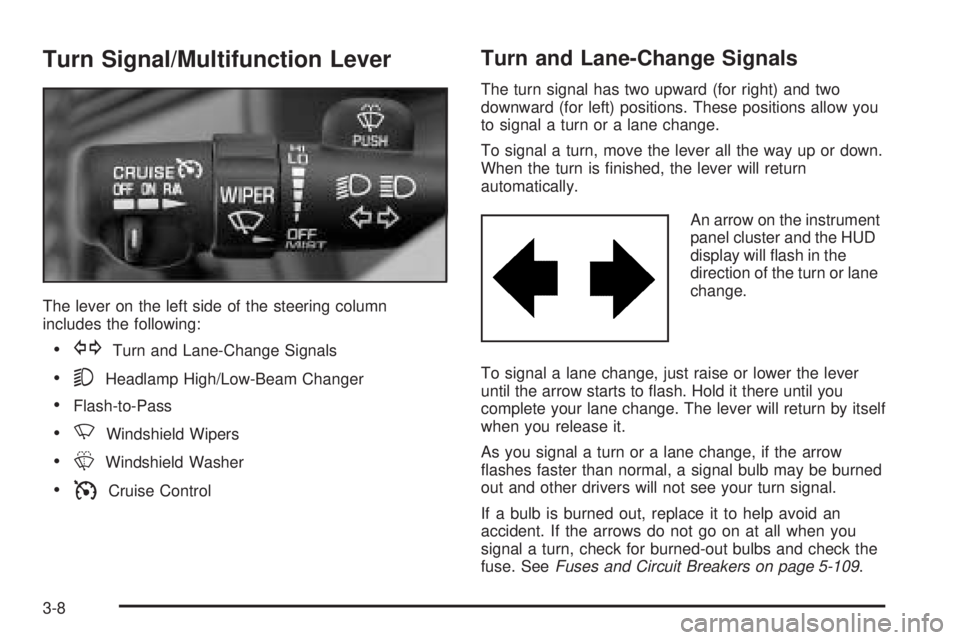
The lever on the left side of the steering column
includes the following:
GTurn and Lane-Change Signals
5Headlamp High/Low-Beam Changer
Flash-to-Pass
NWindshield Wipers
LWindshield Washer
ICruise Control
Turn and Lane-Change Signals
The turn signal has two upward (for right) and two
downward (for left) positions. These positions allow you
to signal a turn or a lane change.
To signal a turn, move the lever all the way up or down.
When the turn is �nished, the lever will return
automatically.
An arrow on the instrument
panel cluster and the HUD
display will �ash in the
direction of the turn or lane
change.
To signal a lane change, just raise or lower the lever
until the arrow starts to �ash. Hold it there until you
complete your lane change. The lever will return by itself
when you release it.
As you signal a turn or a lane change, if the arrow
�ashes faster than normal, a signal bulb may be burned
out and other drivers will not see your turn signal.
If a bulb is burned out, replace it to help avoid an
accident. If the arrows do not go on at all when you
signal a turn, check for burned-out bulbs and check the
fuse. SeeFuses and Circuit Breakers on page 5-109.
3-8
Page 149 of 486
If you have a trailer towing option with added wiring for
the trailer lamps, the signal indicator will �ash at a
normal rate even if a turn signal bulb is burned
out. Check the front and rear turn signal lamps regularly
to make sure they are working.
Turn Signal On Chime
If either turn signal is left on for more than 3/4 mile
(1,2 km), a chime will sound to let the driver know to turn
it off.
If you need to leave the signal on for more than 3/4 mile
(1,2 km), turn off the signal and then turn it back on.
Headlamp High/Low-Beam Changer
To change the headlamps from low to high, push the
turn signal lever away from you. Then release it.
To change the headlamps from high to low, pull the
lever toward you.
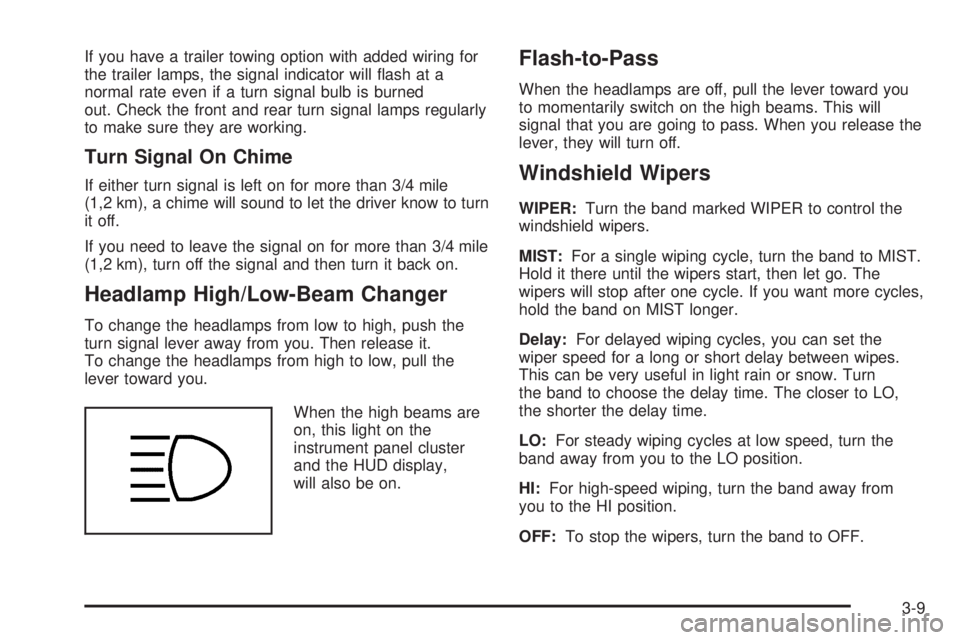
When the high beams are
on, this light on the
instrument panel cluster
and the HUD display,
will also be on.
Flash-to-Pass
When the headlamps are off, pull the lever toward you
to momentarily switch on the high beams. This will
signal that you are going to pass. When you release the
lever, they will turn off.
Windshield Wipers
WIPER:Turn the band marked WIPER to control the
windshield wipers.
MIST:For a single wiping cycle, turn the band to MIST.
Hold it there until the wipers start, then let go. The
wipers will stop after one cycle. If you want more cycles,
hold the band on MIST longer.
Delay:For delayed wiping cycles, you can set the
wiper speed for a long or short delay between wipes.
This can be very useful in light rain or snow. Turn
the band to choose the delay time. The closer to LO,
the shorter the delay time.
LO:For steady wiping cycles at low speed, turn the
band away from you to the LO position.
HI:For high-speed wiping, turn the band away from
you to the HI position.
OFF:To stop the wipers, turn the band to OFF.
3-9
Page 161 of 486
Instrument Panel Switchbank
There is an instrument panel switchbank located below
the comfort controls. It contains switches or blanks
that will vary with the options that are on your vehicle.
The switches you may have are:
Rear Window Wiper/Washer. SeeTurn
Signal/Multifunction Lever on page 3-8.
Traction Disable. SeeTraction Control System
(TCS) on page 4-11.
Park Aid Disable. SeeUltrasonic Rear Parking
Assist (URPA) on page 3-24.
Heated Seats. SeeHeated Seats on page 1-6.
Head-Up Display (HUD)
{CAUTION:
If the HUD image is too bright, or too high in
your �eld of view, it may take you more time to
see things you need to see when it is dark
outside. Be sure to keep the HUD image dim
and placed low in your �eld of view.
If your vehicle has the HUD, it can display the
speedometer reading in English or metric. The current
audio system information, as well as Rear Seat
Entertainment system information, may also be
displayed and will appear as an image focused out
toward the front of your vehicle.
The HUD is capable of displaying English or French.
SeeDIC Controls and Displays on page 3-62to change
the display from English to metric.
3-21
Page 162 of 486

The Head-Up Display also displays the following lights
and messages when they appear on the instrument
panel cluster:
Turn Signal Indicators. SeeTurn
Signal/Multifunction Lever on page 3-8.
High-Beam Indicator. SeeTurn Signal/Multifunction
Lever on page 3-8.
Low-Fuel Warning Message. SeeLow Fuel Warning
Message on page 3-56.
The Head-Up Display also displays a CHECK GAGES
icon. The following messages could appear on the
instrument panel cluster when CHECK GAGES appears:
Engine Coolant Temperature Warning. SeeEngine
Coolant Temperature Warning Message on
page 3-51.
Low Oil Pressure. SeeLow Oil Pressure Message
on page 3-52.
Charging System Indicator. SeeCharging System
Indicator Message on page 3-52.
Low Brake Fluid Warning. SeeLow Brake Fluid
Warning Message on page 3-57.
Under warning conditions, the CHECK GAGES icon will
illuminate in the HUD. Look at the instrument panel
cluster for more information.
3-22
Page 163 of 486

Notice:If you try to use the HUD image as a
parking aid, you may misjudge the distance and
damage your vehicle. Do not use the HUD image as
a parking aid.
The HUD controls are
located to the left of the
steering wheel on the
instrument panel.
When the HUD is on, the speedometer reading will
always be displayed. The current audio system
information will only be displayed for three seconds after
the radio, tape or CD track status changes. This will
happen whenever one of the radio controls is pressed,
either on the radio or on the audio steering wheel
controls, if equipped.To adjust the HUD so you can see it properly,
do the following:
1. Start your engine and turn the dimmer knob to the
desired HUD image brightness.
The brightness of the HUD image is determined by
the ambient light conditions in the direction your
vehicle is facing and where you have the HUD
dimmer knob set. If you are facing a dark object or a
heavily shaded area, your HUD may anticipate that
you are entering a dark area and may begin to dim.
2. Adjust the driver’s seat. If you change your seat
position, you may have to readjust your HUD.
3. Press the UP or DN buttons until the HUD image is
easy to see and then press the DN button until the
HUD image is as low as possible, but remains
in full view straight ahead near the front bumper.
The HUD image can only be adjusted up and down,
not side-to-side.
4. To turn the image off, turn the dimmer knob
counterclockwise until it stops.
If the sun comes out or it becomes cloudy, you may
need to adjust the HUD brightness again using
the dimmer knob. Polarized sunglasses could make the
HUD image harder to see.
3-23
Page 164 of 486
When you �rst start the vehicle the display will show
BUICK and the Buick logo for a few seconds. If it is cold
outside, this display may stay on for up to a minute.
Clean the inside of the windshield as needed to remove
any dirt or �lm that reduces the sharpness or clarity
of the HUD image.
To clean the HUD, spray household glass cleaner on a
soft, clean cloth. Wipe the HUD lens gently, then dry
it. Do not spray cleaner directly on the lens because the
cleaner could leak into the unit.
If the ignition is on and you cannot see the HUD image,
check to see if one of the following conditions exist:
The HUD unit is covered
The HUD dimmer knob is adjusted incorrectly
The HUD image is not adjusted to the proper height
Ambient light in the direction your vehicle is
facing, is low
A fuse is blown. SeeFuses and Circuit Breakers on
page 5-109.
If you ever have to have your windshield replaced, be
sure to get one that is designed for the HUD or your
HUD image may look blurred and out of focus.
Ultrasonic Rear Parking Assist
(URPA)
The Ultrasonic Rear Parking Assist (URPA) system is
designed to help you park, while the vehicle is in
REVERSE (R). It operates only at very low speeds, less
than 3 mph (5 km/h). URPA can help make parking
easier and to help you avoid colliding with objects such as
parked vehicles. The URPA system can detect objects up
to 5 feet (1.5 m) behind the vehicle, and tell you how
close these objects are from your rear bumper.
Your vehicle’s URPA operates when the shift lever is
moved into REVERSE (R) and the vehicle speed is less
than 3 mph (5 km/h). Four ultrasonic sensors located at
the rear bumper are used to detect the distance to the
object. The URPA display is located inside the vehicle,
near the rear window. It has three color-coded lights used
to provide distance and system information to the driver.
3-24