oil level BUICK RANDEZVOUS 2005 Owner's Manual
[x] Cancel search | Manufacturer: BUICK, Model Year: 2005, Model line: RANDEZVOUS, Model: BUICK RANDEZVOUS 2005Pages: 480, PDF Size: 2.96 MB
Page 140 of 480

Message Center.............................................3-51
Passenger Seatbelt Reminder Message...........3-51
Service Traction System Warning Message......3-51
Traction Active Message................................3-52
Engine Coolant Temperature Warning
Message..................................................3-52
Charging System Indicator Message................3-53
Reduced Engine Power Message....................3-53
Low Oil Pressure Message............................3-54
Low Engine Oil Level Message.......................3-55
Change Engine Oil Message..........................3-55
Low Tire Message........................................3-56
Door Ajar Warning Message...........................3-56
Rear Hatch Ajar Warning Message..................3-56
Check Gas Cap Message..............................3-57
PASS-Key
®III Security Message....................3-57
All-Wheel Drive Disable Warning Message.......3-57
Low Washer Fluid Warning Message...............3-58
Low Fuel Warning Message...........................3-58
Low Brake Fluid Warning Message.................3-59
Service Vehicle Soon Message.......................3-59
Program Mode Message................................3-60
Remote Keyless Entry Transmitter Battery Low
Warning Message......................................3-60Parking Lamp Warning Message.....................3-61
Highbeam Out Warning Message....................3-61
Driver Information Center (DIC).........................3-62
DIC Controls and Displays.............................3-64
DIC Vehicle Personalization............................3-66
Audio System(s).............................................3-75
Setting the Time...........................................3-76
Radio with CD..............................................3-76
Radio with Cassette and CD..........................3-87
Radio with Six-Disc CD................................3-100
Rear Seat Entertainment System...................3-115
Navigation/Radio System..............................3-130
Rear Seat Audio (RSA)................................3-130
Theft-Deterrent Feature................................3-132
Audio Steering Wheel Controls......................3-133
Radio Reception.........................................3-134
Care of Your Cassette Tape Player...............3-134
Care of Your CDs and DVDs........................3-135
Care of Your CD and DVD Player.................3-135
Integrated Windshield Antenna......................3-135
XM™ Satellite Radio Antenna System............3-135
Section 3 Instrument Panel
3-2
Page 192 of 480

Low Oil Pressure Message
Your vehicle is equipped with a low oil pressure
warning message.
Your oil pressure message lets you know when you
may have a problem with your engine oil pressure.
When the engine is running and this message appears,
the engine oil level may be too low. There may also
be another problem causing low oil pressure.
{CAUTION:
Do not keep driving if the oil pressure is low. If
you do, your engine can become so hot that it
catches �re. You or others could be burned.
Check your oil as soon as possible and have
your vehicle serviced.
Notice:Lack of proper engine oil maintenance may
damage the engine. The repairs would not be covered
by your warranty. Always follow the maintenance
schedule in this manual for changing engine oil. United States
Canada
3-54
Page 193 of 480

Low Engine Oil Level Message
Your vehicle may have a low engine oil level message.
If this message comes on, it means your engine is
low on oil. You should check your oil level right away.
Have your vehicle serviced immediately.
SeeEngine Oil on page 5-16for more information.
Change Engine Oil Message
When this message comes on and stays on after you
have started the engine, it means that service is required
for your vehicle. SeeScheduled Maintenance on
page 6-4andEngine Oil on page 5-16for more
information. United States
CanadaUnited StatesCanada
3-55
Page 297 of 480

When you want to leave the freeway, move to the
proper lane well in advance. If you miss your exit, do
not, under any circumstances, stop and back up. Drive
on to the next exit.
The exit ramp can be curved, sometimes quite sharply.
The exit speed is usually posted.
Reduce your speed according to your speedometer, not
to your sense of motion. After driving for any distance
at higher speeds, you may tend to think you are
going slower than you actually are.
Before Leaving on a Long Trip
Make sure you are ready. Try to be well rested. If you
must start when you are not fresh — such as after
a day’s work — do not plan to make too many miles that
�rst part of the journey. Wear comfortable clothing
and shoes you can easily drive in.
Is your vehicle ready for a long trip? If you keep it
serviced and maintained, it is ready to go. If it needs
service, have it done before starting out. Of course, you
will �nd experienced and able service experts in GM
dealerships all across North America. They will be ready
and willing to help if you need it.Here are some things you can check before a trip:
Windshield Washer Fluid:Is the reservoir full? Are
all windows clean inside and outside?
Wiper Blades:Are they in good shape?
Fuel, Engine Oil, Other Fluids:Have you checked
all levels?
Lamps:Are they all working? Are the lenses clean?
Tires:They are vitally important to a safe,
trouble-free trip. Is the tread good enough for
long-distance driving? Are the tires all in�ated to the
recommended pressure?
Weather Forecasts:What is the weather outlook
along your route? Should you delay your trip a
short time to avoid a major storm system?
Maps:Do you have up-to-date maps?
4-23
Page 333 of 480

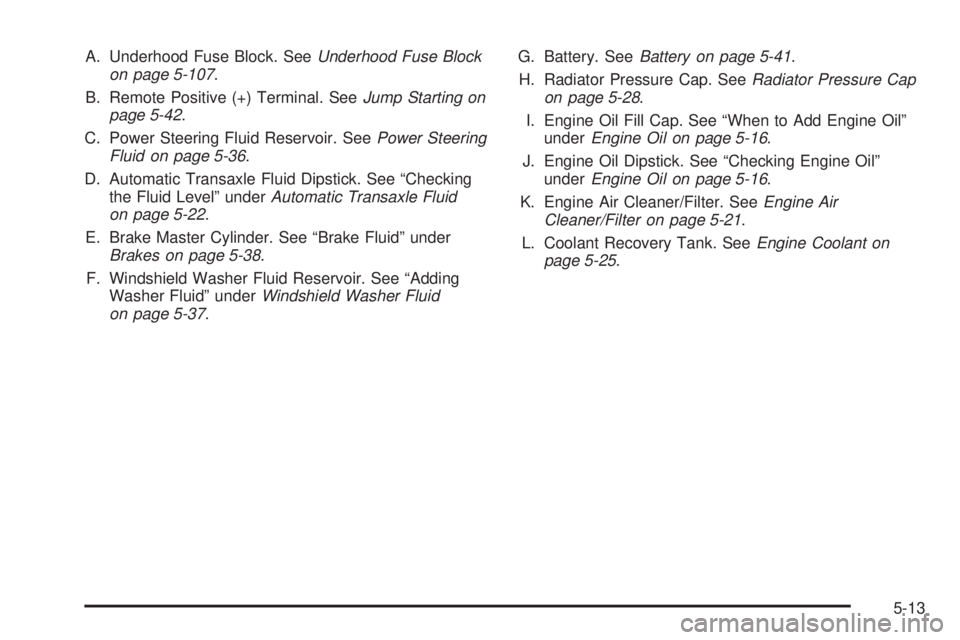
A. Underhood Fuse Block. SeeUnderhood Fuse Block
on page 5-107.
B. Remote Positive (+) Terminal. SeeJump Starting on
page 5-42.
C. Power Steering Fluid Reservoir. SeePower Steering
Fluid on page 5-36.
D. Automatic Transaxle Fluid Dipstick. See “Checking
the Fluid Level” underAutomatic Transaxle Fluid
on page 5-22.
E. Brake Master Cylinder. See “Brake Fluid” under
Brakes on page 5-38.
F. Windshield Washer Fluid Reservoir. See “Adding
Washer Fluid” underWindshield Washer Fluid
on page 5-37.G. Battery. SeeBattery on page 5-41.
H. Radiator Pressure Cap. SeeRadiator Pressure Cap
on page 5-28.
I. Engine Oil Fill Cap. See “When to Add Engine Oil”
underEngine Oil on page 5-16.
J. Engine Oil Dipstick. See “Checking Engine Oil”
underEngine Oil on page 5-16.
K. Engine Air Cleaner/Filter. SeeEngine Air
Cleaner/Filter on page 5-21.
L. Coolant Recovery Tank. SeeEngine Coolant on
page 5-25.
5-13
Page 335 of 480

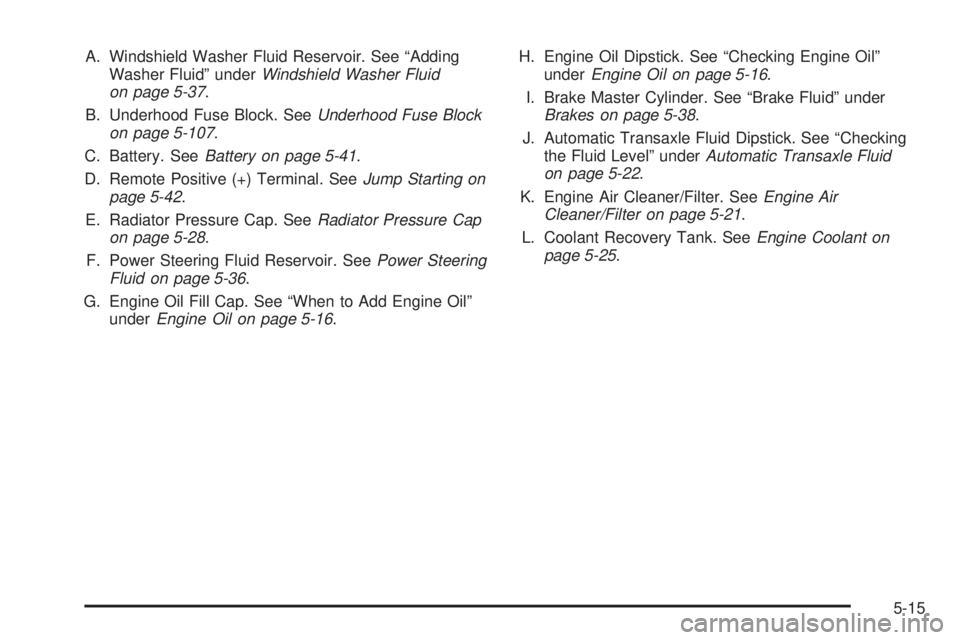
A. Windshield Washer Fluid Reservoir. See “Adding
Washer Fluid” underWindshield Washer Fluid
on page 5-37.
B. Underhood Fuse Block. SeeUnderhood Fuse Block
on page 5-107.
C. Battery. SeeBattery on page 5-41.
D. Remote Positive (+) Terminal. SeeJump Starting on
page 5-42.
E. Radiator Pressure Cap. SeeRadiator Pressure Cap
on page 5-28.
F. Power Steering Fluid Reservoir. SeePower Steering
Fluid on page 5-36.
G. Engine Oil Fill Cap. See “When to Add Engine Oil”
underEngine Oil on page 5-16.H. Engine Oil Dipstick. See “Checking Engine Oil”
underEngine Oil on page 5-16.
I. Brake Master Cylinder. See “Brake Fluid” under
Brakes on page 5-38.
J. Automatic Transaxle Fluid Dipstick. See “Checking
the Fluid Level” underAutomatic Transaxle Fluid
on page 5-22.
K. Engine Air Cleaner/Filter. SeeEngine Air
Cleaner/Filter on page 5-21.
L. Coolant Recovery Tank. SeeEngine Coolant on
page 5-25.
5-15
Page 336 of 480

Engine Oil
Checking Engine Oil
It is a good idea to check your engine oil every time you
get fuel. In order to get an accurate reading, the oil
must be warm and the vehicle must be on level ground.
The engine oil dipstick handle is a yellow loop. See
Engine Compartment Overview on page 5-12for
the location of the engine oil dipstick.
1. Turn off the engine and give the oil several minutes
to drain back into the oil pan. If you do not do this,
the oil dipstick might not show the actual level.
2. Pull out the dipstick and clean it with a paper towel
or cloth, then push it back in all the way. Remove it
again, keeping the tip down, and check the level.3400 V6 Engine
3.6L V6 Engine
5-16
Page 337 of 480

When to Add Engine Oil
If the oil is below the cross-hatched area at the tip of
the dipstick, then you will need to add at least one quart
of oil. But you must use the right kind. This section
explains what kind of oil to use. For engine oil crankcase
capacity, seeCapacities and Speci�cations on
page 5-112.
Notice:Do not add too much oil. If your engine has
so much oil that the oil level gets above the
cross-hatched area that shows the proper operating
range, your engine could be damaged.
SeeEngine Compartment
Overview on page 5-12for
the location of the
engine oil �ll cap.Be sure to add enough oil to put the level somewhere in
the proper operating range in the cross-hatched area.
Push the dipstick all the way back in when you are
through.
What Kind of Engine Oil to Use
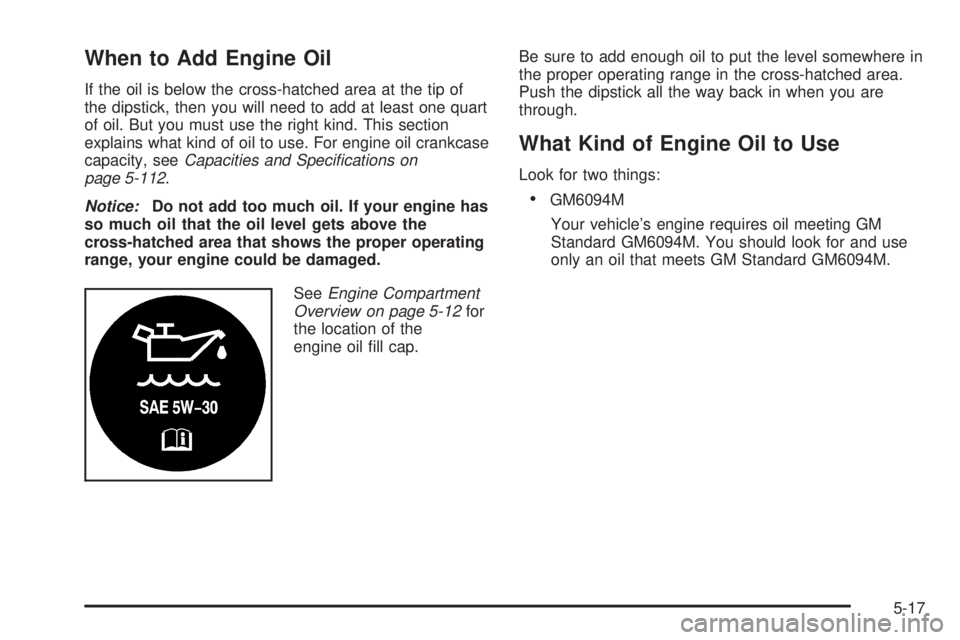
Look for two things:
GM6094M
Your vehicle’s engine requires oil meeting GM
Standard GM6094M. You should look for and use
only an oil that meets GM Standard GM6094M.
5-17
Page 339 of 480

Notice:Use only engine oil identi�ed as meeting
GM Standard GM6094M and showing the American
Petroleum Institute Certi�ed For Gasoline Engines
starburst symbol. Failure to use the recommended
oil can result in engine damage not covered by
your warranty.
GM Goodwrench
®oil meets all the requirements for
your vehicle.
If you are in an area of extreme cold, where the
temperature falls below−20°F (−29°C), it is
recommended that you use either an SAE 5W-30
synthetic oil or an SAE 0W-30 oil. Both will provide
easier cold starting and better protection for your engine
at extremely low temperatures.
Engine Oil Additives
Do not add anything to your oil. The recommended oils
with the starburst symbol that meet GM Standard
GM6094M are all you will need for good performance
and engine protection.
Engine Oil Life System
When to Change Engine Oil
Your vehicle has a computer system that lets you know
when to change the engine oil and �lter. This is based on
engine revolutions and engine temperature, and not on
mileage. Based on driving conditions, the mileage at
which an oil change will be indicated can vary
considerably. For the oil life system to work properly, you
must reset the system every time the oil is changed.
When the system has calculated that oil life has been
diminished, it will indicate that an oil change is
necessary. A CHANGE ENGINE OIL message will
come on. SeeChange Engine Oil Message on
page 3-55. Change your oil as soon as possible within
the next 600 miles (1 000 km). It is possible that, if
you are driving under the best conditions, the oil
life system may not indicate that an oil change is
necessary for over a year. However, your engine oil and
�lter must be changed at least once a year and at
this time the system must be reset. Your dealer has
GM-trained service people who will perform this
work using genuine GM parts and reset the system. It is
also important to check your oil regularly and keep it
at the proper level.
5-19
Page 342 of 480

3. Unlatch the two hooks on top of the engine air
cleaner/�lter housing.
4. Inspect or replace the engine air cleaner/�lter.
5. Align the tabs located on the bottom of the panel
with the slots at the bottom of the housing.
6. Latch the hooks to secure the panel in place. If the
panel moves easily, check that the tabs are seated
correctly in the slots.
7. Put the duct back on and reinstall the clamps.
{CAUTION:
Operating the engine with the air cleaner/�lter
off can cause you or others to be burned. The
air cleaner not only cleans the air; it helps to
stop �ame if the engine back�res. If it is not
there and the engine back�res, you could be
burned. Do not drive with it off, and be
careful working on the engine with the air
cleaner/�lter off.Notice:If the air cleaner/�lter is off, a back�re can
cause a damaging engine �re. And, dirt can
easily get into your engine, which will damage it.
Always have the air cleaner/�lter in place when you
are driving.
Automatic Transaxle Fluid
When to Check and Change Automatic
Transaxle Fluid
A good time to check your automatic transaxle �uid
level is when the engine oil is changed.
Change both the �uid and �lter every 50,000 miles
(83 000 km) if the vehicle is mainly driven under one or
more of these conditions:
In heavy city traffic where the outside temperature
regularly reaches 90°F (32°C) or higher.
In hilly or mountainous terrain.
When doing frequent trailer towing.
Uses such as found in taxi, police or delivery
service.
If you do not use your vehicle under any of these
conditions, change the �uid and �lter at 100,000 miles
(166 000 km). SeeScheduled Maintenance on page 6-4
for more information.
5-22