remote control BUICK RANDEZVOUS 2005 Owner's Manual
[x] Cancel search | Manufacturer: BUICK, Model Year: 2005, Model line: RANDEZVOUS, Model: BUICK RANDEZVOUS 2005Pages: 480, PDF Size: 2.96 MB
Page 91 of 480
Keys...............................................................2-3
Remote Keyless Entry System.........................2-5
Remote Keyless Entry System Operation...........2-6
Doors and Locks.............................................2-8
Door Locks....................................................2-8
Power Door Locks..........................................2-9
Delayed Locking.............................................2-9
Programmable Automatic Door Locks..............2-10
Rear Door Security Locks..............................2-10
Lockout Protection........................................2-11
Liftgate........................................................2-11
Windows........................................................2-13
Power Windows............................................2-14
Sun Visors...................................................2-15
Theft-Deterrent Systems..................................2-15
Content Theft-Deterrent.................................2-15
PASS-Key
®III ..............................................2-17
PASS-Key®III Operation...............................2-18
Starting and Operating Your Vehicle................2-19
New Vehicle Break-In....................................2-19
Ignition Positions..........................................2-20
Retained Accessory Power (RAP)...................2-21
Starting Your Engine.....................................2-21
Engine Coolant Heater..................................2-22Automatic Transaxle Operation.......................2-23
All-Wheel Drive............................................2-26
Parking Brake..............................................2-26
Shifting Into Park (P).....................................2-27
Shifting Out of Park (P).................................2-28
Parking Over Things That Burn.......................2-29
Engine Exhaust............................................2-29
Running Your Engine While You Are Parked.......2-30
Mirrors...........................................................2-31
Manual Rearview Mirror.................................2-31
Outside Power Mirror....................................2-31
Outside Curb View Assist Mirror.....................2-32
Outside Convex Mirror...................................2-32
Outside Heated Mirrors..................................2-32
OnStar
®System.............................................2-33
HomeLink®Transmitter...................................2-34
Programming the HomeLink®Transmitter.........2-35
Storage Areas................................................2-38
Glove Box...................................................2-38
Cupholder(s)................................................2-39
Cell Phone Storage Area...............................2-39
Overhead Console........................................2-39
Floor Console Storage Area...........................2-39
Section 2 Features and Controls
2-1
Page 140 of 480

Message Center.............................................3-51
Passenger Seatbelt Reminder Message...........3-51
Service Traction System Warning Message......3-51
Traction Active Message................................3-52
Engine Coolant Temperature Warning
Message..................................................3-52
Charging System Indicator Message................3-53
Reduced Engine Power Message....................3-53
Low Oil Pressure Message............................3-54
Low Engine Oil Level Message.......................3-55
Change Engine Oil Message..........................3-55
Low Tire Message........................................3-56
Door Ajar Warning Message...........................3-56
Rear Hatch Ajar Warning Message..................3-56
Check Gas Cap Message..............................3-57
PASS-Key
®III Security Message....................3-57
All-Wheel Drive Disable Warning Message.......3-57
Low Washer Fluid Warning Message...............3-58
Low Fuel Warning Message...........................3-58
Low Brake Fluid Warning Message.................3-59
Service Vehicle Soon Message.......................3-59
Program Mode Message................................3-60
Remote Keyless Entry Transmitter Battery Low
Warning Message......................................3-60Parking Lamp Warning Message.....................3-61
Highbeam Out Warning Message....................3-61
Driver Information Center (DIC).........................3-62
DIC Controls and Displays.............................3-64
DIC Vehicle Personalization............................3-66
Audio System(s).............................................3-75
Setting the Time...........................................3-76
Radio with CD..............................................3-76
Radio with Cassette and CD..........................3-87
Radio with Six-Disc CD................................3-100
Rear Seat Entertainment System...................3-115
Navigation/Radio System..............................3-130
Rear Seat Audio (RSA)................................3-130
Theft-Deterrent Feature................................3-132
Audio Steering Wheel Controls......................3-133
Radio Reception.........................................3-134
Care of Your Cassette Tape Player...............3-134
Care of Your CDs and DVDs........................3-135
Care of Your CD and DVD Player.................3-135
Integrated Windshield Antenna......................3-135
XM™ Satellite Radio Antenna System............3-135
Section 3 Instrument Panel
3-2
Page 155 of 480

Headlamp Exit Delay
If your vehicle has headlamp exit delay, it will keep the
headlamps and parking lamps on at night for
30 seconds if the following conditions are met:
The ignition is turned to OFF.
The exterior lamp control is in the AUTO position.
LOCK is pressed on the remote keyless entry
transmitter.
It is dark enough outside.
After 30 seconds, the headlamps and parking lamps will
turn off.
The lamps will turn off before the 30 seconds if the
following conditions are met:
The ignition is turned to ON.
The exterior lamp control is turned out of the AUTO
position.
If your vehicle is equipped with the Driver Information
Center (DIC), seeDIC Vehicle Personalization on
page 3-66to program the headlamp exit delay feature.
Entry Lighting
If your vehicle has entry lighting, the interior of your
vehicle will illuminate for 25 seconds so you can
see inside your vehicle before you enter. To activate
entry lighting, do one of the following:
Unlock a door using the key when the interior lamp
control is in the DOOR position, and when the
ignition is in OFF.
Press UNLOCK on the remote keyless entry
transmitter when the interior lamp control is in the
DOOR position, and when the ignition is in OFF.
After 25 seconds, the interior lamps will fade out.
The lamps will turn off before 25 seconds if you do one
of the following:
Press LOCK on the remote keyless entry
transmitter.
Press the front of the power door lock switch.
Turn the ignition to ON.
When any door is opened, entry lighting is cancelled. The
interior lamps will stay on while any door or the liftgate is
open, and fade out when all the doors are closed.
3-17
Page 156 of 480

Delayed Lighting
If your vehicle has delayed lighting, it will continue to
illuminate the interior for 25 seconds after all doors have
been closed. The lamps will continue to illuminate
when the following conditions are met:
A door is opened then closed.
The interior lamp control is in the DOOR position.
The ignition is in OFF.
After 25 seconds, the interior lamps will fade out.
The lamps will fade out before the 25 seconds if you do
one of the following:
Turn the ignition to ON.
Press LOCK on the remote keyless entry
transmitter.
Press the front of the power door lock switch.
If your vehicle is equipped with the Driver Information
Center (DIC), you can program this feature on or
off. SeeDIC Vehicle Personalization on page 3-66.
Exit Lighting
If your vehicle is equipped with exit lighting, the interior
lamps will come on for about 30 seconds whenever
you remove the key from the ignition if the following
conditions are met:
The vehicle is in PARK (P).
The key is out of the ignition.
The interior lamp control is in the DOOR position.
All of the doors are closed.
After 30 seconds, the interior lamps will fade out.
The interior lamps will fade out before 30 seconds if you
do one of the following:
Turn the ignition to ON.
Press LOCK on the remote keyless entry
transmitter.
Press the front of the power door lock switch.
If your vehicle is equipped with the Driver Information
Center (DIC), you can program this feature on or
off. SeeDIC Vehicle Personalization on page 3-66.
3-18
Page 157 of 480

Perimeter Lighting
If your vehicle has perimeter lighting, it will turn on the
headlamps and parking lamps for 25 seconds when
the following conditions are met:
The ignition is turned to OFF.
The exterior lamp control is in the AUTO position.
UNLOCK is pressed on the remote keyless
entry transmitter.
It is dark enough outside.
After 25 seconds, the headlamps and parking lamps will
turn off.
The lamps will turn off before the 25 seconds if you do
one of the following:
Turn the ignition to ON.
Turn the exterior lamp control out of the AUTO
position.
If your vehicle is equipped with the Driver Information
Center (DIC), you can program this feature on or
off. See “Lock Feedback” underDIC Vehicle
Personalization on page 3-66.
Front Reading Lamps
There are two reading lamps located on the rearview
mirror.
To turn either reading lamp on or off, press the button
located next to each lamp. These lamps will come
on each time you open the doors, if the interior lamp
control is in the ON or DOOR position.
Rear Reading Lamps
There are two reading lamps with coat hooks above the
rear doors.
To turn on or off either reading lamp, press the lens of
the lamp.
Cargo Lamp
The cargo lamp is located in the rear of the vehicle,
above the liftgate opening. It comes on automatically
each time you open the doors, if the interior lamp control
is in the DOOR position.
There are two reading lamps located on the cargo lamp.
To turn either reading lamp on or off, press the button
located next to the lamp.
3-19
Page 202 of 480
DIC Controls and Displays
When the ignition is turned to ON or START, the DIC
will display the following:
BUICK:BUICK will be displayed for three seconds.
DRIVER #:This message will be displayed for another
three seconds after BUICK appears in the display.
This display lets the driver know which driver’s remote
keyless entry transmitter is being used and the
driver’s customization features.
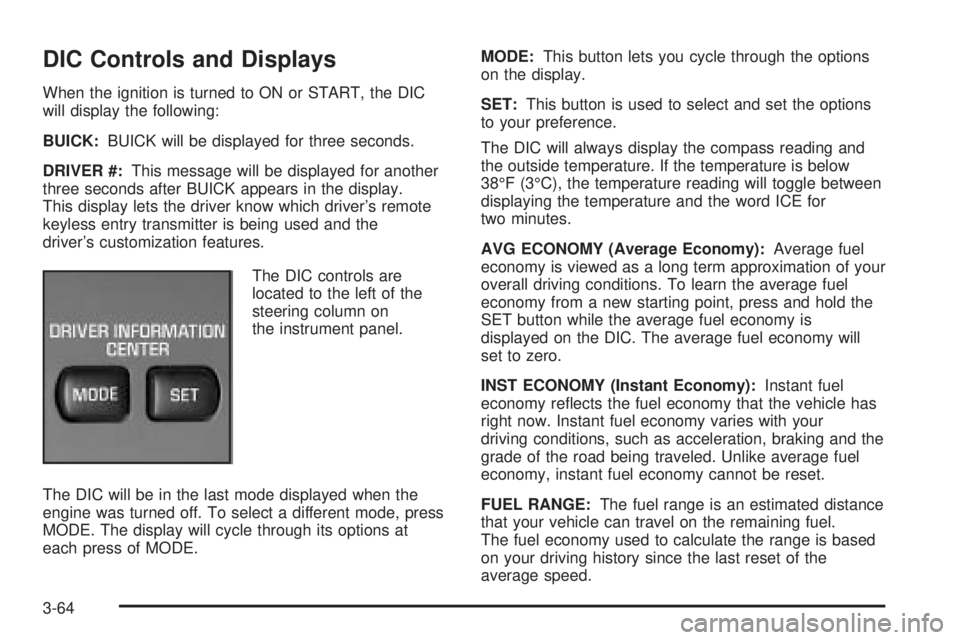
The DIC controls are
located to the left of the
steering column on
the instrument panel.
The DIC will be in the last mode displayed when the
engine was turned off. To select a different mode, press
MODE. The display will cycle through its options at
each press of MODE.MODE:This button lets you cycle through the options
on the display.
SET:This button is used to select and set the options
to your preference.
The DIC will always display the compass reading and
the outside temperature. If the temperature is below
38°F (3°C), the temperature reading will toggle between
displaying the temperature and the word ICE for
two minutes.
AVG ECONOMY (Average Economy):Average fuel
economy is viewed as a long term approximation of your
overall driving conditions. To learn the average fuel
economy from a new starting point, press and hold the
SET button while the average fuel economy is
displayed on the DIC. The average fuel economy will
set to zero.
INST ECONOMY (Instant Economy):Instant fuel
economy re�ects the fuel economy that the vehicle has
right now. Instant fuel economy varies with your
driving conditions, such as acceleration, braking and the
grade of the road being traveled. Unlike average fuel
economy, instant fuel economy cannot be reset.
FUEL RANGE:The fuel range is an estimated distance
that your vehicle can travel on the remaining fuel.
The fuel economy used to calculate the range is based
on your driving history since the last reset of the
average speed.
3-64
Page 253 of 480

If the CD is not playing correctly, for any other reason,
try a known good CD.
If any error occurs repeatedly or if an error cannot be
corrected, contact your dealer. If the radio displays
an error message, write it down and provide it to your
dealer when reporting the problem.
Listening to a DVD
Your vehicle may have a Rear Seat Entertainment
System, seeRear Seat Entertainment System on
page 3-115for more information. If your vehicle has this
system and a DVD is playing, the DVD symbol will appear
on the radio display indicating that the DVD is available
and can be listened through your vehicles speakers.
To listen to the DVD, press the CD AUX button until
RSE appears on the radio display. The current source
will stop and the DVD sound will come through the
speakers. To stop listening to the DVD press the CD
AUX button, if a CD is loaded, or press the BAND button
to select a different source.
When the RSE system is turned off, the radio will
display RSE OFF and the radio will return to the last
radio source that you were listening to.
Rear Seat Entertainment System
Your vehicle may have a DVD Rear Seat
Entertainment (RSE) system. The RSE system includes
a DVD player, a video display screen, two sets of
wireless headphones, and a remote control.
Parental Control
This button is located behind the video screen, next to the
auxiliary jacks, near the driver of the vehicle. Press this
button while a DVD or CD is playing to freeze the video
and mute the audio. The video screen will display
Parental Control On and the power indicator light on the
DVD player will �ash. It will also disable all other button
operations from the remote control and the DVD player,
with the exception of the eject button. The driver will then
be able to gain the attention of the rear seat passengers.
Press this button again to restore normal operation of the
DVD player and remote control.
This button may also be used to turn the DVD player
power on and automatically resume play if the vehicle is
in an enabled power mode.
3-115
Page 255 of 480
Notice:Do not store the headphones in heat or
direct sunlight. This could damage the headphones
and repairs would not be covered by your warranty.
Keep the headphones stored in a cool, dry place.
If there is a decreased audio signal during CD or DVD
play, there may be a low hissing noise through the
speakers and/or headphones. If the hissing sound in the
wireless headphones seems excessive, make sure
that the headphone batteries are fully charged. Some
amount of hissing is normal.
Battery Replacement
To change the batteries, do the following:
1. Loosen the screw on the battery compartment door
located on the left side of the headphone earpiece.
2. Replace the two AAA batteries in the compartment.
Make sure that they are installed correctly using the
diagram on the inside of the battery compartment.
3. Tighten the screw on the battery compartment door.
If the headphones are to be stored for a long period
of time, remove the batteries, and keep them in a cool,
dry place.
Stereo RCA Jacks
The RCA jacks are located behind the video screen on
the DVD console. The RCA jacks allow audio and
video signals to be connected from an auxiliary device
such as a camcorder or a video game unit to the
RSE. The yellow RCA jack is used for video inputs, the
red RCA jack for right audio inputs, and the white
RCA jack for left audio inputs. The system requires
standard RCA cables, not included, to connect the
auxiliary device to the RCA jacks. Refer to the
manufacturer’s instructions for proper usage.
To use the auxiliary audio and video inputs, connect an
external auxiliary device such as a camcorder to the
RCA jacks and turn on both the auxiliary device power
and the power on the front of the RSE player.
If a disc is present when the RSE power is turned on,
the player will automatically begin playing the disc
and the user will need to press the SRCE button on the
remote control or on the DVD player faceplate to
switch the system between the DVD player and the
auxiliary device. See “DVD Player” and “Remote
Control” later in this section for more information.
3-117
Page 257 of 480
Video Screen
The video screen is located in the overhead console.
To use the video screen, do the following:
1. Push forward on the release button and the screen
will fold down.
2. Push the screen away from you and adjust its
position as desired.
When the video screen is not in use, push it up into its
stowed and latched position.
The DVD player and display will continue to operate
when the video screen is in either the up or down
positions.
The video screen contains the transmitters for the
wireless headphones and the receiver for the remote
control. If the screen is in the closed position, the signals
will not be available for the operation of the headphones
or the remote control.
Notice:Directly touching the video screen may
damage it. Do not touch the screen. See “Cleaning
the Video Screen” later in this section for more
information.
DVD Player
The DVD player is located in the overhead console.
The DVD player can be controlled by the buttons on the
DVD player, and/or by the buttons on the remote
control. See “Remote Control” later in this section for
more information.
The RSE system DVD player is only compatible with
DVDs of the appropriate region code for the country that
the vehicle was sold in. The DVD region code is
printed on the jacket of most DVDs.
Standard audio CDs, CD-R, CD-RW, Video CD and
Photo CD/CD-R media are fully supported by this DVD
player. DVD-R and DVD-RW media is supported if
formatted as DVD-Video. DVD+R and DVD+RW media
may or may not be supported by the DVD player.
The DVD player does not support DVD-RAM,
DVD-ROM, and DVD Audio media. An error message
will appear on the display if this type of media is inserted
into the DVD player.
If an error message appears on the video screen, see
“DVD Messages” later in this section.
3-119
Page 259 of 480
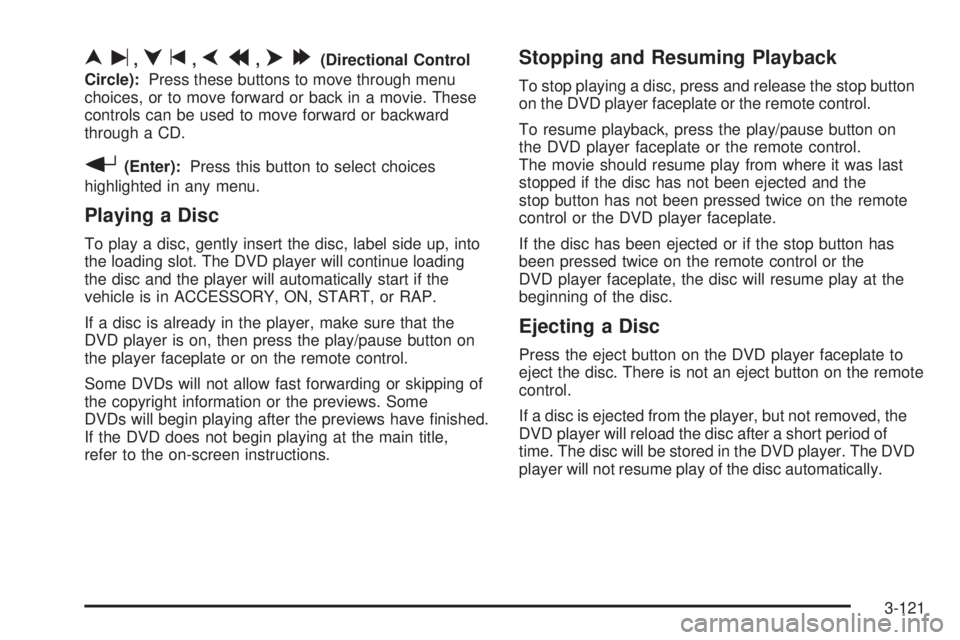
nu,qt,pr,o[(Directional Control
Circle):Press these buttons to move through menu
choices, or to move forward or back in a movie. These
controls can be used to move forward or backward
through a CD.
r(Enter):Press this button to select choices
highlighted in any menu.
Playing a Disc
To play a disc, gently insert the disc, label side up, into
the loading slot. The DVD player will continue loading
the disc and the player will automatically start if the
vehicle is in ACCESSORY, ON, START, or RAP.
If a disc is already in the player, make sure that the
DVD player is on, then press the play/pause button on
the player faceplate or on the remote control.
Some DVDs will not allow fast forwarding or skipping of
the copyright information or the previews. Some
DVDs will begin playing after the previews have �nished.
If the DVD does not begin playing at the main title,
refer to the on-screen instructions.
Stopping and Resuming Playback
To stop playing a disc, press and release the stop button
on the DVD player faceplate or the remote control.
To resume playback, press the play/pause button on
the DVD player faceplate or the remote control.
The movie should resume play from where it was last
stopped if the disc has not been ejected and the
stop button has not been pressed twice on the remote
control or the DVD player faceplate.
If the disc has been ejected or if the stop button has
been pressed twice on the remote control or the
DVD player faceplate, the disc will resume play at the
beginning of the disc.
Ejecting a Disc
Press the eject button on the DVD player faceplate to
eject the disc. There is not an eject button on the remote
control.
If a disc is ejected from the player, but not removed, the
DVD player will reload the disc after a short period of
time. The disc will be stored in the DVD player. The DVD
player will not resume play of the disc automatically.
3-121