ESP BUICK RANDEZVOUS 2006 Owner's Manual
[x] Cancel search | Manufacturer: BUICK, Model Year: 2006, Model line: RANDEZVOUS, Model: BUICK RANDEZVOUS 2006Pages: 478, PDF Size: 2.97 MB
Page 32 of 478

or the safety belts!
With safety belts, you slow down as the vehicle does.
You get more time to stop. You stop over more
distance, and your strongest bones take the forces.
That is why safety belts make such good sense.
Questions and Answers About
Safety Belts
Q:Will I be trapped in the vehicle after an accident
if I am wearing a safety belt?
A:Youcouldbe — whether you are wearing a safety
belt or not. But you can unbuckle a safety belt,
even if you are upside down. And your chance of
being conscious during and after an accident,
so youcanunbuckle and get out, ismuchgreater
if you are belted.
Q:If my vehicle has airbags, why should I have to
wear safety belts?
A:Airbags are in many vehicles today and will be in
most of them in the future. But they are supplemental
systems only; so they workwithsafety belts — not
instead of them. Every airbag system ever offered for
sale has required the use of safety belts. Even if you
are in a vehicle that has airbags, you still have to
buckle up to get the most protection. That is true not
only in frontal collisions, but especially in side and
other collisions.
1-26
Page 102 of 478

Doors and Locks
Door Locks
{CAUTION:
Unlocked doors can be dangerous.
Passengers — especially children — can
easily open the doors and fall out of a
moving vehicle. When a door is locked,
the handle will not open it. You increase
the chance of being thrown out of the
vehicle in a crash if the doors are not
locked. So, wear safety belts properly and
lock the doors whenever you drive.
Young children who get into unlocked
vehicles may be unable to get out. A child
can be overcome by extreme heat and can
suffer permanent injuries or even death
from heat stroke. Always lock your vehicle
whenever you leave it.
Outsiders can easily enter through an
unlocked door when you slow down or
stop your vehicle. Locking your doors can
help prevent this from happening.There are several ways to lock and unlock your vehicle.
From the outside, use your key or the remote keyless
entry transmitter.
To unlock the driver’s door from the outside with the
key, insert the key and turn it toward the front of
the vehicle. To lock the driver’s door from the outside
with your key, insert the key and turn it toward the rear
of the vehicle.
To unlock either manual
locking front door from the
inside, pull back on the
manual lever. To lock
either front door from the
inside, push the manual
lever forward.
2-8
Page 107 of 478

Windows
{CAUTION:
Leaving children, helpless adults, or pets in a
vehicle with the windows closed is dangerous.
They can be overcome by the extreme heat
and suffer permanent injuries or even death
from heat stroke. Never leave a child, a
helpless adult, or a pet alone in a vehicle,
especially with the windows closed in warm
or hot weather.
2-13
Page 109 of 478

Sun Visors
To block out glare you can swing down the visors.
You can also remove them from the center mount and
swing them to the side. There may be an extension
on the inboard side of the sun visors. Pull the extension
out to block out glare.
Visor Vanity Mirror
Pull down the sun visor. Flip up the cover to expose the
vanity mirror.
Lighted Visor Vanity Mirrors
Pull down the sun visor. Flip up the cover to expose the
vanity mirror. The lamps will come on when you open
the cover.
Theft-Deterrent Systems
Vehicle theft is big business, especially in some cities.
Although your vehicle has a number of theft-deterrent
features, we know that nothing we put on it can make it
impossible to steal.
Content Theft-Deterrent
Your vehicle may have a theft-deterrent alarm system.
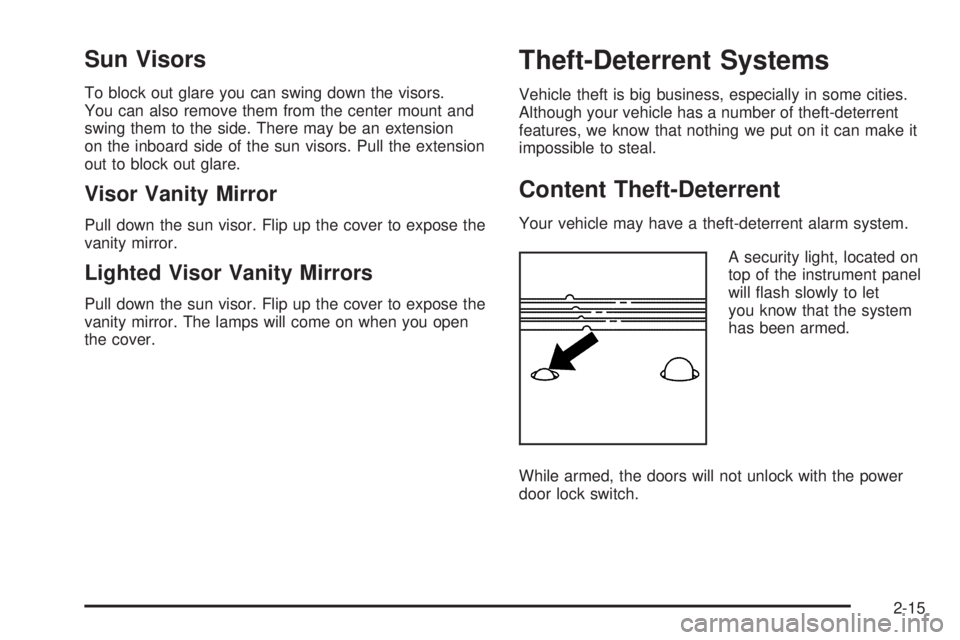
A security light, located on
top of the instrument panel
will �ash slowly to let
you know that the system
has been armed.
While armed, the doors will not unlock with the power
door lock switch.
2-15
Page 141 of 478

Notice:Opening the sunroof when the luggage
rack crossrails are not in the full-rear position could
cause damage to the sunroof or luggage rack.
Verify the luggage rack crossrails are in the full-rear
position before opening the sunroof.
Press the rear of the switch to open the sunroof to
the vent position. The sunshade must be opened
by hand.
Press and release the rear of the switch a second time
to express-open the sunroof. The sunshade will open
with the sunroof. Press the switch in either direction
to stop it from moving. If the rear of the switch is pressed
and held, the express-open operation will be overridden.
To close the sunroof, press and hold the front of
the switch.Vehicle Personalization
In addition to the following features, your vehicle may
also have features that can be programmed through the
Driver Information Center (DIC). SeeDIC Vehicle
Personalization on page 3-64for more information.
Memory Seat
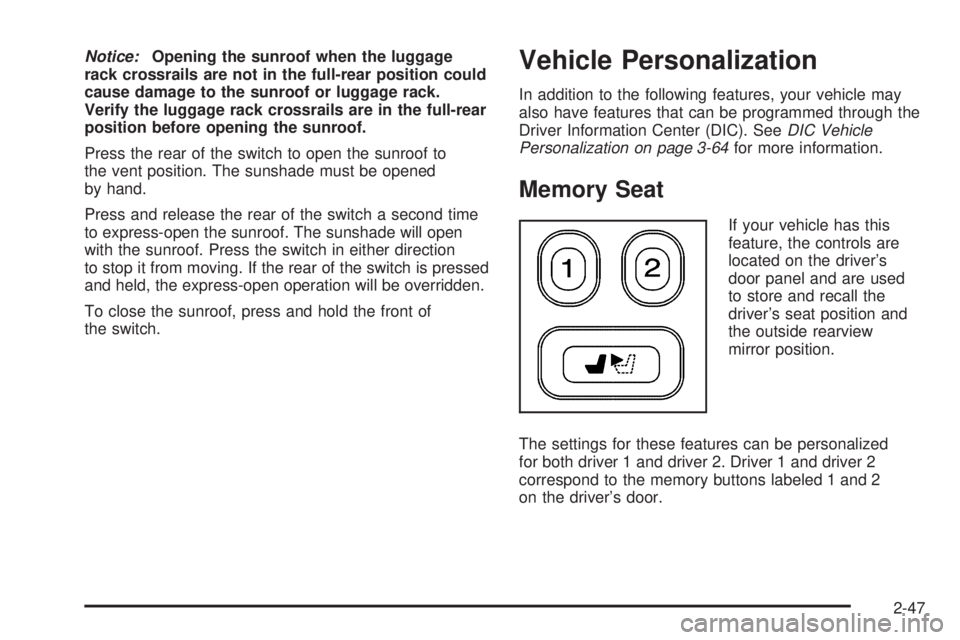
If your vehicle has this
feature, the controls are
located on the driver’s
door panel and are used
to store and recall the
driver’s seat position and
the outside rearview
mirror position.
The settings for these features can be personalized
for both driver 1 and driver 2. Driver 1 and driver 2
correspond to the memory buttons labeled 1 and 2
on the driver’s door.
2-47
Page 142 of 478

To store the memory settings, do the following:
1. Adjust the driver’s seat and the outside rearview
mirrors to the position you would like for driving.
2. Press and hold memory button 1 for more than
three seconds.
A double beep will sound when the memory seat and
mirror position have been stored.
To store the seat and outside rearview mirror positions
for a second driver, follow the previous steps, but
press button 2 instead.
To recall your stored positions, your vehicle must be in
PARK (P). Press and release the memory button (1 or 2)
corresponding to the desired driving position. The
seat and the outside rearview mirrors will move to the
position previously stored for the identi�ed driver.
You will hear one beep.To store an exit position for each driver, do the following:
1. Move the seat to the desired exit position.
2. Hold the button with the exit symbol, located below
the memory buttons, for more than three seconds.
The exit position stored will be for the most recently
selected driving position (1 or 2). A double beep
will sound when the exit position is stored.
To use the exit feature, your vehicle must be in
PARK (P). Press and release the button with the exit
symbol and the seat will move to the exit position stored
for the most recently selected driver. You will hear
one beep.
To stop recall movement of the seat at any time, press
one of the three memory buttons or one of the power
seat controls located on the outboard side of the
driver’s seat.
If your vehicle is equipped with a Driver Information
Center (DIC), you can use it to program certain functions
of the memory seats. SeeDIC Vehicle Personalization
on page 3-64.
2-48
Page 156 of 478

Exterior Lamps
The control on the
left side of the steering
column operates the
exterior lamps.
The exterior lamp control has three positions:
AUTO (Automatic Headlamp Control/Off):Turning
the control to this position will activate the automatic
headlamps when it is dark enough outside and turn off
all lamps and lights during the day except for the
Daytime Running Lamps (DRL).
<(Parking Lamps):Turning the control to this
position turns on the parking lamps together with the
following:
Taillamps
Instrument Panel Lights
5(Headlamps):Turning the control to this position
turns on the headlamps together with the previously
listed lamps and lights.
Lamps on Reminder
If the driver’s door is opened and you turn the ignition
to OFF while leaving the lamps on, you will hear a
warning chime.
Daytime Running Lamps (DRL)
Daytime Running Lamps (DRL) can make it easier for
others to see the front of your vehicle during the
day. DRL can be helpful in many different driving
conditions, but they can be especially helpful in the short
periods after dawn and before sunset. Fully functional
daytime running lamps are required on all vehicles
�rst sold in Canada.
A light sensor on top of the instrument panel makes
the DRL work, so be sure it is not covered. The
DRL system will make your reduced intensity low-beam
headlamps come on in daylight when the following
conditions are met:
The ignition is on.
The exterior lamps control is in AUTO.
The shift lever is not in PARK (P).
3-14
Page 206 of 478

DIC Vehicle Personalization
The DIC is used to program the choices of two drivers.
The drivers are recognized as DRIVER 1 or DRIVER 2
in the DIC display. You will let the DIC know which driver
you are by using your remote keyless entry transmitter.
Each remote keyless entry transmitter was
pre-programmed to belong to DRIVER 1 or DRIVER 2.
Each transmitter may be programmed differently for
each driver’s preferences (lights, doors, horn or activate
the programmed radio stations for driver 1 or driver 2)
using your remote keyless entry transmitter.
After you press the LOCK button on your transmitter
and the ignition key is in ON, the DIC will display
the identi�ed driver number. The vehicle will also recall
the vehicle customization features that were last
programmed to correspond to your transmitter.
If you unlock your vehicle using your key instead of
your transmitter, the DIC will not change drivers
and your vehicle will recall the information from the
last transmitter used.
If your vehicle does not have a DIC, you do not have
available the vehicle customization features using
the remote keyless entry transmitter.
Entering Programming Mode
To program features, your vehicle must be in the
programming mode. Do the following:
1. Turn the ignition key to ON with the vehicle in
PARK (P).
2. Press and release the MODE button,
scrolling through the DIC messages, until
PERSONALIZATION PRESS SET TO BEGIN
is displayed.
3. Press the SET button and TO SELECT DRIVER
PRESS REMOTE LOCK will appear. Press the
LOCK button on the remote keyless entry
transmitter. This identi�es which remote keyless
entry transmitter is being programmed by
displaying PERSONALIZATION FOR DRIVER 1
or DRIVER 2.
3-64
Page 252 of 478

To insert multiple CDs, do the following:
1. Turn the ignition on.
2. Press and hold the LOAD button for two seconds.
You will hear a beep and the light, located to the
right of the slot, will begin to �ash.
3. Once the light stops �ashing and turns green, load
a CD. Insert the CD partway into the slot, label side
up. The player will pull the CD in.
4. Once the CD is loaded, the light will begin �ashing
again. Press the LOAD button again. Once the
light turns green, load the next disc. Repeat
this procedure for each CD. The CD player takes
up to six CDs. Do not try to load more than six.
To load more than one CD but less than six, complete
Steps 1 through 3. When �nished loading CDs, the
radio will begin to play the last CD loaded.
If more than one CD has been loaded, a number for
each CD will be displayed.Playing a Speci�c Loaded CD
For every CD loaded, a number will appear on the
display. To play a speci�c CD, �rst press the CD AUX
button, then press the numbered pushbutton that
corresponds to the CD. A small bar will appear under
the CD number that is playing and the track number
will appear.
If an error appears on the display, see “CD Messages”
later in this section.
LOAD CD
Z(Eject):Press the CD eject side of this
button to eject a CD(s). You will hear a beep and the
indicator light will �ash to let you know when a CD
is being ejected.
REMOVE CD will appear on the display. The CD can
be remove. If the CD is not removed, after 25 seconds,
the CD will be automatically pulled back into the
player. If the CD is pushed back into the player, before
the 25 second time period is complete, the player
will sense an error and will try to eject the CD several
times before stopping.
Do not repeatedly press the CD eject button to eject a
CD after trying to push it in manually. The player’s
25-second eject timer will reset at each press of eject,
causing the player to not eject the CD until the
25-second time period has elapsed.
3-110
Page 275 of 478

MUTE:Press this button to silence the system. Press it
again, or any other radio button, to turn the sound on.
QVOLR(Volume):Press the up or down arrow to
increase or decrease the volume.
QSEEKR:Press the up or the down arrow to
go to the next or to the previous station and stay there.
The sound will mute while seeking. The radio will
only seek stations with a strong signal that are in the
selected band.
When playing a cassette tape or a CD, press the up
arrow to go to the next selection.
BAND:Press this button to switch between FM1, FM2,
AM, or XM1 or XM2 (if equipped).
SCAN:Press this button to scan the stations that are
programmed on the radio preset pushbuttons. The
radio will go to the �rst preset station stored, play for
a few seconds, then go on to the next preset station.
Press this button again to stop scanning. The radio
will only scan preset stations with a strong signal that
are in the selected band.
Radio Reception
You may experience frequency interference and static
during normal radio reception if items such as cellphone
chargers, vehicle convenience accessories, and
external electronic devices are plugged into the
accessory power outlet. If there is interference or static,
unplug the item from the accessory power outlet.
AM
The range for most AM stations is greater than for
FM, especially at night. The longer range can cause
station frequencies to interfere with each other.
For better radio reception, most AM radio stations will
boost the power levels during the day, and then reduce
these levels during the night. Static can also occur
when things like storms and power lines interfere with
radio reception. When this happens, try reducing
the treble on your radio.
FM Stereo
FM stereo will give the best sound, but FM signals
will reach only about 10 to 40 miles (16 to 65 km).
Tall buildings or hills can interfere with FM signals,
causing the sound to fade in and out.
3-133