ignition BUICK RANDEZVOUS 2007 Service Manual
[x] Cancel search | Manufacturer: BUICK, Model Year: 2007, Model line: RANDEZVOUS, Model: BUICK RANDEZVOUS 2007Pages: 528, PDF Size: 2.99 MB
Page 225 of 528

This can happen if you have recently replaced your
battery or if your battery has run down. The
diagnostic system is designed to evaluate critical
emission control systems during normal driving.
This may take several days of routine driving. If you
have done this and your vehicle still does not pass
the inspection for lack of OBD system readiness,
your dealer can prepare the vehicle for inspection.
Fuel Gage
When the indicator nears empty, you still have a
little fuel left, but you should get more soon.If your fuel is low, the warning message in the
message center will come on. SeeLow Fuel
Warning Message on page 232.
Your fuel gage tells you about how much fuel you
have left when the ignition is on.
Here are four things that some owners ask about.
All these things are normal and do not indicate
that anything is wrong with the fuel gage.
At the gas station, the gas pump shuts off
before the gage reads full.
It takes a little more (or less) fuel to �ll up
than the gage reads. For example, the
gage reads half full, but it took more (or less)
than half of the tank’s capacity to �ll it.
The gage pointer may move while cornering,
braking or speeding up.
The gage may not indicate empty when the
ignition is turned off.
Message Center
The message center is located at the top of the
instrument panel cluster in between the tachometer
and speedometer. It gives you important safety
and maintenance facts.
United StatesCanada
225
Page 226 of 528

Passenger Seatbelt Reminder
Message
If your vehicle has the
passenger sensing
system, this message
reminds the passenger
to buckle their
seatbelt.
This message will come on and a chime will
sound when the following conditions exist:
The ignition is ON,
the passenger’s seatbelt is not buckled,
a passenger is detected by the passenger
sensing system.
This light and chime will be repeated if the
ignition is on, the vehicle is in motion,
the passenger is still unbuckled and the
passenger airbag is enabled. You should
buckle your seatbelt. If the passenger’s
seatbelt is already buckled, this message and
chime will not come on.
Service Traction System Warning
Message
If your vehicle has the Traction Control System
(TCS) and this message is displayed when you are
driving, there may be a problem with your TCS.
Your vehicle may need service.
When this message is displayed, the TCS will not
limit wheel spin. Adjust your driving accordingly.
If there is an engine-related and brake system
problem that is speci�cally related to traction
control, the TCS will turn off and the warning
message will come on.
If the TCS warning message comes on and stays
on for an extended period of time when the
system is turned on, your vehicle needs service.
United StatesCanada
226
Page 228 of 528

Charging System Indicator Message
The charging system
battery symbol will
come on in the message
center when you turn
on the ignition as
a check to show you it
is working.
It will remain on as long as the engine is not
running. It should go out once the engine
is running. If it stays on, or comes on while you
are driving, you may have a problem with the
charging system. It could indicate that you have
problems with a generator drive belt, or another
electrical problem. Have it checked right away.
Driving while this indicator appears in the message
center could drain your battery.
If you must drive a short distance with the
message on, be certain to turn off all your
accessories, such as the radio and air conditioner.
Reduced Engine Power Message
If your vehicle has this feature, this message will
appear in the message center when a noticeable
reduction in the vehicle’s engine performance
is detected. This message will also appear when
your vehicle is in overheated engine protection
operating mode. SeeEngine Overheating on
page 378for more information.
If this message comes on and stays on, see your
dealer.
United StatesCanada
228
Page 230 of 528

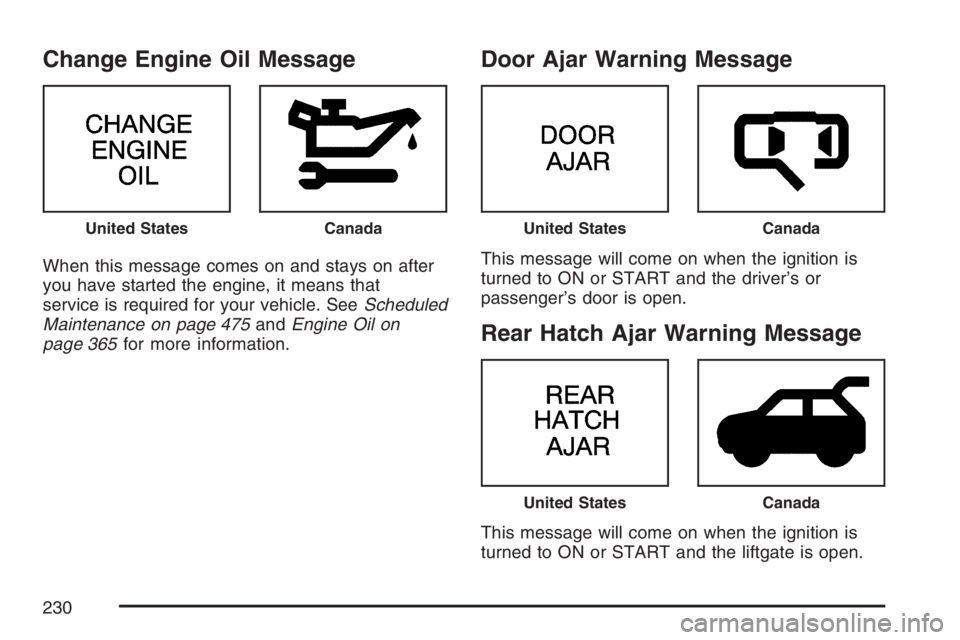
Change Engine Oil Message
When this message comes on and stays on after
you have started the engine, it means that
service is required for your vehicle. SeeScheduled
Maintenance on page 475andEngine Oil on
page 365for more information.
Door Ajar Warning Message
This message will come on when the ignition is
turned to ON or START and the driver’s or
passenger’s door is open.
Rear Hatch Ajar Warning Message
This message will come on when the ignition is
turned to ON or START and the liftgate is open.
United StatesCanadaUnited StatesCanada
United StatesCanada
230
Page 231 of 528

Check Gas Cap Message
If your vehicle has this
message, it will come
on when the ignition
is turned to ON or
START and the gas cap
is open.
PASS-Key®III Security Message
If you are ever driving and this message comes
on and stays on, you will be able to restart
your engine if you turn it off.Your PASS-Key
®III system, however, is not
working properly and must be serviced by your
dealer. Your vehicle is not protected by the
PASS-Key
®III system at this time. See
PASS-Key®III on page 124for more information.
Low Washer Fluid Warning
Message
Your vehicle may have a low washer �uid warning
message. If your washer �uid is low, this warning
message will come on and stay on until you
add washer �uid. SeeWindshield Washer Fluid on
page 388for adding washer �uid instructions.
If the warning message is still on after adding �uid,
you need to reset the warning message. To
reset the warning message, turn the ignition off
and then back on. If the message stays on,
see your dealer.
United StatesCanada
United StatesCanada
231
Page 232 of 528

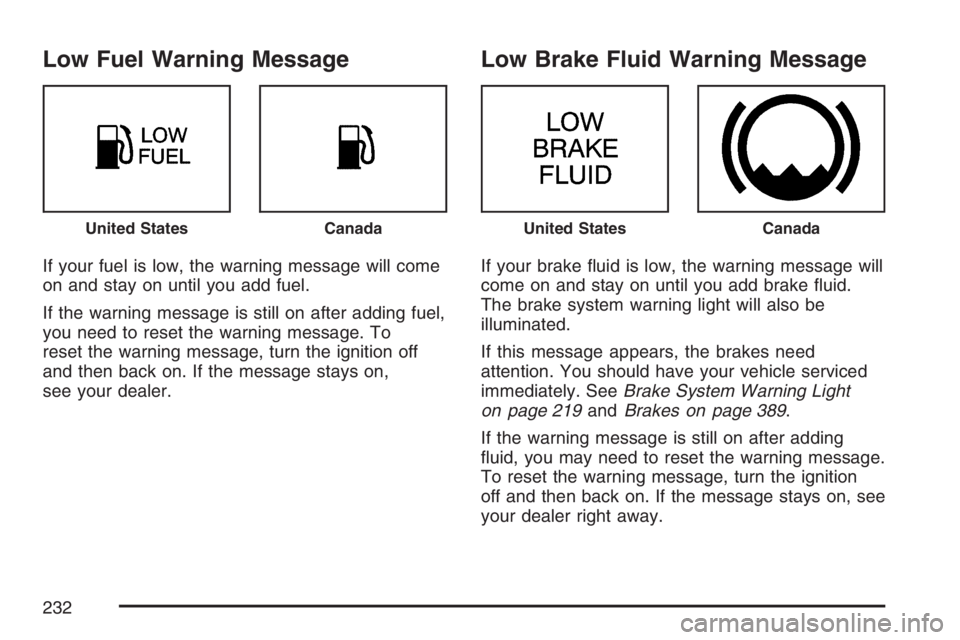
Low Fuel Warning Message
If your fuel is low, the warning message will come
on and stay on until you add fuel.
If the warning message is still on after adding fuel,
you need to reset the warning message. To
reset the warning message, turn the ignition off
and then back on. If the message stays on,
see your dealer.
Low Brake Fluid Warning Message
If your brake �uid is low, the warning message will
come on and stay on until you add brake �uid.
The brake system warning light will also be
illuminated.
If this message appears, the brakes need
attention. You should have your vehicle serviced
immediately. SeeBrake System Warning Light
on page 219andBrakes on page 389.
If the warning message is still on after adding
�uid, you may need to reset the warning message.
To reset the warning message, turn the ignition
off and then back on. If the message stays on, see
your dealer right away.
United StatesCanadaUnited StatesCanada
232
Page 236 of 528

DIC Controls and Displays
When the ignition is turned to ON or START, the
DIC will display the following:
BUICK:BUICK will be displayed for three
seconds.
DRIVER #:This message will be displayed for
another three seconds after BUICK appears in the
display. The driver number corresponds to the
numbers, 1 or 2, on the back of the Remote
Keyless Entry (RKE) transmitters. This display lets
the driver know which driver’s RKE transmitter
is being used and the driver’s customization
features.
The DIC controls are
located to the left of the
steering column on
the instrument panel.The DIC will be in the last mode displayed when
the engine was turned off. To select a different
mode, press MODE. The display will cycle through
its options at each press of MODE.
MODE:This button lets you cycle through the
options on the display.
SET:This button is used to select and set the
options to your preference.
The DIC will always display the compass reading
and the outside temperature. If the temperature
is below 38°F (3°C), the temperature reading will
toggle between displaying the temperature and
the word ICE for two minutes.
AVG ECONOMY (Average Economy):Average
fuel economy is viewed as a long term
approximation of your overall driving conditions.
To learn the average fuel economy from a
new starting point, press and hold the SET button
while the average fuel economy is displayed on
the DIC. The average fuel economy will set
to zero.
236
Page 238 of 528

TIRE PRESSURE:The check tire pressure
system can alert you to a large change in the
pressure of one tire. If the tire pressure is normal,
TIRE PRESSURE NORMAL will display. If the
tire pressure is low, LOW TIRE PRESSURE will
display. You must begin driving before the
system will detect a low tire pressure condition.
SeeCheck Tire Pressure System on page 414.
USE SET TO SELECT ENGLISH METRIC:You
can use this display to select English or metric.
Press the SET button to toggle between English or
metric. The DIC, the odometer, the trip odometer
and head-up display will change. A Canadian
odometer and trip odometer will remain in metric
units only.
OFF:No driver information will be displayed in
this mode. If the DIC is left in this mode for more
than three seconds, the display will turn off.
Press the MODE button to start the DIC.DIC Compass
Your vehicle has a compass in the Driver
Information Center (DIC).
Compass Variance
Compass variance is the difference between
magnetic north and geographic north. In some
areas of the country, the difference is great enough
to cause the compass to give false readings. If
this occurs, the compass must be recalibrated.
Compass Calibration
If the calibration required symbol, or C, appears in
the compass, you must manually put the
compass into the calibration mode. To enter this
mode, do the following:
1. Turn the ignition on and press the MODE
button until CALIBRATE COMPASS
displays.
2. Press and hold the SET button for longer than
three seconds.
238
Page 240 of 528

DIC Vehicle Personalization
The DIC is used to program the choices of
two drivers. The drivers are recognized as
DRIVER 1 or DRIVER 2 in the DIC display. You
will let the DIC know which driver you are by using
your Remote Keyless Entry (RKE) transmitter.
Each RKE transmitter was pre-programmed
to belong to DRIVER 1 or DRIVER 2 and the
corresponding numbers, 1 or 2, appear on
the back of the transmitters. Each transmitter may
be programmed differently for each driver’s
preferences (lights, doors, horn, or activate the
programmed radio stations for driver 1 or driver 2)
using your RKE transmitter.
After you press the LOCK button on your RKE
transmitter and the ignition key is in ON, the DIC
will display the identi�ed driver number. The
vehicle will also recall the vehicle customization
features that were last programmed to correspond
to your RKE transmitter.
If you unlock your vehicle using your key instead
of your RKE transmitter, the DIC will not change
drivers and your vehicle will recall the information
from the last transmitter used.If your vehicle does not have a DIC, you do not
have available the vehicle customization features
using the RKE transmitter.
Entering Programming Mode
To program features, your vehicle must be in the
programming mode. Do the following:
1. Turn the ignition key to ON with the vehicle in
PARK (P).
To avoid excessive drain on the battery, it is
recommended that the headlamps are
turned off.
2. Press and release the MODE button, scrolling
through the DIC messages, until
PERSONALIZATION PRESS SET TO BEGIN
is displayed.
3. Press the SET button and TO SELECT
DRIVER PRESS REMOTE LOCK will appear.
Press the LOCK button on the Remote Keyless
Entry (RKE) transmitter. This identi�es which
RKE transmitter is being programmed by
displaying PERSONALIZATION FOR
DRIVER 1 or DRIVER 2.
240
Page 241 of 528

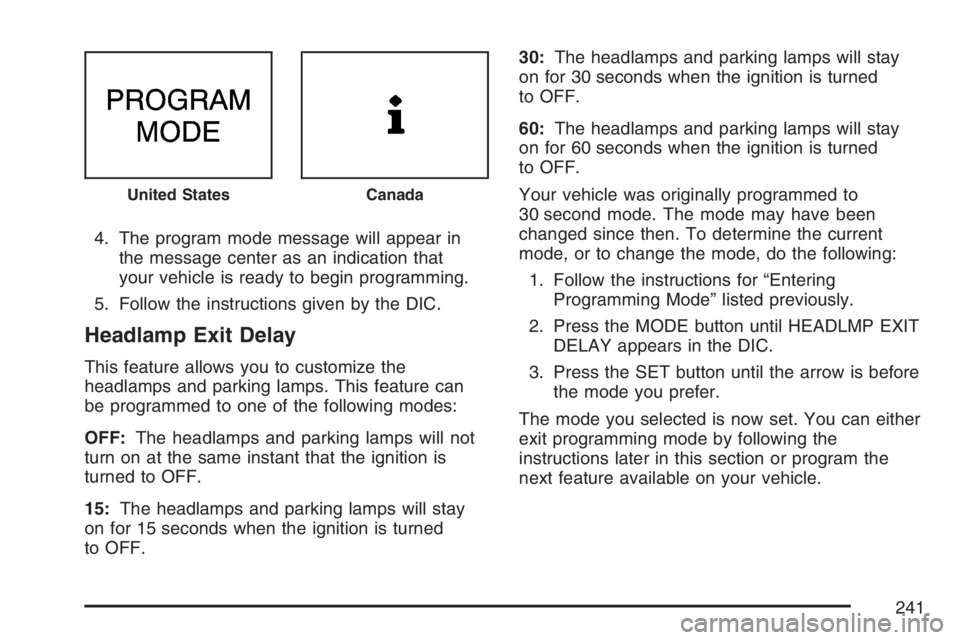
4. The program mode message will appear in
the message center as an indication that
your vehicle is ready to begin programming.
5. Follow the instructions given by the DIC.
Headlamp Exit Delay
This feature allows you to customize the
headlamps and parking lamps. This feature can
be programmed to one of the following modes:
OFF:The headlamps and parking lamps will not
turn on at the same instant that the ignition is
turned to OFF.
15:The headlamps and parking lamps will stay
on for 15 seconds when the ignition is turned
to OFF.30:The headlamps and parking lamps will stay
on for 30 seconds when the ignition is turned
to OFF.
60:The headlamps and parking lamps will stay
on for 60 seconds when the ignition is turned
to OFF.
Your vehicle was originally programmed to
30 second mode. The mode may have been
changed since then. To determine the current
mode, or to change the mode, do the following:
1. Follow the instructions for “Entering
Programming Mode” listed previously.
2. Press the MODE button until HEADLMP EXIT
DELAY appears in the DIC.
3. Press the SET button until the arrow is before
the mode you prefer.
The mode you selected is now set. You can either
exit programming mode by following the
instructions later in this section or program the
next feature available on your vehicle.
United StatesCanada
241