clock BUICK REGAL 2013 Owner's Guide
[x] Cancel search | Manufacturer: BUICK, Model Year: 2013, Model line: REGAL, Model: BUICK REGAL 2013Pages: 412, PDF Size: 6.06 MB
Page 325 of 412
Black plate (77,1)Buick Regal Owner Manual - 2013 - crc - 11/5/12
Vehicle Care 10-77
If a tire goes flat, avoid further tire
and wheel damage by driving slowly
to a level place. Turn on the hazard
warning flashers. SeeHazard
Warning Flashers on page 6‑3.
See If a Tire Goes Flat on
page 10‑62 for other important
safety warnings.
1. Remove the tire sealant and compressor kit from its storage
location. See Storing the Tire
Sealant and Compressor Kit on
page 10‑78.
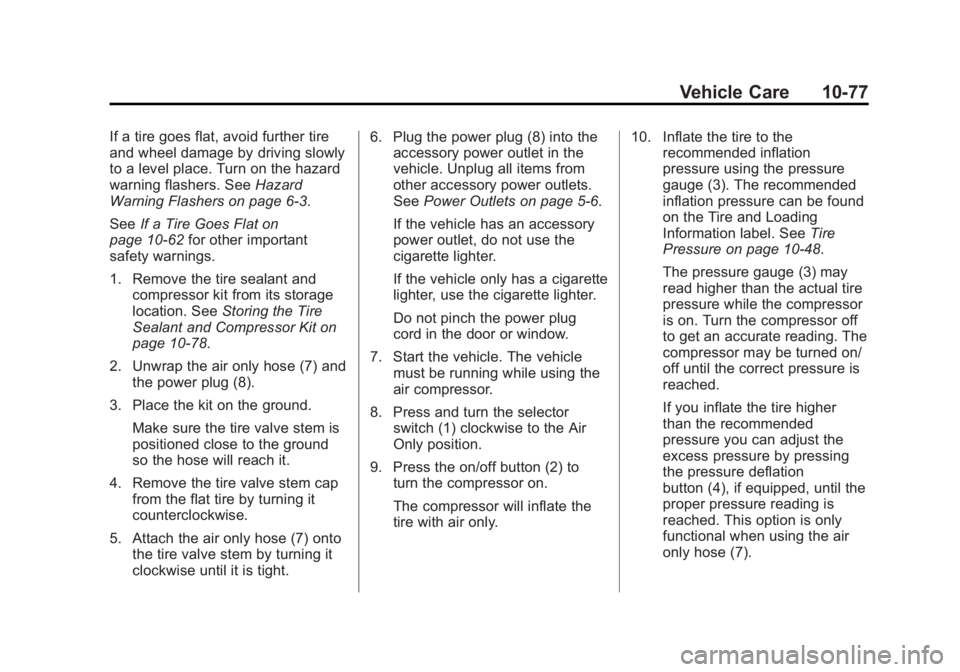
2. Unwrap the air only hose (7) and the power plug (8).
3. Place the kit on the ground. Make sure the tire valve stem is
positioned close to the ground
so the hose will reach it.
4. Remove the tire valve stem cap from the flat tire by turning it
counterclockwise.
5. Attach the air only hose (7) onto the tire valve stem by turning it
clockwise until it is tight. 6. Plug the power plug (8) into the
accessory power outlet in the
vehicle. Unplug all items from
other accessory power outlets.
See Power Outlets on page 5‑6.
If the vehicle has an accessory
power outlet, do not use the
cigarette lighter.
If the vehicle only has a cigarette
lighter, use the cigarette lighter.
Do not pinch the power plug
cord in the door or window.
7. Start the vehicle. The vehicle must be running while using the
air compressor.
8. Press and turn the selector switch (1) clockwise to the Air
Only position.
9. Press the on/off button (2) to turn the compressor on.
The compressor will inflate the
tire with air only. 10. Inflate the tire to the
recommended inflation
pressure using the pressure
gauge (3). The recommended
inflation pressure can be found
on the Tire and Loading
Information label. See Tire
Pressure on page 10‑48.
The pressure gauge (3) may
read higher than the actual tire
pressure while the compressor
is on. Turn the compressor off
to get an accurate reading. The
compressor may be turned on/
off until the correct pressure is
reached.
If you inflate the tire higher
than the recommended
pressure you can adjust the
excess pressure by pressing
the pressure deflation
button (4), if equipped, until the
proper pressure reading is
reached. This option is only
functional when using the air
only hose (7).
Page 326 of 412
Black plate (78,1)Buick Regal Owner Manual - 2013 - crc - 11/5/12
10-78 Vehicle Care
11. Press the on/off button (2) toturn the tire sealant and
compressor kit off.
Be careful while handling the
tire sealant and compressor kit
as it could be warm after
usage.
12. Unplug the power plug (8) from the accessory power outlet in
the vehicle.
13. Disconnect the air only hose (7) from the tire valve stem by
turning it counterclockwise, and
replace the tire valve stem cap.
14. Replace the air only hose (7) and the power plug (8) and
cord back in their original
locations.
15. Place the equipment in the original storage location in the
vehicle.
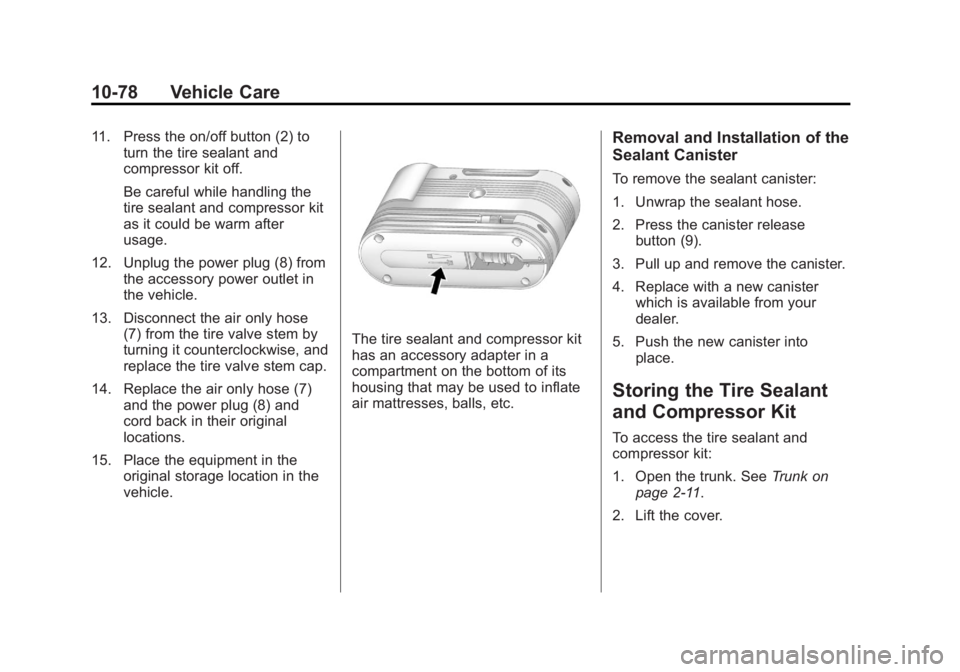
The tire sealant and compressor kit
has an accessory adapter in a
compartment on the bottom of its
housing that may be used to inflate
air mattresses, balls, etc.
Removal and Installation of the
Sealant Canister
To remove the sealant canister:
1. Unwrap the sealant hose.
2. Press the canister releasebutton (9).
3. Pull up and remove the canister.
4. Replace with a new canister which is available from your
dealer.
5. Push the new canister into place.
Storing the Tire Sealant
and Compressor Kit
To access the tire sealant and
compressor kit:
1. Open the trunk. See Trunk on
page 2‑11.
2. Lift the cover.
Page 327 of 412
Black plate (79,1)Buick Regal Owner Manual - 2013 - crc - 11/5/12
Vehicle Care 10-79
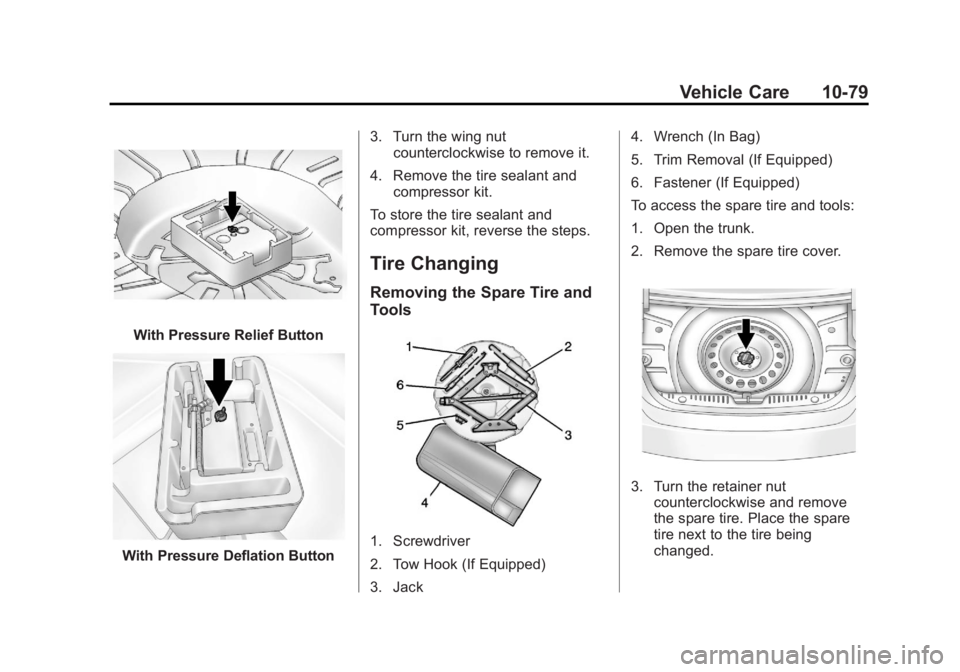
With Pressure Relief Button
With Pressure Deflation Button3. Turn the wing nut
counterclockwise to remove it.
4. Remove the tire sealant and compressor kit.
To store the tire sealant and
compressor kit, reverse the steps.
Tire Changing
Removing the Spare Tire and
Tools
1. Screwdriver
2. Tow Hook (If Equipped)
3. Jack 4. Wrench (In Bag)
5. Trim Removal (If Equipped)
6. Fastener (If Equipped)
To access the spare tire and tools:
1. Open the trunk.
2. Remove the spare tire cover.
3. Turn the retainer nut
counterclockwise and remove
the spare tire. Place the spare
tire next to the tire being
changed.
Page 328 of 412
Black plate (80,1)Buick Regal Owner Manual - 2013 - crc - 11/5/12
10-80 Vehicle Care
4. The jack and tools are storedbelow the spare tire. Remove
them from their container and
place them near the tire being
changed.
Removing the Flat Tire and
Installing the Spare Tire
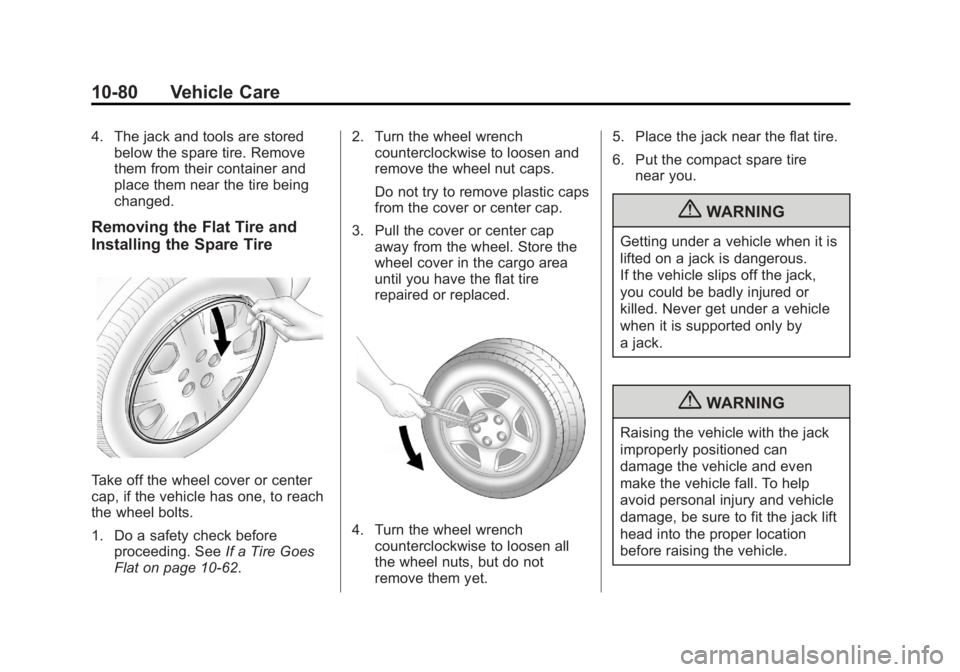
Take off the wheel cover or center
cap, if the vehicle has one, to reach
the wheel bolts.
1. Do a safety check beforeproceeding. See If a Tire Goes
Flat on page 10‑62. 2. Turn the wheel wrench
counterclockwise to loosen and
remove the wheel nut caps.
Do not try to remove plastic caps
from the cover or center cap.
3. Pull the cover or center cap away from the wheel. Store the
wheel cover in the cargo area
until you have the flat tire
repaired or replaced.
4. Turn the wheel wrenchcounterclockwise to loosen all
the wheel nuts, but do not
remove them yet. 5. Place the jack near the flat tire.
6. Put the compact spare tire
near you.
{WARNING
Getting under a vehicle when it is
lifted on a jack is dangerous.
If the vehicle slips off the jack,
you could be badly injured or
killed. Never get under a vehicle
when it is supported only by
a jack.
{WARNING
Raising the vehicle with the jack
improperly positioned can
damage the vehicle and even
make the vehicle fall. To help
avoid personal injury and vehicle
damage, be sure to fit the jack lift
head into the proper location
before raising the vehicle.
Page 329 of 412
Black plate (81,1)Buick Regal Owner Manual - 2013 - crc - 11/5/12
Vehicle Care 10-81
{WARNING
Lifting a vehicle and getting under
it to do maintenance or repairs is
dangerous without the
appropriate safety equipment and
training. If a jack is provided with
the vehicle, it is designed only for
changing a flat tire. If it is used for
anything else, you or others could
be badly injured or killed if the
vehicle slips off the jack. If a jack
is provided with the vehicle, only
use it for changing a flat tire.
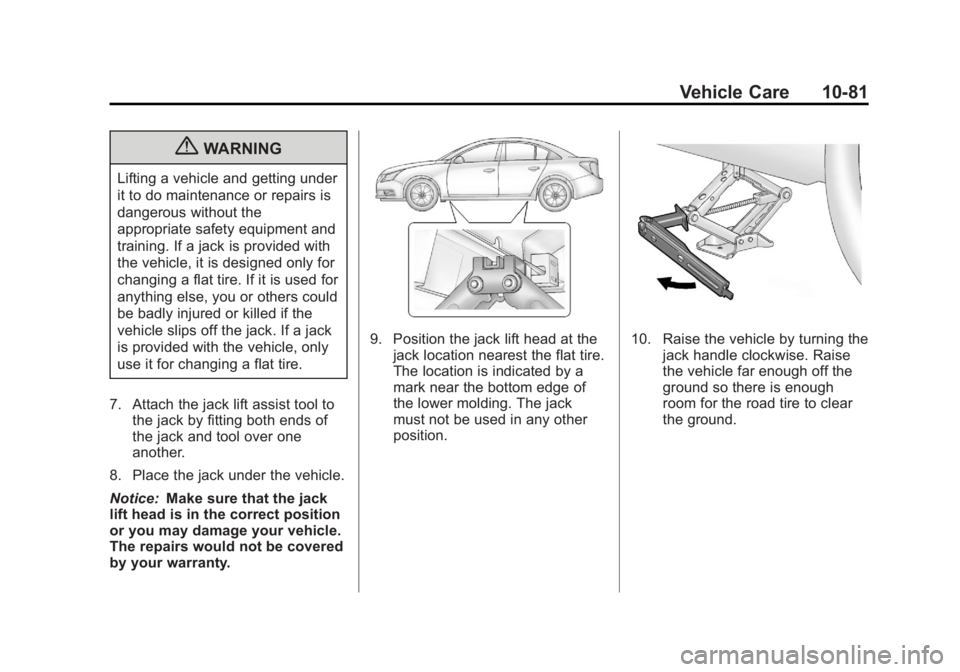
7. Attach the jack lift assist tool to the jack by fitting both ends of
the jack and tool over one
another.
8. Place the jack under the vehicle.
Notice: Make sure that the jack
lift head is in the correct position
or you may damage your vehicle.
The repairs would not be covered
by your warranty.
9. Position the jack lift head at the jack location nearest the flat tire.
The location is indicated by a
mark near the bottom edge of
the lower molding. The jack
must not be used in any other
position.10. Raise the vehicle by turning the jack handle clockwise. Raise
the vehicle far enough off the
ground so there is enough
room for the road tire to clear
the ground.
Page 330 of 412
Black plate (82,1)Buick Regal Owner Manual - 2013 - crc - 11/5/12
10-82 Vehicle Care
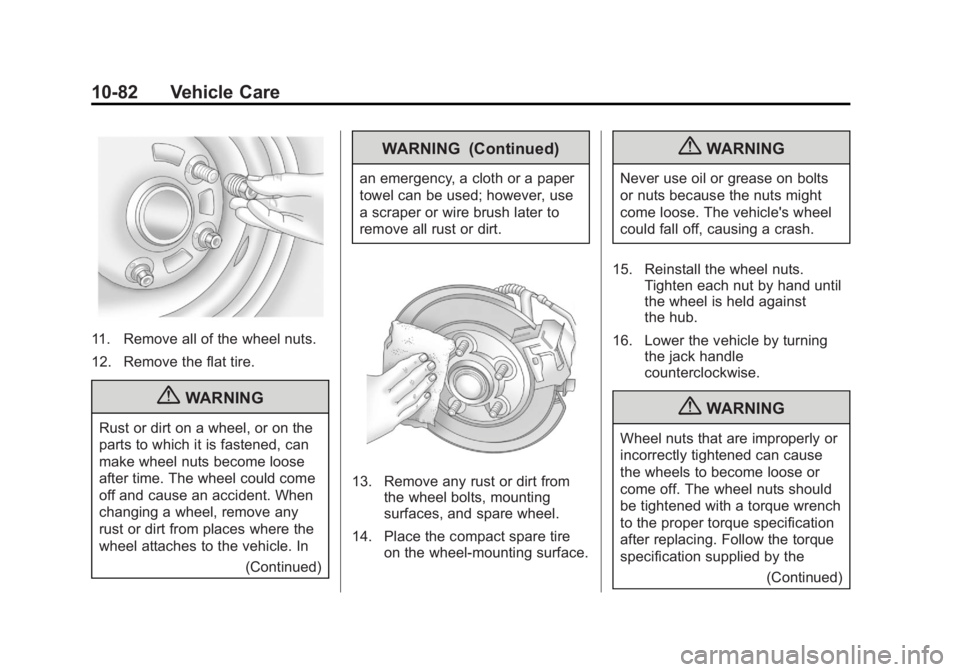
11. Remove all of the wheel nuts.
12. Remove the flat tire.
{WARNING
Rust or dirt on a wheel, or on the
parts to which it is fastened, can
make wheel nuts become loose
after time. The wheel could come
off and cause an accident. When
changing a wheel, remove any
rust or dirt from places where the
wheel attaches to the vehicle. In(Continued)
WARNING (Continued)
an emergency, a cloth or a paper
towel can be used; however, use
a scraper or wire brush later to
remove all rust or dirt.
13. Remove any rust or dirt fromthe wheel bolts, mounting
surfaces, and spare wheel.
14. Place the compact spare tire on the wheel-mounting surface.
{WARNING
Never use oil or grease on bolts
or nuts because the nuts might
come loose. The vehicle's wheel
could fall off, causing a crash.
15. Reinstall the wheel nuts. Tighten each nut by hand until
the wheel is held against
the hub.
16. Lower the vehicle by turning the jack handle
counterclockwise.
{WARNING
Wheel nuts that are improperly or
incorrectly tightened can cause
the wheels to become loose or
come off. The wheel nuts should
be tightened with a torque wrench
to the proper torque specification
after replacing. Follow the torque
specification supplied by the
(Continued)
Page 332 of 412
Black plate (84,1)Buick Regal Owner Manual - 2013 - crc - 11/5/12
10-84 Vehicle Care
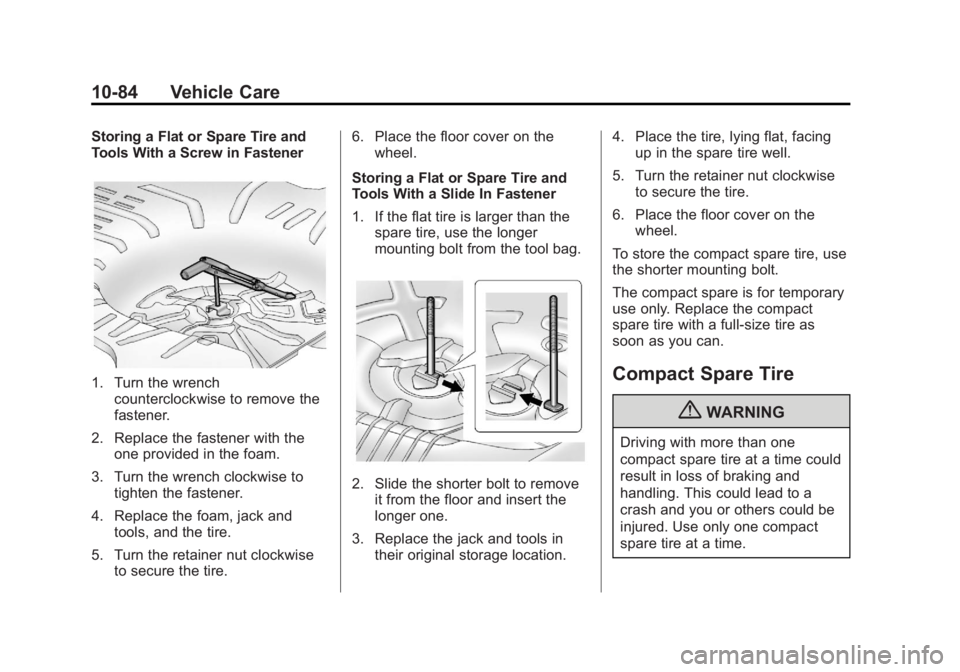
Storing a Flat or Spare Tire and
Tools With a Screw in Fastener
1. Turn the wrenchcounterclockwise to remove the
fastener.
2. Replace the fastener with the one provided in the foam.
3. Turn the wrench clockwise to tighten the fastener.
4. Replace the foam, jack and tools, and the tire.
5. Turn the retainer nut clockwise to secure the tire. 6. Place the floor cover on the
wheel.
Storing a Flat or Spare Tire and
Tools With a Slide In Fastener
1. If the flat tire is larger than the spare tire, use the longer
mounting bolt from the tool bag.
2. Slide the shorter bolt to removeit from the floor and insert the
longer one.
3. Replace the jack and tools in their original storage location. 4. Place the tire, lying flat, facing
up in the spare tire well.
5. Turn the retainer nut clockwise to secure the tire.
6. Place the floor cover on the wheel.
To store the compact spare tire, use
the shorter mounting bolt.
The compact spare is for temporary
use only. Replace the compact
spare tire with a full-size tire as
soon as you can.
Compact Spare Tire
{WARNING
Driving with more than one
compact spare tire at a time could
result in loss of braking and
handling. This could lead to a
crash and you or others could be
injured. Use only one compact
spare tire at a time.
Page 402 of 412
Black plate (2,1)Buick Regal Owner Manual - 2013 - crc - 11/5/12
i-2 INDEX
B
Battery . . . . . . . . . . . . . . . . . . . . . . . 10-26Jump Starting . . . . . . . . 10-85, 10-87
Power Protection . . . . . . . . . . . . . . 6-6
Voltage and ChargingMessages . . . . . . . . . . . . . . . . . . . 5-29
Blade Replacement, Wiper . . . 10-28
Bluetooth . . . . . . . . . . 7-22, 7-24, 7-27
Brake
System Warning Light . . . . . . . . 5-18
Brakes . . . . . . . . . . . . . . . . . . . . . . . . 10-23
Antilock . . . . . . . . . . . . . . . . . . . . . . . 9-31
Assist . . . . . . . . . . . . . . . . . . . . . . . . . 9-34
Fluid . . . . . . . . . . . . . . . . . . . . . . . . 10-24
Parking . . . . . . . . . . . . . . . . . . . . . . . 9-32
System Messages . . . . . . . . . . . . 5-29
Braking . . . . . . . . . . . . . . . . . . . . . . . . . 9-3
Break-In, New Vehicle . . . . . . . . . 9-14
Bulb Replacement . . . . . . . . . . . . 10-33 Fog Lamps . . . . . . . . . . . . . 10-32, 6-4
Halogen Bulbs . . . . . . . . . . . . . . 10-30
Headlamp Aiming . . . . . . . . . . . 10-29
Headlamps . . . . . . . . . . . . . . . . . 10-30
Headlamps, Front TurnSignal, and Parking
Lamps . . . . . . . . . . . . . . . . . . . . 10-30 Bulb Replacement (cont'd)
High Intensity Discharge
(HID) Lighting . . . . . . . . . . . . . 10-30
License Plate Lamps . . . . . . . 10-33
Taillamps, Turn Signal,
Stoplamps, and
Back-up Lamps . . . . . . . . . . . 10-32
Buying New Tires . . . . . . . . . . . . . 10-57
C
Calibration . . . . . . . . . . . . . . . . . . . . . . 5-4
California Fuel Requirements . . . . . . . . . . . 9-46
Perchlorate MaterialsRequirements . . . . . . . . . . . . . . . 10-3
Warning . . . . . . . . . . . . . . . . . . . . . . 10-2
Canadian Vehicle Owners . . . . . . . . iii
Capacities and Specifications . . . . . . . . . . . . . . . . 12-2
Carbon Monoxide
Engine Exhaust . . . . . . . . . . . . . . . 9-26
Trunk . . . . . . . . . . . . . . . . . . . . . . . . . 2-11
Winter Driving . . . . . . . . . . . . . . . . . 9-8
Cargo Net . . . . . . . . . . . . . . . . . . . . . . 4-3
Cautions, Danger, and Warnings . . . . . . . . . . . . . . . . . . . . . . . . iv CD Player . . . . . . . . . . . . . . . . . . . . . 7-15
Center Console Storage . . . . . . . . 4-3
Chains, Tire . . . . . . . . . . . . . . . . . . 10-61
Charging System Light . . . . . . . . 5-15
Check
Engine Light . . . . . . . . . . . . . . . . . . 5-15
IgnitionTransmission Lock . . . . . . . . 10-28
Child Restraints Infants and YoungChildren . . . . . . . . . . . . . . . . . . . . . 3-31
Lower Anchors and Tethers for Children . . . . . . . . . 3-37
Older Children . . . . . . . . . . . . . . . . 3-29
Securing . . . . . . . . . . . . . . . . 3-44, 3-46
Systems . . . . . . . . . . . . . . . . . . . . . . 3-34
Circuit Breakers . . . . . . . . . . . . . . 10-35
Cleaning Exterior Care . . . . . . . . . . . . . . . 10-92
Interior Care . . . . . . . . . . . . . . . . 10-95
Climate Control Systems
Dual Automatic . . . . . . . . . . . . . . . . 8-1
Clock . . . . . . . . . . . . . . . . . . . . . . . . . . . 5-5
Cluster, Instrument . . . . . . . . . . . . . 5-9
Clutch, Hydraulic . . . . . . . . . . . . . 10-14
Collision Damage Repair . . . . . 13-14