change time BUICK REGAL 2013 Owner's Manual
[x] Cancel search | Manufacturer: BUICK, Model Year: 2013, Model line: REGAL, Model: BUICK REGAL 2013Pages: 412, PDF Size: 6.06 MB
Page 21 of 412
Black plate (15,1)Buick Regal Owner Manual - 2013 - crc - 11/5/12
In Brief 1-15
4. Press the Multifunction knob toselect the next value.
5. To save the time and return to the Time Settings menu, press
the BACK button at any time or
press the Multifunction button
after adjusting the minutes.
Setting the 12/24 Hour Format
1. Press the CONFIG button and select Time and Date Settings.
2. Highlight 12/24 Hour Format.
3. Press the Multifunction knob to select the 12 hour or 24 hour
display format.
Setting the Clock (Radio with
CD and Touchscreen)
From the Time and Date Settings
screen button, press to display the
Time and Date Settings menu.
Set Time: Press + or−to increase
or decrease the Hours and Minutes
displayed on the clock. Set Date:
Press + or−to increase
or decrease the day.
Set Time Format: Press the 12 HR
screen button for standard time;
press the 24 HR screen button for
military time.
Set Date Format: Depending on
the region, the following date
formats may be available:
MM/DD/YYYY, DD.MM.YYYY,
or YYYY/MM/DD.
See Clock on page 5‑5.
Satellite Radio
Vehicles with a SiriusXM®satellite
radio tuner and a valid SiriusXM
satellite radio subscription can
receive SiriusXM programming.
SiriusXM Satellite Radio
Service
SiriusXM is a satellite radio service
based in the 48 contiguous United
States and 10 Canadian provinces. SiriusXM satellite radio has a wide
variety of programming and
commercial-free music, coast to
coast, and in digital-quality sound.
A fee is required to receive the
SiriusXM service.
Refer to:
.www.siriusxm.com or call
1-866-635-2349 (U.S.).
.www.xmradio.ca or call
1-877-209-0079 (Canada).
See Satellite Radio on page 7‑11.
Portable Audio Devices
Some vehicles have a 3.5 mm
(1/8 in) auxiliary input and a USB
port in the center console bin.
External devices such as iPods
®,
laptop computers, MP3 players, CD
changers, and USB drives may be
connected, depending on the audio
system.
See Auxiliary Devices on page 7‑18.
Page 29 of 412
Black plate (23,1)Buick Regal Owner Manual - 2013 - crc - 11/5/12
In Brief 1-23
Engine Oil Life System
The engine oil life system calculates
engine oil life based on vehicle use
and displays the CHANGE ENGINE
OIL SOON message when it is time
to change the engine oil and filter.
The oil life system should be reset
to 100% only following an oil
change.
Resetting the Oil Life System
1. Turn the ignition to ON/RUN withthe engine off.
2. Press the DIC MENU button on the turn signal lever to enter the
Vehicle Information Menu. Use
the thumbwheel to scroll through
the menu items until you reach
REMAINING OIL LIFE.
3. Press the SET/CLR button to reset the oil life at 100%.
4. Turn the ignition to LOCK/OFF.
See Engine Oil Life System on
page 10‑12.
Fuel E85 (85% Ethanol)
Vehicles with a yellow fuel cap can
use either unleaded gasoline or
ethanol fuel containing up to 85%
ethanol (E85). See Fuel E85 (85%
Ethanol) on page 9‑48. For all other
vehicles, use only the unleaded
gasoline described under
Recommended Fuel on page 9‑46.
Driving for Better Fuel
Economy
Driving habits can affect fuel
mileage. Here are some driving tips
to get the best fuel economy
possible.
.Avoid fast starts and accelerate
smoothly.
.Brake gradually and avoid
abrupt stops.
.Avoid idling the engine for long
periods of time.
.When road and weather
conditions are appropriate, use
cruise control.
.Always follow posted speed
limits or drive more slowly when
conditions require.
.Keep vehicle tires properly
inflated.
.Combine several trips into a
single trip.
.Replace the vehicle's tires with
the same TPC Spec number
molded into the tire's sidewall
near the size.
.Follow recommended scheduled
maintenance.
Page 56 of 412
Black plate (6,1)Buick Regal Owner Manual - 2013 - crc - 11/5/12
3-6 Seats and Restraints
2. Push and pull on the seatback tomake sure it is locked.
Power Reclining Seatbacks
To adjust a power seatback,
if equipped:
.Tilt the top of the control
rearward to recline.
.Tilt the top of the control forward
to raise.
Heated Front Seats
{WARNING
If you cannot feel temperature
change or pain to the skin, the
seat heater may cause burns. To
reduce the risk of burns, people
with such a condition should use
care when using the seat heater,
especially for long periods of
time. Do not place anything on
the seat that insulates against
heat, such as a blanket, cushion,
cover, or similar item. This may
cause the seat heater to
overheat. An overheated seat
heater may cause a burn or may
damage the seat.
Uplevel Buttons Shown, Base
Buttons Similar
If available, the buttons are on the
climate control panel. To operate,
the ignition must be on.
Press
MorLto heat the driver or
passenger seat cushion and
seatback. Indicator lights on the
button or on the climate control
display show the current setting.
Press the button once for the
highest setting. With each press of
the button, the heated seat will
change to the next lower setting,
Page 129 of 412
Black plate (25,1)Buick Regal Owner Manual - 2013 - crc - 11/5/12
Instruments and Controls 5-25
on the left side of the steering
wheel. The DIC displays trip, fuel,
and vehicle system information, and
warning messages if a system
problem is detected.
The bottom of the DIC display
shows the position of the shift lever
and the odometer. It may also show
the direction the vehicle is driving.
In cold weather the DIC display may
change slowly. This is normal and
will move more quickly as the
vehicle's interior temperature rises.
DIC Buttons
1.SET/CLR (Set/Clear): Press to
set, or press and hold to clear,
the menu item displayed. 2.
w/x(Thumbwheel):
Use to
scroll through the items in
each menu.
3. MENU: Press to display the Trip/
Fuel Menu and the Vehicle
Information Menu. On some
vehicles, there is also an ECO
Menu. This button is also used
to return to or exit the last
screen displayed on the DIC.
Trip/Fuel Menu (TRIP) Items
Press MENU on the turn signal
lever until TRIP menu is displayed.
Use
w/xto scroll through the
following menu items:
.Speed
.Timer
.Navigation
.Speed, Fuel Range,
Instantaneous Fuel Economy
.Trip 1 or Trip 2, Average Fuel
Economy, Average Vehicle
Speed
.Power Flow (eAssist Only) Speed
The speedometer shows how fast
the vehicle is moving in either
kilometers per hour (km/h) or miles
per hour (mph). The speedometer
cannot be reset.
Timer
This display can be used as a timer.
To start the timer, press SET/CLR
while Timer is displayed. The
display will show the amount of time
that has passed since the timer was
last reset, not including time the
ignition is off. Time will continue to
be counted as long as the ignition is
on, even if another display is being
shown on the DIC. The timer will
record up to 99 hours, 59 minutes,
and 59 seconds (99:59:59) after
which the display will return to zero.
To stop the timer, press SET/CLR
briefly while Timer is displayed. To
reset the timer to zero, press and
hold SET/CLR.
Page 130 of 412
Black plate (26,1)Buick Regal Owner Manual - 2013 - crc - 11/5/12
5-26 Instruments and Controls
Navigation
This display is used for the
navigation system Turn-by-Turn
guidance. See the navigation
manual, if the vehicle has
navigation, for more information.
Speed, Fuel Range, Instantaneous
Fuel Economy
The top of this display includes a
digital speedometer. The
speedometer shows how fast the
vehicle is moving in either
kilometers per hour (km/h) or miles
per hour (mph). The speedometer
cannot be reset.
In the center of the page is the fuel
range display. This shows the
approximate distance the vehicle
can be driven without refueling. The
fuel range estimate is based on an
average of the vehicle's fuel
economy over recent driving history
and the amount of fuel remaining in
the fuel tank. This display is shown
as
l.km (mi). Fuel range cannot
be reset. Also included on this page is an
instantaneous fuel economy display.
The instantaneous fuel economy
display shows the current fuel
economy in liters per 100 kilometers
(L/100 km) or miles per
gallon (mpg). This number reflects
only the fuel economy that the
vehicle has right now and changes
frequently as driving conditions
change. This display is shown as
.
L/100 km (mpg). This display cannot
be reset.
Trip 1 or Trip 2, Average Fuel
Economy, Average Vehicle Speed
This displays the current distance
traveled, in either kilometers (km) or
miles (mi), from the last reset for the
trip odometer. The trip odometer can
be reset to zero by pressing and
holding the SET/CLR button while
the trip odometer display is
showing.
The Average Fuel Economy display
shows the approximate average
liters per 100 kilometers (L/100 km)
or miles per gallon (mpg). This
number is based on the number of
L/100 km (mpg) recorded since the
last time this menu item was reset.
This display is shown as
.
c
L/100 km (mpg). Reset the average
consumption by pressing SET/CLR
when it is displayed.
This screen also displays the
average vehicle speed of the
vehicle in kilometers per hour (km/h)
or miles per hour (mph). This
average is based on the various
vehicle speeds recorded since the
last reset. This display is shown as
ckm/h (mph). Reset the average
speed by pressing SET/CLR when it
is displayed.
Power Flow (eAssist Only)
This display shows the operating
mode of the eAssist system and the
high voltage battery charge level.
The animation indicates the
direction of energy flow.
Page 131 of 412
Black plate (27,1)Buick Regal Owner Manual - 2013 - crc - 11/5/12
Instruments and Controls 5-27
Vehicle Information Menu
(OPTION) Items
Press MENU on the turn signal
lever until the OPTION menu is
displayed. Use
w/xto scroll
through the following menu items:
.Unit
.Tire Pressure
.Remaining Oil Life
.Jump Start (eAssist Only)
Unit
Move
w/xto switch between
metric or US when the Unit display
is active. Press SET/CLR to confirm
the setting. This will change the
displays on the cluster and DIC to
either metric or English (US)
measurements.
Tire Pressure
The display will show a vehicle with
the approximate pressures of all
four tires. Tire pressure is displayed in either kilopascal (kPa) or pounds
per square inch (psi). See
Tire
Pressure Monitor System on
page 10‑50 andTire Pressure
Monitor Operation on page 10‑51 for
more information.
Remaining Oil Life
This display shows an estimate of
the oil's remaining useful life.
If REMAINING OIL LIFE 99% is
displayed, that means 99% of the
current oil life remains.
When the remaining oil life is low,
the CHANGE ENGINE OIL SOON
message will appear on the display.
See Engine Oil Messages on
page 5‑31. The oil should be
changed as soon as possible. See
Engine Oil on page 10‑10. In
addition to the Engine Oil Life
System monitoring the oil life,
additional maintenance is
recommended in the Maintenance
Schedule in this manual. See
Maintenance Schedule on
page 11‑3 for more information. Remember, the Remaining Oil Life
display must be reset after each oil
change. It will not reset itself. Also,
be careful not to reset the
Remaining Oil Life display
accidentally at any time other than
when the oil has just been changed.
It cannot be reset accurately until
the next oil change. To reset the
Engine Oil Life System, press SET/
CLR while the Remaining Oil Life
display is active. See
Engine Oil
Life System on page 10‑12.
Jump Start (eAssist Only)
This display allows for on-board
jump starting of the vehicle. See
“Jump Starting (On-board with
eAssist Only)” for more information.
ECO Drive Assist Menu (ECO)
Items
This menu is only available on some
vehicles. Press MENU on the turn
signal lever until ECO Menu is
displayed. Use
w/xto scroll
through the following menu items:
.Best Average Fuel Economy
Page 135 of 412
Black plate (31,1)Buick Regal Owner Manual - 2013 - crc - 11/5/12
Instruments and Controls 5-31
HIGH COOLANT
TEMPERATURE
This message displays if the coolant
temperature is hot. SeeEngine
Overheating on page 10‑20.
Engine Oil Messages
CHANGE ENGINE OIL SOON
This message displays when the
engine oil needs to be changed.
When you change the engine oil, be
sure to reset the Oil Life System.
See Engine Oil Life System on
page 10‑12, Driver Information
Center (DIC) on page 5‑24, Engine
Oil on page 10‑10, and Maintenance
Schedule on page 11‑3.
ENGINE OIL HOT, IDLE
ENGINE
This message displays when the
engine oil temperature is too hot.
Stop and allow the vehicle to idle
until it cools down.
ENGINE OIL LOW —ADD OIL
On some vehicles, this message
may display when the engine oil
level is too low. Check the oil level.
See Engine Oil on page 10‑10.
OIL PRESSURE LOW —STOP
ENGINE
This message displays if low oil
pressure levels occur. Stop the
vehicle as soon as safely possible
and do not operate it until the cause
of the low oil pressure has been
corrected. Check the oil as soon as
possible and have the vehicle
serviced by your dealer.
Engine Power Messages
ENGINE POWER IS REDUCED
This message displays when the
vehicle's engine power is reduced.
Reduced engine power can affect
the vehicle's ability to accelerate.
If this message is on, but there is no
reduction in performance, proceed
to your destination. The
performance may be reduced the next time the vehicle is driven. The
vehicle may be driven at a reduced
speed while this message is on, but
maximum acceleration and speed
may be reduced. Anytime this
message stays on, the vehicle
should be taken to your dealer for
service as soon as possible.
Fuel System Messages
FUEL LEVEL LOW
This message displays when the
vehicle is low on fuel. Refuel as
soon as possible.
Key and Lock Messages
NO REMOTE DETECTED
This message displays when the
transmitter battery is weak on
vehicles with keyless access. See
“Starting the Vehicle with a Low
Transmitter Battery”
underRemote
Keyless Entry (RKE) System
Operation on page 2‑3.
Page 139 of 412
Black plate (35,1)Buick Regal Owner Manual - 2013 - crc - 11/5/12
Instruments and Controls 5-35
3. Press the center of theMultifunction knob to select the
Vehicle Settings menu.
The following list of menu items will
be available:
.Climate and Air Quality
.Comfort and Convenience
.Languages
.Lighting
.Power Door Locks
.Remote Lock/Unlock/Start
.Return to Factory Settings
Turn the Multifunction knob to
highlight the menu. Press the knob
to select it. Each of the menus is
detailed in the following information.
Climate and Air Quality
Select the Climate and Air Quality
menu and the following may be
displayed:
.Auto Fan Speed
.Auto Compartment Zone Temp
.Remote Start Auto Heat Seats
.Auto Defog
.Auto Rear Defog
Auto Fan Speed
This allows selection of the
automatic fan speed to run lower or
higher than normal.
Press the Multifunction knob when
Auto Fan Speed is highlighted to
open the menu. Turn the knob to
highlight High, Medium, or Low.
Press the knob to confirm the
selection and move back to the
last menu.
Auto Compartment Zone Temp
This allows the selection of how the
climate control system will operate
upon vehicle start. Selecting Single
Zone automatically resets the
passenger temperature setting the
same as the driver's for every
vehicle start. The climate control
system will operate using only the
driver's setting until the passenger
temperature setting is changed. Selecting Dual Zone or Last Setting
will keep the passenger temperature
adjustment separate from the
driver's setting all the time.
Press the Multifunction knob when
Auto Compartment Zone Temp is
highlighted. Turn the knob to
highlight Single Zone, Dual Zone,
or Last Setting. Press the knob to
confirm the selection and go back to
the last menu.
Remote Start Auto Heat Seats
When on, this feature will turn the
heated seats on when using remote
start on cold days.
Press the Multifunction knob when
Remote Start Auto Heat Seats is
highlighted. Turn the knob to
highlight On or Off. Press the knob
to confirm the selection and go back
to the last menu.
Auto Defog
This allows the auto defog function
to be turned on or off.
Page 144 of 412
Black plate (40,1)Buick Regal Owner Manual - 2013 - crc - 11/5/12
5-40 Instruments and Controls
To program up to three devices:
1. Hold the end of the hand-heldtransmitter about 3 to 8 cm (1 to
3 in) away from the Universal
Remote system buttons while
keeping the indicator light in
view. The hand-held transmitter
was supplied by the
manufacturer of the garage door
opener receiver
(motor-head unit).
2. At the same time, press and hold both the hand-held
transmitter button and one of the
three Universal Remote system
buttons to be used to operate
the garage door. Do not release
the Universal Remote system
button or the hand-held
transmitter button until the
indicator light changes from a
slowly to a rapidly flashing light.
You now may release both
buttons. Some entry gates and garage
door openers may require
substitution of Step 2 with the
procedure noted in
“Gate
Operator and Canadian
Programming” later in this
section.
3. Press and hold for five seconds the newly trained Universal
Remote system button (the
button selected in Step 2) while
observing the indicator light and
garage door activation.
.If the indicator light stays on
continuously or the garage
door starts to move when
the Universal Remote
system button is pressed
and released, then the
programming is complete.
There is no need to
continue programming
Steps 4–6.
.If the Universal Remote
system indicator light blinks
rapidly for two seconds,
then turns to a constant
light and the garage door
does not move, continue
with programming
Steps 4–6.
It may be helpful to have
another person assist with
the remaining Steps 4–6.
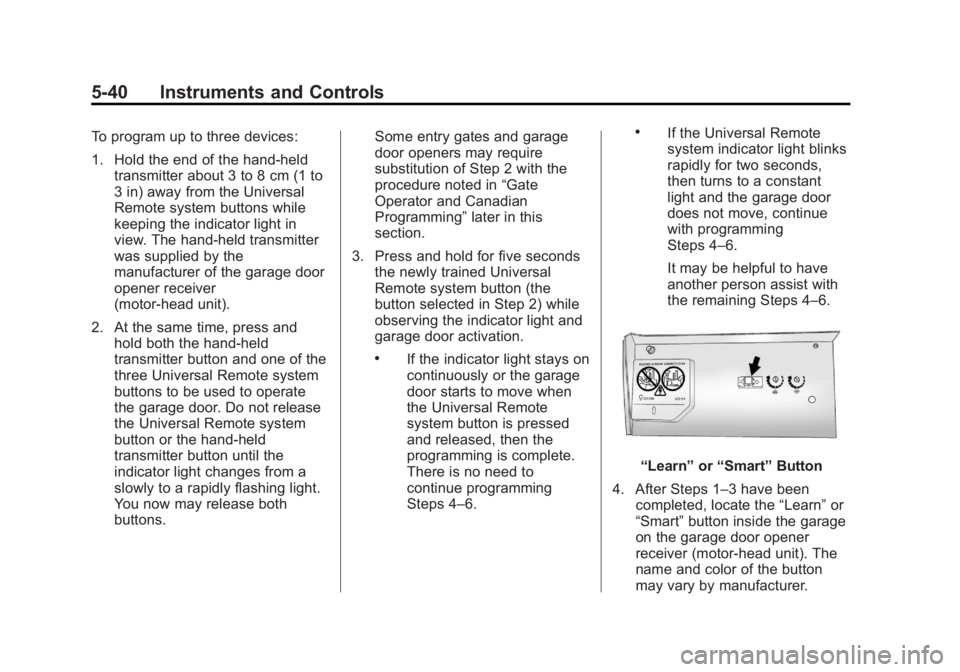
“Learn” or“Smart” Button
4. After Steps 1–3 have been completed, locate the “Learn”or
“Smart” button inside the garage
on the garage door opener
receiver (motor-head unit). The
name and color of the button
may vary by manufacturer.
Page 147 of 412
Black plate (1,1)Buick Regal Owner Manual - 2013 - crc - 11/5/12
Lighting 6-1
Lighting
Exterior Lighting
Exterior Lamp Controls . . . . . . . . 6-1
Exterior Lamps OffReminder . . . . . . . . . . . . . . . . . . . . 6-2
Headlamp High/Low-Beam Changer . . . . . . . . . . . . . . . . . . . . . 6-2
Flash-to-Pass . . . . . . . . . . . . . . . . . 6-2
Daytime Running Lamps (DRL) . . . . . . . . . . . . . . . . 6-2
Automatic Headlamp System . . . . . . . . . . . . . . . . . . . . . . 6-2
Hazard Warning Flashers . . . . . 6-3
Turn and Lane-Change Signals . . . . . . . . . . . . . . . . . . . . . . 6-3
Fog Lamps . . . . . . . . . . . . . . . . . . . . 6-4
Interior Lighting
Instrument Panel Illumination Control . . . . . . . . . . . . . . . . . . . . . . 6-4
Dome Lamps . . . . . . . . . . . . . . . . . 6-5
Reading Lamps . . . . . . . . . . . . . . . 6-5
Lighting Features
Entry Lighting . . . . . . . . . . . . . . . . . 6-6
Exit Lighting . . . . . . . . . . . . . . . . . . . 6-6
Battery Power Protection . . . . . . 6-6
Exterior Lighting
Exterior Lamp Controls
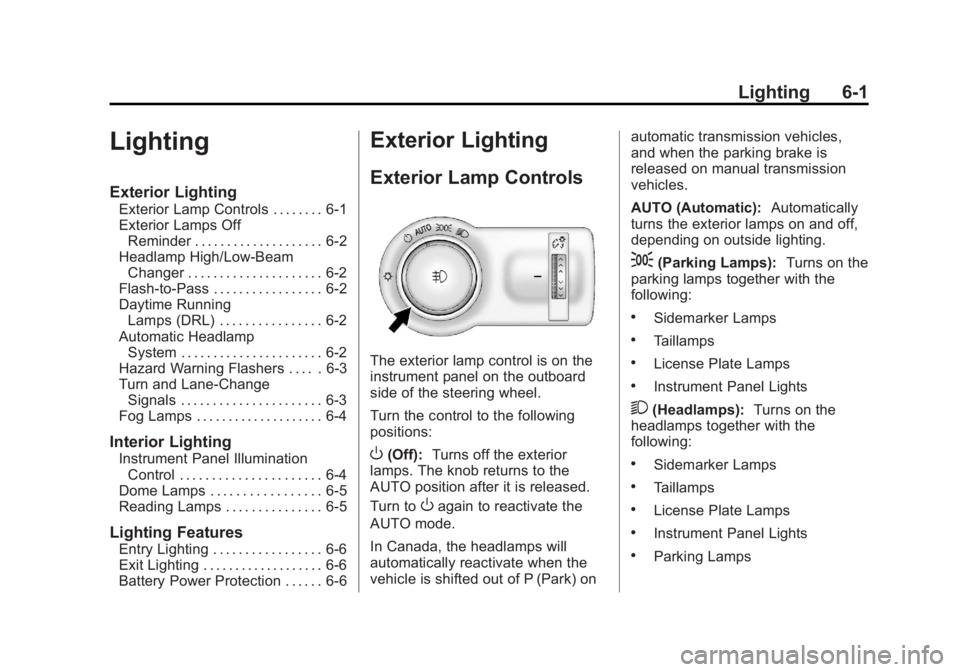
The exterior lamp control is on the
instrument panel on the outboard
side of the steering wheel.
Turn the control to the following
positions:
O(Off): Turns off the exterior
lamps. The knob returns to the
AUTO position after it is released.
Turn to
Oagain to reactivate the
AUTO mode.
In Canada, the headlamps will
automatically reactivate when the
vehicle is shifted out of P (Park) on automatic transmission vehicles,
and when the parking brake is
released on manual transmission
vehicles.
AUTO (Automatic):
Automatically
turns the exterior lamps on and off,
depending on outside lighting.
;(Parking Lamps): Turns on the
parking lamps together with the
following:
.Sidemarker Lamps
.Taillamps
.License Plate Lamps
.Instrument Panel Lights
2(Headlamps): Turns on the
headlamps together with the
following:
.Sidemarker Lamps
.Taillamps
.License Plate Lamps
.Instrument Panel Lights
.Parking Lamps