check engine light BUICK REGAL 2015 User Guide
[x] Cancel search | Manufacturer: BUICK, Model Year: 2015, Model line: REGAL, Model: BUICK REGAL 2015Pages: 399, PDF Size: 4.96 MB
Page 213 of 399
Black plate (32,1)Buick Regal Owner Manual (GMNA-Localizing-U.S./Canada/Mexico-
7576024) - 2015 - CRC - 9/15/14
9-32 Driving and Operating
suddenly slows or stops. Always
leave enough room up ahead to
stop, even with ABS.
Using ABS
Do not pump the brakes. Just hold
the brake pedal down firmly and let
ABS work. You may hear the ABS
pump or motor operating and feel
the brake pedal pulsate. This is
normal.
Braking in Emergencies
ABS allows you to steer and brake
at the same time. In many
emergencies, steering can help
more than even the very best
braking.
Parking Brake
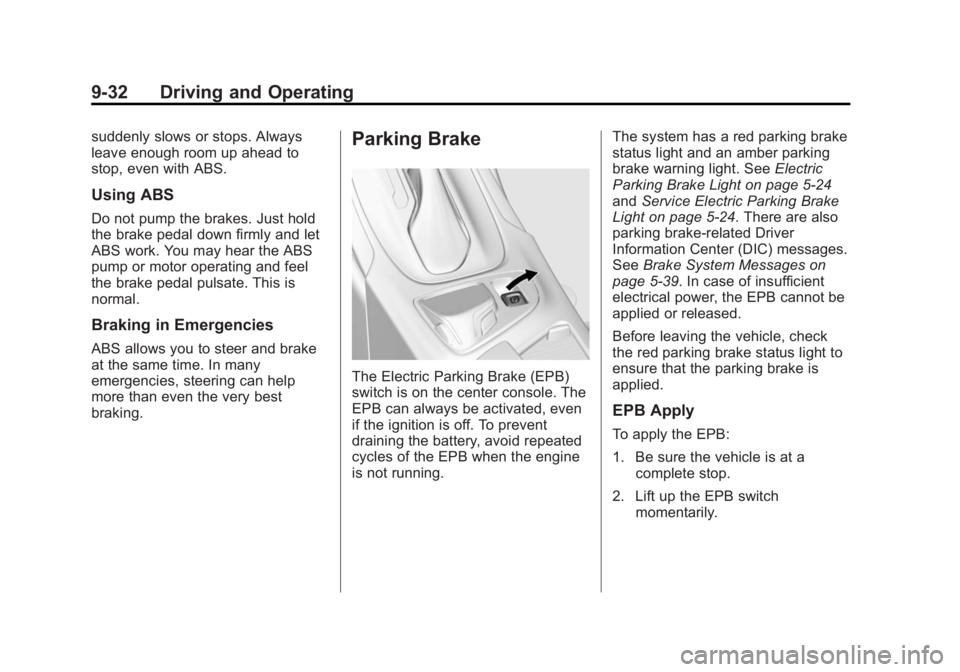
The Electric Parking Brake (EPB)
switch is on the center console. The
EPB can always be activated, even
if the ignition is off. To prevent
draining the battery, avoid repeated
cycles of the EPB when the engine
is not running.The system has a red parking brake
status light and an amber parking
brake warning light. See
Electric
Parking Brake Light on page 5-24
and Service Electric Parking Brake
Light on page 5-24. There are also
parking brake-related Driver
Information Center (DIC) messages.
See Brake System Messages on
page 5-39. In case of insufficient
electrical power, the EPB cannot be
applied or released.
Before leaving the vehicle, check
the red parking brake status light to
ensure that the parking brake is
applied.
EPB Apply
To apply the EPB:
1. Be sure the vehicle is at a complete stop.
2. Lift up the EPB switch momentarily.
Page 216 of 399
Black plate (35,1)Buick Regal Owner Manual (GMNA-Localizing-U.S./Canada/Mexico-
7576024) - 2015 - CRC - 9/15/14
Driving and Operating 9-35
Ride Control Systems
Traction Control/
Electronic Stability
Control
System Operation
The vehicle has a Traction Control
System (TCS) and StabiliTrak®, an
electronic stability control system.
These systems help limit wheel slip
and assist the driver in maintaining
control, especially on slippery road
conditions.
TCS activates if it senses that any
of the drive wheels are spinning or
beginning to lose traction. When this
happens, TCS applies the brakes to
the spinning wheels and reduces
engine power to limit wheel spin.
StabiliTrak activates when the
vehicle senses a difference between
the intended path and the direction
the vehicle is actually traveling.
StabiliTrak selectively applies
braking pressure to any one of the vehicle wheel brakes to assist the
driver in keeping the vehicle on the
intended path.
If cruise control is being used and
traction control or StabiliTrak begins
to limit wheel spin, cruise control will
disengage. Cruise control may be
turned back on when road
conditions allow.
Both systems come on
automatically when the vehicle is
started and begins to move. The
systems may be heard or felt while
they are operating or while
performing diagnostic checks. This
is normal and does not mean there
is a problem with the vehicle.
It is recommended to leave both
systems on for normal driving
conditions, but it may be necessary
to turn TCS off if the vehicle gets
stuck in sand, mud, ice, or snow.
See
If the Vehicle Is Stuck on
page 9-9 and“Turning the Systems
Off and On” later in this section.
The indicator light for both systems
is in the instrument cluster. This
light will:
.Flash when TCS is limiting
wheel spin.
.Flash when StabiliTrak is
activated.
.Turn on and stay on when either
system is not working.
If either system fails to turn on or to
activate, a message displays in the
Driver Information Center (DIC), and
dcomes on and stays on to
indicate that the system is inactive
and is not assisting the driver in
maintaining control. The vehicle is
safe to drive, but driving should be
adjusted accordingly.
Page 248 of 399
Black plate (1,1)Buick Regal Owner Manual (GMNA-Localizing-U.S./Canada/Mexico-
7576024) - 2015 - CRC - 9/15/14
Vehicle Care 10-1
Vehicle Care
General Information
General Information . . . . . . . . . . 10-2
California Proposition65 Warning . . . . . . . . . . . . . . . . . 10-2
California Perchlorate Materials Requirements . . . . 10-3
Accessories and Modifications . . . . . . . . . . . . . . . 10-3
Vehicle Checks
Doing Your OwnService Work . . . . . . . . . . . . . . . 10-3
Hood . . . . . . . . . . . . . . . . . . . . . . . . 10-5
Engine Compartment Overview . . . . . . . . . . . . . . . . . . . 10-6
Engine Oil . . . . . . . . . . . . . . . . . . 10-11
Engine Oil Life System . . . . . 10-13
Automatic Transmission Fluid . . . . . . . . . . . . . . . . . . . . . . 10-15
Manual Transmission Fluid . . . . . . . . . . . . . . . . . . . . . . 10-15
Hydraulic Clutch . . . . . . . . . . . . 10-15
Engine Air Cleaner/Filter . . . . 10-16
Cooling System . . . . . . . . . . . . 10-18
Engine Coolant . . . . . . . . . . . . . 10-19
Engine Overheating . . . . . . . . 10-22 Washer Fluid . . . . . . . . . . . . . . . 10-23
Brakes . . . . . . . . . . . . . . . . . . . . . 10-24
Brake Fluid . . . . . . . . . . . . . . . . . 10-25
Battery . . . . . . . . . . . . . . . . . . . . . 10-26
All-Wheel Drive . . . . . . . . . . . . . 10-27
Starter Switch Check . . . . . . . 10-28
Automatic Transmission Shift
Lock Control Function
Check . . . . . . . . . . . . . . . . . . . . . 10-28
Ignition Transmission Lock Check . . . . . . . . . . . . . . . . . . . . . 10-29
Park Brake and P (Park) Mechanism Check . . . . . . . . 10-29
Wiper Blade Replacement . . . . . . . . . . . . . . 10-29
Headlamp Aiming
Headlamp Aiming . . . . . . . . . . 10-30
Bulb Replacement
Bulb Replacement . . . . . . . . . . 10-31
Halogen Bulbs . . . . . . . . . . . . . . 10-31
High Intensity Discharge(HID) Lighting . . . . . . . . . . . . . 10-31
Headlamps, Front Turn Signal and Parking
Lamps . . . . . . . . . . . . . . . . . . . . 10-31
Fog Lamps . . . . . . . . . . . . . . . . . 10-32 Taillamps, Turn Signal,
Stoplamps, and Back-Up
Lamps . . . . . . . . . . . . . . . . . . . . 10-32
License Plate Lamp . . . . . . . . 10-32
Replacement Bulbs . . . . . . . . . 10-33
Electrical System
High Voltage Devices and Wiring . . . . . . . . . . . . . . . . . . . . . 10-34
Electrical System Overload . . . . . . . . . . . . . . . . . . 10-34
Fuses and Circuit Breakers . . . . . . . . . . . . . . . . . . 10-35
Engine Compartment Fuse Block . . . . . . . . . . . . . . . . . . . . . 10-35
Instrument Panel Fuse Block . . . . . . . . . . . . . . . . . . . . . 10-39
Wheels and Tires
Tires . . . . . . . . . . . . . . . . . . . . . . . . 10-40
All-Season Tires . . . . . . . . . . . . 10-41
Winter Tires . . . . . . . . . . . . . . . . 10-42
Summer Tires . . . . . . . . . . . . . . 10-42
Tire Sidewall Labeling . . . . . . 10-42
Tire Designations . . . . . . . . . . . 10-45
Tire Terminology and
Definitions . . . . . . . . . . . . . . . . 10-45
Tire Pressure . . . . . . . . . . . . . . . 10-48
Page 263 of 399
Black plate (16,1)Buick Regal Owner Manual (GMNA-Localizing-U.S./Canada/Mexico-
7576024) - 2015 - CRC - 9/15/14
10-16 Vehicle Care
Do not remove the cap to check the
fluid level or to top off the fluid level.
Remove the cap only when
necessary to add the proper fluid
until the level reaches the MIN line.
Engine Air Cleaner/Filter
SeeEngine Compartment Overview
on page 10-6 for the location of the
engine air cleaner/filter.
When to Inspect the Engine Air
Cleaner/Filter
Inspect/replace the air cleaner/filter
at the scheduled maintenance
intervals listed in Maintenance
Schedule on page 11-3. If you are
driving in dusty/dirty conditions,
inspect the filter at each engine oil
change.
How to Inspect the Engine Air
Cleaner/Filter
To inspect the air cleaner/filter,
remove the filter from the vehicle
and lightly shake the filter to release
loose dust and dirt. If the filter
remains covered with dirt, a new
filter is required.
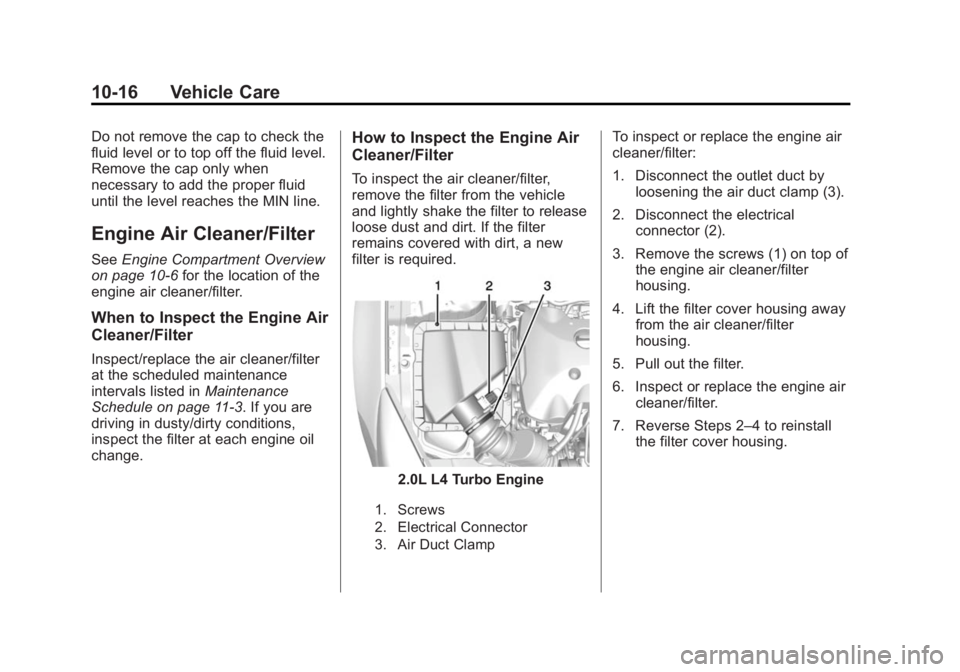
2.0L L4 Turbo Engine
1. Screws
2. Electrical Connector
3. Air Duct Clamp
To inspect or replace the engine air
cleaner/filter:
1. Disconnect the outlet duct by loosening the air duct clamp (3).
2. Disconnect the electrical connector (2).
3. Remove the screws (1) on top of the engine air cleaner/filter
housing.
4. Lift the filter cover housing away from the air cleaner/filter
housing.
5. Pull out the filter.
6. Inspect or replace the engine air cleaner/filter.
7. Reverse Steps 2–4 to reinstall the filter cover housing.
Page 269 of 399
Black plate (22,1)Buick Regal Owner Manual (GMNA-Localizing-U.S./Canada/Mexico-
7576024) - 2015 - CRC - 9/15/14
10-22 Vehicle Care
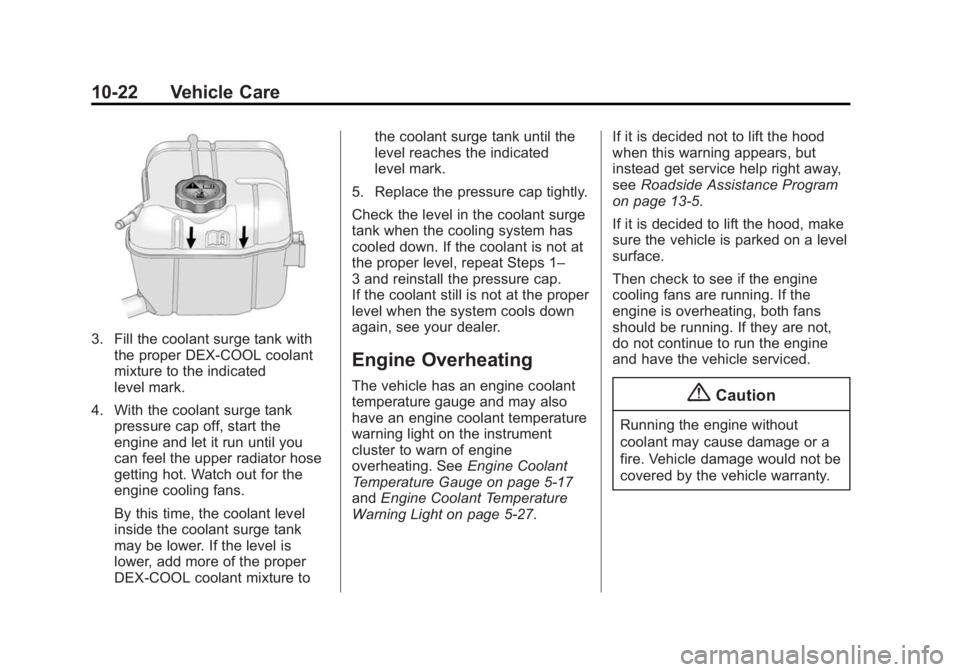
3. Fill the coolant surge tank withthe proper DEX-COOL coolant
mixture to the indicated
level mark.
4. With the coolant surge tank pressure cap off, start the
engine and let it run until you
can feel the upper radiator hose
getting hot. Watch out for the
engine cooling fans.
By this time, the coolant level
inside the coolant surge tank
may be lower. If the level is
lower, add more of the proper
DEX-COOL coolant mixture to the coolant surge tank until the
level reaches the indicated
level mark.
5. Replace the pressure cap tightly.
Check the level in the coolant surge
tank when the cooling system has
cooled down. If the coolant is not at
the proper level, repeat Steps 1–
3 and reinstall the pressure cap.
If the coolant still is not at the proper
level when the system cools down
again, see your dealer.
Engine Overheating
The vehicle has an engine coolant
temperature gauge and may also
have an engine coolant temperature
warning light on the instrument
cluster to warn of engine
overheating. See Engine Coolant
Temperature Gauge on page 5-17
and Engine Coolant Temperature
Warning Light on page 5-27. If it is decided not to lift the hood
when this warning appears, but
instead get service help right away,
see
Roadside Assistance Program
on page 13-5.
If it is decided to lift the hood, make
sure the vehicle is parked on a level
surface.
Then check to see if the engine
cooling fans are running. If the
engine is overheating, both fans
should be running. If they are not,
do not continue to run the engine
and have the vehicle serviced.{Caution
Running the engine without
coolant may cause damage or a
fire. Vehicle damage would not be
covered by the vehicle warranty.
Page 270 of 399
Black plate (23,1)Buick Regal Owner Manual (GMNA-Localizing-U.S./Canada/Mexico-
7576024) - 2015 - CRC - 9/15/14
Vehicle Care 10-23
If Steam Is Coming from the
Engine Compartment
{Warning
Steam from an overheated engine
can burn you badly, even if you
just open the hood. Stay away
from the engine if you see or hear
steam coming from it. Just turn it
off and get everyone away from
the vehicle until it cools down.
Wait until there is no sign of
steam or coolant before you open
the hood.
If you keep driving when the
engine is overheated, the liquids
in it can catch fire. You or others
could be badly burned. Stop the
engine if it overheats, and get out
of the vehicle until the engine
is cool.
If No Steam Is Coming from
the Engine Compartment
If an engine overheat warning is
displayed but no steam can be seen
or heard, the problem may not be
too serious. Sometimes the engine
can get a little too hot when the
vehicle:
.Climbs a long hill on a hot day.
.Stops after high-speed driving.
.Idles for long periods in traffic.
If the overheat warning is displayed
with no sign of steam:
1. Turn the air conditioning off.
2. Turn the heater on to the highest temperature and to the highest
fan speed. Open the windows as
necessary.
3. When it is safe to do so, pull off the road, shift to P (Park) or
N (Neutral), and let the
engine idle.
If the engine coolant temperature
gauge is no longer in the overheat
zone or the engine coolant temperature warning light no longer
displays, the vehicle can be driven.
Continue to drive the vehicle slowly
for about 10 minutes. Keep a safe
vehicle distance from the vehicle in
front. If the warning does not come
back on, continue to drive normally
and have the cooling system
checked for proper fill and function.
If the warning continues, pull over,
stop, and park the vehicle
right away.
If there is no sign of steam, idle the
engine for three minutes while
parked. If the warning is still
displayed, turn off the engine until it
cools down.
Washer Fluid
What to Use
When windshield washer fluid is
needed, be sure to read the
manufacturer's instructions before
use. If operating the vehicle in an
area where the temperature may fall
Page 273 of 399
Black plate (26,1)Buick Regal Owner Manual (GMNA-Localizing-U.S./Canada/Mexico-
7576024) - 2015 - CRC - 9/15/14
10-26 Vehicle Care
Checking Brake Fluid
The brake/clutch fluid can be
checked without taking off the cap
by looking at the brake/clutch fluid
reservoir.
The fluid level should be above
MIN. If it is not, have the brake/
clutch hydraulic system checked to
see if there is a leak.
After work is done on the brake/
clutch hydraulic system, make sure
the level is above MIN but not over
the MAX mark.
When the brake/clutch fluid falls to a
low level, the brake warning light
comes on. SeeBrake System
Warning Light on page 5-23.
What to Add
Use only new DOT 3 brake fluid
from a sealed container. See
Recommended Fluids and
Lubricants on page 11-12. Always clean the brake/clutch fluid
reservoir cap and the area around
the cap before removing it. This
helps keep dirt from entering the
reservoir.
{Warning
With the wrong kind of fluid in the
brake/clutch hydraulic system, the
brakes might not work well. This
could cause a crash. Always use
the proper brake/clutch fluid.
{Caution
.Using the wrong fluid can
badly damage brake/clutch
hydraulic system parts. For
example, just a few drops of
mineral-based oil, such as
engine oil, in the brake
hydraulic system can damage
brake hydraulic system parts
so badly that they will have to
(Continued)
Caution (Continued)
be replaced. Do not let
someone put in the wrong
kind of fluid.
.If brake fluid is spilled on the
vehicle's painted surfaces,
the paint finish can be
damaged. Be careful not to
spill brake fluid on the
vehicle. If you do, wash it off
immediately.
Battery
The original equipment battery is
maintenance free. Do not remove
the cap and do not add fluid.
This vehicle has a standard 12-volt
battery. Refer to the replacement
number on the original battery label
when a new standard 12-volt battery
is needed.
eAssist vehicles also have a high
voltage battery. Only a trained
service technician with the proper
Page 350 of 399
Black plate (9,1)Buick Regal Owner Manual (GMNA-Localizing-U.S./Canada/Mexico-
7576024) - 2015 - CRC - 9/15/14
Service and Maintenance 11-9
The following list is intended to
explain the services and conditions
to look for that may indicate
services are required.
Battery
The battery supplies power to start
the engine and operate any
additional electrical accessories.
.To avoid break-down or failure to
start the vehicle, maintain a
battery with full cranking power.
.Trained dealer technicians have
the diagnostic equipment to test
the battery and ensure that the
connections and cables are
corrosion-free.Belts
.Belts may need replacing if they
squeak or show signs of
cracking or splitting.
.Trained dealer technicians have
access to tools and equipment
to inspect the belts and
recommend adjustment or
replacement when necessary.
Brakes
Brakes stop the vehicle and are
crucial to safe driving.
.Signs of brake wear may include
chirping, grinding, or squealing
noises, or difficulty stopping.
.Trained dealer technicians have
access to tools and equipment
to inspect the brakes and
recommend quality parts
engineered for the vehicle. Fluids
Proper fluid levels and approved
fluids protect the vehicle’s systems
and components. See
Recommended Fluids and
Lubricants on page 11-12
for GM
approved fluids.
.Engine oil and windshield
washer fluid levels should be
checked at every fuel fill.
.Instrument cluster lights may
come on to indicate that fluids
may be low and need to be
filled.
Hoses
Hoses transport fluids and should
be regularly inspected to ensure
that there are no cracks or leaks.
With a multi-point inspection, your
dealer can inspect the hoses and
advise if replacement is needed.
Page 386 of 399
Black plate (1,1)Buick Regal Owner Manual (GMNA-Localizing-U.S./Canada/Mexico-
7576024) - 2015 - CRC - 9/15/14
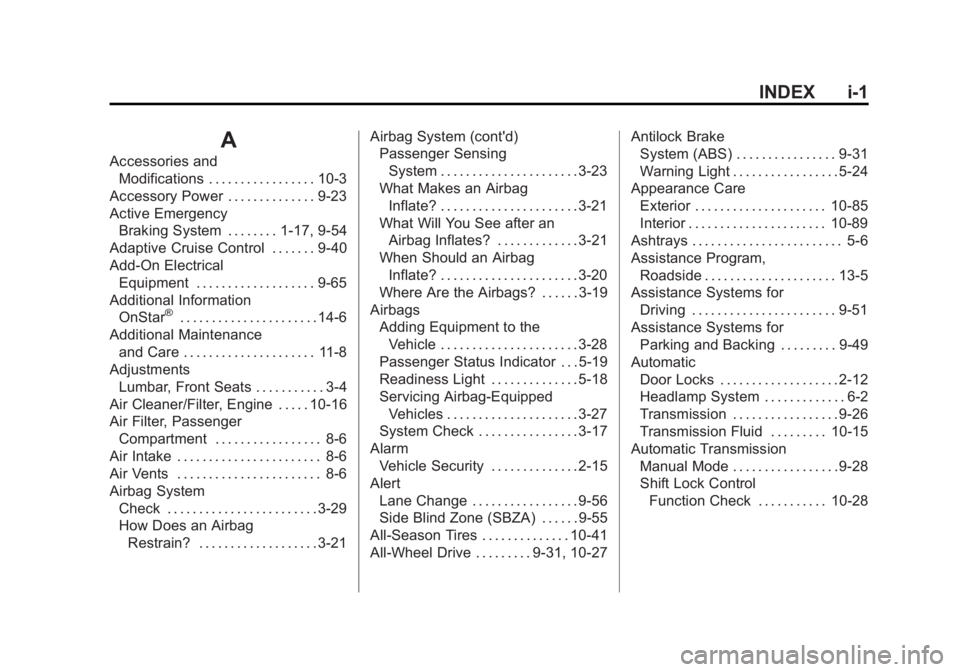
INDEX i-1
A
Accessories andModifications . . . . . . . . . . . . . . . . . 10-3
Accessory Power . . . . . . . . . . . . . . 9-23
Active Emergency Braking System . . . . . . . . 1-17, 9-54
Adaptive Cruise Control . . . . . . . 9-40
Add-On Electrical
Equipment . . . . . . . . . . . . . . . . . . . 9-65
Additional Information OnStar
®. . . . . . . . . . . . . . . . . . . . . . 14-6
Additional Maintenance and Care . . . . . . . . . . . . . . . . . . . . . 11-8
Adjustments Lumbar, Front Seats . . . . . . . . . . . 3-4
Air Cleaner/Filter, Engine . . . . . 10-16
Air Filter, Passenger
Compartment . . . . . . . . . . . . . . . . . 8-6
Air Intake . . . . . . . . . . . . . . . . . . . . . . . 8-6
Air Vents . . . . . . . . . . . . . . . . . . . . . . . 8-6
Airbag System Check . . . . . . . . . . . . . . . . . . . . . . . . 3-29
How Does an AirbagRestrain? . . . . . . . . . . . . . . . . . . . 3-21 Airbag System (cont'd)
Passenger Sensing
System . . . . . . . . . . . . . . . . . . . . . . 3-23
What Makes an Airbag
Inflate? . . . . . . . . . . . . . . . . . . . . . . 3-21
What Will You See after an Airbag Inflates? . . . . . . . . . . . . . 3-21
When Should an Airbag Inflate? . . . . . . . . . . . . . . . . . . . . . . 3-20
Where Are the Airbags? . . . . . . 3-19
Airbags Adding Equipment to theVehicle . . . . . . . . . . . . . . . . . . . . . . 3-28
Passenger Status Indicator . . . 5-19
Readiness Light . . . . . . . . . . . . . . 5-18
Servicing Airbag-Equipped
Vehicles . . . . . . . . . . . . . . . . . . . . . 3-27
System Check . . . . . . . . . . . . . . . . 3-17
Alarm Vehicle Security . . . . . . . . . . . . . . 2-15
Alert Lane Change . . . . . . . . . . . . . . . . . 9-56
Side Blind Zone (SBZA) . . . . . . 9-55
All-Season Tires . . . . . . . . . . . . . . 10-41
All-Wheel Drive . . . . . . . . . 9-31, 10-27 Antilock Brake
System (ABS) . . . . . . . . . . . . . . . . 9-31
Warning Light . . . . . . . . . . . . . . . . . 5-24
Appearance Care Exterior . . . . . . . . . . . . . . . . . . . . . 10-85
Interior . . . . . . . . . . . . . . . . . . . . . . 10-89
Ashtrays . . . . . . . . . . . . . . . . . . . . . . . . 5-6
Assistance Program,
Roadside . . . . . . . . . . . . . . . . . . . . . 13-5
Assistance Systems for Driving . . . . . . . . . . . . . . . . . . . . . . . 9-51
Assistance Systems for Parking and Backing . . . . . . . . . 9-49
Automatic Door Locks . . . . . . . . . . . . . . . . . . . 2-12
Headlamp System . . . . . . . . . . . . . 6-2
Transmission . . . . . . . . . . . . . . . . . 9-26
Transmission Fluid . . . . . . . . . 10-15
Automatic Transmission Manual Mode . . . . . . . . . . . . . . . . . 9-28
Shift Lock ControlFunction Check . . . . . . . . . . . 10-28
Page 387 of 399
Black plate (2,1)Buick Regal Owner Manual (GMNA-Localizing-U.S./Canada/Mexico-
7576024) - 2015 - CRC - 9/15/14
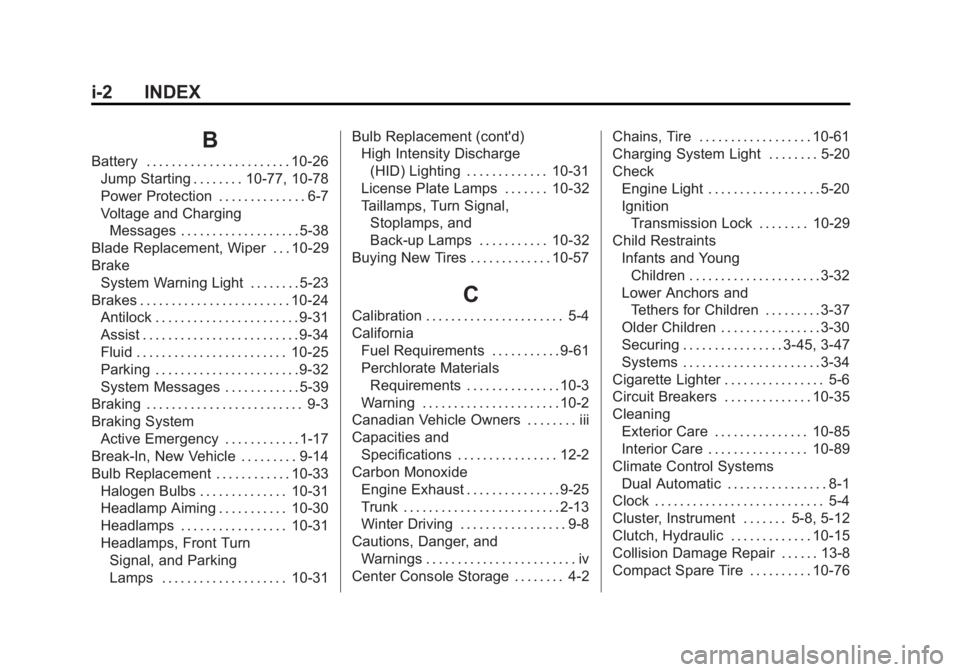
i-2 INDEX
B
Battery . . . . . . . . . . . . . . . . . . . . . . . 10-26Jump Starting . . . . . . . . 10-77, 10-78
Power Protection . . . . . . . . . . . . . . 6-7
Voltage and ChargingMessages . . . . . . . . . . . . . . . . . . . 5-38
Blade Replacement, Wiper . . . 10-29
Brake
System Warning Light . . . . . . . . 5-23
Brakes . . . . . . . . . . . . . . . . . . . . . . . . 10-24 Antilock . . . . . . . . . . . . . . . . . . . . . . . 9-31
Assist . . . . . . . . . . . . . . . . . . . . . . . . . 9-34
Fluid . . . . . . . . . . . . . . . . . . . . . . . . 10-25
Parking . . . . . . . . . . . . . . . . . . . . . . . 9-32
System Messages . . . . . . . . . . . . 5-39
Braking . . . . . . . . . . . . . . . . . . . . . . . . . 9-3
Braking System
Active Emergency . . . . . . . . . . . . 1-17
Break-In, New Vehicle . . . . . . . . . 9-14
Bulb Replacement . . . . . . . . . . . . 10-33 Halogen Bulbs . . . . . . . . . . . . . . 10-31
Headlamp Aiming . . . . . . . . . . . 10-30
Headlamps . . . . . . . . . . . . . . . . . 10-31
Headlamps, Front TurnSignal, and Parking
Lamps . . . . . . . . . . . . . . . . . . . . 10-31 Bulb Replacement (cont'd)
High Intensity Discharge
(HID) Lighting . . . . . . . . . . . . . 10-31
License Plate Lamps . . . . . . . 10-32
Taillamps, Turn Signal,
Stoplamps, and
Back-up Lamps . . . . . . . . . . . 10-32
Buying New Tires . . . . . . . . . . . . . 10-57
C
Calibration . . . . . . . . . . . . . . . . . . . . . . 5-4
California Fuel Requirements . . . . . . . . . . . 9-61
Perchlorate MaterialsRequirements . . . . . . . . . . . . . . . 10-3
Warning . . . . . . . . . . . . . . . . . . . . . . 10-2
Canadian Vehicle Owners . . . . . . . . iii
Capacities and Specifications . . . . . . . . . . . . . . . . 12-2
Carbon Monoxide
Engine Exhaust . . . . . . . . . . . . . . . 9-25
Trunk . . . . . . . . . . . . . . . . . . . . . . . . . 2-13
Winter Driving . . . . . . . . . . . . . . . . . 9-8
Cautions, Danger, and Warnings . . . . . . . . . . . . . . . . . . . . . . . . iv
Center Console Storage . . . . . . . . 4-2 Chains, Tire . . . . . . . . . . . . . . . . . . 10-61
Charging System Light . . . . . . . . 5-20
Check
Engine Light . . . . . . . . . . . . . . . . . . 5-20
IgnitionTransmission Lock . . . . . . . . 10-29
Child Restraints
Infants and YoungChildren . . . . . . . . . . . . . . . . . . . . . 3-32
Lower Anchors and Tethers for Children . . . . . . . . . 3-37
Older Children . . . . . . . . . . . . . . . . 3-30
Securing . . . . . . . . . . . . . . . . 3-45, 3-47
Systems . . . . . . . . . . . . . . . . . . . . . . 3-34
Cigarette Lighter . . . . . . . . . . . . . . . . 5-6
Circuit Breakers . . . . . . . . . . . . . . 10-35
Cleaning Exterior Care . . . . . . . . . . . . . . . 10-85
Interior Care . . . . . . . . . . . . . . . . 10-89
Climate Control Systems Dual Automatic . . . . . . . . . . . . . . . . 8-1
Clock . . . . . . . . . . . . . . . . . . . . . . . . . . . 5-4
Cluster, Instrument . . . . . . . 5-8, 5-12
Clutch, Hydraulic . . . . . . . . . . . . . 10-15
Collision Damage Repair . . . . . . 13-8
Compact Spare Tire . . . . . . . . . . 10-76