BUICK REGAL 2018 Owner's Manual
Manufacturer: BUICK, Model Year: 2018, Model line: REGAL, Model: BUICK REGAL 2018Pages: 384, PDF Size: 5.67 MB
Page 111 of 384
Buick Regal Owner Manual (GMNA-Localizing-2nd Timed Print-U.S./Canada-
11486030) - 2018 - crc - 3/23/18
110 Seats and Restraints
.Vehicle speed at impact is less
than 25 km/h (15 mph) or greater
than 50 km/h (31 mph).
. The vehicle impacts a small
object.
For other frontal impacts or vehicle
speeds, the airbags may also
deploy. See Airbag System 079.
After the pedestrian protection
system has deployed, the hood will
remain in the raised position and the
driver ’s view may be reduced by the
raised hood.
{Warning
Do not drive the vehicle when the
hood is raised.
Operating the vehicle with the
hood raised can obstruct your
view and may cause a collision
resulting in damage to the
vehicle, damage to other property,
personal injury, or even death.
Caution
After the pedestrian protection
system has deployed, see your
dealer for service. The hood
assembly including hinges, latch,
and actuators must be replaced.
If towing service is not available, the
hood may be repositioned
temporarily. See “Temporary Hood
Repair” following.
The SERVICE PEDESTRIAN
PROTECTION SYSTEM message
will appear when there is a problem
with the pedestrian protection
system. See your dealer for service
immediately.
During a frontal impact involving a
pedestrian, the vehicle may record
information about the condition of
the vehicle and how it was
operated. See Vehicle Data
Recording and Privacy 0358.
Temporary Hood Repair
If the rear of the hood is raised, the
hood may be repositioned
temporarily if a towing service is not
available.
{Warning
Before beginning the procedure,
read all the instructions. Failure to
read and follow the instructions
could injure you or others, and
damage the vehicle.
{Warning
After the hood has lifted, the hood
hinge and latch area may be hot.
Do not touch the pedestrian
protection system components.
Allow the engine to cool before
attempting any repair.
Page 112 of 384
Buick Regal Owner Manual (GMNA-Localizing-2nd Timed Print-U.S./Canada-
11486030) - 2018 - crc - 3/23/18
Seats and Restraints 111
{Warning
You or others could be injured
when the hood is lowered or
latched.
Be sure to keep fingers and other
body parts away from the edge of
the hood and fenders.
1. Place both hands on top of the right corner of the hood near
the windshield and push the
hood down quickly.
If the hood does not latch, push
down again with slightly more
force until the hood is latched
securely.
2. Repeat the previous step to latch the left side of the hood.
3. Pull up on the rear corners of the hood to make sure the
hood is latched securely and
will not lift.
{Warning
Do not drive the vehicle if the
hood is not securely latched at
both rear corners and the front
latch.
Operating your vehicle without the
hood securely latched can lead to
a collision resulting in damage to
your vehicle, damage to other
property, personal injury, or even
death.
4. Drive directly to a dealer for service. If you cannot go in for
service immediately, have the
vehicle towed.
Some noise will occur when
the vehicle is driven while the
hood is temporarily
repositioned.
If you do not have the system
repaired, the pedestrian protection
system will not be operable in the
event of another crash or frontal
impact involving a pedestrian. See
your dealer for service immediately.
{Warning
Safety procedures must always
be observed when disposing of
the vehicle or vehicle parts.
Disposal should only be
performed by an authorized
service center, to help protect the
environment and your health.
Page 113 of 384
Buick Regal Owner Manual (GMNA-Localizing-2nd Timed Print-U.S./Canada-
11486030) - 2018 - crc - 3/23/18
112 Storage
Storage
Storage Compartments
Storage Compartments . . . . . . . 112
Glove Box . . . . . . . . . . . . . . . . . . . . 112
Cupholders . . . . . . . . . . . . . . . . . . . 112
Front Storage . . . . . . . . . . . . . . . . . 113
Sunglasses Storage . . . . . . . . . . 113
Armrest Storage . . . . . . . . . . . . . . 114
Additional Storage Features
Cargo Cover . . . . . . . . . . . . . . . . . . 114
Cargo Tie-Downs (Wagon) . . . . 115
Convenience Net . . . . . . . . . . . . . 116
Storage
Compartments
{Warning
Do not store heavy or sharp
objects in storage compartments.
In a crash, these objects may
cause the cover to open and
could result in injury.
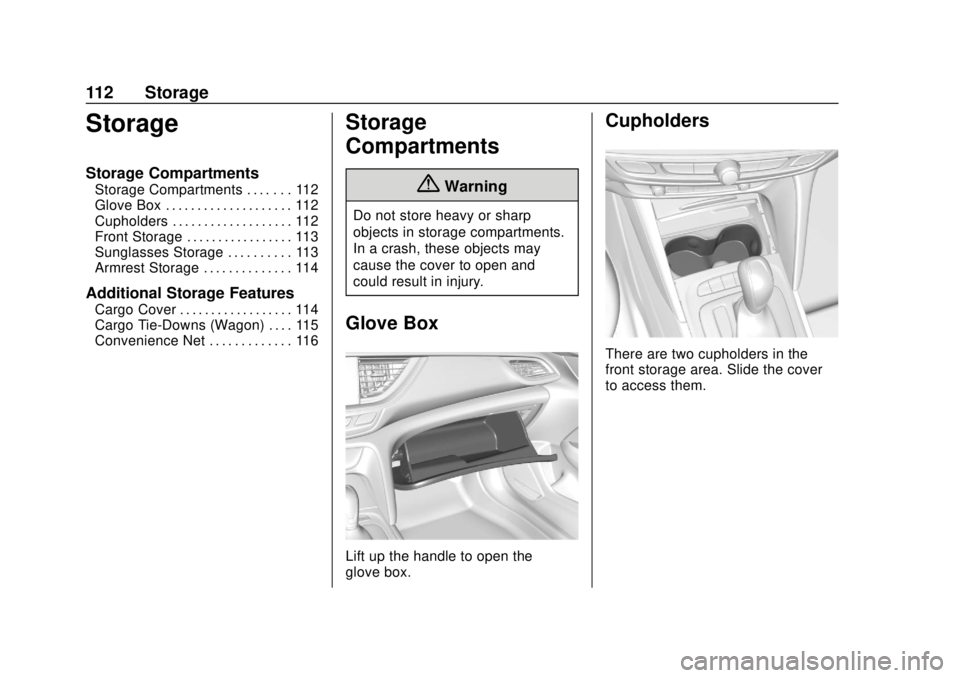
Glove Box
Lift up the handle to open the
glove box.
Cupholders
There are two cupholders in the
front storage area. Slide the cover
to access them.
Page 114 of 384
Buick Regal Owner Manual (GMNA-Localizing-2nd Timed Print-U.S./Canada-
11486030) - 2018 - crc - 3/23/18
Storage 113
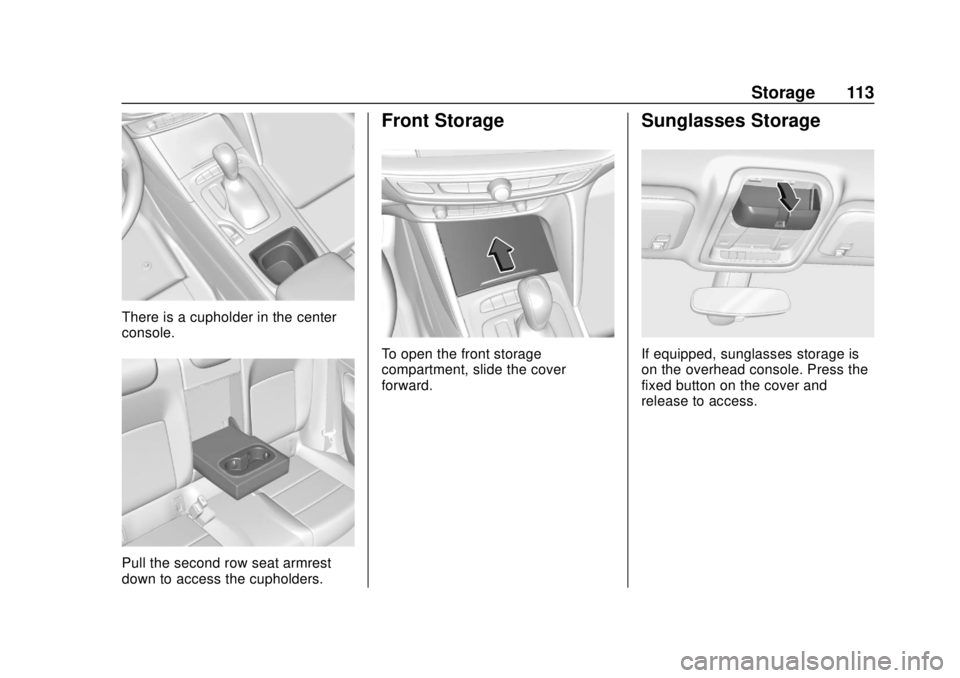
There is a cupholder in the center
console.
Pull the second row seat armrest
down to access the cupholders.
Front Storage
To open the front storage
compartment, slide the cover
forward.
Sunglasses Storage
If equipped, sunglasses storage is
on the overhead console. Press the
fixed button on the cover and
release to access.
Page 115 of 384
Buick Regal Owner Manual (GMNA-Localizing-2nd Timed Print-U.S./Canada-
11486030) - 2018 - crc - 3/23/18
114 Storage
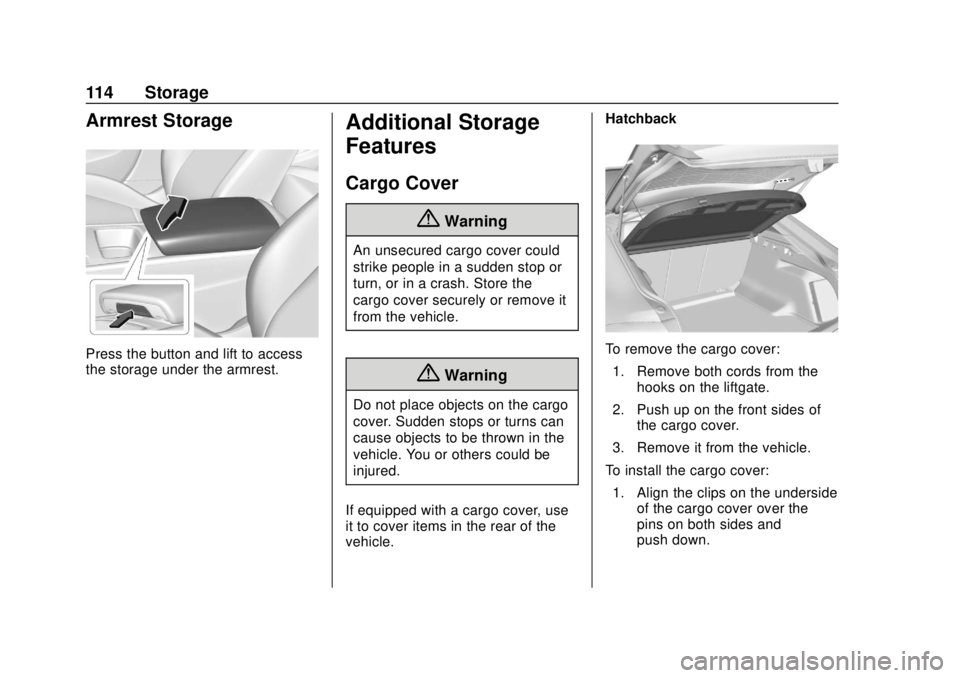
Armrest Storage
Press the button and lift to access
the storage under the armrest.
Additional Storage
Features
Cargo Cover
{Warning
An unsecured cargo cover could
strike people in a sudden stop or
turn, or in a crash. Store the
cargo cover securely or remove it
from the vehicle.
{Warning
Do not place objects on the cargo
cover. Sudden stops or turns can
cause objects to be thrown in the
vehicle. You or others could be
injured.
If equipped with a cargo cover, use
it to cover items in the rear of the
vehicle. Hatchback
To remove the cargo cover:
1. Remove both cords from the hooks on the liftgate.
2. Push up on the front sides of the cargo cover.
3. Remove it from the vehicle.
To install the cargo cover: 1. Align the clips on the underside of the cargo cover over the
pins on both sides and
push down.
Page 116 of 384
Buick Regal Owner Manual (GMNA-Localizing-2nd Timed Print-U.S./Canada-
11486030) - 2018 - crc - 3/23/18
Storage 115
2. Reconnect both of the cords tothe hooks at the top of the
liftgate.
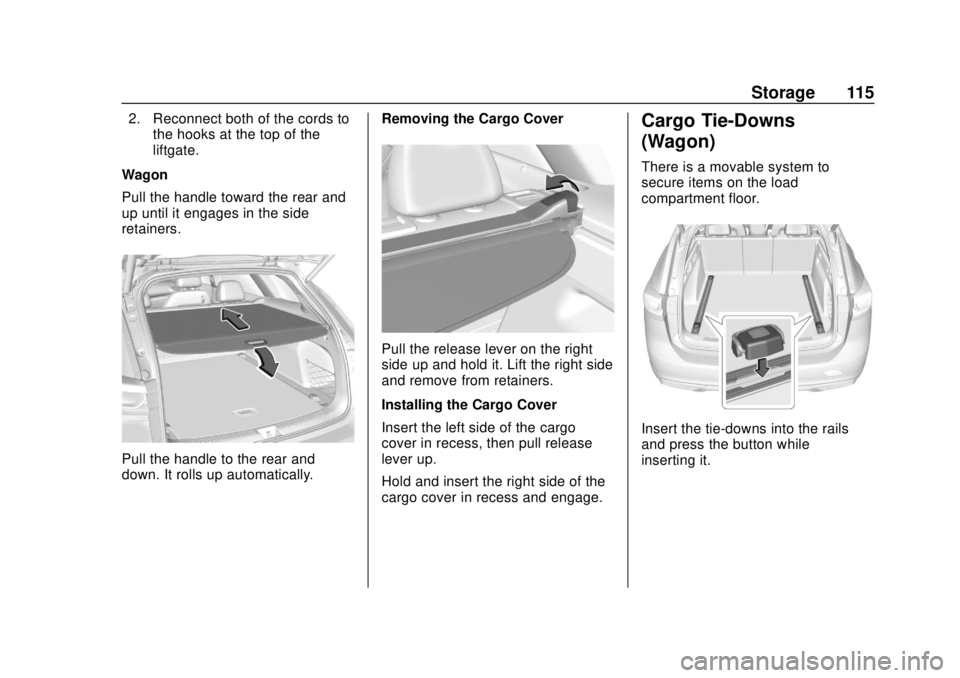
Wagon
Pull the handle toward the rear and
up until it engages in the side
retainers.
Pull the handle to the rear and
down. It rolls up automatically. Removing the Cargo Cover
Pull the release lever on the right
side up and hold it. Lift the right side
and remove from retainers.
Installing the Cargo Cover
Insert the left side of the cargo
cover in recess, then pull release
lever up.
Hold and insert the right side of the
cargo cover in recess and engage.
Cargo Tie-Downs
(Wagon)
There is a movable system to
secure items on the load
compartment floor.
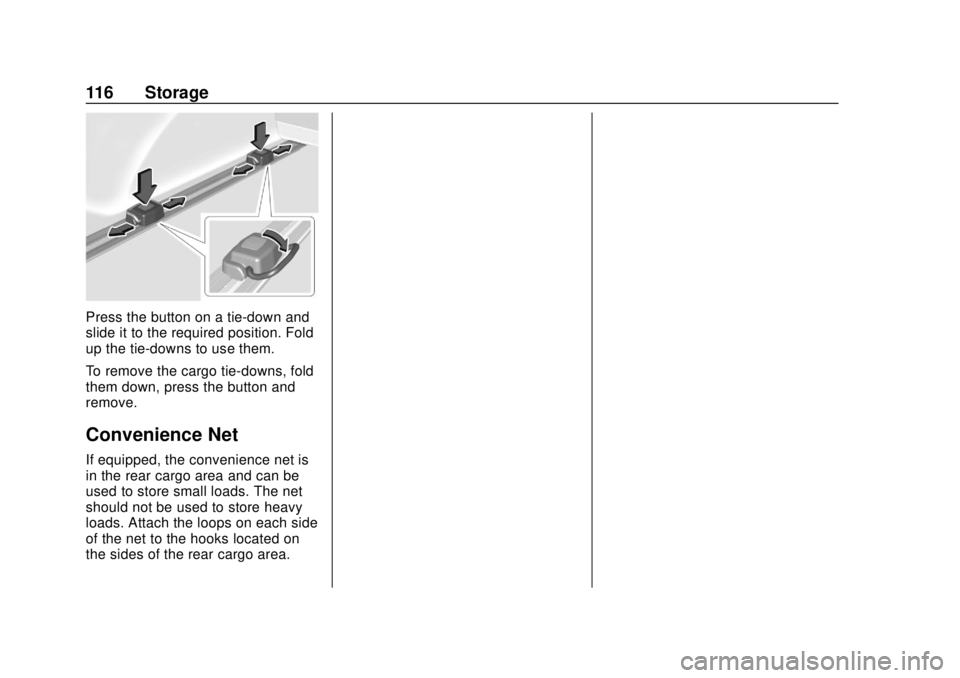
Insert the tie-downs into the rails
and press the button while
inserting it.
Page 117 of 384
Buick Regal Owner Manual (GMNA-Localizing-2nd Timed Print-U.S./Canada-
11486030) - 2018 - crc - 3/23/18
116 Storage
Press the button on a tie-down and
slide it to the required position. Fold
up the tie-downs to use them.
To remove the cargo tie-downs, fold
them down, press the button and
remove.
Convenience Net
If equipped, the convenience net is
in the rear cargo area and can be
used to store small loads. The net
should not be used to store heavy
loads. Attach the loops on each side
of the net to the hooks located on
the sides of the rear cargo area.
Page 118 of 384
Buick Regal Owner Manual (GMNA-Localizing-2nd Timed Print-U.S./Canada-
11486030) - 2018 - crc - 3/23/18
Instruments and Controls 117
Instruments and
Controls
Controls
Steering Wheel Adjustment . . . 118
Steering Wheel Controls . . . . . . 118
Heated Steering Wheel . . . . . . . 118
Horn . . . . . . . . . . . . . . . . . . . . . . . . . . 118
Windshield Wiper/Washer . . . . 118
Rear Window Wiper/Washer . . . . . . . . . . . . . . . . . . . . . . 119
Compass . . . . . . . . . . . . . . . . . . . . . 120
Clock . . . . . . . . . . . . . . . . . . . . . . . . . 120
Power Outlets . . . . . . . . . . . . . . . . 120
Wireless Charging . . . . . . . . . . . . 121
Warning Lights, Gauges, and
Indicators
Warning Lights, Gauges, and Indicators . . . . . . . . . . . . . . . . . . . 123
Instrument Cluster . . . . . . . . . . . . 124
Speedometer . . . . . . . . . . . . . . . . . 128
Odometer . . . . . . . . . . . . . . . . . . . . . 128
Tachometer . . . . . . . . . . . . . . . . . . . 128
Fuel Gauge . . . . . . . . . . . . . . . . . . . 129
Engine Coolant Temperature
Gauge . . . . . . . . . . . . . . . . . . . . . . 130
Seat Belt Reminders . . . . . . . . . 130 Airbag Readiness Light . . . . . . . 131
Passenger Airbag Status
Indicator . . . . . . . . . . . . . . . . . . . . 132
Charging System Light . . . . . . . 132
Malfunction Indicator Lamp (Check Engine Light) . . . . . . . . 133
Brake System Warning Light . . . . . . . . . . . . . . . . . . . . . . . . 135
Electric Parking Brake Light . . . . . . . . . . . . . . . . . . . . . . . . 135
Service Electric Parking Brake Light . . . . . . . . . . . . . . . . . . . . . . . . 135
Antilock Brake System (ABS) Warning Light . . . . . . . . . . . . . . . 136
Lane Keep Assist (LKA) Light . . . . . . . . . . . . . . . . . . . . . . . . 136
Vehicle Ahead Indicator . . . . . . 136
Traction Off Light . . . . . . . . . . . . . 137
StabiliTrak OFF Light . . . . . . . . . 137
Traction Control System (TCS)/ StabiliTrak Light . . . . . . . . . . . . . 137
Engine Coolant Temperature Warning Light . . . . . . . . . . . . . . . 138
Tire Pressure Light . . . . . . . . . . . 138
Engine Oil Pressure Light . . . . 139
Low Fuel Warning Light . . . . . . 139
Security Light . . . . . . . . . . . . . . . . . 139
High-Beam On Light . . . . . . . . . . 139
Adaptive Forward Lighting (AFL) Light . . . . . . . . . . . . . . . . . . 140 Front Fog Lamp Light . . . . . . . . . 140
Lamps On Reminder . . . . . . . . . 140
Cruise Control Light . . . . . . . . . . 140
Door Ajar Light . . . . . . . . . . . . . . . 141
Information Displays
Driver Information
Center (DIC) . . . . . . . . . . . . . . . . 141
Head-Up Display (HUD) . . . . . . 145
Vehicle Messages
Vehicle Messages . . . . . . . . . . . . 149
Engine Power Messages . . . . . 149
Vehicle Speed Messages . . . . . 150
Vehicle Personalization
Vehicle Personalization . . . . . . . 150
Universal Remote System
Universal Remote System . . . . 155
Universal Remote System Programming . . . . . . . . . . . . . . . 155
Universal Remote System Operation . . . . . . . . . . . . . . . . . . . 157
Page 119 of 384
Buick Regal Owner Manual (GMNA-Localizing-2nd Timed Print-U.S./Canada-
11486030) - 2018 - crc - 3/23/18
118 Instruments and Controls
Controls
Steering Wheel
Adjustment
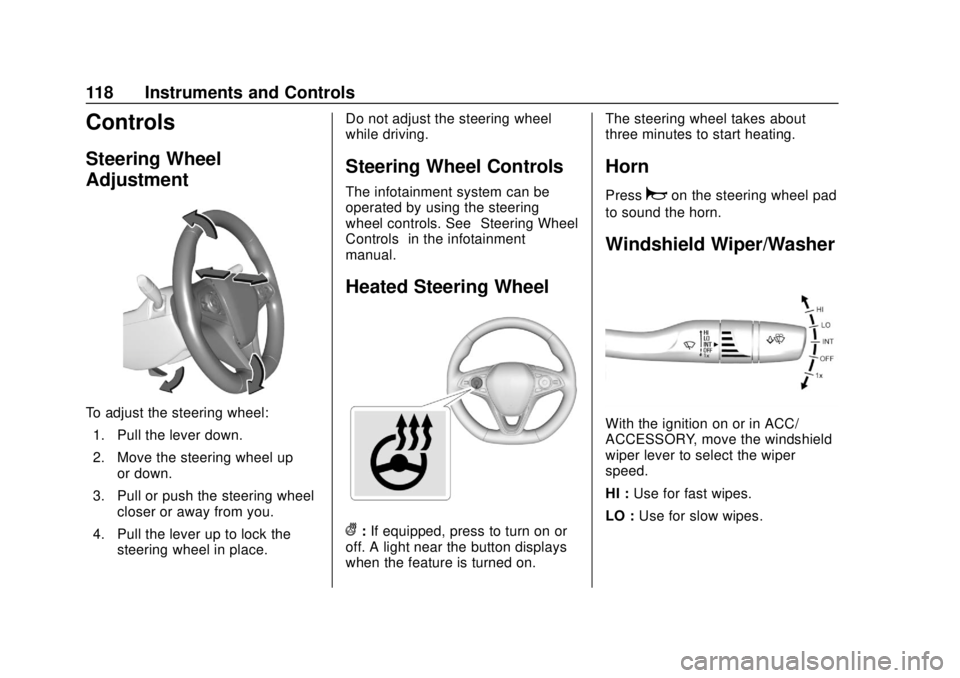
To adjust the steering wheel:1. Pull the lever down.
2. Move the steering wheel up or down.
3. Pull or push the steering wheel closer or away from you.
4. Pull the lever up to lock the steering wheel in place. Do not adjust the steering wheel
while driving.
Steering Wheel Controls
The infotainment system can be
operated by using the steering
wheel controls. See
“Steering Wheel
Controls” in the infotainment
manual.
Heated Steering Wheel
(: If equipped, press to turn on or
off. A light near the button displays
when the feature is turned on. The steering wheel takes about
three minutes to start heating.
Horn
Pressaon the steering wheel pad
to sound the horn.
Windshield Wiper/Washer
With the ignition on or in ACC/
ACCESSORY, move the windshield
wiper lever to select the wiper
speed.
HI : Use for fast wipes.
LO : Use for slow wipes.
Page 120 of 384
Buick Regal Owner Manual (GMNA-Localizing-2nd Timed Print-U.S./Canada-
11486030) - 2018 - crc - 3/23/18
Instruments and Controls 119
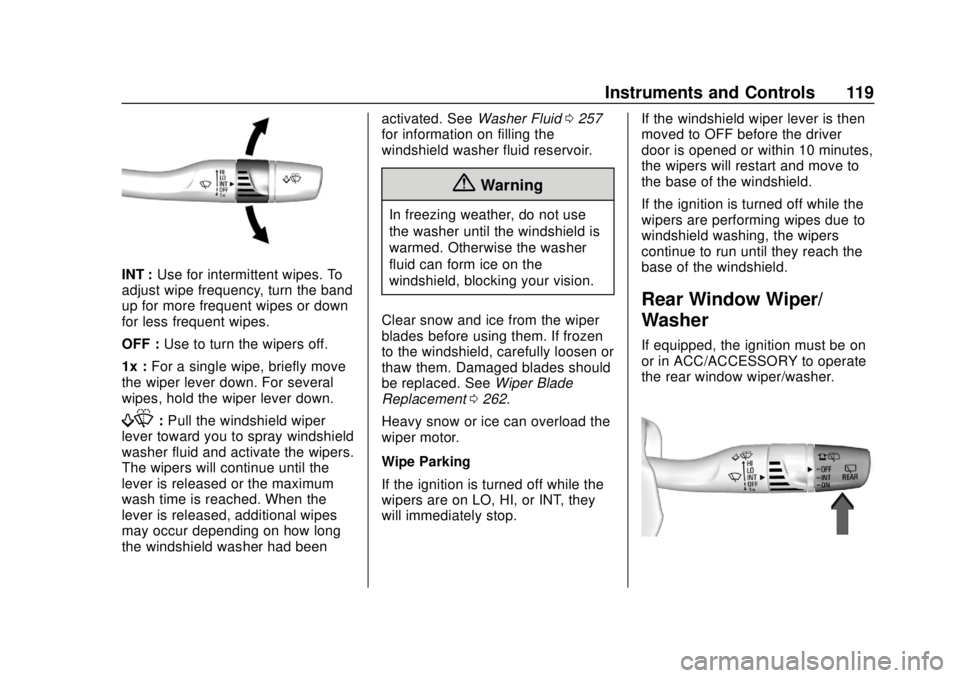
INT :Use for intermittent wipes. To
adjust wipe frequency, turn the band
up for more frequent wipes or down
for less frequent wipes.
OFF : Use to turn the wipers off.
1x : For a single wipe, briefly move
the wiper lever down. For several
wipes, hold the wiper lever down.
f: Pull the windshield wiper
lever toward you to spray windshield
washer fluid and activate the wipers.
The wipers will continue until the
lever is released or the maximum
wash time is reached. When the
lever is released, additional wipes
may occur depending on how long
the windshield washer had been activated. See
Washer Fluid0257
for information on filling the
windshield washer fluid reservoir.
{Warning
In freezing weather, do not use
the washer until the windshield is
warmed. Otherwise the washer
fluid can form ice on the
windshield, blocking your vision.
Clear snow and ice from the wiper
blades before using them. If frozen
to the windshield, carefully loosen or
thaw them. Damaged blades should
be replaced. See Wiper Blade
Replacement 0262.
Heavy snow or ice can overload the
wiper motor.
Wipe Parking
If the ignition is turned off while the
wipers are on LO, HI, or INT, they
will immediately stop. If the windshield wiper lever is then
moved to OFF before the driver
door is opened or within 10 minutes,
the wipers will restart and move to
the base of the windshield.
If the ignition is turned off while the
wipers are performing wipes due to
windshield washing, the wipers
continue to run until they reach the
base of the windshield.
Rear Window Wiper/
Washer
If equipped, the ignition must be on
or in ACC/ACCESSORY to operate
the rear window wiper/washer.