key BUICK TERRAZA 2005 Workshop Manual
[x] Cancel search | Manufacturer: BUICK, Model Year: 2005, Model line: TERRAZA, Model: BUICK TERRAZA 2005Pages: 428, PDF Size: 2.6 MB
Page 203 of 428
Press the menu button until FOB LOCK FEEDBACK
appears on the DIC display. Press the set/reset button
to scroll through the following choices:
OFF:There will be no feedback when locking the
vehicle.
LIGHTS:The exterior lamps will �ash when you press
the lock button on the remote keyless entry transmitter.
LIGHTS and HORN (default):The exterior lamps
will �ash when you press the lock button on the
remote keyless entry transmitter, and the horn will
sound when the lock button is pressed again within
�ve seconds of the previous command.
Choose one of the available settings and press the
menu button while it is displayed on the DIC to select
it and move on to the next feature.
REMOTE START
If your vehicle has remote start, this feature allows
the remote start to be turned OFF or ON. The remote
start feature allows you to start the engine from
outside of the vehicle using the remote keyless entry
transmitter. See “Remote Vehicle Start” underRemote
Keyless Entry System Operation on page 2-5for
more information.Press the menu button until REMOTE START appears
on the DIC display. Press the set/reset button to
scroll through the following choices:
OFF:The remote start feature will be disabled.
ON (default):The remote start feature will be enabled.
Choose one of the available settings and press the
menu button while it is displayed on the DIC to select it
and move on to the next feature.
REAR PARK CHIME
If your vehicle has the Ultrasonic Rear Parking Assist
(URPA) system, this feature allows the URPA system’s
chime to be turned OFF or ON. SeeUltrasonic Rear
Parking Assist (URPA) on page 3-20for more
information.
Press the option button until REAR PARK CHIME
appears on the DIC display. Press the set/reset button
to scroll through the following choices:
OFF:The URPA system’s chime will be disabled.
ON (default):The URPA system’s chime will be
enabled.
Choose one of the available settings and press the
menu button while it is displayed on the DIC to select
it and move on to the next feature.
3-73
Page 204 of 428
Personalization Menu Items
The following are personalization features that allow you
to program setting for up to two drivers:
PERSONALIZE KEY
If you are using a key that has already been
personalized to be recognized as key 1 or 2, this screen
will not display. This feature allows you to personalize
a key to be recognized as key 1 or 2. A personalized key
allows you to program personalization features to a
preferred setting to correspond to key 1 or 2.
Press the menu button until PERSONALIZE KEY
appears on the DIC display. Press the set/reset button
to scroll through the following choices:
NO (default):The key will not be personalized.
YES:The key will be personalized.
Choose one of the available settings and press the
menu button while it is displayed on the DIC to select it
and move on to the next feature.
REPLACE KEY
This screen displays only if YES was selected for the
PERSONALIZE KEY feature, keys 1 and 2 have already
been personalized, and the current key being used is
not key 1 or 2. This feature allows you to program a key
to be recognized as key 1 or 2 in the event that the
previously programmed key needs to be replaced.
1:The key will be programmed to be recognized
as key 1.
2:The key will be programmed to be recognized
as key 2.
CANCEL (default):The key will not be programmed.
RADIO STATIONS PERSONALIZED
This screen displays only if YES was selected for the
PERSONALIZE KEY feature. This feature allows you to
set the radio station presets to be recognized for the
key, 1 or 2, that is being used. Once this message
displays, set the radio station presets. If the presets are
not set at this time, the presets will not be recognized
for key 1 or 2, however, the vehicle radio station presets
will be maintained.
3-74
Page 205 of 428
AUTO DOOR LOCK
This feature allows automatic door locking to be turned
OFF or ON.
Press the menu button until AUTO DOOR LOCK
appears on the DIC display. Press the set/reset button
to scroll through the following choices:
OFF:All automatic door locking is disabled. The doors
will always need to be locked manually before driving,
to increase occupant safety.
ON (default):The vehicle’s doors automatically lock
when the doors are closed and the vehicle is shifted into
DRIVE (D).
Choose one of the available settings and press the
menu button while it is displayed on the DIC to select it
and move on to the next feature.
AUTO DOOR UNLOCK
This feature displays only if ON was selected for the
AUTO DOOR LOCK feature. This feature allows
automatic door unlocking to be turned off, used for
the driver’s door only, or for all of the doors.Press the menu button until AUTO DOOR UNLOCK
appears on the DIC display. Press the set/reset button
to scroll through the following choices:
OFF:None of the doors will unlock when the vehicle is
shifted into PARK (P) or the key is taken out of the
ignition.
DRIVER:Only the driver’s door will unlock when the
vehicle is shifted into PARK (P) or the key is taken out of
the ignition.
ALL (default):All of the doors will unlock when the
vehicle is shifted into PARK (P) or the key is taken out
of the ignition.
Choose one of the available settings and press the
menu button while it is displayed on the DIC to select it
and move on to the next feature.
AUTO UNLOCK ON
This feature displays only if DRIVER or ALL was
selected for the AUTO DOOR UNLOCK feature. This
feature allows the selection of when the vehicle’s doors
will unlock.
3-75
Page 206 of 428
Press the menu button until AUTO UNLOCK ON
appears on the DIC display. Press the set/reset button
to scroll through the following choices:
KEY-OUT:The door(s) will unlock when the key is
taken out of the ignition.
PARK (default):The door(s) will unlock when the
vehicle is shifted into PARK (P).
Choose one of the available settings and press the
menu button while it is displayed on the DIC to select
it and move on to the next feature.
FOB UNLOCK ON 1ST PRESS
This feature allows the selection of which doors will
unlock on the �rst press of the unlock button on
the remote keyless entry transmitter. SeeRemote
Keyless Entry System Operation on page 2-5for more
information.
Press the menu button until FOB UNLOCK ON 1ST
PRESS appears on the DIC display. Press the set/reset
button to scroll through the following choices:
DRIVER (default):The driver’s door will unlock on the
�rst press of the unlock button on the remote keyless
entry transmitter.ALL:All of the doors will unlock on the �rst press of
the unlock button on the remote keyless entry
transmitter.
Choose one of the available settings and press the
menu button while it is displayed on the DIC to select it.
The DIC will then display PRESS UNLOCK SWITCH
ON KEY FOB. Press the unlock button on the remote
keyless entry transmitter and your setting will be
saved for that remote keyless entry transmitter.
After programming the last option, the message KEY
FOB NOW PERSONALIZED will appear on the
DIC display for a few seconds if you personalized the
key. Next, the message PERSONAL OPTIONS SAVED
will appear brie�y on the DIC display, then the display
will return to the PERSONAL PROGRAM main screen.
Exiting the Personal Program Menu
The personal program menu will be exited when any of
the following occurs:
The vehicle is shifted out of PARK (P).
The vehicle is no longer in RUN.
The end of the personal program menu is reached.
3-76
Page 234 of 428
{(Subtitles):Press this button to display the current
subtitles. Each press of this button will move the
DVD to the next available subtitle option (English,
Spanish, French, etc., if available). The format
and content of this function will vary for each disc.
AUX (Auxiliary):Press this button to switch the system
between the DVD player and an auxiliary source.
|(Camera):Press this button to display the current
camera angle on DVDs that have this feature. Each
press will move the DVD to the next available camera
angle. The format and content of this function will
vary for each disc.
0 through 9 (Numeric Keypad):The numeric keypad
provides the capability of direct chapter or track
number selection.
\(Clear):Press this button within two seconds after
inputting a numeric selection, to clear all numeric
inputs.
}10 (Multiple Digit Entries):Press this button to
select chapter or track numbers greater than 9. Press
this button before inputting the number.
RSE On-Screen Display (OSD) Menu
To use the RSE OSD menu when using a DVD or an
auxiliary device, do the following:
To access this menu, press the display button on the
remote control. Once the menu is on the screen, use the
directional arrows and the enter button to navigate the
screen. This menu will let you select default preferences
for video format, language preference, brightness,
color, contrast, and tint. Not all DVDs support all the
feature defaults in the setup menus. If a feature is not
supported, the defaults will be provided by the DVD
media. To exit this menu, press the display or the return
button on the remote control or wait for the menu to
time out.
To use the RSE OSD menu when using a CD or an
MP3, do the following:
Make sure that a CD or an MP3 is loaded in the RSE
system and that the system is not in auxiliary, then press
the display button on the remote control. Once the
menu is on the screen, use the directional arrows and
the enter button to navigate the screen. This menu
will let you select default preferences for language and
playback settings. To exit this menu, press the
display or the return button on the remote control or
wait for the menu to time out.
3-104
Page 248 of 428
The Blood Alcohol Concentration (BAC) of someone
who is drinking depends upon four things:
The amount of alcohol consumed
The drinker’s body weight
The amount of food that is consumed before and
during drinking
The length of time it has taken the drinker to
consume the alcohol
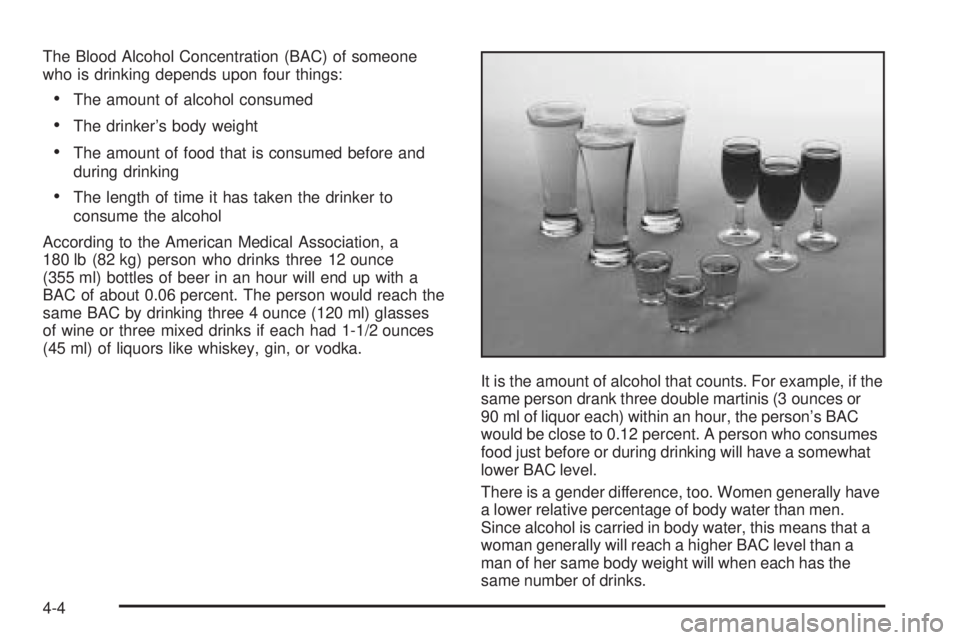
According to the American Medical Association, a
180 lb (82 kg) person who drinks three 12 ounce
(355 ml) bottles of beer in an hour will end up with a
BAC of about 0.06 percent. The person would reach the
same BAC by drinking three 4 ounce (120 ml) glasses
of wine or three mixed drinks if each had 1-1/2 ounces
(45 ml) of liquors like whiskey, gin, or vodka.
It is the amount of alcohol that counts. For example, if the
same person drank three double martinis (3 ounces or
90 ml of liquor each) within an hour, the person’s BAC
would be close to 0.12 percent. A person who consumes
food just before or during drinking will have a somewhat
lower BAC level.
There is a gender difference, too. Women generally have
a lower relative percentage of body water than men.
Since alcohol is carried in body water, this means that a
woman generally will reach a higher BAC level than a
man of her same body weight will when each has the
same number of drinks.
4-4
Page 282 of 428
Here are some important things to consider before you
do recreational vehicle towing:
What’s the towing capacity of the towing vehicle?
Be sure you read the tow vehicle manufacturer’s
recommendations.
How far will you tow? Some vehicles have
restrictions on how far and how long they can tow.
Do you have the proper towing equipment?
See your dealer or trailering professional for
additional advice and equipment recommendations.
Is your vehicle ready to be towed? Just as you
would prepare your vehicle for a long trip, you’ll
want to make sure your vehicle is prepared to be
towed. SeeBefore Leaving on a Long Trip on
page 4-24.
Dinghy Towing
Your vehicle was not designed to be towed with all of its
wheels on the ground. If you have a two-wheel-drive
vehicle, it can be towed with the two rear wheels on the
ground. See “Dolly Towing” following. If you have an
all-wheel-drive vehicle, it cannot be towed with any of its
wheels on the ground. It can be towed with car carrier
equipment.Notice:Towing an all-wheel-drive vehicle with all
four wheels on the ground, or even with only two of
its wheels on the ground, will damage drivetrain
components. Do not tow an all-wheel-drive vehicle if
any of its wheels will be on the ground.
Dolly Towing
If you have a two-wheel-drive vehicle, it can be towed
with its two rear wheels on the ground. To dolly tow your
vehicle, do the following:
1. Put the front wheels on a dolly.
2. Put the vehicle in PARK (P).
3. Set the parking brake and then remove the key.
4. Clamp the steering wheel in a straight-ahead
position with a clamping device designed for towing.
5. Release the parking brake.
If you have an all-wheel-drive vehicle, it cannot be
towed with any of its wheels on the ground. It can be
towed with car carrier equipment.
Notice:Towing an all-wheel-drive vehicle with all
four wheels on the ground, or even with only two of
its wheels on the ground, will damage drivetrain
components. Do not tow an all-wheel-drive vehicle if
any of its wheels will be on the ground.
4-38
Page 308 of 428
If you are in an area of extreme cold, where the
temperature falls below−20°F (−29°C), it is
recommended that you use either an SAE 5W-30
synthetic oil or an SAE 0W-30 oil. Both will provide
easier cold starting and better protection for your engine
at extremely low temperatures.
Engine Oil Additives
Do not add anything to your oil. The recommended oils
with the starburst symbol meet GM Standard GM6094M
are all you will need for good performance and engine
protection.
Engine Oil Life System
When to Change Engine Oil
Your vehicle has a computer system that lets you know
when to change the engine oil and �lter. This is based
on engine revolutions and engine temperature, and not
on mileage. Based on driving conditions, the mileage
at which an oil change will be indicated can vary
considerably. For the oil life system to work properly,
you must reset the system every time the oil is changed.
When the system has calculated that oil life has
been diminished, it will indicate that an oil change is
necessary. A CHANGE OIL SOON message will come
on. SeeDIC Warnings and Messages on page 3-51.Change your oil as soon as possible within the next
600 miles (1 000 km). It is possible that, if you are
driving under the best conditions, the oil life system
may not indicate that an oil change is necessary for
over a year. However, your engine oil and �lter must
be changed at least once a year and at this time
the system must be reset. Your dealer has GM-trained
people who will perform this work using genuine
GM parts and reset the system. It is also important to
check your oil regularly and keep it at the proper level.
If the system is ever reset accidentally, you must
change your oil at 3,000 miles (5 000 km) since your
last oil change. Remember to reset the oil life system
whenever the oil is changed.
How to Reset the Engine Oil Life
System
The Engine Oil Life System calculates when to change
your engine oil and �lter based on vehicle use. Anytime
your oil is changed, reset the system so it can calculate
when the next oil change is required. If a situation occurs
where you change your oil prior to a CHANGE OIL SOON
message being turned on, reset the system.
1. With the ignition key in RUN but the engine off,
repeatedly push the trip/reset button until OIL is
displayed on the Driver Information Center (DIC).
5-16
Page 309 of 428
2. Once OIL is displayed, push and hold the trip/reset
button for �ve seconds. The number will disappear
and be replaced by 100 (indicating 100% oil life
remaining).
3. Turn the key to LOCK.
If the CHANGE OIL SOON message comes back on
when you start your vehicle, the engine oil life system
has not reset. Repeat the procedure.
What to Do with Used Oil
Used engine oil contains certain elements that may be
unhealthy for your skin and could even cause cancer.
Do not let used oil stay on your skin for very long. Clean
your skin and nails with soap and water, or a good
hand cleaner. Wash or properly dispose of clothing or
rags containing used engine oil. See the manufacturer’s
warnings about the use and disposal of oil products.
Used oil can be a threat to the environment. If you
change your own oil, be sure to drain all the oil from the
�lter before disposal. Never dispose of oil by putting it
in the trash, pouring it on the ground, into sewers, or
into streams or bodies of water. Instead, recycle it
by taking it to a place that collects used oil. If you have
a problem properly disposing of your used oil, ask
your dealer, a service station, or a local recycling
center for help.
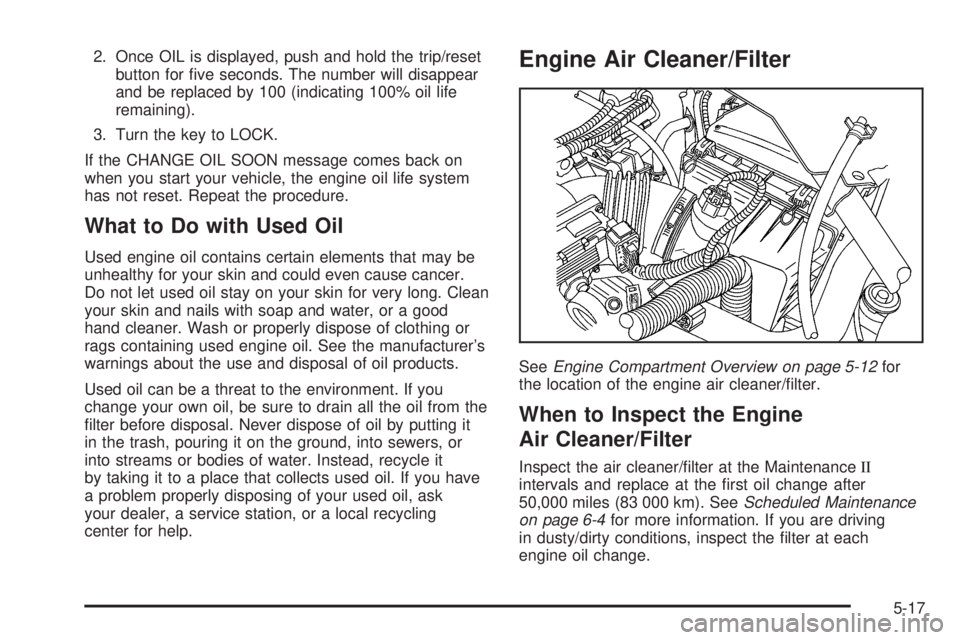
Engine Air Cleaner/Filter
SeeEngine Compartment Overview on page 5-12for
the location of the engine air cleaner/�lter.
When to Inspect the Engine
Air Cleaner/Filter
Inspect the air cleaner/�lter at the MaintenanceII
intervals and replace at the �rst oil change after
50,000 miles (83 000 km). SeeScheduled Maintenance
on page 6-4for more information. If you are driving
in dusty/dirty conditions, inspect the �lter at each
engine oil change.
5-17
Page 324 of 428
Power Steering Fluid
SeeEngine Compartment
Overview on page 5-12for
reservoir location.
When to Check Power Steering Fluid
It is not necessary to regularly check power steering �uid
unless you suspect there is a leak in the system or
you hear an unusual noise. A �uid loss in this system
could indicate a problem. Have the system inspected
and repaired.
How to Check Power Steering Fluid
To check the power steering �uid, do the following:
1. Turn the key off and let the engine compartment
cool down.
2. Wipe the cap and the top of the reservoir clean.3. Unscrew the cap and wipe the dipstick with a
clean rag.
4. Replace the cap and completely tighten it.
5. Remove the cap again and look at the �uid level
on the dipstick.
When the engine compartment is hot, the level should
be at the H (hot) mark. When it is cold, the level
should be at the C (cold) mark. If the �uid is at the
ADD mark, you should add �uid.
What Power Steering Fluid to Use
To determine what kind of �uid to use, see
Recommended Fluids and Lubricants on page 6-11.
Always use the proper �uid. Failure to use the proper
�uid can cause leaks and damage hoses and seals.
Windshield Washer Fluid
What Washer Fluid to Use
When you need windshield washer �uid, be sure to
read the manufacturer’s instructions before use. If you
will be operating your vehicle in an area where the
temperature may fall below freezing, use a �uid that
has sufficient protection against freezing.
5-32