tow CADILLAC ATS 2013 1.G User Guide
[x] Cancel search | Manufacturer: CADILLAC, Model Year: 2013, Model line: ATS, Model: CADILLAC ATS 2013 1.GPages: 450, PDF Size: 6.98 MB
Page 85 of 450
Black plate (31,1)Cadillac ATS Owner Manual - 2013 - CRC - 10/5/12
Seats and Restraints 3-31
lit, and the airbag readiness light
on the instrument cluster will
also be lit.
.Liquid pooled on the seat that
has not soaked in may make it
more likely that the passenger
sensing system will turn on the
passenger frontal airbag and
passenger knee airbag while a
child restraint or child occupant
is on the seat. If the passenger
frontal airbag and passenger
knee airbag are turned on, the
on indicator will be lit.
If the passenger seat gets wet, dry
the seat immediately. If the airbag
readiness light is lit, do not install a
child restraint or allow anyone to
occupy the seat. See Airbag
Readiness Light on page 5‑14 for
important safety information.
The on indicator may be lit if an
object, such as a briefcase,
handbag, grocery bag, laptop,
or other electronic device, is put on an unoccupied seat. If this is not
desired, remove the object from
the seat.{WARNING
Stowing of articles under the
passenger seat or between the
passenger seat cushion and
seatback may interfere with the
proper operation of the passenger
sensing system.
Servicing the
Airbag-Equipped Vehicle
Airbags affect how the vehicle
should be serviced. There are parts
of the airbag system in several
places around the vehicle. Your
dealer and the service manual have
information about servicing the
vehicle and the airbag system. To
purchase a service manual, see
Service Publications Ordering
Information on page 13‑17.
{WARNING
For up to 10 seconds after the
vehicle is turned off and the
battery is disconnected, an airbag
can still inflate during improper
service. You can be injured if you
are close to an airbag when it
inflates. Avoid yellow connectors.
They are probably part of the
airbag system. Be sure to follow
proper service procedures, and
make sure the person performing
work for you is qualified to do so.
Adding Equipment to the
Airbag-Equipped Vehicle
Adding accessories that change the
vehicle's frame, bumper system,
height, front end, or side sheet
metal, may keep the airbag
system from working properly.
Page 98 of 450
Black plate (44,1)Cadillac ATS Owner Manual - 2013 - CRC - 10/5/12
3-44 Seats and Restraints
According to accident statistics,
children and infants are safer when
properly restrained in a child
restraint system or infant restraint
system secured in a rear seating
position. SeeWhere to Put the
Restraint on page 3‑39 for
additional information.
Securing a Child Restraint
Designed for the LATCH
System
{WARNING
If a LATCH-type child restraint is
not attached to anchors, the child
restraint will not be able to protect
the child correctly. In a crash, the
child could be seriously injured or
killed. Install a LATCH-type child
restraint properly using the
anchors, or use the vehicle safety
belts to secure the restraint,
following the instructions that
came with the child restraint and
the instructions in this manual.
{WARNING
Do not attach more than one child
restraint to a single anchor.
Attaching more than one child
restraint to a single anchor could
cause the anchor or attachment
to come loose or even break
during a crash. A child or others
could be injured. To reduce the
risk of serious or fatal injuries
during a crash, attach only one
child restraint per anchor.
{WARNING
Children can be seriously injured
or strangled if a shoulder belt is
wrapped around their neck and
the safety belt continues to
tighten. Buckle any unused safety
belts behind the child restraint so
children cannot reach them. Pull
the shoulder belt all the way out
(Continued)
WARNING (Continued)
of the retractor to set the lock,
if the vehicle has one, after the
child restraint has been installed.
Notice: Do not let the LATCH
attachments rub against the
vehicle’ s safety belts. This may
damage these parts. If necessary,
move buckled safety belts to
avoid rubbing the LATCH
attachments.
Do not fold the empty rear seat
with a safety belt buckled. This
could damage the safety belt or
the seat. Unbuckle and return the
safety belt to its stowed position,
before folding the seat.
If you need to secure more than one
child restraint in the rear seat, see
Where to Put the Restraint on
page 3‑39.
Page 103 of 450
Black plate (49,1)Cadillac ATS Owner Manual - 2013 - CRC - 10/5/12
Seats and Restraints 3-49
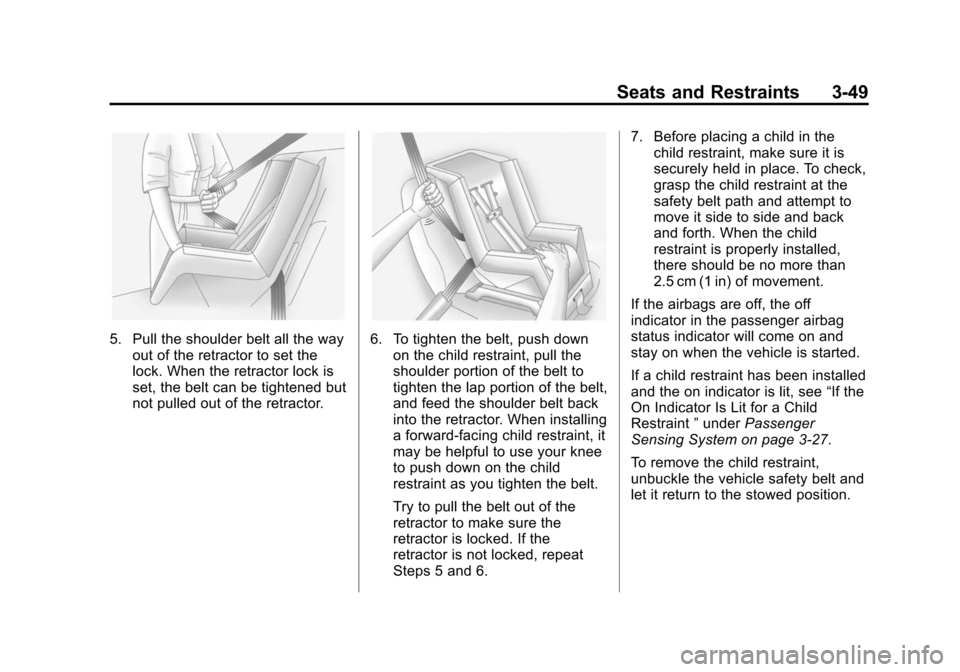
5. Pull the shoulder belt all the wayout of the retractor to set the
lock. When the retractor lock is
set, the belt can be tightened but
not pulled out of the retractor.6. To tighten the belt, push downon the child restraint, pull the
shoulder portion of the belt to
tighten the lap portion of the belt,
and feed the shoulder belt back
into the retractor. When installing
a forward-facing child restraint, it
may be helpful to use your knee
to push down on the child
restraint as you tighten the belt.
Try to pull the belt out of the
retractor to make sure the
retractor is locked. If the
retractor is not locked, repeat
Steps 5 and 6. 7. Before placing a child in the
child restraint, make sure it is
securely held in place. To check,
grasp the child restraint at the
safety belt path and attempt to
move it side to side and back
and forth. When the child
restraint is properly installed,
there should be no more than
2.5 cm (1 in) of movement.
If the airbags are off, the off
indicator in the passenger airbag
status indicator will come on and
stay on when the vehicle is started.
If a child restraint has been installed
and the on indicator is lit, see “If the
On Indicator Is Lit for a Child
Restraint ”under Passenger
Sensing System on page 3‑27.
To remove the child restraint,
unbuckle the vehicle safety belt and
let it return to the stowed position.
Page 105 of 450
Black plate (51,1)Cadillac ATS Owner Manual - 2013 - CRC - 10/5/12
Seats and Restraints 3-51
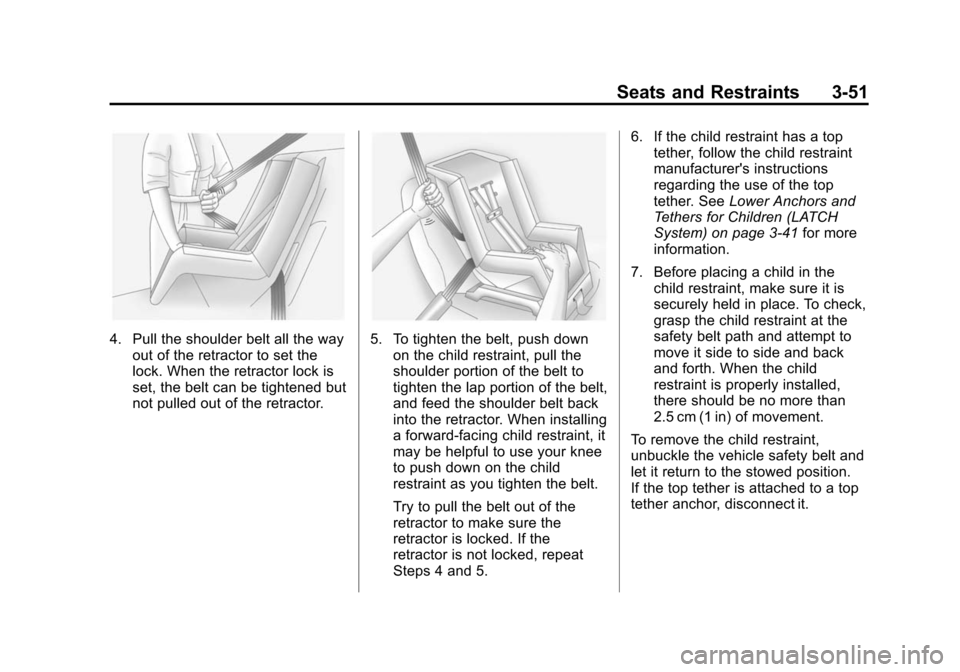
4. Pull the shoulder belt all the wayout of the retractor to set the
lock. When the retractor lock is
set, the belt can be tightened but
not pulled out of the retractor.5. To tighten the belt, push downon the child restraint, pull the
shoulder portion of the belt to
tighten the lap portion of the belt,
and feed the shoulder belt back
into the retractor. When installing
a forward-facing child restraint, it
may be helpful to use your knee
to push down on the child
restraint as you tighten the belt.
Try to pull the belt out of the
retractor to make sure the
retractor is locked. If the
retractor is not locked, repeat
Steps 4 and 5. 6. If the child restraint has a top
tether, follow the child restraint
manufacturer's instructions
regarding the use of the top
tether. See Lower Anchors and
Tethers for Children (LATCH
System) on page 3‑41 for more
information.
7. Before placing a child in the child restraint, make sure it is
securely held in place. To check,
grasp the child restraint at the
safety belt path and attempt to
move it side to side and back
and forth. When the child
restraint is properly installed,
there should be no more than
2.5 cm (1 in) of movement.
To remove the child restraint,
unbuckle the vehicle safety belt and
let it return to the stowed position.
If the top tether is attached to a top
tether anchor, disconnect it.
Page 115 of 450
Black plate (5,1)Cadillac ATS Owner Manual - 2013 - CRC - 10/5/12
Instruments and Controls 5-5
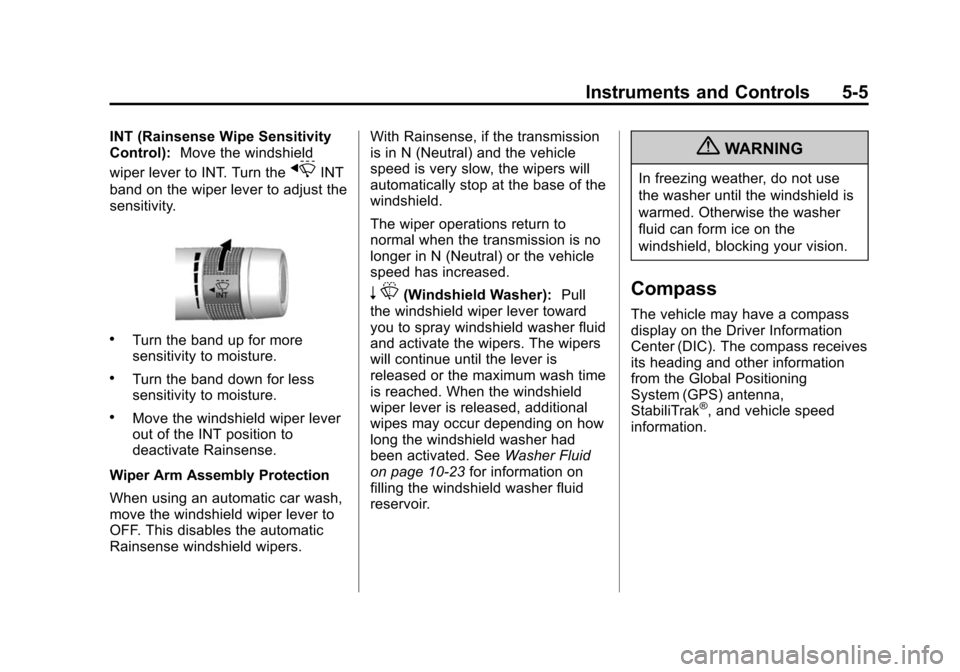
INT (Rainsense Wipe Sensitivity
Control):Move the windshield
wiper lever to INT. Turn the
xINT
band on the wiper lever to adjust the
sensitivity.
.Turn the band up for more
sensitivity to moisture.
.Turn the band down for less
sensitivity to moisture.
.Move the windshield wiper lever
out of the INT position to
deactivate Rainsense.
Wiper Arm Assembly Protection
When using an automatic car wash,
move the windshield wiper lever to
OFF. This disables the automatic
Rainsense windshield wipers. With Rainsense, if the transmission
is in N (Neutral) and the vehicle
speed is very slow, the wipers will
automatically stop at the base of the
windshield.
The wiper operations return to
normal when the transmission is no
longer in N (Neutral) or the vehicle
speed has increased.
n
L(Windshield Washer): Pull
the windshield wiper lever toward
you to spray windshield washer fluid
and activate the wipers. The wipers
will continue until the lever is
released or the maximum wash time
is reached. When the windshield
wiper lever is released, additional
wipes may occur depending on how
long the windshield washer had
been activated. See Washer Fluid
on page 10‑23 for information on
filling the windshield washer fluid
reservoir.
{WARNING
In freezing weather, do not use
the washer until the windshield is
warmed. Otherwise the washer
fluid can form ice on the
windshield, blocking your vision.
Compass
The vehicle may have a compass
display on the Driver Information
Center (DIC). The compass receives
its heading and other information
from the Global Positioning
System (GPS) antenna,
StabiliTrak
®, and vehicle speed
information.
Page 127 of 450
Black plate (17,1)Cadillac ATS Owner Manual - 2013 - CRC - 10/5/12
Instruments and Controls 5-17
.If towing a trailer, reduce the
amount of cargo being hauled as
soon as it is possible.
If the light continues to flash, find a
safe place to stop and park the
vehicle. Turn the vehicle off, wait at
least 10 seconds, and restart the
engine. If the light is still flashing,
follow the previous steps and see
your dealer for service as soon as
possible.
Light On Steady: An emission
control system malfunction has
been detected on the vehicle.
Diagnosis and service might be
required.
The following may correct an
emission control system
malfunction:
.Check that the fuel cap is fully
installed. See Filling the Tank on
page 9‑68. The diagnostic
system can determine if the
fuel cap has been left off or
improperly installed. A loose or
missing fuel cap allows fuel to
evaporate into the atmosphere. A few driving trips with the cap
properly installed should turn the
light off.
.Check that good quality fuel is
used. Poor fuel quality causes
the engine not to run as
efficiently as designed and may
cause stalling after start-up,
stalling when the vehicle is
changed into gear, misfiring,
hesitation on acceleration,
or stumbling on acceleration.
These conditions might go away
once the engine is warmed up.
If one or more of these conditions
occurs, change the fuel brand used.
It may require at least one full tank
of the proper fuel to turn the light off.
See Recommended Fuel on
page 9‑64.
If none of the above have made
the light turn off, your dealer can
check the vehicle. The dealer has
the proper test equipment and diagnostic tools to fix any
mechanical or electrical problems
that might have developed.Emissions Inspection and
Maintenance Programs
Depending on where you live,
your vehicle may be required to
participate in an emission control
system inspection and maintenance
program. For the inspection, the
emission system test equipment will
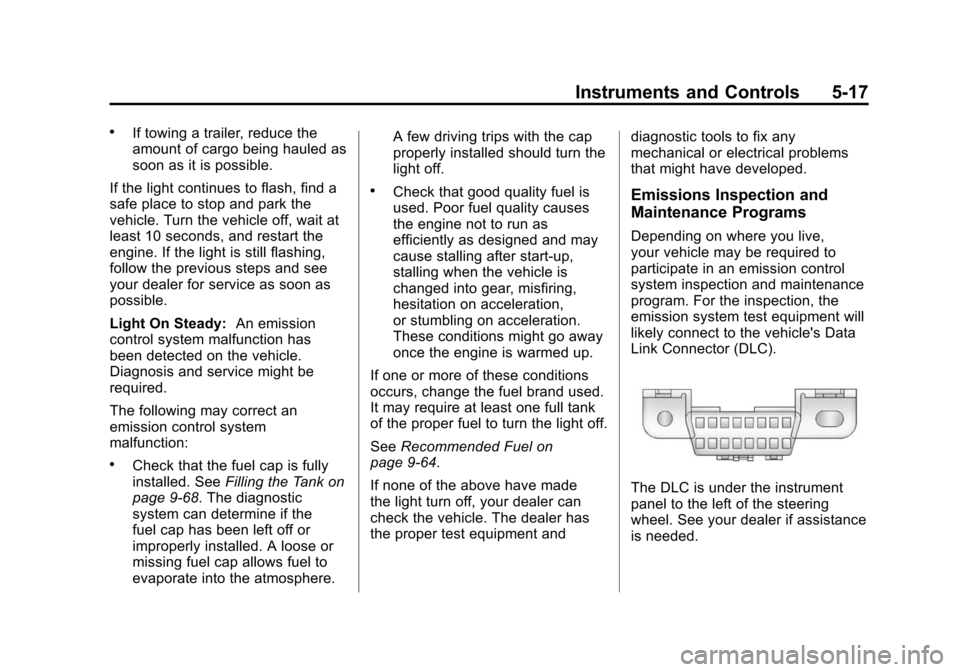
likely connect to the vehicle's Data
Link Connector (DLC).
The DLC is under the instrument
panel to the left of the steering
wheel. See your dealer if assistance
is needed.
Page 128 of 450
Black plate (18,1)Cadillac ATS Owner Manual - 2013 - CRC - 10/5/12
5-18 Instruments and Controls
The vehicle may not pass
inspection if:
.The malfunction indicator lamp is
on with the engine running, or if
the vehicle is placed in Service
Only Mode and the malfunction
indicator lamp does not come
on. See your dealer for
assistance in verifying proper
operation of the malfunction
indicator lamp.
.The OBD II (On-Board
Diagnostics) system determines
that critical emission control
systems have not been
completely diagnosed. The
vehicle would be considered not
ready for inspection. This can
happen if the 12-volt battery has
recently been replaced or run
down. The diagnostic system is
designed to evaluate critical
emission control systems during
normal driving. This can take
several days of routine driving.
If this has been done and the
vehicle still does not pass the
inspection for lack of OBD IIsystem readiness, your dealer
can prepare the vehicle for
inspection.
Brake System Warning
Light
The vehicle brake system consists
of two hydraulic circuits. If one
circuit is not working, the remaining
circuit can still work to stop the
vehicle. For normal braking
performance, both circuits need to
be working.
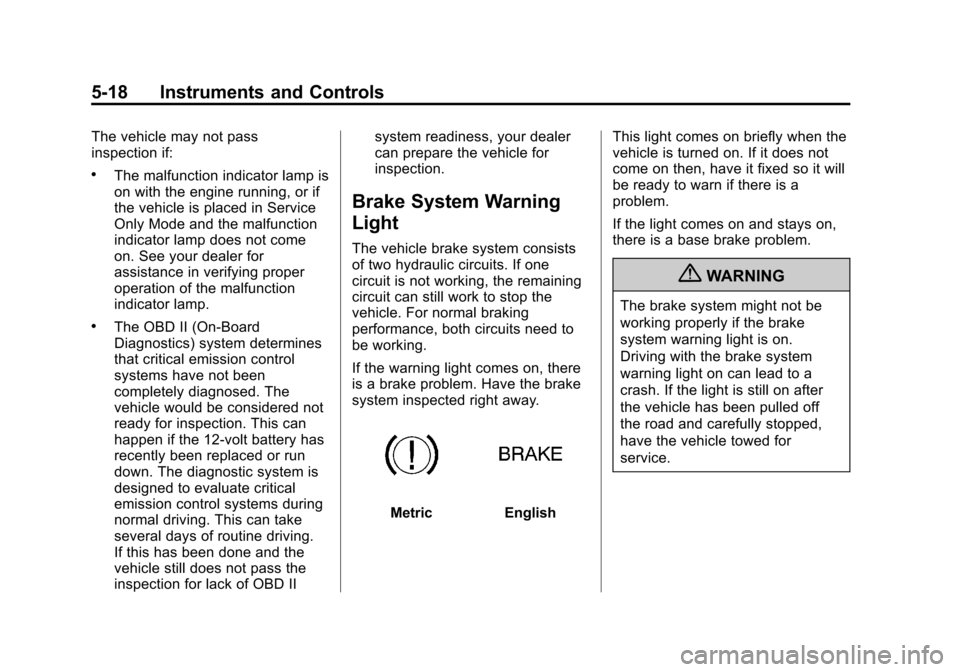
If the warning light comes on, there
is a brake problem. Have the brake
system inspected right away.
MetricEnglish
This light comes on briefly when the
vehicle is turned on. If it does not
come on then, have it fixed so it will
be ready to warn if there is a
problem.
If the light comes on and stays on,
there is a base brake problem.
{WARNING
The brake system might not be
working properly if the brake
system warning light is on.
Driving with the brake system
warning light on can lead to a
crash. If the light is still on after
the vehicle has been pulled off
the road and carefully stopped,
have the vehicle towed for
service.
Page 139 of 450
Black plate (29,1)Cadillac ATS Owner Manual - 2013 - CRC - 10/5/12
Instruments and Controls 5-29
Head-Up Display (HUD)
{WARNING
If the HUD image is too bright or
too high in your field of view, it
may take you more time to see
things you need to see when it is
dark outside. Be sure to keep the
HUD image dim and placed low in
your field of view.
For vehicles with HUD, some
information concerning the
operation of the vehicle is projected
onto the windshield. This includes
the speedometer reading, rpm
reading, transmission position,
compass heading, audio/phone
information, and Turn-by-Turn
Navigation information. The images
are projected through the HUD lens
on the driver side of the instrument
panel. Notice:
If you try to use the HUD
image as a parking aid, you may
misjudge the distance and
damage your vehicle. Do not use
the HUD image as a parking aid.
The HUD information can be
displayed in various languages. The
speedometer reading and other
numerical values can be displayed
in either English or metric units.
The language selection is changed
through the radio and the units of
measurement is changed through
the instrument cluster. See Vehicle
Personalization on page 5‑43 and
“Settings” underInstrument Cluster
on page 5‑9.
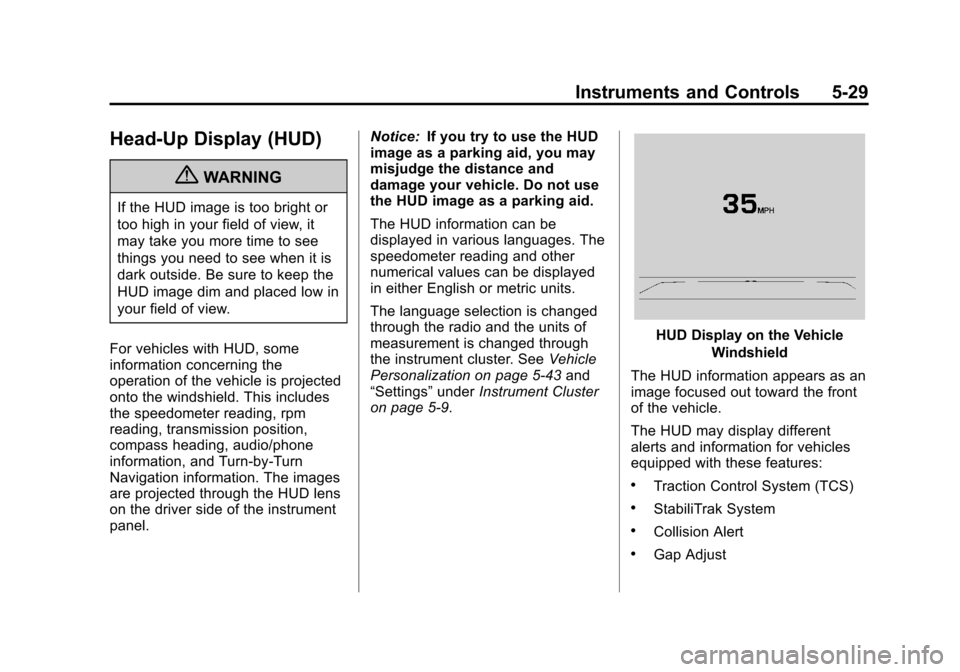
HUD Display on the Vehicle
Windshield
The HUD information appears as an
image focused out toward the front
of the vehicle.
The HUD may display different
alerts and information for vehicles
equipped with these features:
.Traction Control System (TCS)
.StabiliTrak System
.Collision Alert
.Gap Adjust
Page 168 of 450
Black plate (4,1)Cadillac ATS Owner Manual - 2013 - CRC - 10/5/12
6-4 Lighting
Exterior Lamps Off
Reminder
A warning chime will sound if the
exterior lamp control is left on in
either the headlamp or parking lamp
position and the driver door is
opened with the ignition off.
Headlamp High/
Low-Beam Changer
2 3
(Headlamp High/Low-Beam
Changer): Push the turn signal
lever away from you and release, to
turn the high beams on. To return to
low beams, push the lever again or
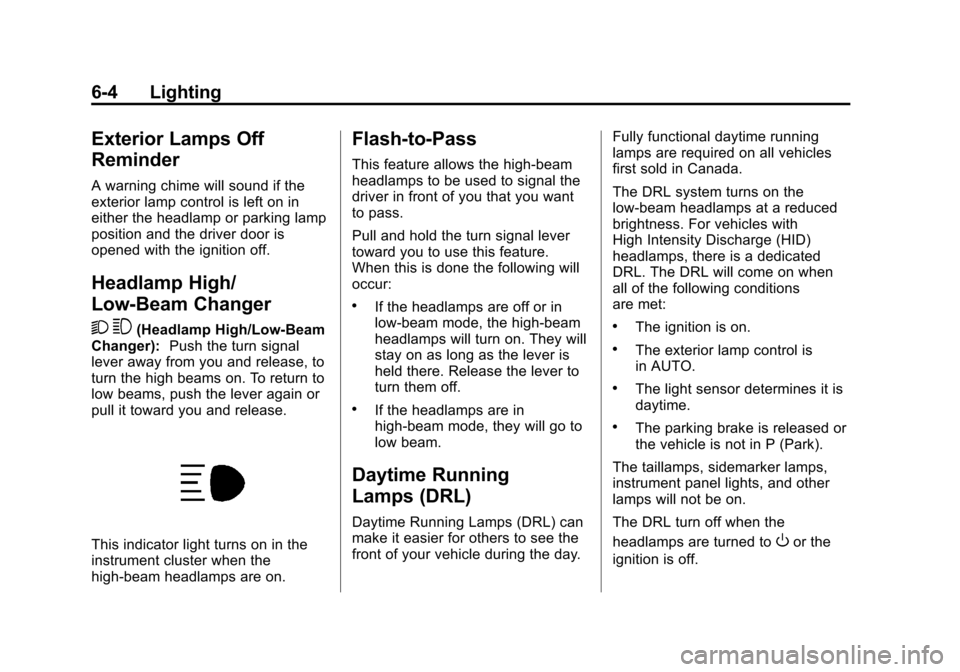
pull it toward you and release.
This indicator light turns on in the
instrument cluster when the
high-beam headlamps are on.
Flash-to-Pass
This feature allows the high-beam
headlamps to be used to signal the
driver in front of you that you want
to pass.
Pull and hold the turn signal lever
toward you to use this feature.
When this is done the following will
occur:
.If the headlamps are off or in
low-beam mode, the high-beam
headlamps will turn on. They will
stay on as long as the lever is
held there. Release the lever to
turn them off.
.If the headlamps are in
high-beam mode, they will go to
low beam.
Daytime Running
Lamps (DRL)
Daytime Running Lamps (DRL) can
make it easier for others to see the
front of your vehicle during the day. Fully functional daytime running
lamps are required on all vehicles
first sold in Canada.
The DRL system turns on the
low-beam headlamps at a reduced
brightness. For vehicles with
High Intensity Discharge (HID)
headlamps, there is a dedicated
DRL. The DRL will come on when
all of the following conditions
are met:
.The ignition is on.
.The exterior lamp control is
in AUTO.
.The light sensor determines it is
daytime.
.The parking brake is released or
the vehicle is not in P (Park).
The taillamps, sidemarker lamps,
instrument panel lights, and other
lamps will not be on.
The DRL turn off when the
headlamps are turned to
Oor the
ignition is off.
Page 220 of 450
Black plate (2,1)Cadillac ATS Owner Manual - 2013 - CRC - 10/5/12
9-2 Driving and Operating
Fuel
Fuel . . . . . . . . . . . . . . . . . . . . . . . . . 9-64
Recommended Fuel . . . . . . . . . 9-64
Gasoline Specifications . . . . . . 9-65
California FuelRequirements . . . . . . . . . . . . . . 9-65
Fuels in Foreign Countries . . . 9-65
Fuel Additives . . . . . . . . . . . . . . . 9-65
Fuel E85 (85% Ethanol) . . . . . 9-66
Filling the Tank . . . . . . . . . . . . . . 9-68
Filling a Portable Fuel Container . . . . . . . . . . . . . . . . . . . 9-69
Towing
General TowingInformation . . . . . . . . . . . . . . . . . 9-70
Driving Characteristics and Towing Tips . . . . . . . . . . . . . . . . 9-70
Trailer Towing (With V6 Engine) . . . . . . . . . . . . . . . . . 9-73
Trailer Towing (With L4 Engine) . . . . . . . . . . . . . . . . . . . . . 9-74
Towing Equipment . . . . . . . . . . . 9-74
Conversions and Add-Ons
Add-On Electrical Equipment . . . . . . . . . . . . . . . . . 9-75
Driving Information
Distracted Driving
Distraction comes in many forms
and can take your focus from the
task of driving. Exercise good
judgment and do not let other
activities divert your attention
away from the road. Many local
governments have enacted laws
regarding driver distraction. Become
familiar with the local laws in
your area.
To avoid distracted driving, always
keep your eyes on the road, hands
on the wheel, and mind on the drive.
.Do not use a phone in
demanding driving situations.
Use a hands-free method to
place or receive necessary
phone calls.
.Watch the road. Do not read,
take notes, or look up
information on phones or other
electronic devices.
.Designate a front seat
passenger to handle potential
distractions.
.Become familiar with vehicle
features before driving, such as
programming favorite radio
stations and adjusting climate
control and seat settings.
Program all trip information into
any navigation device prior to
driving.
.Wait until the vehicle is parked
to retrieve items that have fallen
to the floor.
.Stop or park the vehicle to tend
to children.
.Keep pets in an appropriate
carrier or restraint.
.Avoid stressful conversations
while driving, whether with a
passenger or on a cell phone.