brake light CADILLAC ATS COUPE 2017 1.G Owner's Manual
[x] Cancel search | Manufacturer: CADILLAC, Model Year: 2017, Model line: ATS COUPE, Model: CADILLAC ATS COUPE 2017 1.GPages: 335, PDF Size: 3.73 MB
Page 207 of 335
Cadillac ATS/ATS-V Owner Manual (GMNA-Localizing-MidEast-10287885) -
2017 - crc - 6/16/16
206 DRIVING AND OPERATING
.To increase vehicle speed in small
increments, briefly press +RES up
to the first detent. For each press,
the vehicle goes about 1 km/h
(1 mph) faster.
. To increase vehicle speed in larger
increments, briefly press +RES up
to the second detent. For each
press, the vehicle speed increases
to the next 5 km/h (5 mph) mark
on the speedometer.
The speedometer reading can be
displayed in either English or metric
units. See Instrument Cluster 0107.
The increment value used depends on
the units displayed.
Reducing Speed While Cruise
Control is at a Set Speed
If the cruise control system is already
activated:
. Press and hold SET− down until
the desired lower speed is reached,
then release it.
. To decrease the vehicle speed in
small increments, briefly press
SET− down to the first detent. For
each press, the vehicle goes about
1 km/h (1 mph) slower. .
To decrease the vehicle speed in
larger increments, briefly press
SET− down to the second detent.
For each press, the vehicle speed
decreases to the next 5 km/h
(5 mph) mark on the speedometer.
The cruise control system may
automatically brake to slow the
vehicle down (ATS model only).
The speedometer reading can be
displayed in either English or metric
units. See Instrument Cluster 0107.
The increment value used depends on
the units displayed.
Passing Another Vehicle While
Using Cruise Control
Use the accelerator pedal to increase
the vehicle speed. When you take your
foot off the pedal, the vehicle will slow
down to the previously set cruise
speed. While pressing the accelerator
pedal or shortly following the release
to override cruise control, briefly
applying the SET– switch will result in
cruise control set to the current
vehicle speed. Using Cruise Control on Hills
How well the cruise control will work
on hills depends upon the vehicle
speed, load, and the steepness of the
hills. When going up steep hills, you
might have to step on the accelerator
pedal to maintain the vehicle speed.
When going downhill, the cruise
control system may automatically
brake to slow the vehicle down (ATS
model only). Also, you may have to
brake or shift to a lower gear to keep
the vehicle speed down. If the brake
pedal is applied, cruise control will
disengage.
Ending Cruise Control
There are four ways to end cruise
control:
.
Step lightly on the brake pedal.
. Shift the transmission to
N (Neutral).
. Press
*.
. Press
J.
Page 212 of 335
Cadillac ATS/ATS-V Owner Manual (GMNA-Localizing-MidEast-10287885) -
2017 - crc - 6/16/16
DRIVING AND OPERATING 211
Warning (Continued)
when a vehicle suddenly appears
due to a vehicle ahead changing
lanes. Your vehicle may not stop
and could cause a crash. Use
caution when using ACC. Your
complete attention is always
required while driving and you
should be ready to take action and
apply the brakes.
ACC Automatically Disengages
ACC may automatically disengage and
the driver will need to manually apply
the brakes to slow the vehicle when:
. The sensors are blocked.
. The Traction Control System (TCS)
or electronic stability control
system has activated or been
disabled.
. No traffic or other objects are
being detected.
. There is a fault in the system. The ACC active symbol will not be
displayed when ACC is no longer
active.
Notification to Resume ACC
ACC will maintain a follow gap behind
a detected vehicle and slow your
vehicle to a stop behind that vehicle.
If the stopped vehicle ahead has
driven away and ACC has not
resumed, the vehicle ahead indicator
will flash as a reminder to check
traffic before proceeding. In addition,
the left and right sides of the Safety
Alert Seat will pulse three times,
or three beeps will sound. See
”Alert
Type ”and “Go Notifier” in“Collision/
Detection Systems” underVehicle
Personalization 0137.
When the vehicle ahead drives away,
press +RES or the accelerator pedal to
resume ACC. If stopped for more than
two minutes or if the driver door is
opened and the driver safety belt is
unbuckled, the ACC automatically
applies the electric parking brake to hold the vehicle. The electric parking
brake status light will turn on. See
Parking Brake (Manual)
0195 or
Parking Brake (Electric) 0196. To
release the electric parking brake,
press the accelerator pedal.
A DIC warning message may display
indicating to shift to P (Park) before
exiting the vehicle. See Vehicle
Messages 0127.
{Warning
If ACC has stopped the vehicle, and
if ACC is disengaged, turned off,
or canceled, the vehicle will no
longer be held at a stop. The vehicle
can move. When ACC is holding the
vehicle at a stop, always be
prepared to manually apply the
brakes.
Page 214 of 335
Cadillac ATS/ATS-V Owner Manual (GMNA-Localizing-MidEast-10287885) -
2017 - crc - 6/16/16
DRIVING AND OPERATING 213
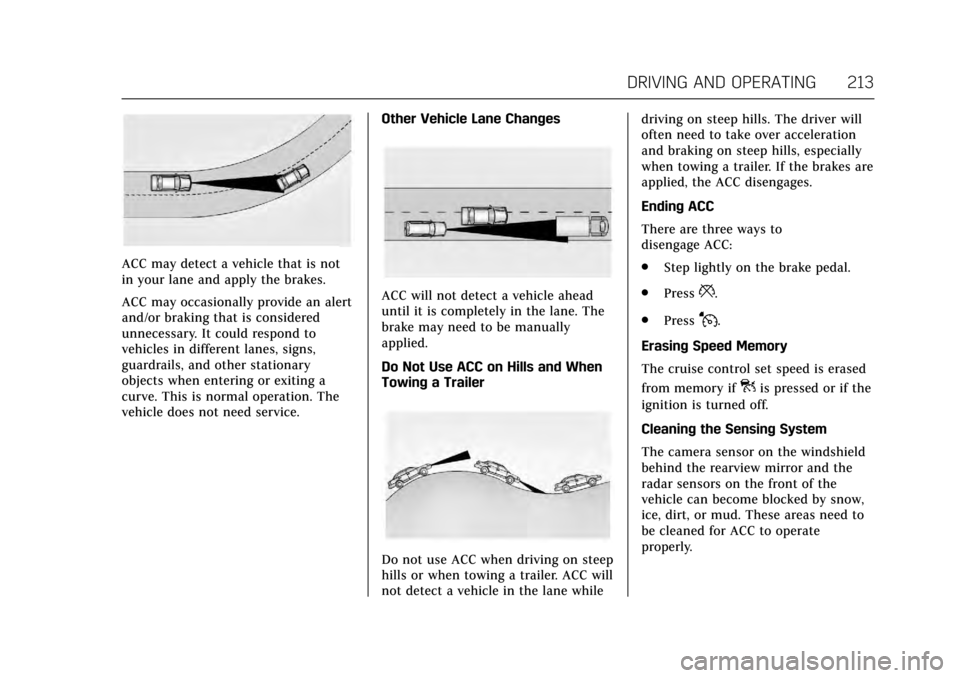
ACC may detect a vehicle that is not
in your lane and apply the brakes.
ACC may occasionally provide an alert
and/or braking that is considered
unnecessary. It could respond to
vehicles in different lanes, signs,
guardrails, and other stationary
objects when entering or exiting a
curve. This is normal operation. The
vehicle does not need service.Other Vehicle Lane Changes
ACC will not detect a vehicle ahead
until it is completely in the lane. The
brake may need to be manually
applied.
Do Not Use ACC on Hills and When
Towing a Trailer
Do not use ACC when driving on steep
hills or when towing a trailer. ACC will
not detect a vehicle in the lane whiledriving on steep hills. The driver will
often need to take over acceleration
and braking on steep hills, especially
when towing a trailer. If the brakes are
applied, the ACC disengages.
Ending ACC
There are three ways to
disengage ACC:
.
Step lightly on the brake pedal.
. Press
*.
. Press
J.
Erasing Speed Memory
The cruise control set speed is erased
from memory if
]is pressed or if the
ignition is turned off.
Cleaning the Sensing System
The camera sensor on the windshield
behind the rearview mirror and the
radar sensors on the front of the
vehicle can become blocked by snow,
ice, dirt, or mud. These areas need to
be cleaned for ACC to operate
properly.
Page 219 of 335
Cadillac ATS/ATS-V Owner Manual (GMNA-Localizing-MidEast-10287885) -
2017 - crc - 6/16/16
218 DRIVING AND OPERATING
press the accelerator pedal firmly at
any time to override the Reverse
Automatic Braking.
{Warning
There may be instances where
unexpected or undesired automatic
braking occurs. If this happens,
either press the brake pedal or
firmly press the accelerator pedal to
release the brakes from the RAB
system. Before releasing the brakes,
check the RVC screen and check the
area around the vehicle to make
sure it is safe to proceed.
Rear Cross Traffic Alert (RCTA)
If equipped, RCTA displays a red
warning triangle with a left or right
pointing arrow on the RVC screen to
warn of traffic coming from the left or
right. This system detects objects
coming from up to 20 m (65 ft) from
the left or right side of the vehicle.
When an object is detected, either
three beeps sound from the left or
right or three Safety Alert Seat pulses occur on the left or right side,
depending on the direction of the
detected vehicle.
Use caution while backing up when
towing a trailer, as the RCTA
detection zones that extend out from
the back of the vehicle do not move
further back when a trailer is towed.
Turning the Features On or Off
TheXbutton to the left of the
steering wheel is used to turn on or
off the Front and Rear Parking Assist,
Rear Cross Traffic Alert (RCTA),
Reverse Automatic Braking, and
Backing Warning System at the same
time. The indicator light next to the
button comes on when the features
are on and turns off when the features
have been disabled.
Turn off parking assist and Reverse
Automatic Braking when towing a
trailer.
To turn the RPA symbols and rear
guidance lines on or off, see “Rear
Camera ”under Vehicle
Personalization 0137. RCTA can be turned on or off through
vehicle personalization. See
“Collision/
Detection Systems” underVehicle
Personalization 0137.
Assistance Systems for
Driving
If equipped, when driving the vehicle
in a forward gear, Forward Collision
Alert (FCA), Lane Departure Warning
(LDW), Lane Keep Assist (LKA), Side
Blind Zone Alert (SBZA), Lane Change
Alert (LCA), and/or Forward
Automatic Braking (FAB) can help to
avoid a crash or reduce crash damage.
Forward Collision Alert
(FCA) System
If equipped, the FCA system may help
to avoid or reduce the harm caused by
front-end crashes. When approaching
a vehicle ahead too quickly, FCA
provides a flashing red alert on the
windshield and rapidly beeps or pulses
the Safety Alert Seat. FCA also lights
an amber visual alert if following
another vehicle much too closely.
Page 223 of 335
Cadillac ATS/ATS-V Owner Manual (GMNA-Localizing-MidEast-10287885) -
2017 - crc - 6/16/16
222 DRIVING AND OPERATING
Minor brake pedal pulsations or pedal
movement during this time is normal
and the brake pedal should continue
to be applied as needed. IBA will
automatically disengage only when
the brake pedal is released.
{Warning
IBA may increase vehicle braking in
situations when it may not be
necessary. You could block the flow
of traffic. If this occurs, take your
foot off the brake pedal and then
apply the brakes as needed.
FAB and IBA can be disabled through
vehicle personalization. See “Collision/
Detection Systems” underVehicle
Personalization 0137.
{Warning
Using FAB or IBA while towing a
trailer could cause you to lose
control of the vehicle and crash.
Turn the system to Off when
towing a trailer.
Side Blind Zone
Alert (SBZA)
If equipped, the SBZA system is a
lane-changing aid that assists drivers
with avoiding crashes that occur with
moving vehicles in the side blind zone
(or spot) areas. When the vehicle is in
a forward gear, the left or right side
mirror display will light up if a moving
vehicle is detected in that blind zone.
If the turn signal is activated and a
vehicle is also detected on the same
side, the display will flash as an extra
warning not to change lanes. Since
this system is part of the Lane Change
Alert (LCA) system, read the entire
LCA section before using this feature.
Lane Change Alert (LCA)
If equipped, the LCA system is a
lane-changing aid that assists drivers
with avoiding lane change crashes
that occur with moving vehicles in the
side blind zone (or spot) areas or with
vehicles rapidly approaching these
areas from behind. The LCA warning
display will light up in the
corresponding outside side mirror and
will flash if the turn signal is on.
{Warning
LCA does not alert the driver to
vehicles outside of the system
detection zones, pedestrians,
bicyclists, or animals. It may not
provide alerts when changing lanes
under all driving conditions. Failure
to use proper care when changing
lanes may result in injury, death,
or vehicle damage. Before making a
lane change, always check mirrors,
glance over your shoulder, and use
the turn signals.
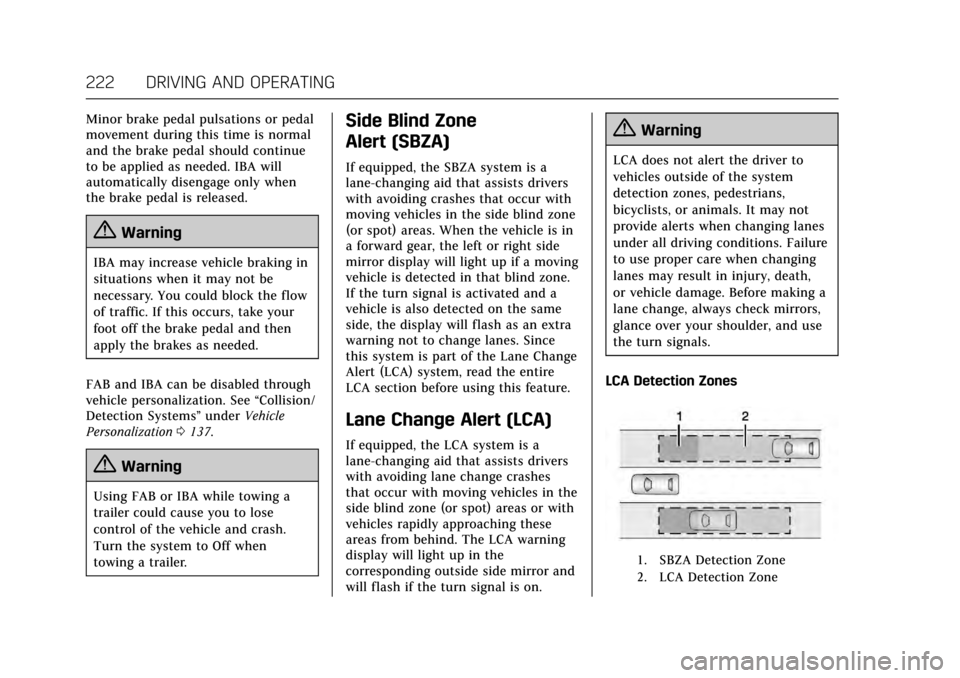
LCA Detection Zones
1. SBZA Detection Zone
2. LCA Detection Zone
Page 232 of 335
Cadillac ATS/ATS-V Owner Manual (GMNA-Localizing-MidEast-10287885) -
2017 - crc - 6/16/16
VEHICLE CARE 231
Vehicle Care
General Information
General Information . . . . . . . . . . . . . 232
Accessories andModifications . . . . . . . . . . . . . . . . . . . 232
Vehicle Checks
Doing Your OwnService Work . . . . . . . . . . . . . . . . . . . . 233
Hood . . . . . . . . . . . . . . . . . . . . . . . . . . . . . . 233
Engine Compartment Overview . . . . . . . . . . . . . . . . . . . . . . . . . 234
Engine Oil . . . . . . . . . . . . . . . . . . . . . . . . . 241
Engine Oil Life System . . . . . . . . . . . 243
Automatic Transmission Fluid . . . . . . . . . . . . . . . . . . . . . . . . . . . . . 244
Engine Air Cleaner/Filter . . . . . . . . . 245
Cooling System (Engine) . . . . . . . . . 246
Cooling System (Intercooler) . . . . 248
Engine Coolant . . . . . . . . . . . . . . . . . . . 248
Engine Overheating . . . . . . . . . . . . . . 251
Washer Fluid . . . . . . . . . . . . . . . . . . . . . 253
Brakes . . . . . . . . . . . . . . . . . . . . . . . . . . . . . 253
Brake Fluid . . . . . . . . . . . . . . . . . . . . . . . 254
Battery . . . . . . . . . . . . . . . . . . . . . . . . . . . . 255
Starter Switch Check . . . . . . . . . . . . . 256
Automatic Transmission Shift Lock Control Function
Check . . . . . . . . . . . . . . . . . . . . . . . . . . . . 257 Park Brake and P (Park)
Mechanism Check . . . . . . . . . . . . . . 257
Wiper Blade Replacement . . . . . . . 257
Windshield Replacement . . . . . . . . 258
Headlamp Aiming
Headlamp Aiming . . . . . . . . . . . . . . . . 258
Bulb Replacement
Bulb Replacement . . . . . . . . . . . . . . . . 259
Halogen Bulbs . . . . . . . . . . . . . . . . . . . . 259
High Intensity Discharge (HID) Lighting . . . . . . . . . . . . . . . . . . . . . . . . . 259
LED Lighting . . . . . . . . . . . . . . . . . . . . . 259
Back-Up Lamps . . . . . . . . . . . . . . . . . . . 259
License Plate Lamp . . . . . . . . . . . . . . 260
Replacement Bulbs . . . . . . . . . . . . . . . 261
Electrical System
Electrical System Overload . . . . . . 261
Fuses and Circuit Breakers . . . . . . 261
Engine Compartment Fuse Block . . . . . . . . . . . . . . . . . . . . . . . . . . . . 262
Instrument Panel Fuse Block . . . . 265
Rear Compartment Fuse Block . . . . . . . . . . . . . . . . . . . . . . . . . . . . 267
Wheels and Tires
Tires . . . . . . . . . . . . . . . . . . . . . . . . . . . . . . . 270
All-Season Tires . . . . . . . . . . . . . . . . . . 271
Winter Tires . . . . . . . . . . . . . . . . . . . . . . 271
Run-Flat Tires . . . . . . . . . . . . . . . . . . . . 271 Summer Tires . . . . . . . . . . . . . . . . . . . . 272
Tire Pressure . . . . . . . . . . . . . . . . . . . . . . 273
Tire Pressure for High-Speed
Operation . . . . . . . . . . . . . . . . . . . . . . . . 274
Tire Pressure Monitor System . . . 274
Tire Pressure Monitor
Operation . . . . . . . . . . . . . . . . . . . . . . . . 275
Tire Inspection . . . . . . . . . . . . . . . . . . . 278
Tire Rotation . . . . . . . . . . . . . . . . . . . . . 278
When It Is Time for New Tires . . . . . . . . . . . . . . . . . . . . . . . . . . . . . 280
Buying New Tires . . . . . . . . . . . . . . . . 280
Different Size Tires and Wheels . . . . . . . . . . . . . . . . . . . . . . . . . . 282
Wheel Alignment and Tire Balance . . . . . . . . . . . . . . . . . . . . . . . . . . 282
Wheel Replacement . . . . . . . . . . . . . . 282
Tire Chains . . . . . . . . . . . . . . . . . . . . . . . 284
If a Tire Goes Flat . . . . . . . . . . . . . . . . 284
Tire Sealant and Compressor Kit . . . . . . . . . . . . . . . . . 286
Storing the Tire Sealant and Compressor Kit . . . . . . . . . . . . . . . . . 292
Jump Starting
Jump Starting . . . . . . . . . . . . . . . . . . . . . 292
Towing the Vehicle
Towing the Vehicle . . . . . . . . . . . . . . . 295
Recreational Vehicle Towing . . . . 296
Page 255 of 335
Cadillac ATS/ATS-V Owner Manual (GMNA-Localizing-MidEast-10287885) -
2017 - crc - 6/16/16
254 VEHICLE CARE
Caution
Continuing to drive with worn-out
brake pads could result in costly
brake repair.
Some driving conditions or climates
can cause a brake squeal when the
brakes are first applied or lightly
applied. This does not mean
something is wrong with the brakes.
If equipped with high performance
brake linings, there could be an
increased build-up of brake dust as
well as minor noises as compared to
standard brake linings.
Properly torqued wheel nuts are
necessary to help prevent brake
pulsation. When tires are rotated,
inspect brake pads for wear and
evenly tighten wheel nuts in the
proper sequence to torque
specifications. See Capacities and
Specifications 0319.
Brake pads should be replaced as
complete sets.
Brake Pedal Travel
See your dealer if the brake pedal does
not return to normal height, or if
there is a rapid increase in pedal
travel. This could be a sign that brake
service may be required.
Replacing Brake System Parts
Always replace brake system parts
with new, approved replacement parts.
If this is not done, the brakes may not
work properly. The braking
performance expected can change in
many other ways if the wrong
replacement brake parts are installed
or parts are improperly installed.
Brake Fluid
The brake master cylinder reservoir is
filled with GM approved DOT 3 brake
fluid as indicated on the reservoir cap.
See Engine Compartment Overview
0 234 for the location of the reservoir.
Checking Brake Fluid
With the vehicle in P (Park) on a level
surface, the brake fluid level should be
between the minimum and maximum
marks on the brake fluid reservoir.
There are only two reasons why the
brake fluid level in the reservoir may
go down:
. Normal brake lining wear. When
new linings are installed, the fluid
level goes back up.
. A fluid leak in the brake hydraulic
system. Have the brake hydraulic
system fixed. With a leak, the
brakes will not work well.
Always clean the brake fluid reservoir
cap and the area around the cap
before removing it.
Do not top off the brake fluid. Adding
fluid does not correct a leak. If fluid is
added when the linings are worn,
there will be too much fluid when
Page 256 of 335
Cadillac ATS/ATS-V Owner Manual (GMNA-Localizing-MidEast-10287885) -
2017 - crc - 6/16/16
VEHICLE CARE 255
new brake linings are installed. Add or
remove fluid, as necessary, only when
work is done on the brake hydraulic
system.
{Warning
If too much brake fluid is added, it
can spill on the engine and burn,
if the engine is hot enough. You or
others could be burned, and the
vehicle could be damaged. Add
brake fluid only when work is done
on the brake hydraulic system.
When the brake fluid falls to a low
level, the brake warning light comes
on. See Brake System Warning
Light 0116.
Brake fluid absorbs water over time
which degrades the effectiveness of
the brake fluid. Replace brake fluid at
the specified intervals to prevent
increased stopping distance. See
Maintenance Schedule 0307. What to Add
Use only GM approved DOT 3 brake
fluid from a clean, sealed container.
See
Recommended Fluids and
Lubricants 0314.{Warning
The wrong or contaminated brake
fluid could result in damage to the
brake system. This could result in
the loss of braking leading to a
possible injury. Always use the
proper GM approved brake fluid.
Caution
If brake fluid is spilled on the
vehicle's painted surfaces, the paint
finish can be damaged. Immediately
wash off any painted surface.
Battery
The original equipment battery is
maintenance free. Do not remove the
cap and do not add fluid. The battery is in the trunk, behind the
trim panel, on the driver side of the
vehicle. Refer to the replacement
number shown on the original battery
label when a new battery is needed.
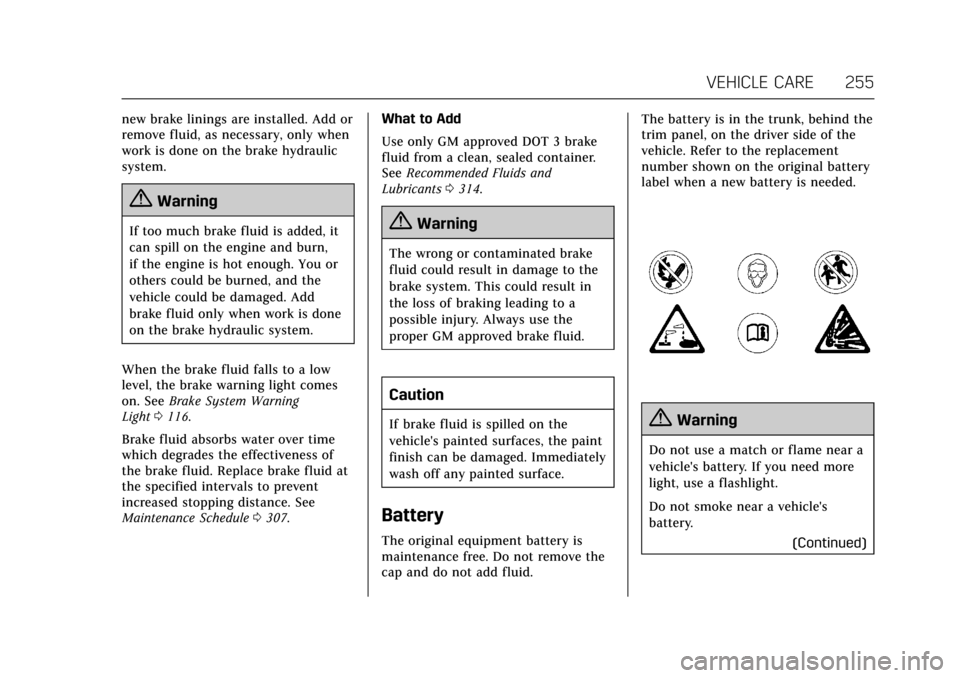
{Warning
Do not use a match or flame near a
vehicle's battery. If you need more
light, use a flashlight.
Do not smoke near a vehicle's
battery.
(Continued)
Page 278 of 335
Cadillac ATS/ATS-V Owner Manual (GMNA-Localizing-MidEast-10287885) -
2017 - crc - 6/16/16
VEHICLE CARE 277
performed successfully. See“TPMS
Sensor Matching Process ”later in
this section.
. The TPMS sensor matching
process was not done or not
completed successfully after
rotating the tires. The malfunction
light and the DIC message should
go off after successfully
completing the sensor matching
process. See "TPMS Sensor
Matching Process" later in this
section.
. One or more TPMS sensors are
missing or damaged. The
malfunction light and the DIC
message should go off when the
TPMS sensors are installed and
the sensor matching process is
performed successfully. See your
dealer for service.
. Replacement tires or wheels do
not match the original equipment
tires or wheels. Tires and wheels
other than those recommended
could prevent the TPMS from
functioning properly. See Buying
New Tires 0280. .
Operating electronic devices or
being near facilities using radio
wave frequencies similar to the
TPMS could cause the TPMS
sensors to malfunction.
If the TPMS is not functioning
properly it cannot detect or signal a
low tire condition. See your dealer for
service if the TPMS malfunction light
and DIC message comes on and
stays on.
TPMS Sensor Matching Process
Each TPMS sensor has a unique
identification code. The identification
code needs to be matched to a new
tire/wheel position after rotating the
vehicle’s tires or replacing one or more
of the TPMS sensors. The TPMS
sensor matching process should also
be performed after replacing a spare
tire with a road tire containing the
TPMS sensor. The malfunction light
and the DIC message should go off at
the next ignition cycle. The sensors
are matched to the tire/wheel
positions, using a TPMS relearn tool,
in the following order: driver side
front tire, passenger side front tire, passenger side rear tire, and driver
side rear. See your dealer for service or
to purchase a relearn tool.
There are two minutes to match the
first tire/wheel position, and
five minutes overall to match all four
tire/wheel positions. If it takes longer,
the matching process stops and must
be restarted.
The TPMS sensor matching process is:
1. Set the parking brake.
2. Place the vehicle power mode in ON/RUN/START. See Ignition
Positions 0185.
3. Make sure the Tire Pressure info display option is turned on. The
info displays on the DIC can be
turned on and off through the
Settings menu. See Driver
Information Center (DIC) 0122.
4. Use the five-way DIC control on the right side of the steering
wheel to scroll to the Tire
Pressure screen under the DIC
info page. See Driver Information
Center (DIC) 0122.
Page 281 of 335
Cadillac ATS/ATS-V Owner Manual (GMNA-Localizing-MidEast-10287885) -
2017 - crc - 6/16/16
280 VEHICLE CARE
on the flat wheel mounting
surface or on the wheel nuts or
bolts.
When It Is Time for New
Tires
Factors such as maintenance,
temperatures, driving speeds, vehicle
loading, and road conditions affect the
wear rate of the tires.
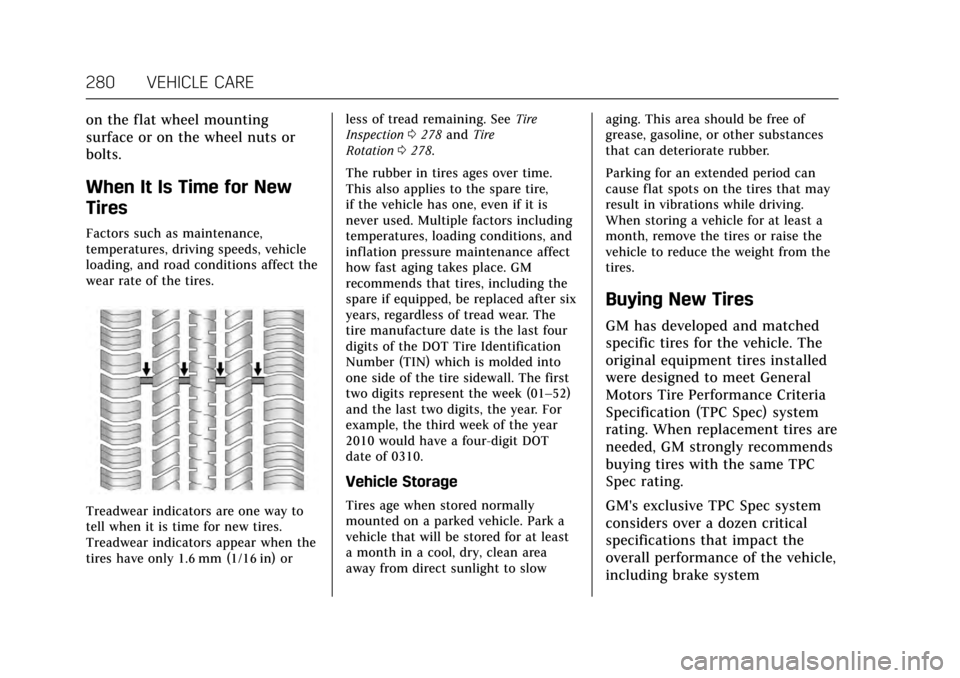
Treadwear indicators are one way to
tell when it is time for new tires.
Treadwear indicators appear when the
tires have only 1.6 mm (1/16 in) orless of tread remaining. See
Tire
Inspection 0278 and Tire
Rotation 0278.
The rubber in tires ages over time.
This also applies to the spare tire,
if the vehicle has one, even if it is
never used. Multiple factors including
temperatures, loading conditions, and
inflation pressure maintenance affect
how fast aging takes place. GM
recommends that tires, including the
spare if equipped, be replaced after six
years, regardless of tread wear. The
tire manufacture date is the last four
digits of the DOT Tire Identification
Number (TIN) which is molded into
one side of the tire sidewall. The first
two digits represent the week (01–52)
and the last two digits, the year. For
example, the third week of the year
2010 would have a four-digit DOT
date of 0310.
Vehicle Storage
Tires age when stored normally
mounted on a parked vehicle. Park a
vehicle that will be stored for at least
a month in a cool, dry, clean area
away from direct sunlight to slow aging. This area should be free of
grease, gasoline, or other substances
that can deteriorate rubber.
Parking for an extended period can
cause flat spots on the tires that may
result in vibrations while driving.
When storing a vehicle for at least a
month, remove the tires or raise the
vehicle to reduce the weight from the
tires.
Buying New Tires
GM has developed and matched
specific tires for the vehicle. The
original equipment tires installed
were designed to meet General
Motors Tire Performance Criteria
Specification (TPC Spec) system
rating. When replacement tires are
needed, GM strongly recommends
buying tires with the same TPC
Spec rating.
GM's exclusive TPC Spec system
considers over a dozen critical
specifications that impact the
overall performance of the vehicle,
including brake system