radio controls CADILLAC CT5 2020 Owner's Manual
[x] Cancel search | Manufacturer: CADILLAC, Model Year: 2020, Model line: CT5, Model: CADILLAC CT5 2020Pages: 359, PDF Size: 6.04 MB
Page 99 of 359
Cadillac CT5 Owner Manual (GMNA-Localizing-U.S./Canada-13060105) -
2020 - CRC - 2/14/20
98 INSTRUMENTS AND CONTROLS
Caution
Hanging heavy equipment from the
power outlet can cause damage not
covered by the vehicle warranty.
The power outlets are designed for
accessory power plugs only, such as
cell phone charge cords.
Always unplug electrical equipment
when not in use and do not plug in
equipment that exceeds the maximum
15 amps rating.
Wireless Charging
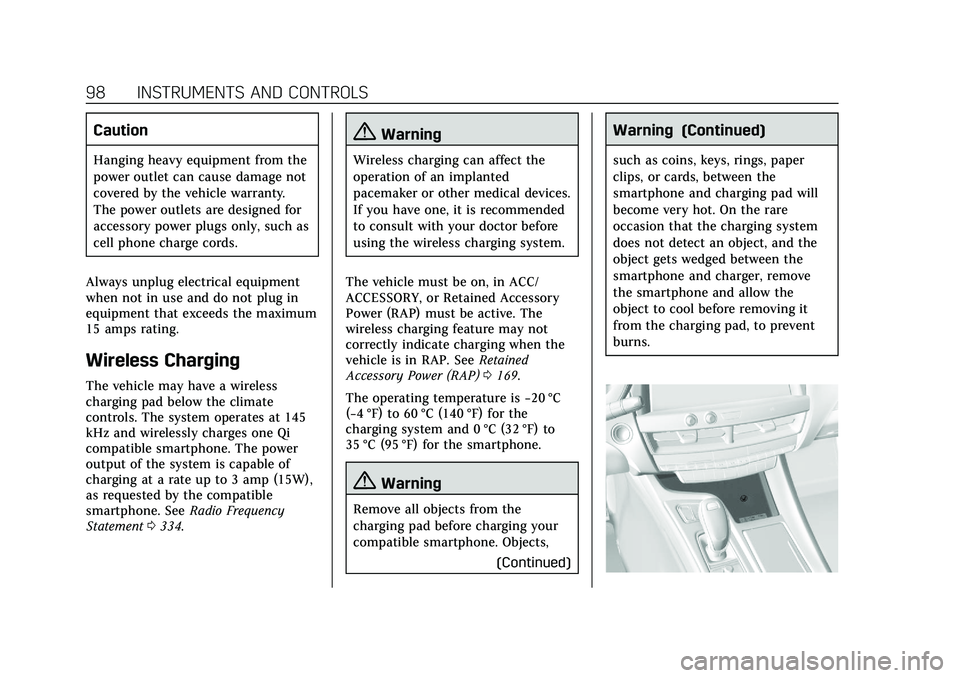
The vehicle may have a wireless
charging pad below the climate
controls. The system operates at 145
kHz and wirelessly charges one Qi
compatible smartphone. The power
output of the system is capable of
charging at a rate up to 3 amp (15W),
as requested by the compatible
smartphone. See Radio Frequency
Statement 0334.
{Warning
Wireless charging can affect the
operation of an implanted
pacemaker or other medical devices.
If you have one, it is recommended
to consult with your doctor before
using the wireless charging system.
The vehicle must be on, in ACC/
ACCESSORY, or Retained Accessory
Power (RAP) must be active. The
wireless charging feature may not
correctly indicate charging when the
vehicle is in RAP. See Retained
Accessory Power (RAP) 0169.
The operating temperature is −20 °C
(−4 °F) to 60 °C (140 °F) for the
charging system and 0 °C (32 °F) to
35 °C (95 °F) for the smartphone.
{Warning
Remove all objects from the
charging pad before charging your
compatible smartphone. Objects,
(Continued)
Warning (Continued)
such as coins, keys, rings, paper
clips, or cards, between the
smartphone and charging pad will
become very hot. On the rare
occasion that the charging system
does not detect an object, and the
object gets wedged between the
smartphone and charger, remove
the smartphone and allow the
object to cool before removing it
from the charging pad, to prevent
burns.
Page 109 of 359
Cadillac CT5 Owner Manual (GMNA-Localizing-U.S./Canada-13060105) -
2020 - CRC - 2/14/20
108 INSTRUMENTS AND CONTROLS
If the light stays on, or comes on
while driving, there may be a problem
with the electrical charging system.
Have it checked by your dealer.
Driving while this light is on could
drain the battery.
When this light comes on, or is
flashing, the Driver Information
Center (DIC) also displays a message.
If a short distance must be driven
with the light on, be sure to turn off
all accessories, such as the radio and
air conditioner.
Malfunction Indicator Lamp
(Check Engine Light)
This light is part of the vehicle’s
emission control on-board diagnostic
system. If this light is on while the
engine is running, a malfunction has
been detected and the vehicle may
require service. The light should come
on to show that it is working when
the ignition is in Service Mode. See
Ignition Positions0164.
Malfunctions are often indicated by
the system before any problem is
noticeable. Being aware of the light
and seeking service promptly when it
comes on may prevent damage.
Caution
If the vehicle is driven continually
with this light on, the emission
control system may not work as
well, the fuel economy may be
lower, and the vehicle may not run
smoothly. This could lead to costly
repairs that might not be covered
by the vehicle warranty.
Caution
Modifications to the engine,
transmission, exhaust, intake,
or fuel system, or the use of
replacement tires that do not meet
the original tire specifications, can
cause this light to come on. This
could lead to costly repairs not
covered by the vehicle warranty.
This could also affect the vehicle’s
ability to pass an Emissions
Inspection/Maintenance test. See
Accessories and Modifications 0240.
If the light is f lashing : A
malfunction has been detected that
could damage the emission control
system and increase vehicle
emissions. Diagnosis and service may
be required.
To help prevent damage, reduce
vehicle speed and avoid hard
accelerations and uphill grades.
If towing a trailer, reduce the amount
of cargo being hauled as soon as
possible.
Page 121 of 359
Cadillac CT5 Owner Manual (GMNA-Localizing-U.S./Canada-13060105) -
2020 - CRC - 2/14/20
120 INSTRUMENTS AND CONTROLS
windshield. The information is
projected through the HUD lens on
the driver side of the instrument
panel and focused out toward the
front of the vehicle.
Caution
If you try to use the HUD image as
a parking aid, you may misjudge
the distance and damage your
vehicle. Do not use the HUD image
as a parking aid.
The HUD information can be
displayed in various languages in
some vehicles. The speedometer
reading and other numerical values
can be displayed in either English or
metric units.
The language selection is changed
through the radio and the units of
measurement is changed through the
instrument cluster. See “Settings”in
the Infotainment Manual and
"Options" under Instrument Cluster
0 101.
HUD Display on the Windshield
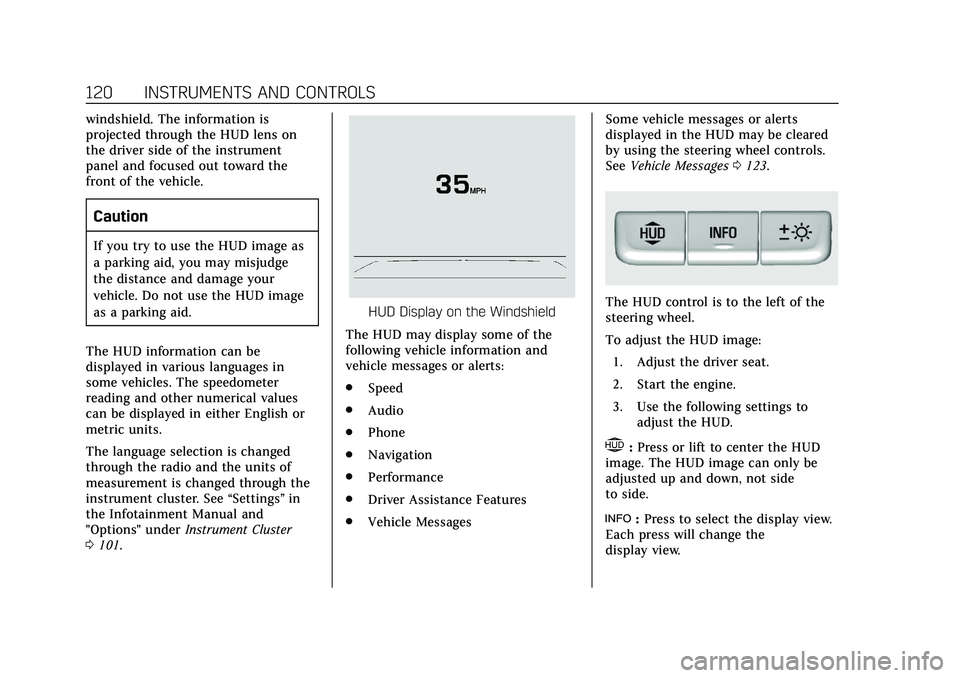
The HUD may display some of the
following vehicle information and
vehicle messages or alerts:
. Speed
. Audio
. Phone
. Navigation
. Performance
. Driver Assistance Features
. Vehicle Messages Some vehicle messages or alerts
displayed in the HUD may be cleared
by using the steering wheel controls.
See
Vehicle Messages 0123.The HUD control is to the left of the
steering wheel.
To adjust the HUD image:
1. Adjust the driver seat.
2. Start the engine.
3. Use the following settings to adjust the HUD.
$:Press or lift to center the HUD
image. The HUD image can only be
adjusted up and down, not side
to side.
!: Press to select the display view.
Each press will change the
display view.
Page 123 of 359
Cadillac CT5 Owner Manual (GMNA-Localizing-U.S./Canada-13060105) -
2020 - CRC - 2/14/20
122 INSTRUMENTS AND CONTROLS
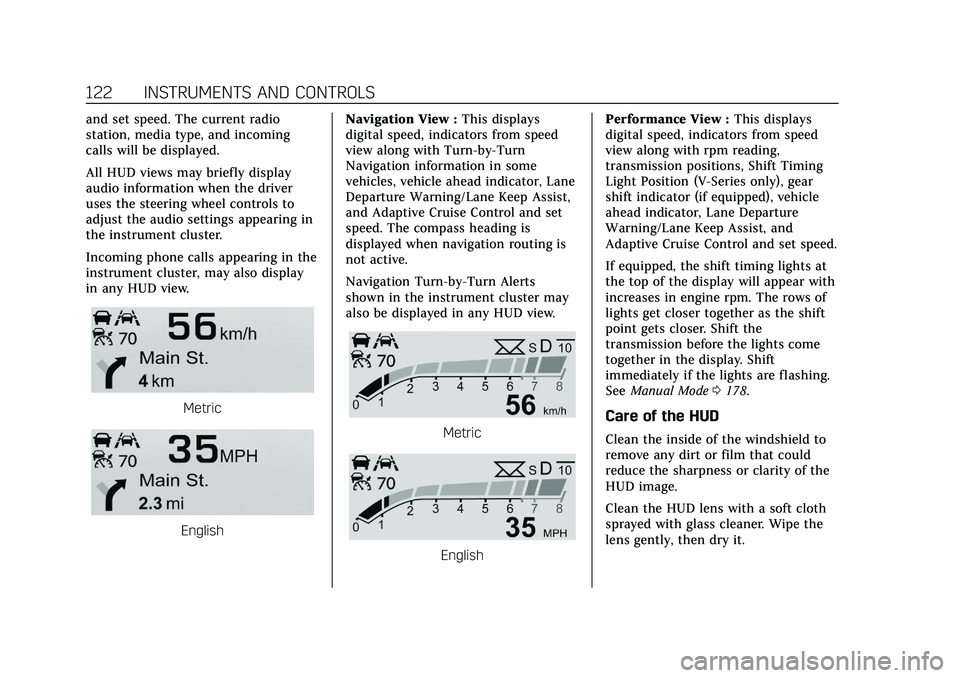
and set speed. The current radio
station, media type, and incoming
calls will be displayed.
All HUD views may briefly display
audio information when the driver
uses the steering wheel controls to
adjust the audio settings appearing in
the instrument cluster.
Incoming phone calls appearing in the
instrument cluster, may also display
in any HUD view.
Metric
EnglishNavigation View :
This displays
digital speed, indicators from speed
view along with Turn-by-Turn
Navigation information in some
vehicles, vehicle ahead indicator, Lane
Departure Warning/Lane Keep Assist,
and Adaptive Cruise Control and set
speed. The compass heading is
displayed when navigation routing is
not active.
Navigation Turn-by-Turn Alerts
shown in the instrument cluster may
also be displayed in any HUD view.
Metric
English Performance View :
This displays
digital speed, indicators from speed
view along with rpm reading,
transmission positions, Shift Timing
Light Position (V-Series only), gear
shift indicator (if equipped), vehicle
ahead indicator, Lane Departure
Warning/Lane Keep Assist, and
Adaptive Cruise Control and set speed.
If equipped, the shift timing lights at
the top of the display will appear with
increases in engine rpm. The rows of
lights get closer together as the shift
point gets closer. Shift the
transmission before the lights come
together in the display. Shift
immediately if the lights are flashing.
See Manual Mode 0178.
Care of the HUD
Clean the inside of the windshield to
remove any dirt or film that could
reduce the sharpness or clarity of the
HUD image.
Clean the HUD lens with a soft cloth
sprayed with glass cleaner. Wipe the
lens gently, then dry it.
Page 131 of 359
Cadillac CT5 Owner Manual (GMNA-Localizing-U.S./Canada-13060105) -
2020 - CRC - 2/14/20
130 INSTRUMENTS AND CONTROLS
Universal Remote
System
SeeRadio Frequency Statement 0334.
Universal Remote System
Programming
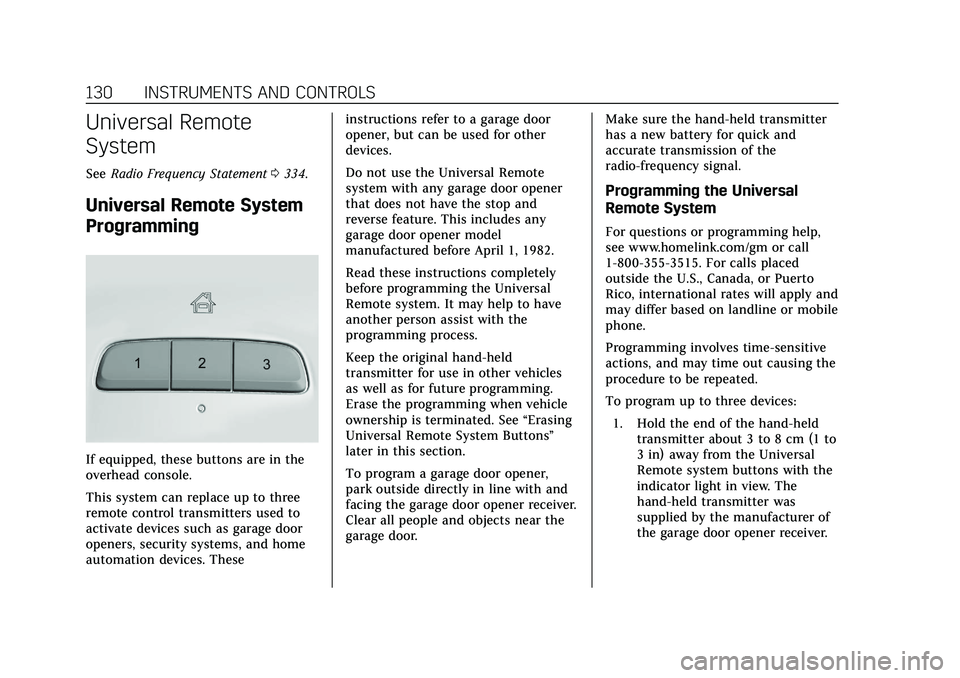
If equipped, these buttons are in the
overhead console.
This system can replace up to three
remote control transmitters used to
activate devices such as garage door
openers, security systems, and home
automation devices. These instructions refer to a garage door
opener, but can be used for other
devices.
Do not use the Universal Remote
system with any garage door opener
that does not have the stop and
reverse feature. This includes any
garage door opener model
manufactured before April 1, 1982.
Read these instructions completely
before programming the Universal
Remote system. It may help to have
another person assist with the
programming process.
Keep the original hand-held
transmitter for use in other vehicles
as well as for future programming.
Erase the programming when vehicle
ownership is terminated. See
“Erasing
Universal Remote System Buttons”
later in this section.
To program a garage door opener,
park outside directly in line with and
facing the garage door opener receiver.
Clear all people and objects near the
garage door. Make sure the hand-held transmitter
has a new battery for quick and
accurate transmission of the
radio-frequency signal.
Programming the Universal
Remote System
For questions or programming help,
see www.homelink.com/gm or call
1-800-355-3515. For calls placed
outside the U.S., Canada, or Puerto
Rico, international rates will apply and
may differ based on landline or mobile
phone.
Programming involves time-sensitive
actions, and may time out causing the
procedure to be repeated.
To program up to three devices:
1. Hold the end of the hand-held transmitter about 3 to 8 cm (1 to
3 in) away from the Universal
Remote system buttons with the
indicator light in view. The
hand-held transmitter was
supplied by the manufacturer of
the garage door opener receiver.
Page 132 of 359
Cadillac CT5 Owner Manual (GMNA-Localizing-U.S./Canada-13060105) -
2020 - CRC - 2/14/20
INSTRUMENTS AND CONTROLS 131
2. At the same time, press and holdboth the hand-held transmitter
button and one of the three
Universal Remote system
buttons to be used to operate the
garage door. Do not release either
button until the indicator light
changes from a slow to a rapid
flash. Then release both buttons.
Some garage door openers may
require substitution of Step 2
with the procedure under “Radio
Signals for Some Gate Operators”
later in this section.
3. Press and hold the newly programmed Universal Remote
system button for five seconds
while watching the indicator
light and garage door activation.
.If the indicator light stays on
continuously or the garage
door moves when the button
is pressed, then programming
is complete. There is no need
to complete Steps 4–6.
. If the indicator light does not
come on or the garage door
does not move, a second
button press may be required. For a second time,
press and hold the newly
programmed button for
five seconds. If the light stays
on or the garage door moves,
programming is complete.
. If the indicator light blinks
rapidly for two seconds, then
changes to a solid light and
the garage door does not
move, continue with
programming Steps 4–6.
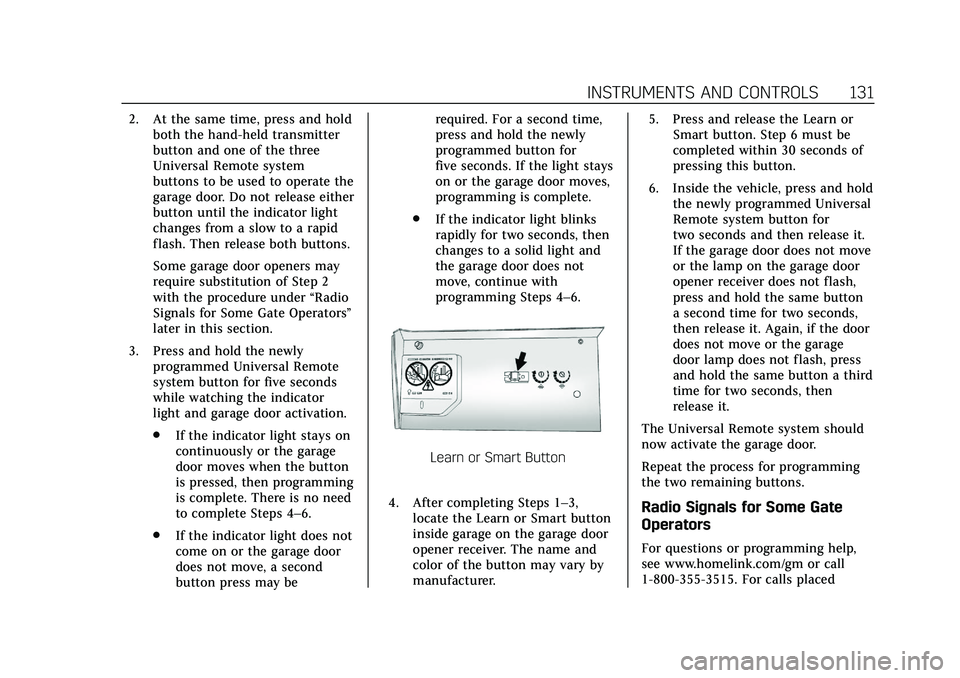
Learn or Smart Button
4. After completing Steps 1–3, locate the Learn or Smart button
inside garage on the garage door
opener receiver. The name and
color of the button may vary by
manufacturer. 5. Press and release the Learn or
Smart button. Step 6 must be
completed within 30 seconds of
pressing this button.
6. Inside the vehicle, press and hold the newly programmed Universal
Remote system button for
two seconds and then release it.
If the garage door does not move
or the lamp on the garage door
opener receiver does not flash,
press and hold the same button
a second time for two seconds,
then release it. Again, if the door
does not move or the garage
door lamp does not flash, press
and hold the same button a third
time for two seconds, then
release it.
The Universal Remote system should
now activate the garage door.
Repeat the process for programming
the two remaining buttons.
Radio Signals for Some Gate
Operators
For questions or programming help,
see www.homelink.com/gm or call
1-800-355-3515. For calls placed
Page 133 of 359
Cadillac CT5 Owner Manual (GMNA-Localizing-U.S./Canada-13060105) -
2020 - CRC - 2/14/20
132 INSTRUMENTS AND CONTROLS
outside the U.S., Canada, or Puerto
Rico, international rates will apply and
may differ based on landline or mobile
phone.
Some gate operators and
radio-frequency laws require
transmitter signals to time out or quit
after several seconds of transmission.
This may not be long enough for the
Universal Remote system to pick up
the signal during programming.
If the programming did not work,
replace Step 2 under“Programming
the Universal Remote System ”with
the following:
Press and hold the Universal Remote
system button while pressing and
releasing the hand-held transmitter
button every two seconds until the
signal has been successfully accepted
by the Universal Remote system. The
Universal Remote system indicator
light will flash slowly at first and then
rapidly. Proceed with Step 3 under
“Programming the Universal Remote
System ”to complete.Universal Remote System
Operation
Using the Universal Remote
System
Press and hold the appropriate
Universal Remote system button for at
least one-half second. The indicator
light will come on while the signal is
being transmitted.
Erasing Universal Remote
System Buttons
Erase all programmed buttons when
vehicle ownership is terminated.
To erase:
1. Press and hold the two outside buttons until the indicator light
begins to flash. This should take
about 10 seconds.
2. Release both buttons.
Reprogramming a Single
Universal Remote System Button
To reprogram any of the system
buttons: 1. Press and hold any one of the buttons. Do not release the
button.
2. The indicator light will begin to flash after 20 seconds. Without
releasing the button, proceed
with Step 1 under “Programming
the Universal Remote System.”
Page 351 of 359
Cadillac CT5 Owner Manual (GMNA-Localizing-U.S./Canada-13060105) -
2020 - CRC - 2/14/20
350 INDEX
E
Electric Brake Boost . . . . . . . . . . . . . . . . 180
Electric Parking Brake . . . . . . . . . . . . . . 180
Electric Parking Brake Light . . . . . . . 110
Electrical Equipment, Add-On . . . . . 236
Electrical SystemEngine Compartment FuseBlock . . . . . . . . . . . . . . . . . . . . . . . . . . . . . 265
Fuses and Circuit Breakers . . . . . . . 265
Instrument Panel Fuse Block . . . . 267
Overload . . . . . . . . . . . . . . . . . . . . . . . . . . . 264
Rear Compartment Fuse Block . . . . . . . . . . . . . . . . . . . . . . . . . . . . . 270
Emergency
OnStar . . . . . . . . . . . . . . . . . . . . . . . . . . . . . 339
Engine Air Cleaner/Filter . . . . . . . . . . . . . . . . . 250
Check Light (MalfunctionIndicator) . . . . . . . . . . . . . . . . . . . . . . . . 108
Compartment Overview . . . . . . . . . . 243
Coolant Temperature Gauge . . . . . 105
Coolant Temperature Warning Light . . . . . . . . . . . . . . . . . . . 113
Cooling System . . . . . . . . . . . . . . . . . . . 251
Drive Belt Routing . . . . . . . . . . . . . . . . 323
Exhaust . . . . . . . . . . . . . . . . . . . . . . . . . . . . 172
Heater . . . . . . . . . . . . . . . . . . . . . . . . . . . . . 168
Oil Life System . . . . . . . . . . . . . . . . . . . . 248 Engine (cont'd)
Oil Pressure Light . . . . . . . . . . . . . . . . . 115
Overheating . . . . . . . . . . . . . . . . . . . . . . . 256
Power Messages . . . . . . . . . . . . . . . . . . 123
Running While Parked . . . . . . . . . . . 173
Starting . . . . . . . . . . . . . . . . . . . . . . . . . . . . 165
Entry Lighting . . . . . . . . . . . . . . . . . . . . . . 139
Equipment, Towing . . . . . . . . . . . . . . . . . 235
Event Data Recorders . . . . . . . . . . . . . . 336
Exit Lighting . . . . . . . . . . . . . . . . . . . . . . . . 139
Extended Parking . . . . . . . . . . . . . . . . . . . 172
Extender, Seat Belt . . . . . . . . . . . . . . . . . . 57
Exterior Lamp Controls . . . . . . . . . . . . 133
Exterior Lamps Off Reminder . . . . . . 135
Exterior Lighting Battery Saver . . . . 140
F
Filter,
Engine Air Cleaner . . . . . . . . . . . . . . . . 250
Flash-to-Pass . . . . . . . . . . . . . . . . . . . . . . . . 135
Flashers, Hazard Warning . . . . . . . . . . 136
Flat Tire . . . . . . . . . . . . . . . . . . . . . . . . . . . . . 291
Floor Mats . . . . . . . . . . . . . . . . . . . . . . . . . . . 304
Fluid Automatic Transmission . . . . . . . . . 249
Brakes . . . . . . . . . . . . . . . . . . . . . . . . . . . . . 258
Washer . . . . . . . . . . . . . . . . . . . . . . . . . . . . 257
Folding Mirrors . . . . . . . . . . . . . . . . . . . . . . 30 Forward Collision Alert (FCA)
System . . . . . . . . . . . . . . . . . . . . . . . . . . . . . 214
Frequency Statement Radio . . . . . . . . . . . . . . . . . . . . . . . . . . . . . . 334
Front Pedestrian Braking (FPB) System . . . . . . . . . . . . . . . . . . . . . . . . . . . . . 218
Front Seats
Heated and Ventilated . . . . . . . . . . . . . 46
Fuel Additives . . . . . . . . . . . . . . . . . . . . . . . . . . 227
Economy, Driving for Better . . . . . 149
Filling a Portable FuelContainer . . . . . . . . . . . . . . . . . . . . . . . . 229
Filling the Tank . . . . . . . . . . . . . . . . . . . 228
Foreign Countries . . . . . . . . . . . . . . . . . 227
Gauge . . . . . . . . . . . . . . . . . . . . . . . . . . . . . . 104
Low Fuel Warning Light . . . . . . . . . 115
Management, Active . . . . . . . . . . . . . . 172
Prohibited Fuels . . . . . . . . . . . . . . . . . . 227
Recommended . . . . . . . . . . . . . . . 226, 227
Top Tier . . . . . . . . . . . . . . . . . . . . . . . . . . . 226
Fuses Engine Compartment FuseBlock . . . . . . . . . . . . . . . . . . . . . . . . . . . . . 265
Fuses and Circuit Breakers . . . . . . . 265
Instrument Panel Fuse Block . . . . 267
Rear Compartment Fuse
Block . . . . . . . . . . . . . . . . . . . . . . . . . . . . . 270