stop start CADILLAC CT5 2021 Owner's Manual
[x] Cancel search | Manufacturer: CADILLAC, Model Year: 2021, Model line: CT5, Model: CADILLAC CT5 2021Pages: 435, PDF Size: 8.9 MB
Page 4 of 435
Cadillac CT5 Owner Manual (GMNA-Localizing-U.S./Canada-14584312) -
2021 - CRC - 11/23/20
INTRODUCTION 3
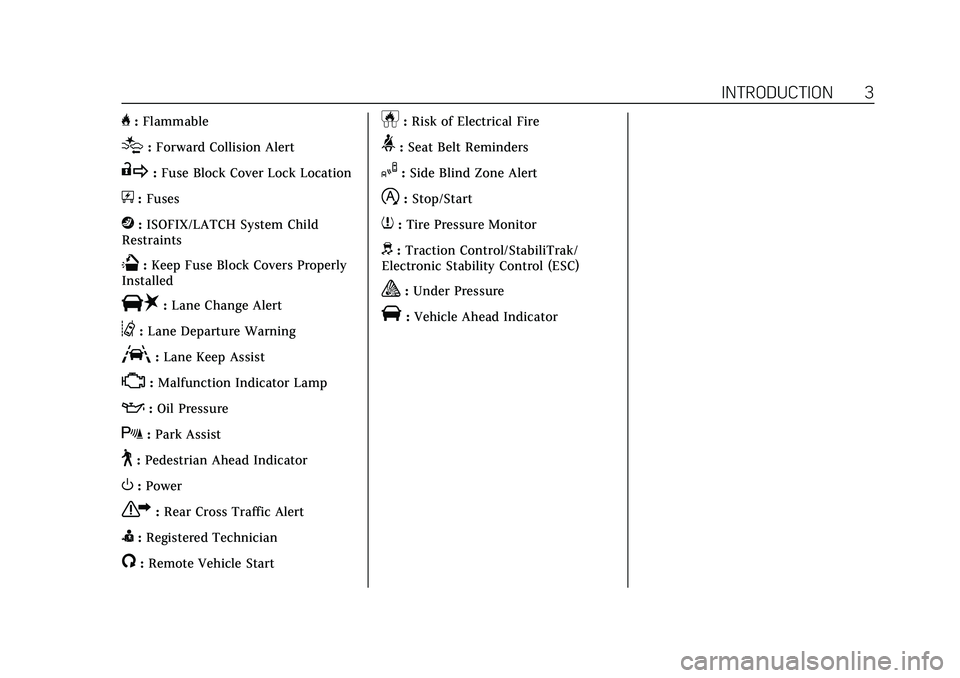
H:Flammable
[:Forward Collision Alert
R:Fuse Block Cover Lock Location
+:Fuses
j:ISOFIX/LATCH System Child
Restraints
Q: Keep Fuse Block Covers Properly
Installed
|: Lane Change Alert
@:Lane Departure Warning
A:Lane Keep Assist
*: Malfunction Indicator Lamp
::Oil Pressure
X:Park Assist
~:Pedestrian Ahead Indicator
O:Power
7:Rear Cross Traffic Alert
I:Registered Technician
/:Remote Vehicle Start
h:Risk of Electrical Fire
>:Seat Belt Reminders
I:Side Blind Zone Alert
h:Stop/Start
7:Tire Pressure Monitor
d:Traction Control/StabiliTrak/
Electronic Stability Control (ESC)
a: Under Pressure
V: Vehicle Ahead Indicator
Page 6 of 435
Cadillac CT5 Owner Manual (GMNA-Localizing-U.S./Canada-14584312) -
2021 - CRC - 11/23/20
INTRODUCTION 5
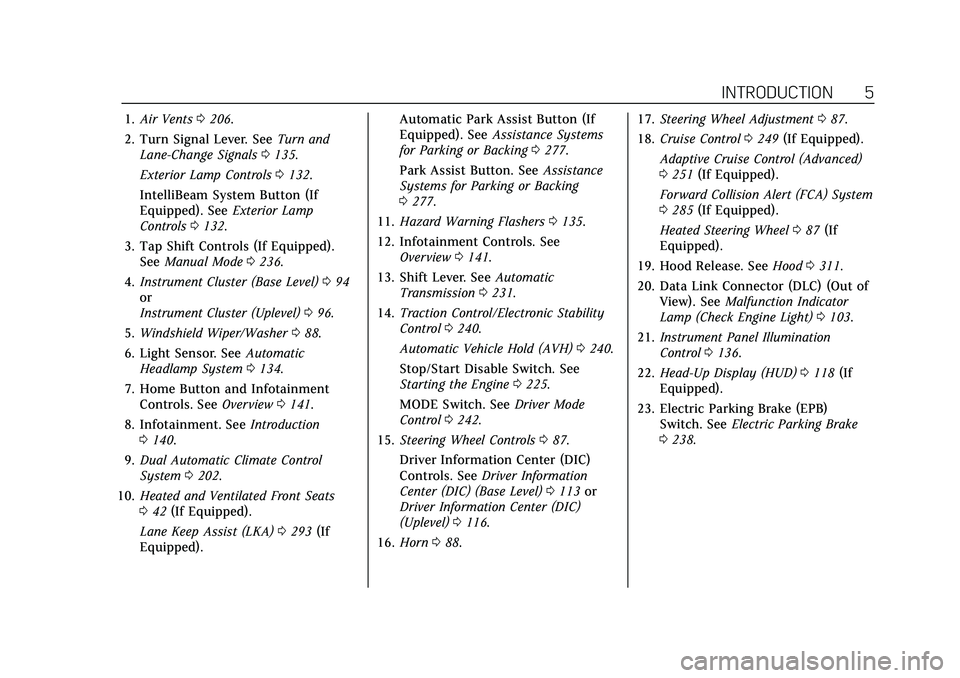
1.Air Vents 0206.
2. Turn Signal Lever. See Turn and
Lane-Change Signals 0135.
Exterior Lamp Controls 0132.
IntelliBeam System Button (If
Equipped). See Exterior Lamp
Controls 0132.
3. Tap Shift Controls (If Equipped). See Manual Mode 0236.
4. Instrument Cluster (Base Level) 094
or
Instrument Cluster (Uplevel) 096.
5. Windshield Wiper/Washer 088.
6. Light Sensor. See Automatic
Headlamp System 0134.
7. Home Button and Infotainment Controls. See Overview0141.
8. Infotainment. See Introduction
0 140.
9. Dual Automatic Climate Control
System 0202.
10. Heated and Ventilated Front Seats
042 (If Equipped).
Lane Keep Assist (LKA) 0293 (If
Equipped). Automatic Park Assist Button (If
Equipped). See
Assistance Systems
for Parking or Backing 0277.
Park Assist Button. See Assistance
Systems for Parking or Backing
0 277.
11. Hazard Warning Flashers 0135.
12. Infotainment Controls. See Overview 0141.
13. Shift Lever. See Automatic
Transmission 0231.
14. Traction Control/Electronic Stability
Control 0240.
Automatic Vehicle Hold (AVH) 0240.
Stop/Start Disable Switch. See
Starting the Engine 0225.
MODE Switch. See Driver Mode
Control 0242.
15. Steering Wheel Controls 087.
Driver Information Center (DIC)
Controls. See Driver Information
Center (DIC) (Base Level) 0113 or
Driver Information Center (DIC)
(Uplevel) 0116.
16. Horn 088. 17.
Steering Wheel Adjustment 087.
18. Cruise Control 0249 (If Equipped).
Adaptive Cruise Control (Advanced)
0 251 (If Equipped).
Forward Collision Alert (FCA) System
0 285 (If Equipped).
Heated Steering Wheel 087 (If
Equipped).
19. Hood Release. See Hood0311.
20. Data Link Connector (DLC) (Out of View). See Malfunction Indicator
Lamp (Check Engine Light) 0103.
21. Instrument Panel Illumination
Control 0136.
22. Head-Up Display (HUD) 0118 (If
Equipped).
23. Electric Parking Brake (EPB) Switch. See Electric Parking Brake
0 238.
Page 12 of 435
Cadillac CT5 Owner Manual (GMNA-Localizing-U.S./Canada-14584312) -
2021 - CRC - 11/23/20
KEYS, DOORS, AND WINDOWS 11
your dealer. The vehicle can be
reprogrammed so that lost or stolen
remote keys no longer work. Each
vehicle can have up to eight remote
keys matched to it.
Programming with Recognized
Remote Keys
A new key can be programmed to the
vehicle when there are two
recognized keys.
To program, the vehicle must be in
RUN and all remote keys, both
currently recognized and new, must
be with you.1. Place the two recognized remote keys on the passenger seat.
2. Scroll to the DIC menu to "Remote Key Learn" menu and select.
The DIC displays READY FOR
REMOTE #3, 4, 5, ETC.
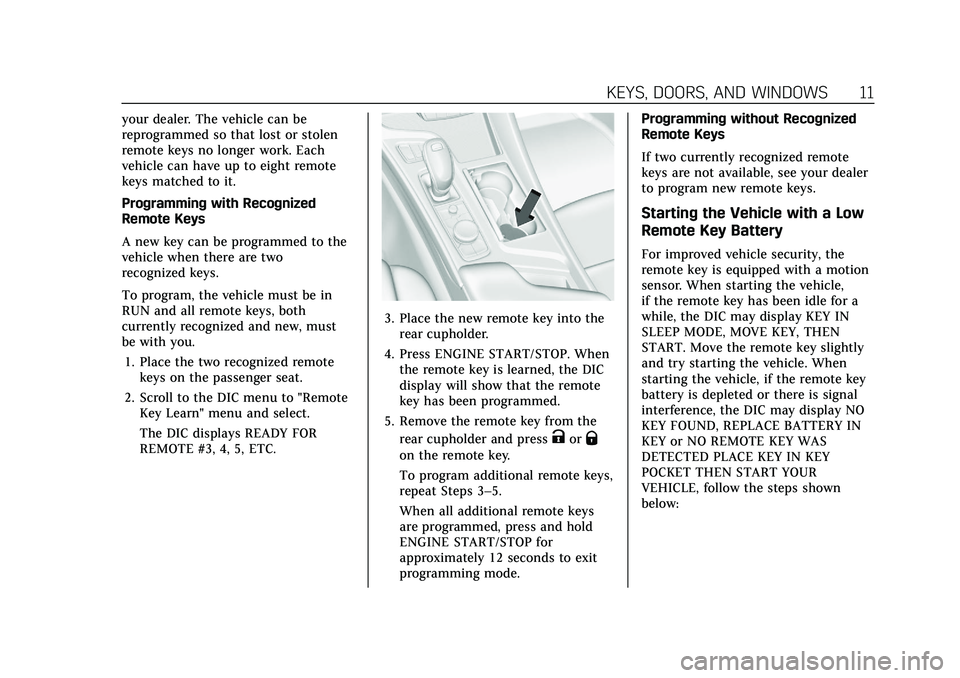
3. Place the new remote key into therear cupholder.
4. Press ENGINE START/STOP. When the remote key is learned, the DIC
display will show that the remote
key has been programmed.
5. Remove the remote key from the rear cupholder and press
KorQ
on the remote key.
To program additional remote keys,
repeat Steps 3–5.
When all additional remote keys
are programmed, press and hold
ENGINE START/STOP for
approximately 12 seconds to exit
programming mode. Programming without Recognized
Remote Keys
If two currently recognized remote
keys are not available, see your dealer
to program new remote keys.
Starting the Vehicle with a Low
Remote Key Battery
For improved vehicle security, the
remote key is equipped with a motion
sensor. When starting the vehicle,
if the remote key has been idle for a
while, the DIC may display KEY IN
SLEEP MODE, MOVE KEY, THEN
START. Move the remote key slightly
and try starting the vehicle. When
starting the vehicle, if the remote key
battery is depleted or there is signal
interference, the DIC may display NO
KEY FOUND, REPLACE BATTERY IN
KEY or NO REMOTE KEY WAS
DETECTED PLACE KEY IN KEY
POCKET THEN START YOUR
VEHICLE, follow the steps shown
below:
Page 13 of 435
Cadillac CT5 Owner Manual (GMNA-Localizing-U.S./Canada-14584312) -
2021 - CRC - 11/23/20
12 KEYS, DOORS, AND WINDOWS
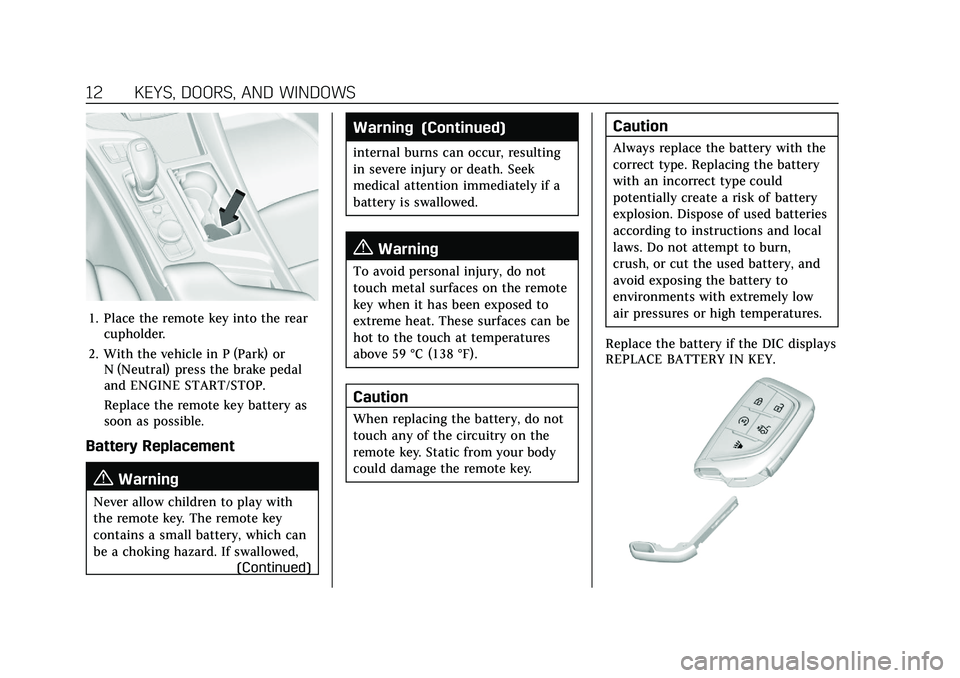
1. Place the remote key into the rearcupholder.
2. With the vehicle in P (Park) or N (Neutral) press the brake pedal
and ENGINE START/STOP.
Replace the remote key battery as
soon as possible.
Battery Replacement
{Warning
Never allow children to play with
the remote key. The remote key
contains a small battery, which can
be a choking hazard. If swallowed,
(Continued)
Warning (Continued)
internal burns can occur, resulting
in severe injury or death. Seek
medical attention immediately if a
battery is swallowed.
{Warning
To avoid personal injury, do not
touch metal surfaces on the remote
key when it has been exposed to
extreme heat. These surfaces can be
hot to the touch at temperatures
above 59 °C (138 °F).
Caution
When replacing the battery, do not
touch any of the circuitry on the
remote key. Static from your body
could damage the remote key.
Caution
Always replace the battery with the
correct type. Replacing the battery
with an incorrect type could
potentially create a risk of battery
explosion. Dispose of used batteries
according to instructions and local
laws. Do not attempt to burn,
crush, or cut the used battery, and
avoid exposing the battery to
environments with extremely low
air pressures or high temperatures.
Replace the battery if the DIC displays
REPLACE BATTERY IN KEY.
Page 15 of 435
Cadillac CT5 Owner Manual (GMNA-Localizing-U.S./Canada-14584312) -
2021 - CRC - 11/23/20
14 KEYS, DOORS, AND WINDOWS
If equipped, the heated and ventilated
front seats may also come on when
the vehicle personalization setting is
enabled. SeeHeated and Ventilated
Front Seats 042.
If equipped with a remote start heated
steering wheel, it may come on during
a remote start. See Heated Steering
Wheel 087.
Laws in some local communities may
restrict the use of remote starters. For
example, some laws may require a
person using remote start to have the
vehicle in view. Check local
regulations for any requirements.
If your vehicle is low on fuel, do not
use the remote start feature. The
vehicle may run out of fuel.
The remote key range may be shorter
while the vehicle is running.
Other conditions can affect the
performance of the remote key. See
Remote Keyless Entry (RKE) System
0 7.
You are allowed multiple starts
totaling 30 minutes of engine run
time. The maximum run time of a
single start is 15 minutes, and it will shut off automatically. You could do
three 10 minute starts, if you
manually shut off after 10 minutes.
The last 10 minute start would shut
off automatically as your total
30 minutes will have been used.
Starting the Engine Using Remote
Start
1. Press
Stwice on the remote key.
The turn signal lamps will flash.
The lamps flash to confirm the
request to remote start the vehicle
has been received. During the
remote start, the doors will be
locked and the parking lamps will
remain on as long as the engine is
running.
2. The engine will shut off after 15 minutes or after the remainder
of the 30 minute total running
time is used, unless you stop the
remote start before engine running
has completed or the vehicle is
turned on.
3. Press the brake pedal and turn the ignition on to drive the vehicle. Additional Engine Run Time
Remote start can be used for up to
30 minutes of total engine run time.
After two remote starts of 15 minutes,
or multiple shorter time starts
totaling 30 minutes have been used,
the vehicle must be started and then
turned off before the remote start can
be used again.
Canceling a Remote Start
To cancel a remote start, do any of
the following:
.PressSonce. The parking lamps
will turn off.
.Turn on the hazard warning
flashers.
.Turn the vehicle on and then
back off.
Conditions in Which Remote Start
Will Not Work
The remote start will not operate if
any of the following occur:
.The ignition is in any mode other
than off.
.A remote key is in the vehicle.
.The hood is not closed.
Page 42 of 435
Cadillac CT5 Owner Manual (GMNA-Localizing-U.S./Canada-14584312) -
2021 - CRC - 11/23/20
SEATS AND RESTRAINTS 41
If too much time passes between
releasing SET and pressing 1, the
memory position will not be saved
and two beeps will not sound.
Repeat Steps 3 and 4.
1 or 2 corresponds to the driver
number. See“Identifying Driver
Number” previously in this section.
5. Repeat Steps 1–4 for a second driver using 1 or 2.
To save the position for
Band Seat
Exit Memory features, repeat Steps 1–
4 using
B. This saves the position for
getting out of the vehicle.
Save preferred memory feature
positions to both 1 and 2 if you are
the only driver.
Manually Recalling Memory
Positions
Press and hold 1, 2, or
Bto recall the
previously saved memory positions if
you are driver 1 or 2 identified in the
DIC welcome message.
To stop Manual Memory recall
movement, release 1, 2, or
Bor press
any of the following controls:
.Power seat
.Memory SET
.Power mirror, with the driver or
passenger side mirror selected
.Power steering wheel, if equipped
Manual Memory recall movement for
1, 2, or
Bbuttons may be initiated
and may complete to the saved
memory position if the vehicle is in or
out of P (Park).
Seat Entry Memory
The vehicle identifies the number of
the current driver’s remote key (1–8).
See Remote Keyless Entry (RKE) System
Operation 07. If the remote key is 1 or
2, and Seat Entry Memory is enabled
in vehicle personalization, the
positions saved to the same memory
button number 1 or 2 are
automatically recalled when the
vehicle is turned on.
To turn Seat Entry Memory on or off,
see “Vehicle Personalization Settings”
previously in this section and Vehicle
Personalization 0123.
The vehicle must be in P (Park) to
start Seat Entry Memory. Seat Entry
Memory recall will complete if the vehicle is shifted out of P (Park) prior
to reaching the saved memory
position.
To stop Seat Entry Memory recall
movement, turn the vehicle off or
press any of the following controls:.Power seat
.Memory SET, 1, 2, orB
.Power mirror, with the driver or
passenger side mirror selected
.Power steering wheel, if equipped
If the saved memory seat position
does not automatically recall or recalls
to the wrong positions, the driver’s
remote key number (1 or 2) may not
match the memory button number
that positions were saved to. Try
storing the position to the other
memory button or try the other
remote key.
Seat Exit Memory
Seat Exit Memory is not linked to a
remote key. The position saved to
B
is used for all drivers. To turn Seat
Exit Memory on or off, see "Vehicle
Page 83 of 435
Cadillac CT5 Owner Manual (GMNA-Localizing-U.S./Canada-14584312) -
2021 - CRC - 11/23/20
82 SEATS AND RESTRAINTS
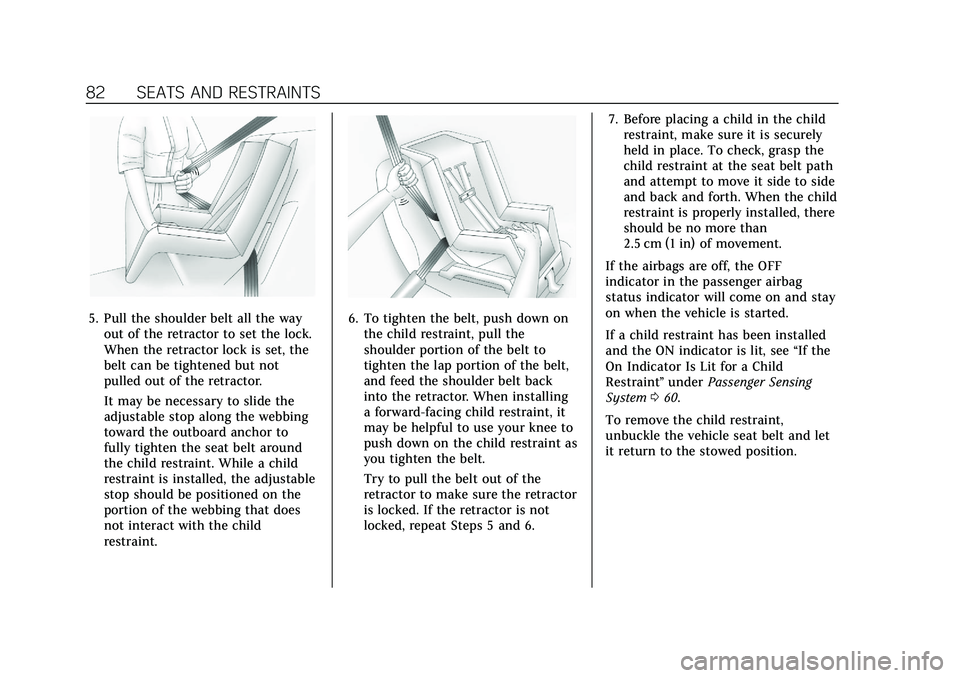
5. Pull the shoulder belt all the wayout of the retractor to set the lock.
When the retractor lock is set, the
belt can be tightened but not
pulled out of the retractor.
It may be necessary to slide the
adjustable stop along the webbing
toward the outboard anchor to
fully tighten the seat belt around
the child restraint. While a child
restraint is installed, the adjustable
stop should be positioned on the
portion of the webbing that does
not interact with the child
restraint.6. To tighten the belt, push down onthe child restraint, pull the
shoulder portion of the belt to
tighten the lap portion of the belt,
and feed the shoulder belt back
into the retractor. When installing
a forward-facing child restraint, it
may be helpful to use your knee to
push down on the child restraint as
you tighten the belt.
Try to pull the belt out of the
retractor to make sure the retractor
is locked. If the retractor is not
locked, repeat Steps 5 and 6. 7. Before placing a child in the child
restraint, make sure it is securely
held in place. To check, grasp the
child restraint at the seat belt path
and attempt to move it side to side
and back and forth. When the child
restraint is properly installed, there
should be no more than
2.5 cm (1 in) of movement.
If the airbags are off, the OFF
indicator in the passenger airbag
status indicator will come on and stay
on when the vehicle is started.
If a child restraint has been installed
and the ON indicator is lit, see “If the
On Indicator Is Lit for a Child
Restraint ”under Passenger Sensing
System 060.
To remove the child restraint,
unbuckle the vehicle seat belt and let
it return to the stowed position.
Page 90 of 435
Cadillac CT5 Owner Manual (GMNA-Localizing-U.S./Canada-14584312) -
2021 - CRC - 11/24/20
INSTRUMENTS AND CONTROLS 89
Warning (Continued)
lamps and windows. Reduced
visibility from snow and ice buildup
could lead to a crash.
Clear snow and ice from the wiper
blades and windshield before using
them. If frozen to the windshield,
carefully loosen or thaw them.
Damaged blades should be replaced.
See Wiper Blade Replacement 0331.
Wiper Parking
If the ignition is turned off while the
wipers are on LO, HI, or INT, they will
immediately stop.
If the windshield wiper lever is then
moved to OFF before the driver door is
opened or within 10 minutes, the
wipers will restart and move to the
base of the windshield.
If the ignition is turned off while the
wipers are performing wipes due to
windshield washing or Rainsense
wipes, the wipers continue to run
until they reach the base of the
windshield.
Rainsense
There is a sensor near the top center
of the windshield detects the amount
of water on the windshield and
controls the frequency of the
windshield wiper. To turn this feature
on or off, see “Rain Sense Wipers ”
under Vehicle Personalization 0123.
Keep this area of the windshield clear
of debris to allow for best system
performance.
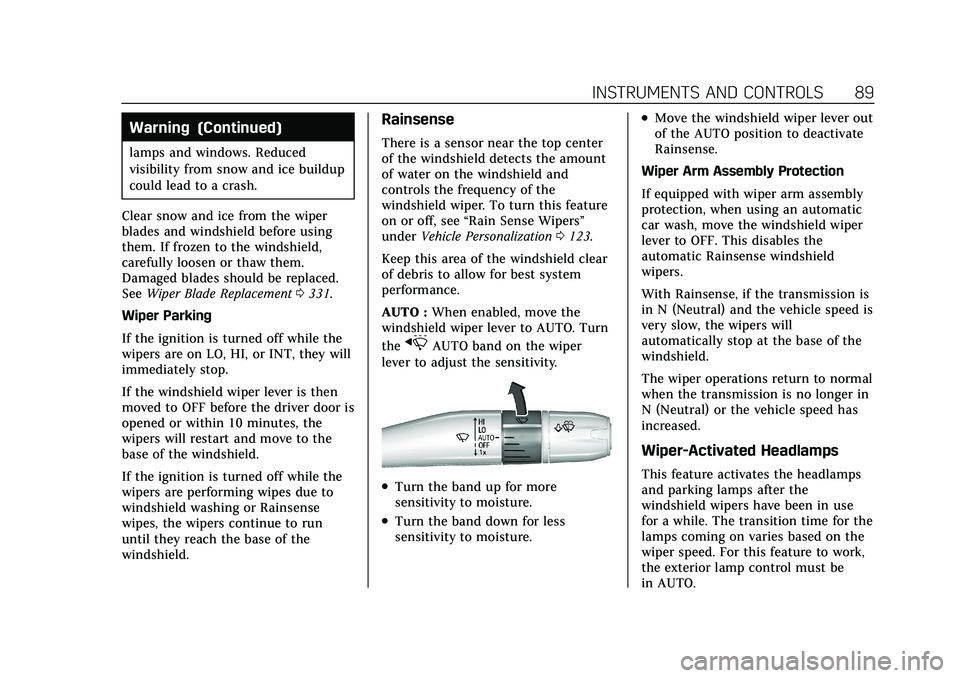
AUTO : When enabled, move the
windshield wiper lever to AUTO. Turn
the
xAUTO band on the wiper
lever to adjust the sensitivity.
.Turn the band up for more
sensitivity to moisture.
.Turn the band down for less
sensitivity to moisture.
.Move the windshield wiper lever out
of the AUTO position to deactivate
Rainsense.
Wiper Arm Assembly Protection
If equipped with wiper arm assembly
protection, when using an automatic
car wash, move the windshield wiper
lever to OFF. This disables the
automatic Rainsense windshield
wipers.
With Rainsense, if the transmission is
in N (Neutral) and the vehicle speed is
very slow, the wipers will
automatically stop at the base of the
windshield.
The wiper operations return to normal
when the transmission is no longer in
N (Neutral) or the vehicle speed has
increased.
Wiper-Activated Headlamps
This feature activates the headlamps
and parking lamps after the
windshield wipers have been in use
for a while. The transition time for the
lamps coming on varies based on the
wiper speed. For this feature to work,
the exterior lamp control must be
in AUTO.
Page 98 of 435
Cadillac CT5 Owner Manual (GMNA-Localizing-U.S./Canada-14584312) -
2021 - CRC - 11/24/20
INSTRUMENTS AND CONTROLS 97
.Driver Assistance
.Audio
.Phone
.Navigation
.Options
.Simplify
Performance
If equipped, press the thumbwheel to
enter the Performance menu. Scroll
through the available items.
Friction Bubble :A four quadrant
visual display, indicative of the four
corners of the car, with a “bubble”
showing where the most inertia is
being exerted on the vehicle.
Performance Timer : Press the
thumbwheel to enter the setup menu.
Use the thumbwheel to scroll to select
the desired speed segment, then press
the thumbwheel to enter the
submenu. Use the thumbwheel to
confirm the speed segment selection
or to reset the best time for that
segment. On the next acceleration, the
performance timer will record the
time. Pressing the thumbwheel while the timer is running will cancel the
timer if done before reaching the end
of the segment.
Lap Timer :
Press the thumbwheel
when Lap Timer is displayed to start,
stop, or reset the lap timer. Press the
thumbwheel while the Lap Timer page
is active to start the timer. If the lap
timer is active, pressing the
thumbwheel will stop the current lap
timer and start a new lap. Pressing the
thumbwheel within 10 seconds after
completing the last lap (Stop Lap
Timer option is displayed), the Lap
Timer will stop. Press the thumbwheel
after the lap timer is stopped to reset
the timer, or to view the lap history.
A maximum of 16 laps will be stored.
Launch Control : If equipped, the
Launch Control display allows the
driver to adjust the parameters of the
Launch Control System. See Track
Events and Competitive Driving (V-Series
Only) 0213.
Audio
In the Audio menu, use the
thumbwheel to scroll through audio
presets.
Phone
In the Phone menu, if there is no
active phone call, view recent calls,
or scroll through contacts. If there is
an active call, mute the phone or
switch to handset operation.
Navigation
If there is an active route, press the
thumbwheel to cancel or resume route
guidance, or turn the voice prompts
on or off.
Options
Use the thumbwheel to scroll through
items in the Options menu.
Display Themes
Press the thumbwheel to enter the
Display menu. There are three
instrument cluster display
configurations to choose from. Sport,
Tour, and Track (if equipped). The
style of the cluster will change
depending on the theme selected.
Default is linked to Driver Mode.
Other display themes can be set
If in My Mode then those displays
plus HUD (if equipped) can be set.
Page 100 of 435
Cadillac CT5 Owner Manual (GMNA-Localizing-U.S./Canada-14584312) -
2021 - CRC - 11/24/20
INSTRUMENTS AND CONTROLS 99
Fuel Range
Fuel Range displays the approximate
distance the vehicle can be driven
without refueling. LOW will be
displayed when the vehicle is low on
fuel. The fuel range estimate is based
on an average of the vehicle's fuel
economy over recent driving history
and the amount of fuel remaining in
the fuel tank.
Software Info
Press the thumbwheel while Software
Info is highlighted to display open
source software information.
Reset To Defaults
Allows the driver to reset to default
settings.
Simplify
Press the thumbwheel to enter the
Simplify menu. Simplify Mode allows
certain features of the instrument
cluster to be hidden. These features
include info tiles and interactive areas.
Using the thumbwheel, except to
acknowledge an alert, will exit
Simplify Mode.The selected features will stay hidden
even after starting and restarting the
vehicle, unless Simplify Mode is
manually canceled.
Speedometer
The speedometer shows the vehicle's
speed in either kilometers per hour
(km/h) or miles per hour (mph).
Odometer
The odometer shows how far the
vehicle has been driven, in either
kilometers or miles.
Trip Odometer
The trip odometer shows how far the
vehicle has been driven since the trip
odometer was last reset.
The trip odometer is accessed and
reset through the Driver Information
Center (DIC). See
Driver Information
Center (DIC) (Base Level) 0113 or
Driver Information Center (DIC)
(Uplevel) 0116.
Tachometer
The tachometer displays the engine
speed in revolutions per minute (rpm).
For vehicles with the Stop/Start
system, when the ignition is on, the
tachometer indicates the vehicle
status. When pointing to AUTO STOP
(Base Level) or the cluster displays
AUTO STOP text (Uplevel), the engine
is off but the vehicle is on and can
move. The engine could auto start at
any time. When the indicator points
to OFF, the vehicle is off.
When the engine is on, the
tachometer will indicate the engine’s
revolutions per minute (rpm). The
tachometer may vary by several
hundred rpm, during Auto Stop mode,
when the engine is shutting off and
restarting.