ECO mode CADILLAC CTS 2006 1.G Owners Manual
[x] Cancel search | Manufacturer: CADILLAC, Model Year: 2006, Model line: CTS, Model: CADILLAC CTS 2006 1.GPages: 442, PDF Size: 2.57 MB
Page 2 of 442
GENERAL MOTORS, GM, the GM Emblem, CADILLAC,
the CADILLAC Crest & Wreath, and the name CTS are
registered trademarks of General Motors Corporation.
This manual includes the latest information at the time it
was printed. We reserve the right to make changes after
that time without notice. For vehicles �rst sold in Canada,
substitute the name “General Motors of Canada Limited”
for Cadillac Motor Car Division whenever it appears in
this manual.
This manual describes features that may be available in
this model, but your vehicle may not have all of them.
For example, more than one entertainment system may
be offered or your vehicle may have been ordered without
a front passenger or rear seats.
Keep this manual in the vehicle, so it will be there if it is
needed while you are on the road. If the vehicle is sold,
leave this manual in the vehicle.
Canadian Owners
A French language copy of this manual can be obtained
from your dealer or from:
Helm, Incorporated
P.O. Box 07130
Detroit, MI 48207
How to Use This Manual
Many people read the owner manual from beginning to
end when they �rst receive their new vehicle. If this
is done, it can help you learn about the features
and controls for the vehicle. Pictures and words work
together in the owner manual to explain things.
Index
A good place to quickly locate information about the
vehicle is the Index in the back of the manual. It is
an alphabetical list of what is in the manual and
the page number where it can be found.
Litho in U.S.A.
Part No. 06CTS B Second Printing
©2006 General Motors Corporation. All Rights Reserved.
ii
Page 105 of 442
Driver Shift Control (DSC)
Notice:If you drive your vehicle at high RPMs
without upshifting while using Driver Shift Control
(DSC), you could damage your vehicle. Always
upshift when necessary while using DSC.
Your automatic transmission has a Driver Shift Control
(DSC) feature that allows you to change gears similar to a
manual transmission. To use the DSC feature:
1. Slide the shift lever over from AUTOMATIC
OVERDRIVE (D) to the right into the DSC area.
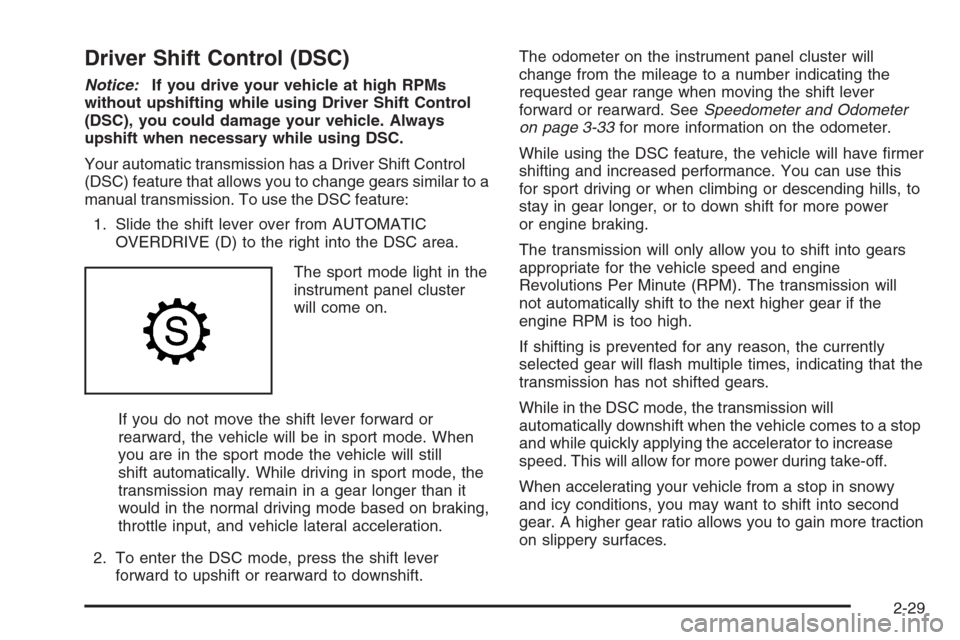
The sport mode light in the
instrument panel cluster
will come on.
If you do not move the shift lever forward or
rearward, the vehicle will be in sport mode. When
you are in the sport mode the vehicle will still
shift automatically. While driving in sport mode, the
transmission may remain in a gear longer than it
would in the normal driving mode based on braking,
throttle input, and vehicle lateral acceleration.
2. To enter the DSC mode, press the shift lever
forward to upshift or rearward to downshift.The odometer on the instrument panel cluster will
change from the mileage to a number indicating the
requested gear range when moving the shift lever
forward or rearward. SeeSpeedometer and Odometer
on page 3-33for more information on the odometer.
While using the DSC feature, the vehicle will have �rmer
shifting and increased performance. You can use this
for sport driving or when climbing or descending hills, to
stay in gear longer, or to down shift for more power
or engine braking.
The transmission will only allow you to shift into gears
appropriate for the vehicle speed and engine
Revolutions Per Minute (RPM). The transmission will
not automatically shift to the next higher gear if the
engine RPM is too high.
If shifting is prevented for any reason, the currently
selected gear will �ash multiple times, indicating that the
transmission has not shifted gears.
While in the DSC mode, the transmission will
automatically downshift when the vehicle comes to a stop
and while quickly applying the accelerator to increase
speed. This will allow for more power during take-off.
When accelerating your vehicle from a stop in snowy
and icy conditions, you may want to shift into second
gear. A higher gear ratio allows you to gain more traction
on slippery surfaces.
2-29
Page 122 of 442
Universal Home Remote System
Operation
Do not use the Universal Home Remote with any
garage door opener that does not have the stop and
reverse feature. This includes any garage door opener
model manufactured before April 1, 1982. If you
have a newer garage door opener with rolling codes,
please be sure to follow Steps 6 through 8 to complete
the programming of your Universal Home Remote
Transmitter.
Read the instructions completely before attempting to
program the Universal Home Remote. Because of
the steps involved, it may be helpful to have another
person available to assist you in the programming steps.
Keep the original hand-held transmitter for use in
other vehicles as well as for future Universal Home
Remote programming. It is also recommended that upon
the sale of the vehicle, the programmed Universal
Home Remote buttons should be erased for security
purposes. See “Erasing Universal Home Remote
Buttons” later in this section or, for assistance, see
Customer Assistance Offices on page 7-5.Be sure that people and objects are clear of the garage
door or gate operator you are programming. When
programming a garage door, it is advised to park outside
of the garage.
It is recommended that a new battery be installed in
your hand-held transmitter for quicker and more
accurate transmission of the radio-frequency signal.
Programming Universal Home Remote
Follow these steps to program up to three channels:
1. Press and hold down the two outside Universal
Home Remote buttons, releasing only when the
Universal Home Remote indicator light begins
to �ash, after 20 seconds. Do not hold down the
buttons for longer than 30 seconds and do not
repeat this step to program a second and/or third
hand-held transmitter to the remaining two Universal
Home Remote buttons.
2. Position the end of your hand-held transmitter
about 1 to 3 inches (3 to 8 cm) away from the
Universal Home Remote buttons while keeping the
indicator light in view.
3. Simultaneously press and hold both the desired
Universal Home Remote button and the hand-held
transmitter button. Do not release the buttons
until Step 4 has been completed.
2-46
Page 124 of 442
Gate Operator and Canadian
Programming
Canadian radio-frequency laws require transmitter
signals to time out or quit after several seconds of
transmission. This may not be long enough for Universal
Home Remote to pick up the signal during programming.
Similarly, some U.S. gate operators are manufactured
to time out in the same manner.
If you live in Canada, or you are having difficulty
programming a gate operator or garage door opener by
using the “Programming Universal Home Remote”
procedures, regardless of where you live, replace
Step 3 under “Programming Universal Home Remote”
with the following:
Continue to press and hold the Universal Home Remote
button while you press and release every two seconds
(cycle) the hand-held transmitter button until the
frequency signal has been successfully accepted by the
Universal Home Remote. The Universal Home Remote
indicator light will �ash slowly at �rst and then rapidly.
Proceed with Step 4 under “Programming Universal
Home Remote” to complete.
Using Universal Home Remote
Press and hold the appropriate Universal Home Remote
button for at least half of a second. The indicator light
will come on while the signal is being transmitted.
Erasing Universal Home
Remote Buttons
To erase programming from the three Universal Home
Remote buttons do the following:
1. Press and hold down the two outside buttons until
the indicator light begins to �ash, after 20 seconds.
Do not hold the two outside buttons for longer
than 30 seconds.
2. Release both buttons.
The Universal Home Remote is now in the training
(learning) mode and can be programmed at any time
beginning with Step 2 under “Programming Universal
Home Remote” shown earlier in this section.
Individual buttons cannot be erased, but they can be
reprogrammed. See “Reprogramming a Single Universal
Home Remote Button” following this section.
2-48
Page 128 of 442
Anti-Pinch Feature Override
A condition may exist that causes the anti-pinch feature
of the sunroof to activate due to weather or an
obstruction. In an emergency, the anti-pinch feature can
be overridden in a supervised mode.
To override the anti-pinch feature rotate the sunroof
control to the closed position, then press the control
upward and continue pressing upward until the sunroof
reaches the desired position.
In this mode, the sunroof can still close on an object in
its path. Use care when using the override mode.
Vehicle Personalization
In addition to the following features, your vehicle may
also have features that can be programmed through the
Driver Information Center (DIC). SeeDIC Vehicle
Personalization on page 3-70for more information.
Memory Seat and Mirrors
If your vehicle has the memory feature, you can
program and recall memory settings for the driver’s
seating and outside rearview mirror driving positions for
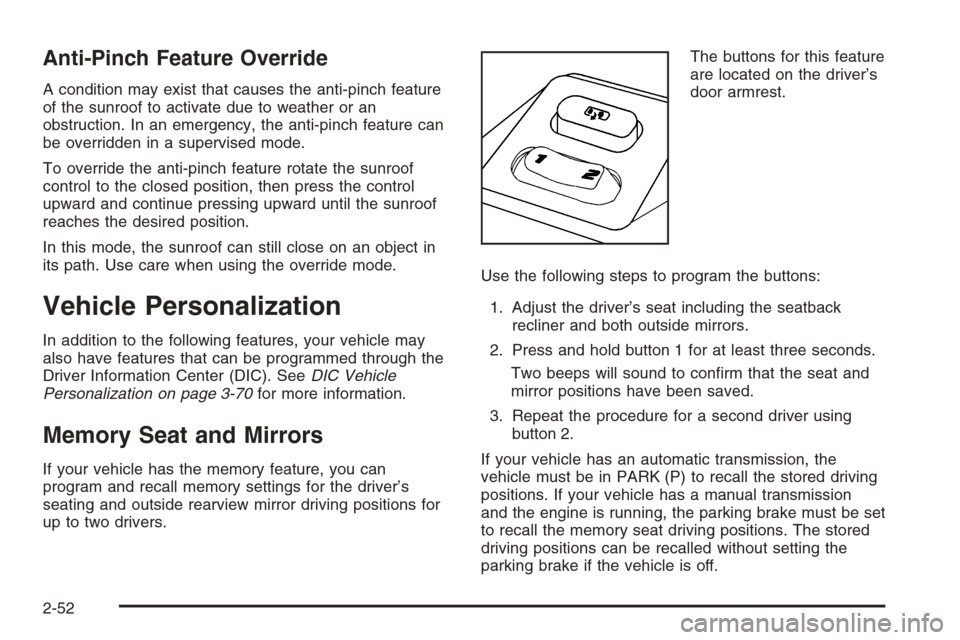
up to two drivers.The buttons for this feature
are located on the driver’s
door armrest.
Use the following steps to program the buttons:
1. Adjust the driver’s seat including the seatback
recliner and both outside mirrors.
2. Press and hold button 1 for at least three seconds.
Two beeps will sound to con�rm that the seat and
mirror positions have been saved.
3. Repeat the procedure for a second driver using
button 2.
If your vehicle has an automatic transmission, the
vehicle must be in PARK (P) to recall the stored driving
positions. If your vehicle has a manual transmission
and the engine is running, the parking brake must be set
to recall the memory seat driving positions. The stored
driving positions can be recalled without setting the
parking brake if the vehicle is off.
2-52
Page 155 of 442
To change the current mode, select one of the following:
Y(Vent):This mode directs air to the instrument
panel outlets.
\(Bi-Level):This mode directs approximately half of
the air to the instrument panel outlets, and then
directs most of the remaining air to the �oor outlets. In
automatic operation, cooler air is directed to the
upper outlets and warmer air to the �oor outlets.
[(Floor):This mode directs most of the air to the
�oor outlets with some air directed to the outboard
outlets (for the side windows), and a little air directed to
the windshield.
The mode switch can also be used to select the defog
mode. Information on defogging and defrosting can
be found later in this section.
yAz(Fan):Press this switch to increase or
decrease the fan speed. Pressing this switch cancels
automatic operation and places the system in manual
mode. Press AUTO to return to automatic operation.
If the air�ow seems low when the fan speed is at
the highest setting, the passenger compartment air �lter
may need to be replaced. For more information, see
Passenger Compartment Air Filter on page 3-29
andScheduled Maintenance on page 6-4.
h(Recirculation):This mode keeps outside air
from coming in the vehicle. It can be used to prevent
outside air and odors from entering your vehicle or
to help heat or cool the air inside your vehicle more
quickly. Press this button to turn the recirculation mode
on or off. The air-conditioning compressor also comes
on. After manually selecting recirculation, the auto button
must be pressed to enable the system to select the
optimum air delivery setting for the vehicle.
Recirculation is not available in the defog or defrost
mode and will automatically turn off after 10 minutes
when defog is selected.
Using recirculation for long periods of time may cause
the air inside your vehicle to become too dry or stuffy.
To prevent this from happening, after the air in your
vehicle has cooled, turn the recirculation mode off
or press the auto button.
QPWRR(Power/Driver’s Temperature):Press
the PWR button located on the driver’s side of
the climate control panel to turn the entire climate
control system on or off. Press the up or down arrow on
the switch to increase or decrease the temperature
inside your vehicle.
3-25
Page 193 of 442
Change Engine Oil
This message indicates that the life of the engine oil
has expired and it should be changed and that
your vehicle is due for service. See your GM dealer.
SeeEngine Oil on page 5-16andScheduled
Maintenance on page 6-4for more information.
When you reset the Change Engine Oil message by
clearing it from the display, you still must reset the
engine oil life system separately. For more information
on resetting the engine oil life system, seeEngine
Oil Life System on page 5-20. If you clear this message
from the display, it will not re-appear.
Change Trans (Transmission) Fluid
(Automatic Transmission)
This message indicates that the life of the transmission
�uid has expired and it should be changed. See
Scheduled Maintenance on page 6-4and
Recommended Fluids and Lubricants on page 6-13for
the proper �uid and change intervals.
When you reset the Change Trans Fluid message by
clearing it from the display, you still must reset the
transmission �uid life monitor separately. For more
information on resetting the transmission �uid life
monitor, seeAutomatic Transmission Fluid on
page 5-23.
Check Brake Fluid
This message will display if the ignition is in ON to
inform the driver that the brake �uid level is low.
Have the brake system serviced by your GM dealer as
soon as possible. SeeBrake System Warning Light
on page 3-38andBrakes on page 5-38for more
information.
Check Coolant Level
Notice:If your engine catches �re because you
keep driving with no coolant, your vehicle can
be badly damaged. The costly repairs would not be
covered by your warranty. SeeOverheated Engine
Protection Operating Mode on page 5-30for
information on driving to a safe place in an
emergency.
This message will appear when there is a low level of
engine coolant. Have the cooling system serviced
by your GM dealer as soon as possible. SeeEngine
Coolant on page 5-26for more information.
Check Gas Cap
When this message appears on the display, the gas cap
has not been fully tightened. You should recheck the
gas cap to ensure that it is on and tightened properly.
See “If the Light Is On Steady” underMalfunction
Indicator Lamp on page 3-41for more information.
3-63
Page 194 of 442
Check Tire Pressure
If your vehicle has a Tire Pressure Monitor (TPM)
system, this message indicates that one or more of the
vehicle’s tires are low. SeeStatus of Vehicle Systems
on page 3-54for information on checking your vehicle’s
tire pressures. Also, seeTire Pressure Monitor
System on page 5-68andIn�ation - Tire Pressure on
page 5-65for more information.
Check Washer Fluid
When this message appears on the display, it means
that your vehicle is low on windshield washer �uid. You
should re�ll the windshield washer �uid reservoir as
soon as possible. SeeWindshield Washer Fluid
on page 5-37for more information.
Competitive Driving (CTS-V)
When competitive driving mode is turned on with the
TC (traction control) button, this message will be
displayed on the DIC. The TC light will be on when the
competitive driving mode is on. The traction control
system will not operate while in competitive driving
mode. You should adjust your driving accordingly. See
the CTS-V portion ofTraction Control System (TCS)
(CTS) on page 4-9orTraction Control System (TCS)
(CTS-V) on page 4-10for more information.
Driver Door Ajar
When this message appears on the display, it means
that the driver’s door was not closed completely.
You should make sure that the driver’s door is
closed completely.
Engine Coolant Hot – AC
(Air Conditioning) Off
This message displays when the engine coolant
becomes hotter than the normal operating temperature.
To avoid added strain on a hot engine, the air
conditioning compressor is automatically turned off.
When the coolant temperature returns to normal, the air
conditioning compressor will turn back on. You can
continue to drive your vehicle.
If this message continues to appear, have the system
repaired by your GM dealer as soon as possible to avoid
damage to the engine or transmission.
3-64
Page 200 of 442
DIC Vehicle Personalization
If your vehicle has the Navigation system, see the
Navigation system manual for instructions on operating
the DIC for your vehicle.
Your vehicle has personalization that allows you to
program certain features to a preferred setting for up to
two people. The number of programmable features
varies depending upon which model of the vehicle is
purchased.
On all vehicles, features such as climate control
settings, radio preset settings, exterior lighting at unlock,
remote lock and unlock con�rmation, and automatic
door locks have already been programmed for
your convenience.
Some vehicles have additional features that can be
programmed including the seat and outside rearview
mirror position.
If your vehicle has the ability to program additional
personalization features, the driver’s preferences are
recalled by pressing the unlock button on the Remote
Keyless Entry (RKE) transmitter, 1 or 2, or by pressing
the appropriate memory button, 1 or 2, located on
the driver’s door. Certain features can be programmed
not to recall until the key is placed in the ignition.
To change feature preferences, see “Entering the
Personalization Menu” following.
Entering the Personalization Menu
To enter the feature programming mode, use the
following procedure:
1. Turn the ignition to ON, but do not start the engine.
Make sure an automatic transmission is in PARK (P)
or a manual transmission has the parking brake set.
To avoid excessive drain on the battery, it is
recommended that the headlamps are turned off.
2. If your vehicle has memory settings, press the
appropriate memory button, 1 or 2, located on
the driver’s door armrest. The DIC display will show
either Driver 1 or 2 depending on which button
was selected.
3. Press the PWR/VOL knob to turn the radio on.
4. Press the TUNE/SEL knob once to access the main
menu of the DIC.
5. Turn the TUNE/SEL knob until SETUP is highlighted.
6. Press the TUNE/SEL knob once to access the
SETUP menu.
7. Turn the TUNE/SEL knob until the feature you want
to change is highlighted, then press the TUNE/SEL
knob to turn the feature on or off. If the feature
is turned on, a check mark will appear next to the
feature name.
If none of the personalization items are turned on,
turn on the personalization menu by pressing
the TUNE/SEL knob. The list of features will then
appear, and you can repeat Step 6.
3-70
Page 202 of 442
Con�gure SWC (Steering Wheel
Controls) Keys
This feature allows you to customize the functions of the
four steering wheel controls located on the left spoke
of the steering wheel. SeeRecon�gurable Steering
Wheel Controls (SWC) (CTS) on page 3-7for
programming information.
Remote Recall Memory
If your vehicle has the optional memory package, you
will have this feature. When this feature is turned on, you
can recall any previously programmed seat and mirror
controls when the unlock button on the Remote Keyless
Entry (RKE) transmitter is pressed.
Programmable Modes
Mode 1:ON
Mode 2:OFF
Before your vehicle was shipped from the factory, it was
programmed to Mode 2. The mode to which the
vehicle was programmed may have been changed since
it left the factory.To program the vehicle to a different mode, use the
following procedure:
1. Enter the personalization portion of the SETUP
menu following the instructions listed previously.
2. Turn the TUNE/SEL knob until REMOTE RECALL
MEMORY is highlighted.
3. Press the TUNE/SEL knob to switch back and forth
between on and off.
When the mode is turned on, a check mark will
appear next to the feature name.
If this feature is selected, Remote Exit Recall or Key In
Recall Memory cannot be selected.
The mode you selected is now set. You can either exit
the programming mode by following the instructions
later in this section or program the next feature available
on your vehicle.
Remote Exit Recall
If your vehicle has the optional memory package, you
will have this feature. When this feature is turned on, you
can recall any previously programmed exit position for
the driver’s seat when the unlock button on the Remote
Keyless Entry (RKE) transmitter is pressed.
3-72