change time CADILLAC CTS 2007 1.G User Guide
[x] Cancel search | Manufacturer: CADILLAC, Model Year: 2007, Model line: CTS, Model: CADILLAC CTS 2007 1.GPages: 518, PDF Size: 2.77 MB
Page 232 of 518
8(Clock):Use this menu item to set the time on
the clock.
SeeSetting the Time on page 259for more
information.
8/4(Clock/Information Display):Use this
menu item to toggle between the clock display and
the XM™ Information (Song, Artist, Album), if
available.
SeeSetting the Time on page 259and “XM™
Satellite Radio Service” underRadio with CD on
page 260for more information.
SETUP:When you select this menu item, the
following submenu is available:
LANGUAGE
PERSONALIZATION
CONFIGURE DISPLAY KEYS
CONFIGURE SWC (Steering Wheel
Control) KEYS
To change the language displayed on the radio,
select LANGUAGE by pressing the TUNE/SEL
knob. Turn the TUNE/SEL knob to scroll through
the available languages and press the knob tomake your selection. If you accidentally select a
language that you did not want, ENGLISH is
always at the top of the language list.
For more information on the other items in the
SETUP menu, seeDIC Vehicle Personalization on
page 242andRecon�gurable Steering Wheel
Controls (SWC) (CTS) on page 169.
DIC Warnings and Messages
These messages will appear if there is a problem
detected in one of your vehicle’s systems.
You must acknowledge a message to clear it from
the screen for further use. To clear a message,
press the CLR button.
Be sure to take any message that appears on the
screen seriously and remember that clearing
the message will only make the message
disappear, not the problem.
Battery Not Charging
When this message appears on the display, there
is a problem with the generator and battery
charging systems. Have the electrical system
checked by your dealer as soon as possible.
232
Page 248 of 518

Programmable Modes
Mode 1:ON
Mode 2:OFF
Before your vehicle was shipped from the factory,
it was programmed to Mode 2. The mode to
which the vehicle was programmed may have
been changed since it left the factory.
To program the vehicle to a different mode, use
the following procedure:
1. Enter the personalization portion of the
SETUP menu following the instructions
listed previously.
2. Turn the TUNE/SEL knob until AUTO EXIT
SEAT is highlighted.
3. Press the TUNE/SEL knob to switch back and
forth between on and off.
When the mode is turned on, a check mark will
appear in the box next to the feature name.
The mode you selected is now set. You can either
exit the programming mode by following the
instructions later in this section or program the
next feature available on your vehicle.Twilight Delay
This feature allows you to set the amount of time
you want the exterior lamps to remain on after
you exit the vehicle.
Programmable Modes
Mode 1:0:00 seconds
Mode 2:0:15 seconds
Mode 3:0:30 seconds
Mode 4:1:00 minute
Mode 5:1:30 minutes
Mode 6:2:00 minutes
Mode 7:2:30 minutes
Mode 8:3:00 minutes
Before your vehicle was shipped from the factory,
it was programmed to Mode 1. The mode to
which the vehicle was programmed may have
been changed since the vehicle left the factory.
248
Page 249 of 518

To determine the mode to which the vehicle is
programmed or to program the vehicle to a
different mode, use the following procedure:
1. Enter the personalization portion of the
SETUP menu following the instructions
listed previously.
2. Turn the TUNE/SEL knob until TWILIGHT
DELAY is highlighted.
3. Press the TUNE/SEL knob to scroll through
and select the available delay settings.
If you choose Mode 1, the exterior lamps will
not illuminate when you exit the vehicle.
Only one mode can be selected at a time.
The mode you selected is now set. You can either
exit the programming mode by following the
instructions later in this section or program the
next feature available on your vehicle.
Lights Flash at Unlock
This feature �ashes the exterior lamps when the
Remote Keyless Entry (RKE) transmitter is used to
unlock the vehicle. The lamps will �ash for about
20 seconds unless a door is opened, the ignition is
turned to ACCESSORY, ON, or START, or the RKE
transmitter is used to lock the vehicle.Programmable Modes
Mode 1:ON
Mode 2:OFF
Before your vehicle was shipped from the factory,
it was programmed to Mode 1. The mode to
which the vehicle was programmed may have
been changed since it left the factory.
To program the vehicle to a different mode, use
the following procedure:
1. Enter the personalization portion of the
SETUP menu following the instructions
listed previously.
2. Turn the TUNE/SEL knob until LIGHTS
FLASH AT UNLOCK is highlighted.
3. Press the TUNE/SEL knob to switch back and
forth between on and off.
When the mode is turned on, a check mark
will appear next to the feature name.
The mode you selected is now set. You can either
exit the programming mode by following the
instructions later in this section or program the
next feature available on your vehicle.
249
Page 261 of 518
XM™ Satellite Radio Service
XM™ is a satellite radio service that is based in
the 48 contiguous United States and Canada.
XM™ offers a large variety of coast-to-coast
channels including music, news, sports, talk,
traffic/weather (U.S. subscribers), and children’s
programming. XM™ provides digital quality
audio and text information that includes song title
and artist name. A service fee is required in
order to receive the XM™ service. For more
information, contact XM™; In the U.S. at
www.xmradio.com or call 1-800-852-XMXM (9696)
or in Canada at www.xmradio.ca or call
1-877-GET-XMSR (438-9677).
CLOCK/INFO DISP (Clock/Information Display):
Press the CLOCK/INFO DISP button to switch
between the clock display, the XM™ screen, and
the XM™ information display.Press this button while in XM™ mode to retrieve
three different categories of information related
to the current song or channel: Artist, Song Title,
and Category. To view this information, perform
the following:
1. Press the TUNE/SEL knob to enter the
main menu.
2. Turn the TUNE/SEL knob until CLOCK/INFO
DISP appears on the display.
3. Press the TUNE/SEL knob to select
CLOCK/INFO DISP. The display changes to
show the additional XM™ information.
4. To return to the original display, press the
CLR (clear) button or wait for the display to
time out.
If the CLOCK/INFO DISP is con�gured into one of
the con�gurable keys, pressing the key switches
the display between the radio station frequency
and the time. See “Con�gurable Radio Display
Keys” later in this section for more information.
261
Page 262 of 518
Playing the Radio
PWR (Power):Press this knob to turn the system
on and off.
VOL (Volume):Turn this knob to increase or to
decrease the volume.
AVC (Automatic Volume Compensation):
Available only with the premium Bose
®audio
system. AVC, which utilizes Bose AudioPilot®
noise compensation technology, continuously
adjusts the audio system equalization, to
compensate for background noise, so that your
music always sounds the same at the set volume
level. This feature is most effective at lower
radio volume settings where background noise
can affect how well you hear the music being
played through your vehicle’s audio system.
At higher volume settings, where the music is
much louder than the background noise, there may
be little or no adjustments by AVC. To turn AVC
on and off, perform the following steps:
1. Press the TUNE/SEL knob to enter the
main menu.
2. Turn the TUNE/SEL knob until AUTO
VOLUME COMP. appears on the display.3. Press the TUNE/SEL knob to turn AVC on or
off. An X appears in the box when AVC is
selected on.
4. Press the CLR button to exit the display.
To return to the original display, repeatedly
press the CLR button or wait for the display to
time out.
For additional information on AudioPilot
®, please
visit www.bose.com/audiopilot.
SOURCE:Press this button to select a source,
either radio or CD. The CD must be loaded to select
the source and to play. CD appears on the display if
a CD is loaded. If a CD is not loaded the display
does not change from the radio source.
Finding a Station
BAND:Press this button to select FM1, FM2, AM,
or XM1 or XM2 (if equipped).
QSEEKR:Press the up or the down arrow to
go to the next or to the previous station and
stay there. SEEK appears on the display.
The sound mutes while seeking.
The radio only seeks stations with a strong signal
that are in the selected band.
262
Page 272 of 518

F3 RDM (Random):Press this �rm key to listen
to the tracks in random, rather than sequential,
order. RANDOM appears on the display.
Press RDM again to turn off random play.
RANDOM disappears from the display.
F4 RPT (Repeat):Press this �rm key to hear a
track over again. REPEAT appears on the display.
Press RPT again to turn off repeat play. REPEAT
disappears from the display.
F6 DISP (Display):Press this �rm key to display
the time of the track. Press this �rm key again
to remove the time of the track from the display.
QSEEKR:Press the up or the down arrow to go
to the next or to the previous track on the CD.
QSCANR:Press this button to listen to each
track for 10 seconds. The CD goes to a track,
plays for 10 seconds, then goes to the next track.
Press this button again to stop scanning.
X(Eject):Press this button to stop a CD when
it is playing or to eject a CD when it is not
playing. Eject may be activated with the ignition
and the radio off.
Using the Six-Disc CD Changer
The CD player can play the smaller 3 inch (8 cm)
single CDs with an adapter ring. Full-size CDs
and the smaller CDs are loaded in the same
manner.
If playing a CD-R, the sound quality may be
reduced due to CD-R quality, the method of
recording, the quality of the music that has been
recorded, and the way the CD-R has been
handled. There may be an increase in skipping,
difficulty in �nding tracks, and/or difficulty in loading
and ejecting. If these problems occur, check the
bottom surface of the CD. If the surface of the CD
is damaged, such as cracked, broken, or
scratched, the CD will not play properly. If the
surface of the CD is soiled, seeCare of Your CDs
on page 283for more information.
If there is no apparent damage, try a known
good CD.
272
Page 276 of 518
If any error occurs repeatedly or if an error cannot
be corrected, contact your dealer. If the radio
displays an error message, write it down and
provide it to your dealer when reporting the
problem.
Con�gurable Radio Display Keys
This feature allows you to customize the four keys
that are located on each side of the radio display
to make it easier to adjust the radio features. Other
non-radio related features are also available for
customizing.
To program the con�gurable radio display keys,
perform the following steps:
1. Press the TUNE/SEL knob to enter the
main menu.
2. Turn the TUNE/SEL knob until SETUP
appears on the display.
3. Press the TUNE/SEL knob to enter
into SETUP.
4. Turn the TUNE/SEL knob until CONFIGURE
DISPLAY KEYS appears on the display.5. Press the TUNE/SEL knob to enter into
CONFIGURE DISPLAY KEYS.
6. Turn the TUNE/SEL knob to select which of
the four con�gurable keys you would like to
change. The currently assigned feature shows
on the display.
7. Press the TUNE/SEL knob to select the
con�gurable key to change.
8. Turn the TUNE/SEL knob to �nd the feature
that you would like to store to the key.
9. Press the TUNE/SEL knob when you have
found the feature to be stored. The display
updates, by showing the symbol of the
feature that you selected next to the
con�gurable key.
10. Repeat the previous steps for each
con�gurable key.
Once a feature is programmed to a key, the
feature does not appear on the display when
programming the remaining con�gurable keys.
The con�gurable keys can be changed at any time.
276
Page 293 of 518
Remember: ABS does not change the time you
need to get your foot up to the brake pedal
or always decrease stopping distance. If you get
too close to the vehicle in front of you, you will not
have time to apply the brakes if that vehicle
suddenly slows or stops. Always leave enough
room up ahead to stop, even though you
have ABS.
Using ABS
Do not pump the brakes. Just hold the brake pedal
down �rmly and let anti-lock work for you. You may
hear the anti-lock pump or motor operate, and feel
the brake pedal pulsate, but this is normal.
Braking in Emergencies
With ABS, you can steer and brake at the same
time. In many emergencies, steering can help you
more than even the very best braking.
Traction Control System (TCS)
(CTS)
Your vehicle has a traction control system that limits
wheel spin. This is especially useful in slippery road
conditions. The system operates only if it senses
that one or both of the rear wheels are spinning or
beginning to lose traction. When this happens,
the system brakes the spinning wheel(s) and/or
reduces engine power to limit wheel spin.
You may feel or hear the system working, but this
is normal.
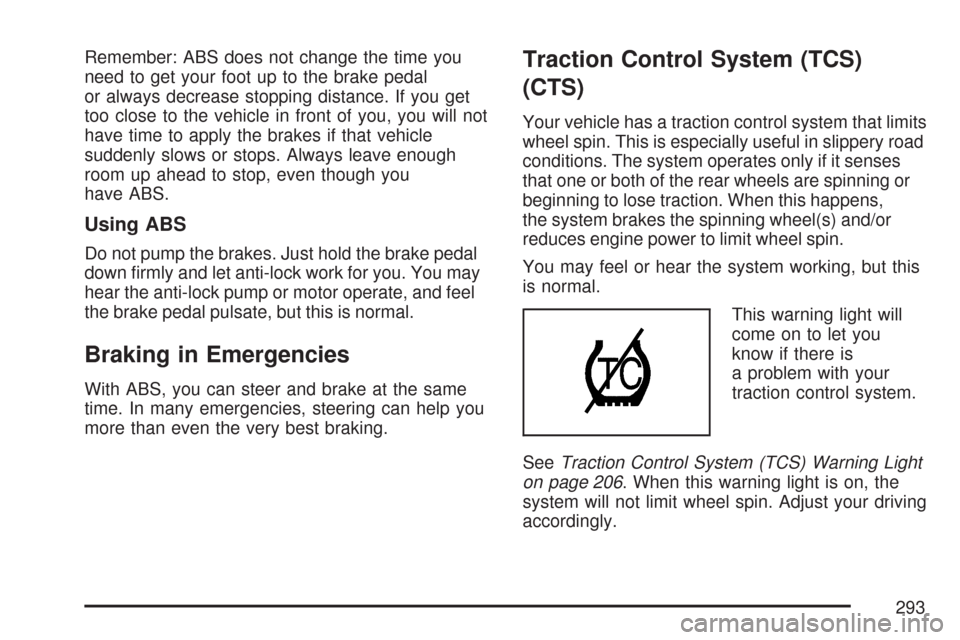
This warning light will
come on to let you
know if there is
a problem with your
traction control system.
SeeTraction Control System (TCS) Warning Light
on page 206. When this warning light is on, the
system will not limit wheel spin. Adjust your driving
accordingly.
293
Page 303 of 518
Check your vehicle’s mirrors, glance over your
shoulder, and start your left lane change
signal before moving out of the right lane to
pass. When you are far enough ahead of
the passed vehicle to see its front in
your vehicle’s inside mirror, activate the right
lane change signal and move back into
the right lane. Remember that your vehicle’s
passenger side outside mirror is convex.
The vehicle you just passed may seem to be
farther away from you than it really is.
Try not to pass more than one vehicle at a
time on two-lane roads. Reconsider before
passing the next vehicle.
Do not overtake a slowly moving vehicle too
rapidly. Even though the brake lamps are
not �ashing, it may be slowing down or starting
to turn.
If you are being passed, make it easy for the
following driver to get ahead of you. Perhaps
you can ease a little to the right.
Loss of Control
Let us review what driving experts say about what
happens when the three control systems — brakes,
steering, and acceleration — do not have enough
friction where the tires meet the road to do what the
driver has asked.
In any emergency, do not give up. Keep trying to
steer and constantly seek an escape route or
area of less danger.
Skidding
In a skid, a driver can lose control of the vehicle.
Defensive drivers avoid most skids by taking
reasonable care suited to existing conditions, and
by not overdriving those conditions. But skids
are always possible.
The three types of skids correspond to your
vehicle’s three control systems. In the braking skid,
your wheels are not rolling. In the steering or
cornering skid, too much speed or steering in a
curve causes tires to slip and lose cornering force.
And in the acceleration skid, too much throttle
causes the driving wheels to spin.
303
Page 349 of 518

Your vehicle’s engine is �lled at the factory
with a Mobil 1®synthetic oil, which meets all
requirements for your vehicle.
Substitute Engine Oil: When adding oil to maintain
engine oil level, oil meeting GM Standard
GM4718M may not be available. You can add
substitute oil designated SAE 5W-30 with
the starburst symbol at all temperatures. Substitute
oil not meeting GM Standard GM4718M should
not be used for an oil change.
Engine Oil Additives
Do not add anything to the oil. The recommended
oils with the starburst symbol that meet GM
standards are all you need for good performance
and engine protection.
Engine Oil Life System
When to Change Engine Oil
Your vehicle has a computer system that lets you
know when to change the engine oil and �lter.
This is based on engine revolutions and engine
temperature, and not on mileage. Based on driving
conditions, the mileage at which an oil changewill be indicated can vary considerably. For the oil
life system to work properly, you must reset the
system every time the oil is changed.
When the system has calculated that oil life has
been diminished, it will indicate that an oil change is
necessary. A change engine oil message in the
Driver Information Center (DIC) will come on.
Change your oil as soon as possible within the next
600 miles (1 000 km). It is possible that, if you are
driving under the best conditions, the oil life system
may not indicate that an oil change is necessary for
over a year. However, your engine oil and �lter
must be changed at least once a year and at this
time the system must be reset. Your dealer has
GM-trained service people who will perform this
work using genuine GM parts and reset the system.
It is also important to check your oil regularly and
keep it at the proper level.
If the system is ever reset accidentally, you must
change your oil at 3,000 miles (5 000 km)
since your last oil change. Remember to reset the
oil life system whenever the oil is changed.
349