display CADILLAC CTS 2008 2.G Owner's Manual
[x] Cancel search | Manufacturer: CADILLAC, Model Year: 2008, Model line: CTS, Model: CADILLAC CTS 2008 2.GPages: 490, PDF Size: 2.59 MB
Page 169 of 490
Defogging and Defrosting
Fog on the inside of windows is a result of high humidity
(moisture) condensing on the cool window glass.
This can be minimized if the climate control system
is used properly. There are two modes to clear fog
from the windshield. Use the defog mode to clear the
windows of fog or moisture and warm the passengers.
Use the defrost mode to remove fog or frost from
the windshield more quickly.
HG(Mode):Press the mode buttons until defog
appears on the display.
-(Defog):This mode directs the air between the
windshield, �oor outlets and side windows. When this
mode is selected, the system turns off recirculation and
runs the air-conditioning compressor unless the outside
temperature is at or below freezing. If recirculation mode
is selected while in defog mode, it will be cancelled after
10 minutes.
0(Defrost):Pressing defrost directs most of the air
to the windshield, with some air directed to the side
windows. In this mode, the system automatically turns off
recirculation and runs the air-conditioning compressor,
unless the outside temperature is at or below freezing.
This mode may also cause the fan speed and air
temperature to increase.
Rear Window Defogger
The rear window defogger uses a warming grid to
remove fog or frost from the rear window.
The rear window defogger will only work when the
ignition is in ON/RUN.
=(Rear Window Defogger):Press this button to turn
the rear window defogger on or off. Be sure to clear
as much snow from the rear window as possible.
The rear window defogger turns off about 15 minutes
after the button is �rst pressed if the vehicle is moving
at slower speeds. At higher speeds, the rear window
defogger may stay on continuously. With each additional
press, the defogger runs for about 10 minutes.
The defogger can also be turned off by pressing the
button again or by turning off the engine.
The heated outside rearview mirrors will heat to help
clear fog or frost from the surface of the mirror when
the rear window defogger button is on. SeeOutside
Heated Mirrors on page 2-51.
Notice:Do not try to clear frost or other material
from the inside of the front windshield and rear
window with a razor blade or anything else that is
sharp. This may damage the rear window defogger
grid and affect your radio’s ability to pick up
stations clearly. The repairs wouldn’t be covered by
your warranty.
3-27
Page 174 of 490
Speedometer and Odometer
The speedometer lets you see your speed in either
miles per hour (mph) or kilometers per hour (km/h).
The odometer shows how far your vehicle has been
driven, in either miles (used in the United States)
or kilometers (used in Canada).
If your vehicle has to have a new odometer installed,
the new one may read the correct mileage. This is
because your vehicle’s computer has stored the mileage
in memory.
While the Driver Shift Control (DSC) feature is active,
the odometer will change to show the gear range.
SeeAutomatic Transmission Operation on page 2-38
for more information.
Trip Odometers
The trip odometer can record the number of miles or
kilometers traveled for up to two trips.
The trip odometer is part of the Driver Information
Center (DIC), for more information seeDIC Operation
and Displays on page 3-48.
For vehicles that have the navigation system, see your
Navigation System manual for more information.
Tachometer
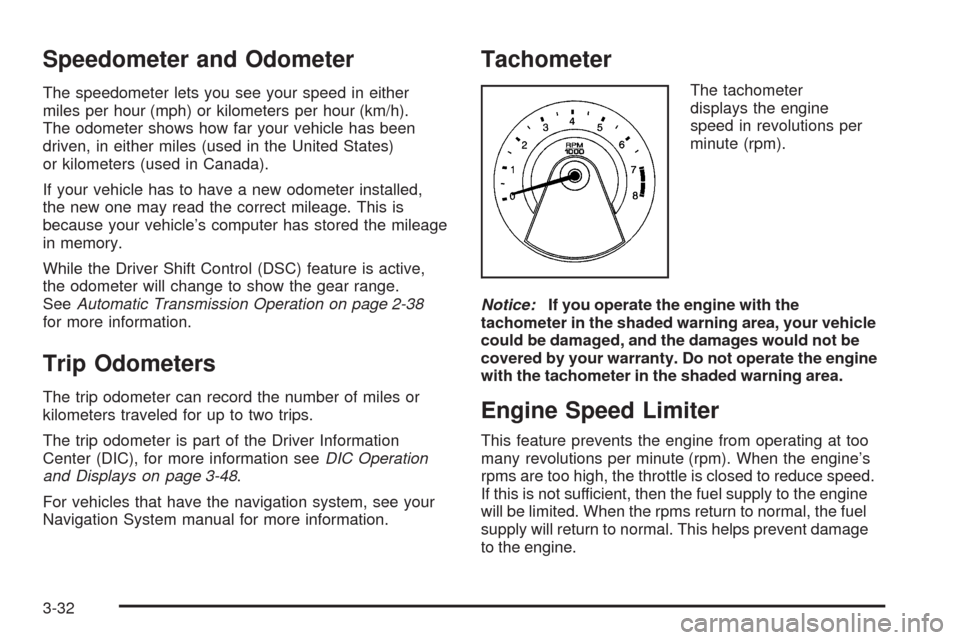
The tachometer
displays the engine
speed in revolutions per
minute (rpm).
Notice:If you operate the engine with the
tachometer in the shaded warning area, your vehicle
could be damaged, and the damages would not be
covered by your warranty. Do not operate the engine
with the tachometer in the shaded warning area.
Engine Speed Limiter
This feature prevents the engine from operating at too
many revolutions per minute (rpm). When the engine’s
rpms are too high, the throttle is closed to reduce speed.
If this is not sufficient, then the fuel supply to the engine
will be limited. When the rpms return to normal, the fuel
supply will return to normal. This helps prevent damage
to the engine.
3-32
Page 190 of 490
Driver Information Center (DIC)
The Driver Information Center (DIC) gives you the
status of many of your vehicle’s systems. The DIC is
also used to display warning/status messages.
All messages appear in the DIC display located at the
bottom of the instrument panel cluster. The DIC buttons
are located on the instrument panel, next to the
steering wheel.
The DIC comes on when the ignition is on. After a short
delay, the DIC displays the information that was last
displayed before the engine was turned off.
The top line of the DIC display shows the DIC
information. The bottom line of the DIC display shows
the compass. The compass displays in the trip/fuel
menus and in some vehicle information menus.
If a problem is detected, a warning message appears
on the display. Take any message that appears on
the display seriously and remember that clearing
the message only makes the message disappear,
and does not correct the problem.
DIC Operation and Displays
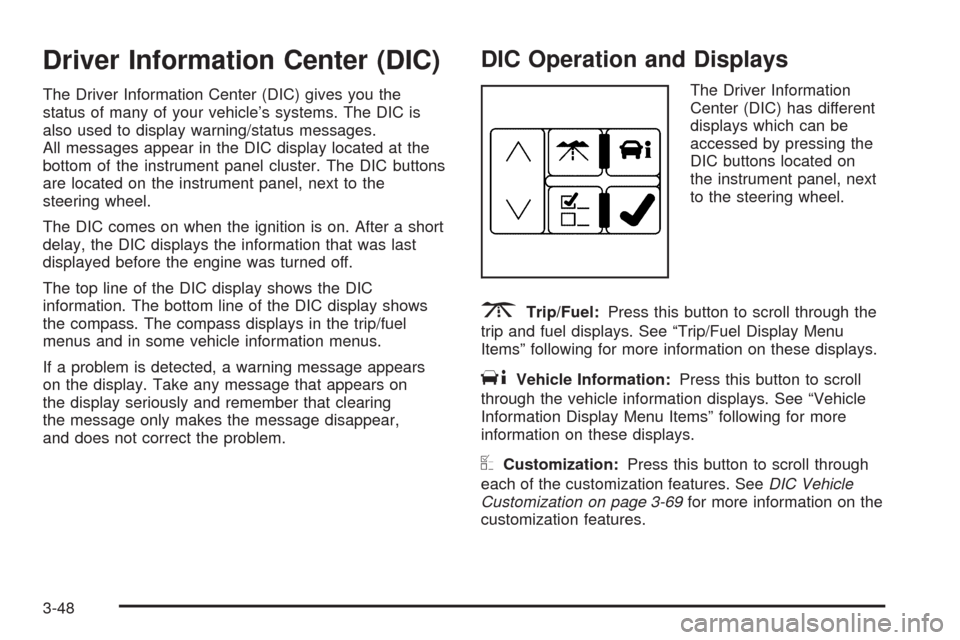
The Driver Information
Center (DIC) has different
displays which can be
accessed by pressing the
DIC buttons located on
the instrument panel, next
to the steering wheel.
3Trip/Fuel:Press this button to scroll through the
trip and fuel displays. See “Trip/Fuel Display Menu
Items” following for more information on these displays.
TVehicle Information:Press this button to scroll
through the vehicle information displays. See “Vehicle
Information Display Menu Items” following for more
information on these displays.
UCustomization:Press this button to scroll through
each of the customization features. SeeDIC Vehicle
Customization on page 3-69for more information on the
customization features.
3-48
Page 191 of 490
VSet/Reset:Press this button to reset certain DIC
features and to acknowledge DIC warning messages
and clear them from the DIC display.
yzMenu Up/Down:Press this button to scroll up
and down the menu items.
Trip/Fuel Display Menu Items
3
(Trip/Fuel):The following display menu items can
be displayed by pressing the trip/fuel button:
Odometer
This display shows the distance the vehicle has been
driven in either miles (mi) or kilometers (km).
Trip A or Trip B
These displays show the current distance traveled since
the last reset for each trip odometer in either miles (mi)
or kilometers (km). Both odometers can be used at
the same time. Each trip odometer can be reset to zero
separately by pressing and holding the set/reset button
for a few seconds while the desired trip odometer is
displayed.
Fuel Range
This display shows the approximate number of
remaining miles (mi) or kilometers (km) you can drive
without re�lling the fuel tank. This estimate is based
on the current driving conditions and changes if the
driving conditions change. For example, if you are
driving in traffic and making frequent stops, the display
may read one number, but if you enter the freeway,
the number may change even though you still have the
same amount of fuel in the fuel tank. This is because
different driving conditions produce different fuel
economies. Generally, freeway driving produces better
fuel economy than city driving.
Once the range drops below about 30 miles (48 km)
remaining, the display shows Low Range.
If your vehicle is low on fuel, the Fuel Level Low
message displays. See “Fuel Level Low” under
DIC Warnings and Messages on page 3-56for more
information.
3-49
Page 192 of 490
AVG (Average) Economy
This display shows the approximate average miles per
gallon (mpg) or liters per 100 kilometers (L/100 km).
This number is calculated based on the number
of mpg (L/100 km) recorded since the last time this
display was reset. To reset this display to zero, press
the set/reset button.
Timer
This display can be used like a stopwatch. You can
record the time it takes to travel from one point to
another. To access the timer, press the trip/fuel button
until Timer 00:00:00 displays.
To turn on the timer, press the set/reset button until the
timer starts.
To turn off the timer, press the set/reset button again.
The timer stops and displays the end timing value.
To reset the timer to zero, press and hold the set/reset
button after the timer has been stopped.
Inst (Instantaneous) Economy
This display shows the current fuel economy
in either miles per gallon (mpg) or liters per
100 kilometers (L/100 km). This number re�ects only
the fuel economy that the vehicle has right now
and changes frequently as driving conditions change.
Unlike average economy, this display cannot be reset.
AVG (Average) Speed
This display shows the average speed of the vehicle
in either miles per hour (mph) or kilometers per
hour (km/h). This average is calculated based on the
various vehicle speeds recorded since the last reset of
this display. To reset this display to zero, press the
set/reset button.
Speedometer
This display shows a digital speedometer in the DIC.
The speed displays in either miles per hour (mph)
or kilometers per hour (km/h). To change the units from
English to metric, see “Units” later in this section.
Blank Display
This display shows no information.
3-50
Page 193 of 490
Vehicle Information Display Menu Items
T
(Vehicle Information):The following display
menu items can be displayed by pressing the vehicle
information button:
Oil Life Remaining
If the vehicle has this display, it shows the estimated oil
life remaining. If you see 99% Oil Life Remaining on
the display, that means that 99% of the current oil life
remains.
When the oil life is depleted, the Change Engine Oil
Soon message appears on the display. You should
change the oil as soon as possible. In addition to the
engine oil life system monitoring the oil life, additional
maintenance is recommended in the Maintenance
Schedule in this manual. SeeScheduled Maintenance
on page 6-4andEngine Oil on page 5-16.
Remember, you must reset the Oil Life yourself after
each oil change. It does not reset itself. Also, be careful
not to reset the Oil Life accidentally at any time other
than when the oil has just been changed. It cannot
be reset accurately until the next oil change. To reset
the engine oil life system, SeeEngine Oil Life System on
page 5-19. The display shows 100% when the system
is reset.
Units
This display allows you to select between English or
Metric units of measurement. Once in this display,
press the set/reset button to select between English or
Metric units.
Parking Assist
If your vehicle has the Ultrasonic Rear Parking Assist
(URPA) system, this display allows the system to
be turned on or off. Once in this display, press the
set/reset button to select between On or Off. If you
choose On, the system turns on. If you choose Off,
the system turns off. The URPA system automatically
turns back on after each vehicle start. When the URPA
system is turned off and the vehicle is shifted out of
PARK (P), the DIC displays the Parking Assist Off
message as a reminder that the system has been turned
off. SeeDIC Warnings and Messages on page 3-56
andUltrasonic Rear Parking Assist (URPA) on
page 2-52for more information.
3-51
Page 194 of 490
Tire Pressure
The pressure for each tire can be viewed in the DIC.
The tire pressure is shown in either pounds per square
inch (psi) or kilopascals (kPa). Press the vehicle
information button until the DIC displays Front Tire
PSI (kPa) Left ## Right ##. Press the vehicle information
button again until the DIC displays Rear Tire PSI (kPa)
Left ## Right ##.
If a low or high tire pressure condition is detected by
the system while driving, a message advising you
to check the pressure in a speci�c tire appears in the
display. SeeInflation - Tire Pressure on page 5-66and
DIC Warnings and Messages on page 3-56for more
information.
Battery Voltage
This display shows the current battery voltage. Your
vehicle’s charging system regulates voltage based
on the state of the battery. The battery voltage may
�uctuate when viewing this information on the DIC.
This is normal.
If there is a problem with the battery charging system,
the charging system light illuminates and/or the DIC
displays a message. SeeCharging System Light
on page 3-37,DIC Warnings and Messages on
page 3-56andElectric Power Management on
page 3-21for more information.
Calibrate Compass
Your vehicle may have this feature. The compass can
be manually calibrated. To calibrate the compass
through the DIC, seeDIC Compass on page 3-53.
Change Compass Zone
Your vehicle may have this feature. To change the
compass zone through the DIC, seeDIC Compass on
page 3-53.
Relearn Remote Key
If your vehicle has the Remote Keyless Entry (RKE)
system, this display allows you to match the transmitter
to your vehicle. If your vehicle has the keyless access
system, seeKeyless Access System Operation on
page 2-10for instructions on matching a keyless access
transmitter to your vehicle. To match an RKE transmitter
to your vehicle:
1. Press the vehicle information button until
Press
VTo Relearn Remote Key displays.
2. Press the set/reset button until Remote Key
Learning Active is displayed.
3-52
Page 195 of 490

3. Press and hold the lock and unlock buttons on
the �rst transmitter at the same time for about
15 seconds.
On vehicles with memory recall seats, the �rst
transmitter learned will match driver 1 and
the second will match driver 2.
A chime sounds indicating that the transmitter is
matched.
4. To match additional transmitters at this time,
repeat Step 3.
Each vehicle can have a maximum of eight
transmitters matched to it.
5. To exit the programming mode, you must cycle
the key to LOCK/OFF.
Blank Display
This display shows no information.
DIC Compass
Your vehicle may have a compass in the Driver
Information Center (DIC).
Compass Zone
The zone is set to zone eight upon leaving the factory.
Your dealer/retailer will set the correct zone for your
location.
Under certain circumstances, such as during a long
distance cross-country trip or moving to a new state
or province, it will be necessary to compensate for
compass variance by resetting the zone through the
DIC if the zone is not set correctly.
Compass variance is the difference between the earth’s
magnetic north and true geographic north. If the
compass is not set to the zone where you live, the
compass may give false readings. The compass must
be set to the variance zone in which the vehicle is
traveling.
3-53
Page 196 of 490

To adjust for compass variance, use the following
procedure:
Compass Variance (Zone) Procedure
1. Do not set the compass zone when the vehicle is
moving. On an automatic transmission vehicle,
only set it when the vehicle is in PARK (P). On a
manual transmission vehicle, only set it when
the vehicle is stopped.
Press the vehicle information button until
Press
VTo Change Compass Zone displays.
2. Find the vehicle’s current location and variance
zone number on the map.
Zones 1 through 15 are available.
3. Press the set/reset button to scroll through and
select the appropriate variance zone.
4. Press the trip/fuel button until the vehicle heading,
for example, N for North, is displayed in the DIC.
5. Calibrate the compass. See “Compass Calibration
Procedure” following.
3-54
Page 197 of 490

Compass Calibration
The compass can be manually calibrated. Only calibrate
the compass in a magnetically clean and safe location,
such as an open parking lot, where driving the vehicle
in circles is not a danger. It is suggested to calibrate
away from tall buildings, utility wires, manhole covers, or
other industrial structures, if possible.
If CAL should ever appear in the DIC display, the
compass should be calibrated.
If the DIC display does not show a heading, for example,
N for North, or the heading does not change after
making turns, there may be a strong magnetic �eld
interfering with the compass. Such interference may
be caused by a magnetic CB or cell phone antenna
mount, a magnetic emergency light, magnetic note
pad holder, or any other magnetic item. Turn off
the vehicle, move the magnetic item, then turn on
the vehicle and calibrate the compass.To calibrate the compass, use the following procedure:Compass Calibration Procedure
1. Before calibrating the compass, make sure the
compass zone is set to the variance zone in
which the vehicle is located. See “Compass
Variance (Zone) Procedure” earlier in this section.
Do not operate any switches such as window,
sunroof, climate controls, seats, etc. during
the calibration procedure.
2. Press the vehicle information button until
Press
VTo Calibrate Compass displays.
3. Press the set/reset button to start the compass
calibration.
4. The DIC will display Calibrating Drive In Circles.
Drive the vehicle in tight circles at less than
5 mph (8 km/h) to complete the calibration. The DIC
will display Calibration Complete for a few seconds
when the calibration is complete. The DIC display
will then return to Press
VTo Calibrate Compass.
3-55