warning CADILLAC CTS 2011 2.G Workshop Manual
[x] Cancel search | Manufacturer: CADILLAC, Model Year: 2011, Model line: CTS, Model: CADILLAC CTS 2011 2.GPages: 496, PDF Size: 7.71 MB
Page 127 of 496

Black plate (59,1)Cadillac CTS/CTS-V Owner Manual - 2011
Seats and Restraints 3-59
If the position you are using
has a fixed headrest or
head restraint and you are
using a dual tether, route
the tether around the
headrest or head restraint.If the position you are using
has a fixed headrest or
head restraint and you are
using a single tether, route
the tether over the headrest
or head restraint.
3. Before placing a child in the child restraint, make sure it is
securely held in place. To check,
grasp the child restraint at the
LATCH path and attempt to
move it side‐to‐side and
back‐and‐forth. There should be
no more than 2.5 cm (1 in) of
movement for proper installation.
Replacing LATCH System
Parts After a Crash
{WARNING
A crash can damage the LATCH
system in the vehicle. A damaged
LATCH system may not properly
secure the child restraint,
resulting in serious injury or even
death in a crash. To help make
sure the LATCH system is
working properly after a crash,
see your dealer to have the
system inspected and any
necessary replacements made as
soon as possible.
If the vehicle has the LATCH system
and it was being used during a
crash, new LATCH system parts
may be needed.
New parts and repairs may be
necessary even if the LATCH
system was not being used at the
time of the crash.
Page 130 of 496

Black plate (62,1)Cadillac CTS/CTS-V Owner Manual - 2011
3-62 Seats and Restraints
Securing Child Restraints
(Front Passenger Seat)
This vehicle has airbags. A rear
seat is a safer place to secure a
forward-facing child restraint. See
Where to Put the Restraint
on
page 3‑51
In addition, the vehicle has a
passenger sensing system which is
designed to turn off the front
passenger frontal airbag under
certain conditions. See Passenger
Sensing System
on page 3‑37and
Passenger Airbag Status Indicator
on page 5‑18for more information,
including important safety
information.
A label on the sun visor says,
“Never put a rear-facing child seat in
the front.” This is because the risk to
the rear-facing child is so great,
if the airbag deploys.
{WARNING
A child in a rear-facing child
restraint can be seriously injured
or killed if the front passenger
airbag inflates. This is because
the back of the rear-facing child
restraint would be very close to
the inflating airbag. A child in a
forward-facing child restraint can
be seriously injured or killed if the
front passenger airbag inflates
and the passenger seat is in a
forward position.
Even if the passenger sensing
system has turned off the front
passenger frontal airbag, no
system is fail-safe. No one can
guarantee that an airbag will not
deploy under some unusual
circumstance, even though it is
turned off.
(Continued)
WARNING (Continued)
Secure rear-facing child
restraints in a rear seat, even if
the airbag is off. If you secure a
forward-facing child restraint in
the front seat, always move the
front passenger seat as far back
as it will go. It is better to secure
the child restraint in a rear seat.
SeePassenger Sensing System
on page 3‑37for additional
information.
If the child restraint has the LATCH
system, see Lower Anchors and
Tethers for Children (LATCH
System)
on page 3‑53for how and
where to install the child restraint
using LATCH. If a child restraint is
secured using a safety belt and it
uses a top tether, see Lower
Anchors and Tethers for Children
(LATCH System)
on page 3‑53for
top tether anchor locations.
Page 135 of 496

Black plate (3,1)Cadillac CTS/CTS-V Owner Manual - 2011
Storage 4-3
{WARNING
An improperly stored cargo cover
could be thrown about the vehicle
during a collision or sudden
maneuver. Someone could be
injured. If the cover is removed,
always store it in the proper
storage location. When it is
replaced, always be sure that it is
securely reattached.
Cargo Management
System (Wagon Only)
Press the bottom of the load floor
handle assembly to lift the top on
the handle. Pull up on the handle to
open the cargo management
system.
The cover can be opened to two
positions to allow access to the
storage area.
Some items may be stored in the
cargo area when the cover is
closed.
D-Ring Sliders
There are four D-Ring sliders that
move along rails on both sides of
the cargo management area. These
can be used as tie-downs when
storing cargo.
Page 136 of 496

Black plate (4,1)Cadillac CTS/CTS-V Owner Manual - 2011
4-4 Storage
Installing D-Ring Sliders
To install the D-Ring slider (A),
insert it into the channel (B) located
in the middle of each rail.
The loop of the D-Ring slider must
be facing inward toward the storage
area and the ring must be in the up
position for proper usage.
Push the button to move the D-Ring
slider. The rings can be locked into
various positions along the rail.
Cargo Net (Wagon)
{WARNING
Do not stack items higher than
the upper end of the cargo net or
hang anything from the net. Avoid
items that have sharp edges or
that apply excessive force to the
net. If items are not properly
stored, damage to the net could
occur and items can be thrown
about the vehicle. You or other
could be injured. Always store
items behind the net.
For vehicles equipped with a cargo
net, it can be used to store light
loads, keeping them from falling
over or being thrown.
The net should not be overloaded or
used to store heavy loads.
Page 138 of 496

Black plate (6,1)Cadillac CTS/CTS-V Owner Manual - 2011
4-6 Storage
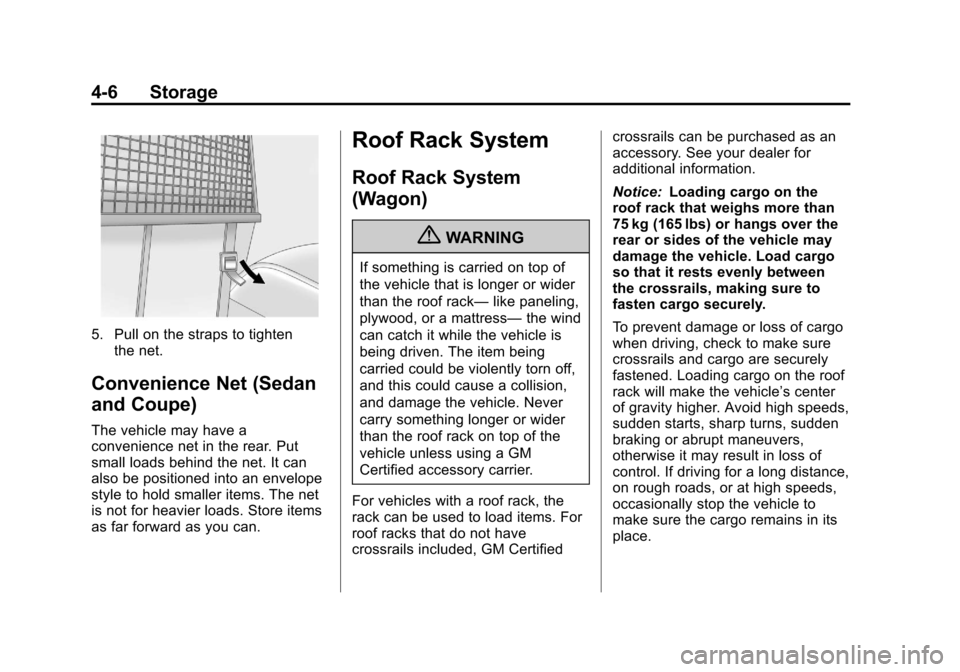
5. Pull on the straps to tightenthe net.
Convenience Net (Sedan
and Coupe)
The vehicle may have a
convenience net in the rear. Put
small loads behind the net. It can
also be positioned into an envelope
style to hold smaller items. The net
is not for heavier loads. Store items
as far forward as you can.
Roof Rack System
Roof Rack System
(Wagon)
{WARNING
If something is carried on top of
the vehicle that is longer or wider
than the roof rack— like paneling,
plywood, or a mattress— the wind
can catch it while the vehicle is
being driven. The item being
carried could be violently torn off,
and this could cause a collision,
and damage the vehicle. Never
carry something longer or wider
than the roof rack on top of the
vehicle unless using a GM
Certified accessory carrier.
For vehicles with a roof rack, the
rack can be used to load items. For
roof racks that do not have
crossrails included, GM Certified crossrails can be purchased as an
accessory. See your dealer for
additional information.
Notice:
Loading cargo on the
roof rack that weighs more than
75 kg (165 lbs) or hangs over the
rear or sides of the vehicle may
damage the vehicle. Load cargo
so that it rests evenly between
the crossrails, making sure to
fasten cargo securely.
To prevent damage or loss of cargo
when driving, check to make sure
crossrails and cargo are securely
fastened. Loading cargo on the roof
rack will make the vehicle’ s center
of gravity higher. Avoid high speeds,
sudden starts, sharp turns, sudden
braking or abrupt maneuvers,
otherwise it may result in loss of
control. If driving for a long distance,
on rough roads, or at high speeds,
occasionally stop the vehicle to
make sure the cargo remains in its
place.
Page 141 of 496

Black plate (1,1)Cadillac CTS/CTS-V Owner Manual - 2011
Instruments and Controls 5-1
Instruments and
Controls
Controls
Steering Wheel Adjustment . . . 5-2
Steering Wheel Controls(Audio) . . . . . . . . . . . . . . . . . . . . . . 5-3
Heated Steering Wheel . . . . . . . 5-4
Horn . . . . . . . . . . . . . . . . . . . . . . . . . . 5-4
Windshield Wiper/Washer . . . . . 5-4
Rear Window Wiper/ Washer . . . . . . . . . . . . . . . . . . . . . . 5-6
Headlamp Washer . . . . . . . . . . . . 5-7
Compass . . . . . . . . . . . . . . . . . . . . . 5-7
Clock . . . . . . . . . . . . . . . . . . . . . . . . . 5-8
Power Outlets . . . . . . . . . . . . . . . . . 5-9
Cigarette Lighter . . . . . . . . . . . . . . 5-9
Ashtrays . . . . . . . . . . . . . . . . . . . . . 5-10
Warning Lights, Gauges, and
Indicators
Warning Lights, Gauges, and Indicators . . . . . . . . . . . . . . . . . . 5-10
Instrument Cluster . . . . . . . . . . . 5-11
Speedometer . . . . . . . . . . . . . . . . 5-13
Odometer . . . . . . . . . . . . . . . . . . . . 5-13
Trip Odometer . . . . . . . . . . . . . . . 5-13 Tachometer . . . . . . . . . . . . . . . . . . 5-13
Fuel Gauge . . . . . . . . . . . . . . . . . . 5-13
Boost Gauge . . . . . . . . . . . . . . . . 5-14
Engine Speed Limiter . . . . . . . . 5-15
Engine Oil Pressure
Gauge . . . . . . . . . . . . . . . . . . . . . . 5-15
Engine Coolant Temperature Gauge . . . . . . . . . . . . . . . . . . . . . . 5-16
Safety Belt Reminders . . . . . . . 5-17
Airbag Readiness Light . . . . . . 5-17
Passenger Airbag Status Indicator . . . . . . . . . . . . . . . . . . . . 5-18
Charging System Light . . . . . . 5-19
Malfunction Indicator Lamp . . . . . . . . . . . . . 5-19
Brake System Warning Light . . . . . . . . . . . . . . . . . . . . . . . 5-22
Antilock Brake System (ABS) Warning Light . . . . . . . . . . . . . . 5-23
Up-Shift Light . . . . . . . . . . . . . . . . 5-24
Traction Control System (TCS)/StabiliTrak
®Light . . . . 5-24
Engine Coolant Temperature Warning Light . . . . . . . . . . . . . . 5-25
Tire Pressure Light . . . . . . . . . . 5-25
Engine Oil Pressure Light . . . . 5-26
Security Light . . . . . . . . . . . . . . . . 5-26
High-Beam on Light . . . . . . . . . 5-26 Fog Lamp Light . . . . . . . . . . . . . . 5-27
Lamps on Reminder . . . . . . . . . 5-27
Cruise Control Light . . . . . . . . . 5-27
Information Displays
Driver Information
Center (DIC) . . . . . . . . . . . . . . . 5-27
Vehicle Messages
Vehicle Messages . . . . . . . . . . . 5-31
Battery Voltage and ChargingMessages . . . . . . . . . . . . . . . . . . 5-31
Brake System Messages . . . . 5-32
Compass Messages . . . . . . . . . 5-34
Cruise Control Messages . . . . 5-34
Door Ajar Messages . . . . . . . . . 5-34
Engine Cooling System Messages . . . . . . . . . . . . . . . . . . 5-35
Engine Oil Messages . . . . . . . . 5-35
Engine Power Messages . . . . 5-36
Fuel System Messages . . . . . . 5-36
Key and Lock Messages . . . . . 5-36
Lamp Messages . . . . . . . . . . . . . 5-39
Object Detection System Messages . . . . . . . . . . . . . . . . . . 5-39
Ride Control System Messages . . . . . . . . . . . . . . . . . . 5-40
Airbag System Messages . . . . 5-42
Page 145 of 496

Black plate (5,1)Cadillac CTS/CTS-V Owner Manual - 2011
Instruments and Controls 5-5
6(Adjustable Interval Wiper
Band): Turn the band up for more
frequent wipes or down for less
frequent wipes.
1 : Slow wipes.
2 : Fast wipes.
If the windshield wipers are in use
for about six seconds while you are
driving, the exterior lamps come on
automatically if the exterior lamp
control is in AUTO. See “Wiper
Activated Headlamps” for more
information.
Clear snow and ice from the wiper
blades before using them. If frozen
to the windshield, carefully loosen or
thaw them. Damaged wiper blades
should be replaced. For more
information, see Wiper Blade
Replacement on page 10‑34.
Heavy snow or ice can overload the
wiper motor. A circuit breaker will
stop the motor until it cools down. Wiper Arm Assembly Protection
When using an automatic car wash,
move the windshield wiper lever to
the OFF position. This disables the
windshield wipers and/or rear
wipers, if equipped.
Windshield Washer
{WARNING
In freezing weather, do not use
your washer until the windshield
is warmed. Otherwise the washer
fluid can form ice on the
windshield, blocking your vision.
Sedan/Coupe Model
K(Washer Fluid): Press the
button with this symbol, on the end
of the windshield washer lever, to
wash the windshield. The washer
fluid sprays onto the windshield and
the wipers run for a few cycles to
clear the windshield. Press and hold
Kfor more wash cycles. Wagon Model
Pull the lever to spray washer fluid
on the windshield. The spray
continues until the lever is released.
The wipers will run a few times.
Washer Fluid Low Add Fluid
displays on the Driver Information
Center (DIC) when the washer fluid
is low. See
Driver Information
Center (DIC) on page 5‑27.
See Washer Fluid
on page 10‑26for
information on filling the windshield
washer fluid reservoir.
If the headlamps are on while the
windshield is being washed, the
headlamp washers, if the vehicle
has them, will also turn on. See
“Headlamp Washer” following for
more information.
Page 146 of 496

Black plate (6,1)Cadillac CTS/CTS-V Owner Manual - 2011
5-6 Instruments and Controls
Wiper Activated Headlamps
This feature activates the
headlamps and parking lamps after
the windshield wipers have been in
use for about six seconds. For this
feature to work, the exterior lamp
control must be in AUTO.
The wiper-activated headlamps
immediately turn off when the
ignition is turned to LOCK/OFF,
or the windshield wiper control is
turned off.
Rear Window Wiper/
Washer
For vehicles with a rear window
wiper/washer, the controls are on
the end of the windshield wiper
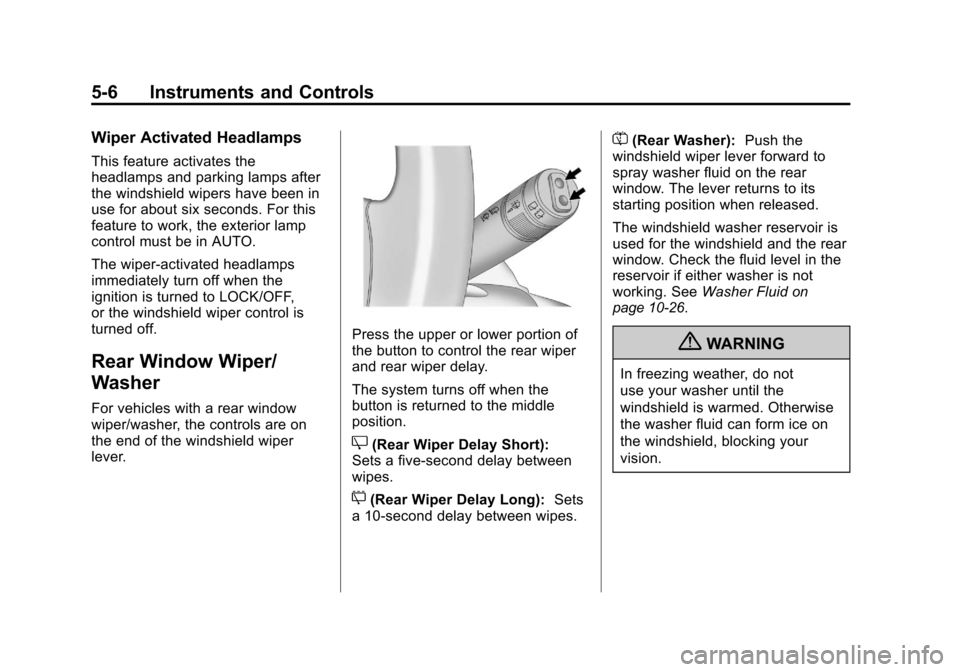
lever.
Press the upper or lower portion of
the button to control the rear wiper
and rear wiper delay.
The system turns off when the
button is returned to the middle
position.
Z(Rear Wiper Delay Short):
Sets a five‐second delay between
wipes.
5(Rear Wiper Delay Long): Sets
a 10‐second delay between wipes.
=(Rear Washer): Push the
windshield wiper lever forward to
spray washer fluid on the rear
window. The lever returns to its
starting position when released.
The windshield washer reservoir is
used for the windshield and the rear
window. Check the fluid level in the
reservoir if either washer is not
working. See Washer Fluid
on
page 10‑26.
{WARNING
In freezing weather, do not
use your washer until the
windshield is warmed. Otherwise
the washer fluid can form ice on
the windshield, blocking your
vision.
Page 150 of 496

Black plate (10,1)Cadillac CTS/CTS-V Owner Manual - 2011
5-10 Instruments and Controls
Ashtrays
The vehicle may have two
removable ashtrays. One ashtray
can be placed into the instrument
panel storage compartment and the
other into the center console rear
compartment.
To empty the ashtrays, hold on to
the edges of the bin and pull straight
out. To reinstall, push the tray back
into place.
Notice:If papers, pins, or other
flammable items are put in the
ashtray, hot cigarettes or other
smoking materials could ignite
them and possibly damage the
vehicle. Never put flammable
items in the ashtray.
Warning Lights,
Gauges, and
Indicators
Warning lights and gauges can
signal that something is wrong
before it becomes serious enough
to cause an expensive repair or
replacement. Paying attention to the
warning lights and gauges could
prevent injury.
Warning lights come on when there
could be a problem with a vehicle
function. Some warning lights come
on briefly when the engine is started
to indicate they are working. Gauges can indicate when there
could be a problem with a vehicle
function. Often gauges and warning
lights work together to indicate a
problem with the vehicle.
When one of the warning lights
comes on and stays on while
driving, or when one of the gauges
shows there may be a problem,
check the section that explains what
to do. Follow this manual's advice.
Waiting to do repairs can be costly
and even dangerous.
Page 153 of 496

Black plate (13,1)Cadillac CTS/CTS-V Owner Manual - 2011
Instruments and Controls 5-13
Speedometer
The speedometer shows the
vehicle's speed in either kilometers
per hour (km/h) or miles per
hour (mph).
Odometer
The odometer shows how far the
vehicle has been driven, in either
kilometers or miles.
This vehicle has a tamper‐resistant
odometer. The digital odometer will
read 999,999 if it is turned back.
If the vehicle needs a new odometer
installed, it must be set to the
mileage total of the old odometer.
If that is not possible, then it must
be set at zero and a label must be
put on the driver door to show the
old mileage reading when the new
odometer was installed.
Trip Odometer
The trip odometer can record the
number of kilometers or miles
traveled for up to two trips.The trip odometer is part of the
Driver Information Center (DIC); for
more information see
Driver
Information Center (DIC)
on
page 5‑27.
For vehicles that have the
navigation system, see the
Navigation System manual for more
information.
Tachometer
The tachometer displays the engine
speed in revolutions per
minute (rpm).
Notice: If the engine is operated
with the tachometer in the shaded
warning area, the vehicle could
be damaged, and the damages
would not be covered by the
vehicle warranty. Do not operate
the engine with the tachometer in
the shaded warning area.
The CTS-V tachometer has tracer
lights that follow the movement of
the tachometer indicator. The tracer
lights also flash when it is time to
up-shift to avoid the engine speed limit. See
Automatic Transmission
on page 9‑26orManual
Transmissionon page 9‑30for
more information.
Fuel Gauge
When the ignition is on, the fuel
gauge indicates how much fuel is
left in the tank.
An arrow on the fuel gauge
indicates the side of the vehicle the
fuel door is on.