light CADILLAC CTS 2013 2.G Infotainment Manual
[x] Cancel search | Manufacturer: CADILLAC, Model Year: 2013, Model line: CTS, Model: CADILLAC CTS 2013 2.GPages: 70, PDF Size: 0.65 MB
Page 35 of 70
Black plate (35,1)Cadillac CTS/CTS-V Navigation System - 2013 - crc - 8/21/12
Infotainment System 35
.Do not use the disc to rest on
while writing or drawing using
any writing utensil or attach a
seal to any of the sides or
the disc.
.Do not keep the disc in direct
sunlight, high temperatures,
or humidity.
.After using the disc, place it
back into the original case.
Map Adjustments
The scale of view on the map can
be adjusted. Also, the map moves
automatically based on the direction
the vehicle is being travelled.
Map Scales
V/U(Zoom In/Zoom Out):Press
the zoom in or out screen buttons or
the scale on the bar to change the
level of map detail. The scale
appears on the screen once the
zoom in or zoom out screen buttons
are selected. The system adjusts
the map accordingly. The scale of a map can range from 50 m (1/32 of a
mile) to 550 km (350 mi). To change
from English or metric, see
“DIC
Operation and Displays” in the
Index of your vehicle's owner
manual.
Scrolling the Map
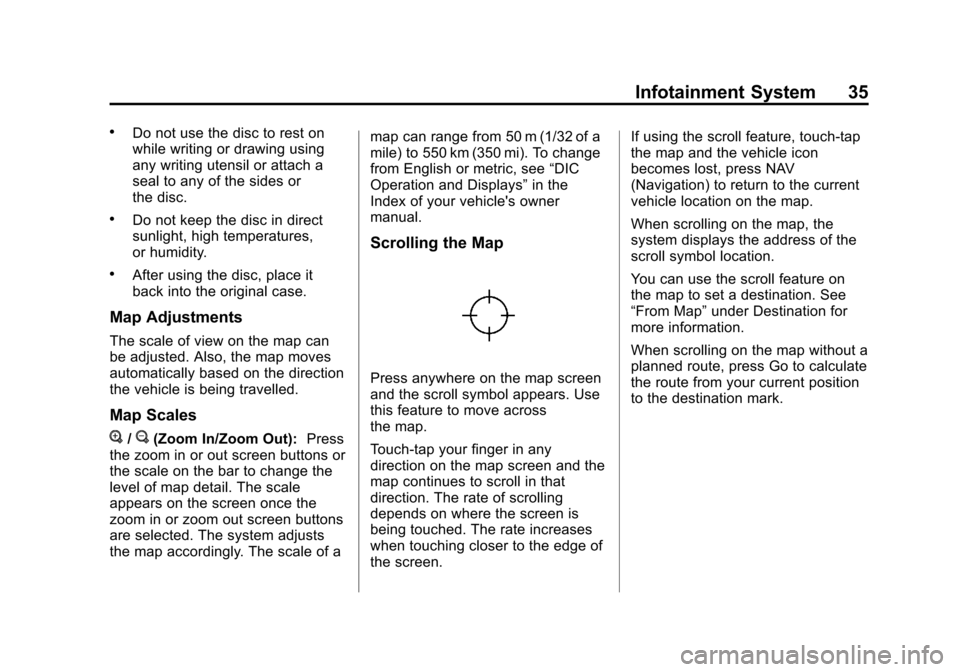
Press anywhere on the map screen
and the scroll symbol appears. Use
this feature to move across
the map.
Touch-tap your finger in any
direction on the map screen and the
map continues to scroll in that
direction. The rate of scrolling
depends on where the screen is
being touched. The rate increases
when touching closer to the edge of
the screen. If using the scroll feature, touch-tap
the map and the vehicle icon
becomes lost, press NAV
(Navigation) to return to the current
vehicle location on the map.
When scrolling on the map, the
system displays the address of the
scroll symbol location.
You can use the scroll feature on
the map to set a destination. See
“From Map”
under Destination for
more information.
When scrolling on the map without a
planned route, press Go to calculate
the route from your current position
to the destination mark.
Page 39 of 70
Black plate (39,1)Cadillac CTS/CTS-V Navigation System - 2013 - crc - 8/21/12
Infotainment System 39
Edit:Press to change one of the
current POI categories. Press the
Edit screen button, select the POI
category to be changed, then select
the new category.
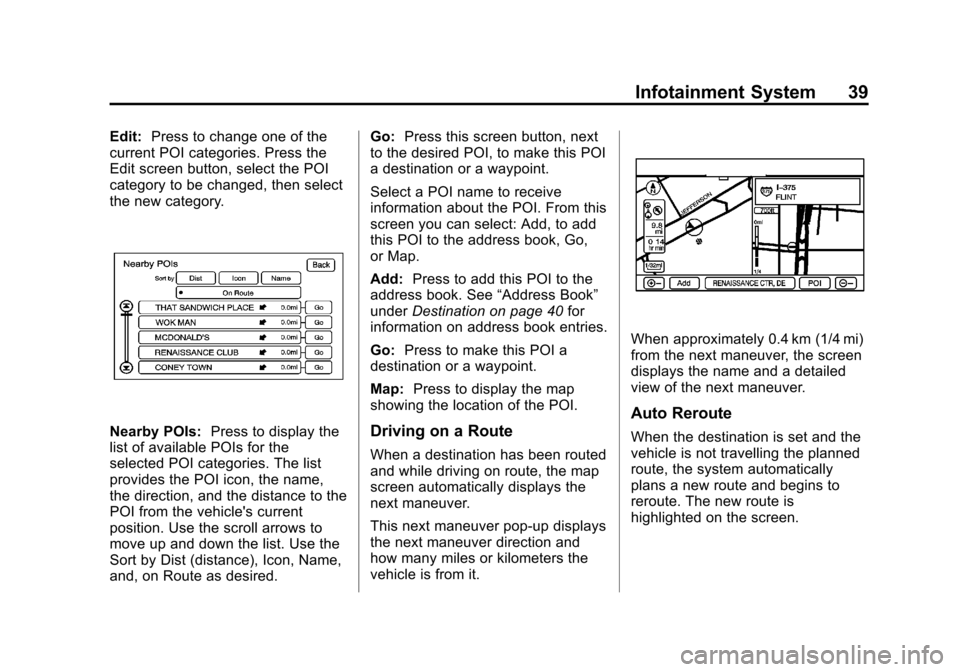
Nearby POIs: Press to display the
list of available POIs for the
selected POI categories. The list
provides the POI icon, the name,
the direction, and the distance to the
POI from the vehicle's current
position. Use the scroll arrows to
move up and down the list. Use the
Sort by Dist (distance), Icon, Name,
and, on Route as desired. Go:
Press this screen button, next
to the desired POI, to make this POI
a destination or a waypoint.
Select a POI name to receive
information about the POI. From this
screen you can select: Add, to add
this POI to the address book, Go,
or Map.
Add: Press to add this POI to the
address book. See “Address Book”
under Destination on page 40 for
information on address book entries.
Go: Press to make this POI a
destination or a waypoint.
Map: Press to display the map
showing the location of the POI.Driving on a Route
When a destination has been routed
and while driving on route, the map
screen automatically displays the
next maneuver.
This next maneuver pop-up displays
the next maneuver direction and
how many miles or kilometers the
vehicle is from it.
When approximately 0.4 km (1/4 mi)
from the next maneuver, the screen
displays the name and a detailed
view of the next maneuver.
Auto Reroute
When the destination is set and the
vehicle is not travelling the planned
route, the system automatically
plans a new route and begins to
reroute. The new route is
highlighted on the screen.
Page 41 of 70

Black plate (41,1)Cadillac CTS/CTS-V Navigation System - 2013 - crc - 8/21/12
Infotainment System 41
.While the Street name
category is empty, there is
a Last 5 Streets screen
button that displays the last
five selected streets. Press
this button to select a street
from the list.
4. Select the street name.
5. Enter the house number. The system displays the house
number range that is available
for the street.
6. If there is more than one city, the list of cities that have that street
address displays. Select a city
from the list.
7. A confirmation screen displays with the address. If the address
is correct, select the Go screen
button. The system calculates
the route.
8. Select the route preference (Fastest, Shortest, or Easy). The
system highlights the route. 9. Press the Start Guidance screen
button. The route is now ready
to be started.
See “Getting Started on Your
Route” in this section.
Entering the City Name First
1. Press the DEST control button.
2. Press the Street screen button.
3. Press the City screen button and start entering the city name.
If four or less names are
available for the entered
characters, a list displays.
If more than four are available,
there is a match counter with a
number in it, it represents the
number of available cities. Press
the List button to view the list
and select a city.
4. Start entering the street name. It is recommended that
directional information or street
type is not entered. Use the
Space screen button between
street or city names. Use the backspace (q) screen button
if an incorrect character has
been entered.
.If four or less names are
available for the entered
characters, a list displays.
If more than four are
available, there is a match
counter with a number in it,
it represents the number of
available streets. Select the
List button to view the list
and select a street.
.While the Street name
category is empty, there is
a Last 5 Streets screen
button that displays the last
five selected streets. Press
this button to select a street
from the list.
5. Select the street name.
6. Once a street has been selected, the numeric keyboard
displays, allowing entry of the
house number. The system
Page 42 of 70

Black plate (42,1)Cadillac CTS/CTS-V Navigation System - 2013 - crc - 8/21/12
42 Infotainment System
displays the house number
range that is available for the
street.
7. A confirmation screen displays with the address. If the address
is correct, select Go. The system
calculates the route.
8. Select the route preference (Fastest, Shortest, or Easy). The
system highlights the route.
9. Press the Start Guidance screen button. The route is now ready
to be started.
See “Getting Started on Your
Route” in this section.
Entering the State or Province
First
1. Press the DEST control button.
2. Press the Street screen button.
3. Press the State screen button and select the state or province
from the list.
4. Press the City screen button and start entering the city name. 5. Start entering the street name.
Do not enter directional
information or street type, and
use the Space screen button
between street or city names.
Use the backspace screen
button if an incorrect character
has been entered.
.If four or less names are
available for the entered
characters, a list displays.
If more than four are
available, there is a match
counter with a number in it,
it represents the number of
available cities. Press the
List button to view the list
and select a city.
.While the Street name
category is empty, there is
a Last 5 Streets screen
button that displays the last
five selected streets. Press
this button to select a street
from the list.
6. Select the street name. 7. Once a street has been
selected, the numeric keyboard
displays, allowing entry of the
house number. The system
displays the house number
range that is available for the
street.
8. A confirmation screen displays with the address. If the address
is correct, select the Go screen
button. The system calculates
the route.
9. Select the route preference (Fastest, Shortest, or Easy). The
system highlights the route.
10. Press the Start Guidance screen button. The route is
now ready to be started.
See“Getting Started on Your
Route” in this section.
Page 43 of 70
Black plate (43,1)Cadillac CTS/CTS-V Navigation System - 2013 - crc - 8/21/12
Infotainment System 43
Point of Interest (POI)
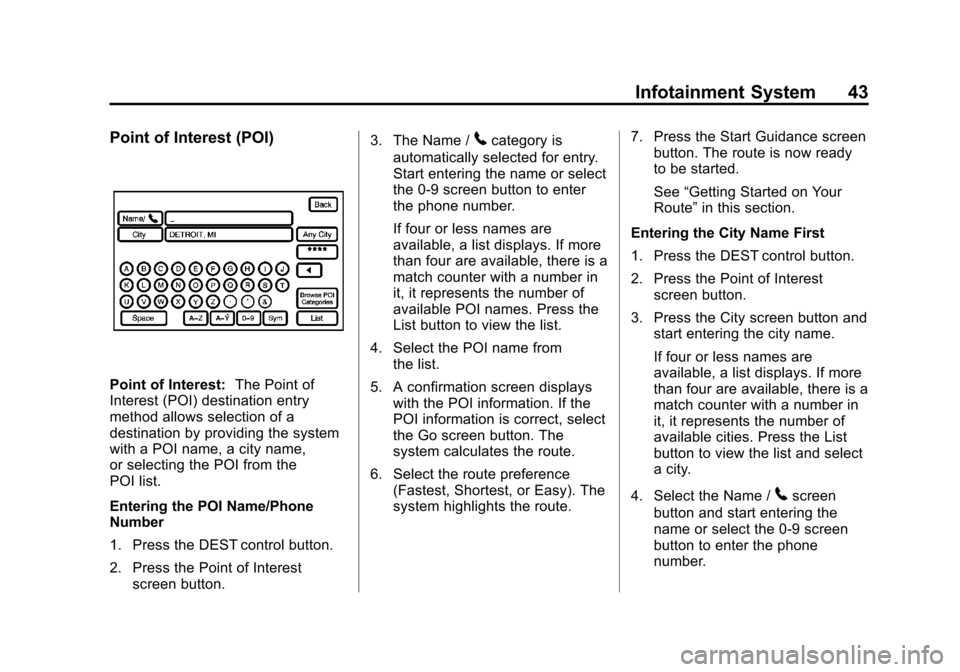
Point of Interest:The Point of
Interest (POI) destination entry
method allows selection of a
destination by providing the system
with a POI name, a city name,
or selecting the POI from the
POI list.
Entering the POI Name/Phone
Number
1. Press the DEST control button.
2. Press the Point of Interest
screen button. 3. The Name /
5category is
automatically selected for entry.
Start entering the name or select
the 0-9 screen button to enter
the phone number.
If four or less names are
available, a list displays. If more
than four are available, there is a
match counter with a number in
it, it represents the number of
available POI names. Press the
List button to view the list.
4. Select the POI name from the list.
5. A confirmation screen displays with the POI information. If the
POI information is correct, select
the Go screen button. The
system calculates the route.
6. Select the route preference (Fastest, Shortest, or Easy). The
system highlights the route. 7. Press the Start Guidance screen
button. The route is now ready
to be started.
See “Getting Started on Your
Route” in this section.
Entering the City Name First
1. Press the DEST control button.
2. Press the Point of Interest screen button.
3. Press the City screen button and start entering the city name.
If four or less names are
available, a list displays. If more
than four are available, there is a
match counter with a number in
it, it represents the number of
available cities. Press the List
button to view the list and select
a city.
4. Select the Name /
5screen
button and start entering the
name or select the 0-9 screen
button to enter the phone
number.
Page 44 of 70
Black plate (44,1)Cadillac CTS/CTS-V Navigation System - 2013 - crc - 8/21/12
44 Infotainment System
If four or less names are
available, a list displays. If more
than four are available, there is a
match counter with a number in
it, it represents the number of
available POI names. Select the
List button to view the list.
5. Select the POI name from the list.
6. A confirmation screen displays with the POI information. If the
POI information is correct, press
the Go screen button. The
system calculates the route.
7. Select the route preference (Fastest, Shortest, or Easy). The
system highlights the route.
8. Press the Start Guidance screen button. The route is now ready
to be started.
See “Getting Started on Your
Route” in this section.
Selecting a POI Category
1. Press the DEST control button. 2. Press the Point of Interest
screen button.
3. Press the Browse POI Categories screen button.
4. Select a category, and then a sub-category.
The system will display available
POI names in the selected
sub-category.
5. Select the POI name from the list.
6. A confirmation screen displays with the POI information. If the
POI information is correct, select
the Go screen button. The
system calculates the route.
7. Select the route preference (Fastest, Shortest, or Easy). The
system highlights the route.
8. Press the Start Guidance screen button. The route is now ready
to be started.
See “Getting Started on Your
Route” in this section. Address Book
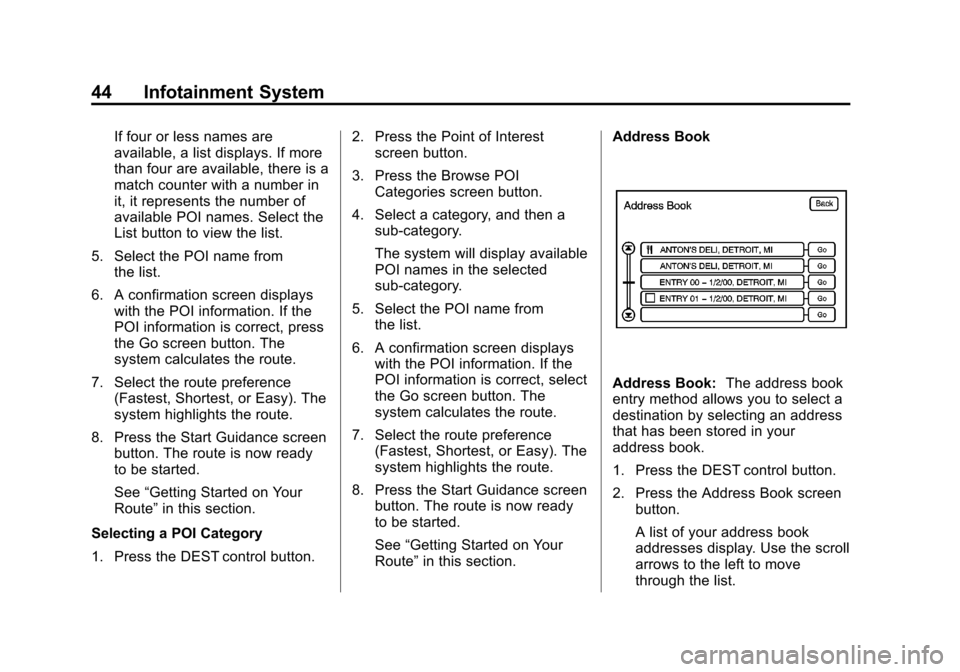
Address Book:
The address book
entry method allows you to select a
destination by selecting an address
that has been stored in your
address book.
1. Press the DEST control button.
2. Press the Address Book screen
button.
A list of your address book
addresses display. Use the scroll
arrows to the left to move
through the list.
Page 45 of 70
Black plate (45,1)Cadillac CTS/CTS-V Navigation System - 2013 - crc - 8/21/12
Infotainment System 45
3. Press the Go screen button,located next to the destination.
The system calculates the route.
4. Select the route preference (Fastest, Shortest, or Easy). The
system highlights the route.
5. Press the Start Guidance screen button. The route is now ready
to be started.
See “Getting Started on Your
Route” later in this section for
more information.
See “Adding Destinations to the
Address Book” in this section.
OnStar®Destination Download
(If Equipped)
OnStar®Destination Download (if
equipped) is a service available for
OnStar subscribers that makes
operating your navigation system
much simpler. It allows subscribers
to request and receive navigation
assistance on-the-go.
Using OnStar®Destination
Download (If Equipped)
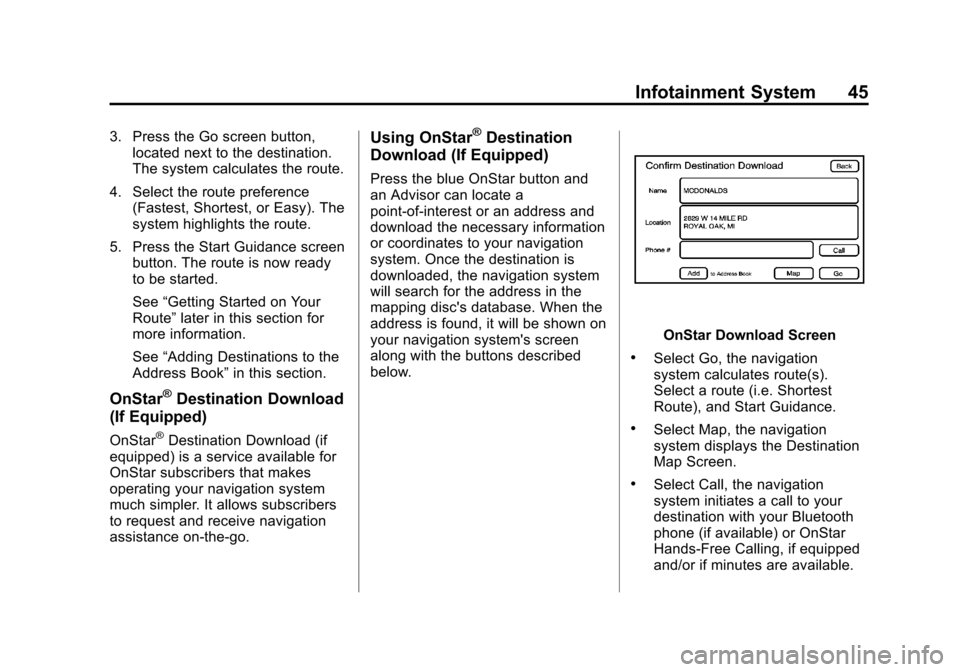
Press the blue OnStar button and
an Advisor can locate a
point-of-interest or an address and
download the necessary information
or coordinates to your navigation
system. Once the destination is
downloaded, the navigation system
will search for the address in the
mapping disc's database. When the
address is found, it will be shown on
your navigation system's screen
along with the buttons described
below.
OnStar Download Screen
.Select Go, the navigation
system calculates route(s).
Select a route (i.e. Shortest
Route), and Start Guidance.
.Select Map, the navigation
system displays the Destination
Map Screen.
.Select Call, the navigation
system initiates a call to your
destination with your Bluetooth
phone (if available) or OnStar
Hands-Free Calling, if equipped
and/or if minutes are available.
Page 49 of 70
Black plate (49,1)Cadillac CTS/CTS-V Navigation System - 2013 - crc - 8/21/12
Infotainment System 49
3. Using the desired method ofentering a destination, enter the
waypoint. See “Destination”
previously for more information.
The system calculates and
highlights the route. The route is
now ready to be started.
4. To add more waypoints, press the DEST control button, then
select the Add screen button,
where the next waypoint should
fall on the route. The system
calculates and highlights the
route. The route is now ready to
be started.
To delete a waypoint:
1. Press the DEST control button.
2. Press Delete next to the waypoint to be deleted.
3. The system displays a pop-up confirmation message. Press
Yes to delete the waypoint;
press No to cancel this
operation. The system calculates
and highlights the route. The
route is now ready to be started. Suspend Guidance
Press this screen button, from the
Route screen, to put the current
route on hold.
Resume Guidance
Press this screen button, from the
Route screen, to resume guidance
on the current route.
Cancel Guidance
Press this screen button, from the
Route screen, to cancel the current
route. A confirmation window
displays. Select Yes to cancel; No to
cancel this operation.
Preset Destinations
—Adding
or Changing
This feature allows addition or
changes to one of six preset
destinations. When a destination
has been added as a preset
destination, it is available to select
from the Select Destination screen. See
“Preset Destination” previously
for information on how to select a
preset destination as a final
destination.
Storing the Current Destination
To store the current final destination
as a preset destination:
1. Press the Add screen button
from the map screen. The
Address Book screen appears.
2. Press the Name screen button. An alpha-keyboard displays.
Enter the name.
3. Press and hold one of the six screen buttons at the bottom of
the screen until the text within
the button changes.
The name appears in that preset
destination screen button and is
now available to select from the
Select Destination screen.
Page 52 of 70
Black plate (52,1)Cadillac CTS/CTS-V Navigation System - 2013 - crc - 8/21/12
52 Infotainment System
Sound
Press the CONFIG control button to
enter the Menu options, then press
the CONFIG control button
repeatedly until Sound is selected or
press the Sound screen button to
make speaker and DSP (Digital
Signal Processing) adjustments.
SeeAM-FM Radio on page 10.
Radio
Press the CONFIG control button to
enter the menu options, then press
the CONFIG control button
repeatedly until Radio is selected or
press the Radio screen button to
make changes for radio information
displayed, preset pages, and
Automatic Volume Control. See
AM-FM Radio on page 10.
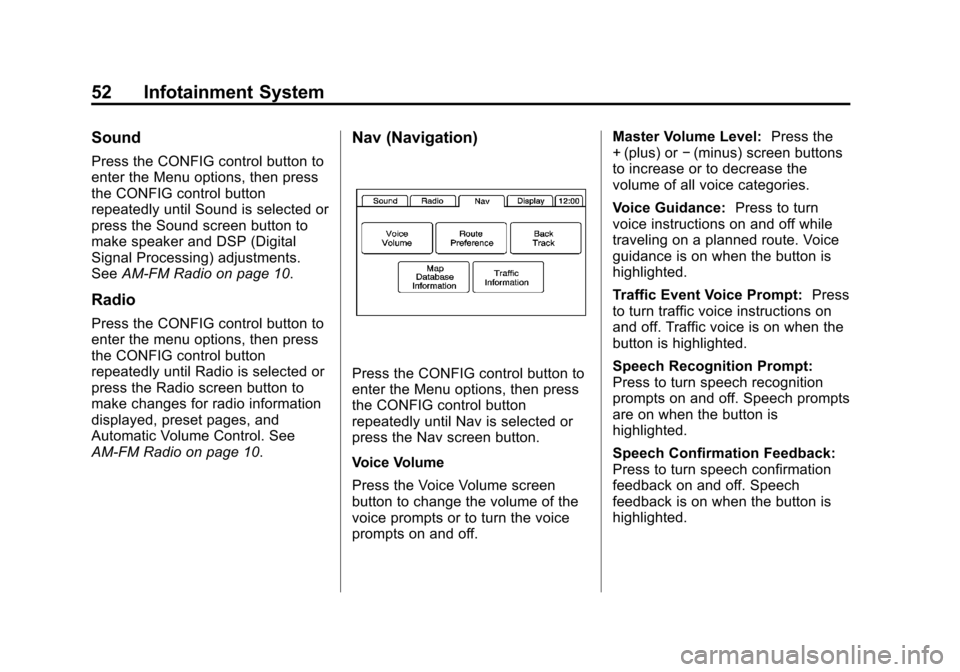
Nav (Navigation)
Press the CONFIG control button to
enter the Menu options, then press
the CONFIG control button
repeatedly until Nav is selected or
press the Nav screen button.
Voice Volume
Press the Voice Volume screen
button to change the volume of the
voice prompts or to turn the voice
prompts on and off. Master Volume Level:
Press the
+ (plus) or −(minus) screen buttons
to increase or to decrease the
volume of all voice categories.
Voice Guidance: Press to turn
voice instructions on and off while
traveling on a planned route. Voice
guidance is on when the button is
highlighted.
Traffic Event Voice Prompt: Press
to turn traffic voice instructions on
and off. Traffic voice is on when the
button is highlighted.
Speech Recognition Prompt:
Press to turn speech recognition
prompts on and off. Speech prompts
are on when the button is
highlighted.
Speech Confirmation Feedback:
Press to turn speech confirmation
feedback on and off. Speech
feedback is on when the button is
highlighted.
Page 53 of 70
Black plate (53,1)Cadillac CTS/CTS-V Navigation System - 2013 - crc - 8/21/12
Infotainment System 53
Route Preference
Press the Route Preference screen
button to change route options
when the system calculates a route.
Avoid Freeway:The system
avoids major roads when calculating
a planned route.
Avoid Toll Road: The system
avoids toll roads when calculating a
planned route.
Avoid Ferry: The system avoids
ferries when calculating a planned
route.
Avoid time and seasonal
restricted road: The system
avoids time restricted and seasonal
roads when calculating a planned
route.
Back Track
Press the Back Track screen button
to turn recording and displaying on
and off or to delete the path being
traveled when not on a
marked road. Record Back Track:
When this
feature is active the system starts
recording the path being traveled
when not on a marked road. This
button highlights when it is active.
Display Back Track: When this
feature is active the system displays
the path that is being traveled. This
path is a simulation since the map
database coverage will not have
these roads on the system. This
button highlights when it is active.
Delete Recorded Back Track:
Press to delete the recorded path.
Map Database Information
Press the Map Database
Information screen button to view
system information.
XM NavTraffic™ (USA and
Canada)
The navigation system might have
an XM NavTraffic receiver. It is a
subscription service provided
through XM Satellite Radio.
A service fee is required to receive
the XM NavTraffic service. Real-time traffic information is
provided to fully integrate the
navigation system to display current
traffic conditions for the chosen
route.
A screen displays to indicate that
the XM Traffic subscription is not
activated.
If activated, traffic information
displays:
.Unscheduled traffic incident
data, such as accidents and
disabled vehicles
.Scheduled traffic incident data,
such as road construction and
road closures
.Traffic flow information (rate of
speed data). Flow data might not
be available in all markets.
Traffic information is delivered to the
vehicle by the XM Radio satellites.
XM NavTraffic provides continuously
updated traffic information.
XM NavTraffic currently broadcasts
the traffic information for many
markets nationally. The service may