window CADILLAC CTS 2013 2.G Service Manual
[x] Cancel search | Manufacturer: CADILLAC, Model Year: 2013, Model line: CTS, Model: CADILLAC CTS 2013 2.GPages: 478, PDF Size: 7.7 MB
Page 86 of 478

Black plate (24,1)Cadillac CTS/CTS-V Owner Manual - 2013 - crc2 - 8/22/12
3-24 Seats and Restraints
whether the object is fixed or
moving, rigid or deformable, narrow
or wide.
Thresholds can also vary with
specific vehicle design.
Frontal airbags are not intended to
inflate during vehicle rollovers, rear
impacts, or in many side impacts.
In addition, the vehicle has
dual-stage frontal airbags.
Dual-stage airbags adjust the
restraint according to crash severity.
The vehicle has electronic frontal
sensors, that help the sensing
system distinguish between a
moderate frontal impact and a more
severe frontal impact. For moderate
frontal impacts, dual-stage airbags
inflate at a level less than full
deployment. For more severe frontal
impacts, full deployment occurs.
The vehicle has seat-mounted side
impact and roof-rail airbags. See
Airbag System on page 3‑20.
Seat-mounted side impact and
roof-rail airbags are intended to
inflate in moderate to severe sidecrashes. In addition, these roof-rail
airbags are intended to inflate
during a rollover or in a severe
frontal impact. Seat-mounted side
impact and roof-rail airbags will
inflate if the crash severity is above
the system's designed threshold
level. The threshold level can vary
with specific vehicle design.
Roof-rail airbags are not intended to
inflate in rear impacts.
A seat-mounted side impact airbag
is intended to inflate on the side of
the vehicle that is struck. Both
roof-rail airbags will inflate when
either side of the vehicle is struck or
if the sensing system predicts that
the vehicle is about to roll over, or in
a severe frontal impact.
In any particular crash, no one can
say whether an airbag should have
inflated simply because of the
vehicle damage or repair costs.What Makes an Airbag
Inflate?
In a deployment event, the sensing
system sends an electrical signal
triggering a release of gas from the
inflator. Gas from the inflator fills the
airbag causing the bag to break out
of the cover and deploy. The inflator,
the airbag, and related hardware are
all part of the airbag module.
Frontal airbag modules are located
inside the steering wheel and
instrument panel. For vehicles with
seat-mounted side impact airbags,
there are airbag modules in the side
of the front seatbacks closest to the
door. For vehicles with roof-rail
airbags, there are airbag modules in
the ceiling of the vehicle, near the
side windows that have occupant
seating positions.
Page 87 of 478

Black plate (25,1)Cadillac CTS/CTS-V Owner Manual - 2013 - crc2 - 8/22/12
Seats and Restraints 3-25
How Does an Airbag
Restrain?
In moderate to severe frontal or
near frontal collisions, even belted
occupants can contact the steering
wheel or the instrument panel. In
moderate to severe side collisions,
even belted occupants can contact
the inside of the vehicle.
Airbags supplement the protection
provided by safety belts. Frontal
airbags distribute the force of the
impact more evenly over the
occupant's upper body, stopping the
occupant more gradually. Seat‐
mounted side impact and roof-rail
airbags distribute the force of the
impact more evenly over the
occupant's upper body.
Rollover capable roof-rail airbags
are designed to help contain the
head and chest of occupants in the
outboard seating positions in the
first and second rows. The rollover
capable roof-rail airbags are
designed to help reduce the risk offull or partial ejection in rollover
events, although no system can
prevent all such ejections.
But airbags would not help in many
types of collisions, primarily
because the occupant's motion is
not toward those airbags. See
When
Should an Airbag Inflate? on
page 3‑23 for more information.
Airbags should never be regarded
as anything more than a supplement
to safety belts.
What Will You See after
an Airbag Inflates?
After the frontal airbags and
seat-mounted side impact airbags
inflate, they quickly deflate, so
quickly that some people may not
even realize an airbag inflated.
Roof-rail airbags may still be at least
partially inflated for some time after
they inflate. Some components of
the airbag module may be hot for
several minutes. For location of the
airbags, see Where Are the
Airbags? on page 3‑22. The parts of the airbag that come
into contact with you may be warm,
but not too hot to touch. There may
be some smoke and dust coming
from the vents in the deflated
airbags. Airbag inflation does not
prevent the driver from seeing out of
the windshield or being able to steer
the vehicle, nor does it prevent
people from leaving the vehicle.
{WARNING
When an airbag inflates, there
may be dust in the air. This dust
could cause breathing problems
for people with a history of
asthma or other breathing trouble.
To avoid this, everyone in the
vehicle should get out as soon as
it is safe to do so. If you have
breathing problems but cannot
get out of the vehicle after an
airbag inflates, then get fresh air
by opening a window or a door.
If you experience breathing
(Continued)
Page 100 of 478

Black plate (38,1)Cadillac CTS/CTS-V Owner Manual - 2013 - crc2 - 8/22/12
3-38 Seats and Restraints
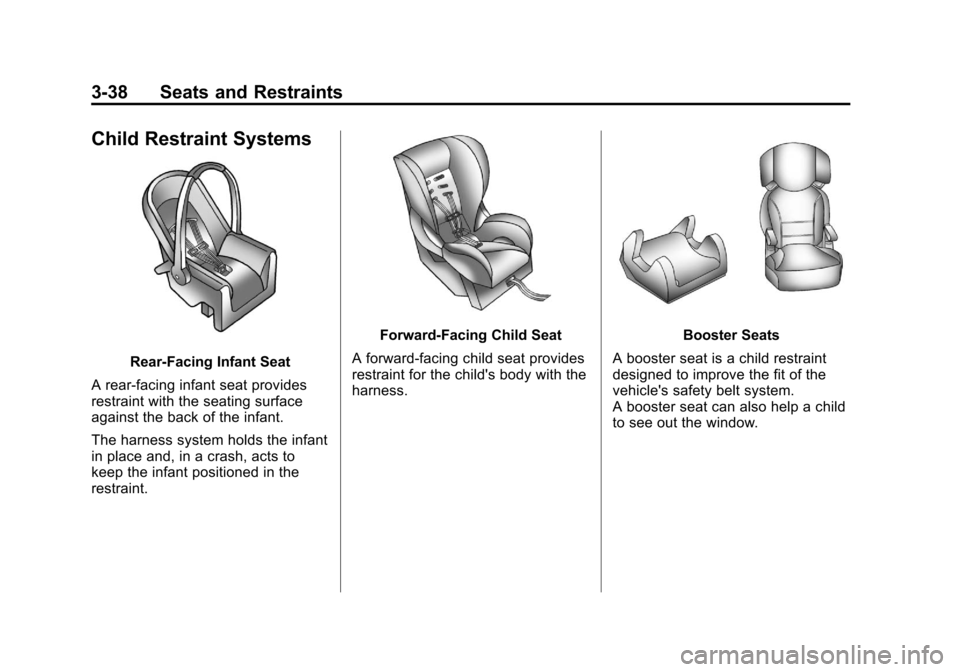
Child Restraint Systems
Rear-Facing Infant Seat
A rear-facing infant seat provides
restraint with the seating surface
against the back of the infant.
The harness system holds the infant
in place and, in a crash, acts to
keep the infant positioned in the
restraint.
Forward-Facing Child Seat
A forward-facing child seat provides
restraint for the child's body with the
harness.Booster Seats
A booster seat is a child restraint
designed to improve the fit of the
vehicle's safety belt system.
A booster seat can also help a child
to see out the window.
Page 123 of 478

Black plate (1,1)Cadillac CTS/CTS-V Owner Manual - 2013 - crc2 - 8/22/12
Instruments and Controls 5-1
Instruments and
Controls
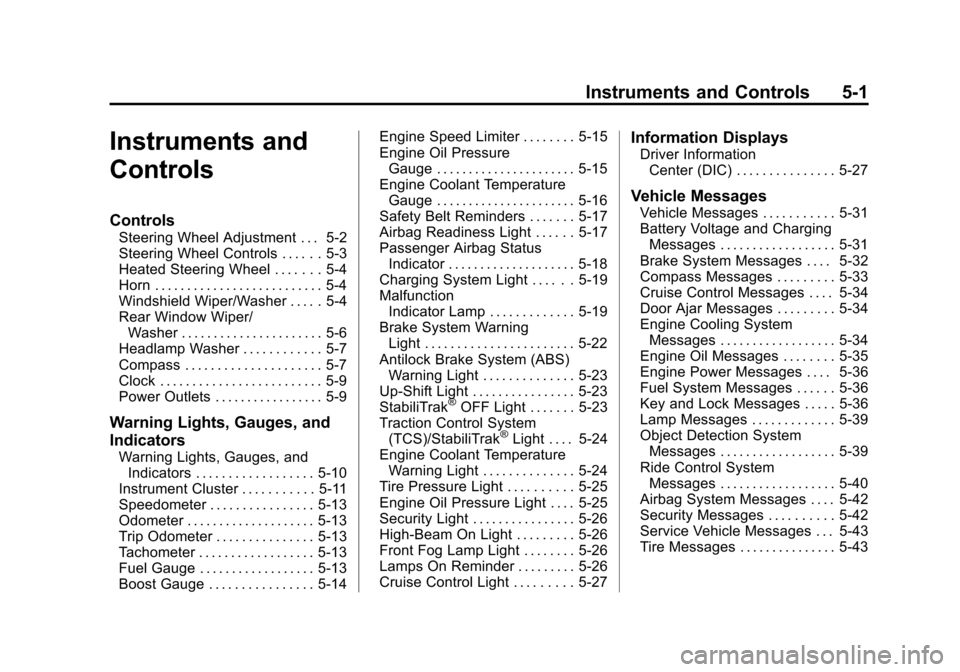
Controls
Steering Wheel Adjustment . . . 5-2
Steering Wheel Controls . . . . . . 5-3
Heated Steering Wheel . . . . . . . 5-4
Horn . . . . . . . . . . . . . . . . . . . . . . . . . . 5-4
Windshield Wiper/Washer . . . . . 5-4
Rear Window Wiper/Washer . . . . . . . . . . . . . . . . . . . . . . 5-6
Headlamp Washer . . . . . . . . . . . . 5-7
Compass . . . . . . . . . . . . . . . . . . . . . 5-7
Clock . . . . . . . . . . . . . . . . . . . . . . . . . 5-9
Power Outlets . . . . . . . . . . . . . . . . . 5-9
Warning Lights, Gauges, and
Indicators
Warning Lights, Gauges, and Indicators . . . . . . . . . . . . . . . . . . 5-10
Instrument Cluster . . . . . . . . . . . 5-11
Speedometer . . . . . . . . . . . . . . . . 5-13
Odometer . . . . . . . . . . . . . . . . . . . . 5-13
Trip Odometer . . . . . . . . . . . . . . . 5-13
Tachometer . . . . . . . . . . . . . . . . . . 5-13
Fuel Gauge . . . . . . . . . . . . . . . . . . 5-13
Boost Gauge . . . . . . . . . . . . . . . . 5-14 Engine Speed Limiter . . . . . . . . 5-15
Engine Oil Pressure
Gauge . . . . . . . . . . . . . . . . . . . . . . 5-15
Engine Coolant Temperature Gauge . . . . . . . . . . . . . . . . . . . . . . 5-16
Safety Belt Reminders . . . . . . . 5-17
Airbag Readiness Light . . . . . . 5-17
Passenger Airbag Status Indicator . . . . . . . . . . . . . . . . . . . . 5-18
Charging System Light . . . . . . 5-19
Malfunction Indicator Lamp . . . . . . . . . . . . . 5-19
Brake System Warning Light . . . . . . . . . . . . . . . . . . . . . . . 5-22
Antilock Brake System (ABS) Warning Light . . . . . . . . . . . . . . 5-23
Up-Shift Light . . . . . . . . . . . . . . . . 5-23
StabiliTrak
®OFF Light . . . . . . . 5-23
Traction Control System (TCS)/StabiliTrak
®Light . . . . 5-24
Engine Coolant Temperature Warning Light . . . . . . . . . . . . . . 5-24
Tire Pressure Light . . . . . . . . . . 5-25
Engine Oil Pressure Light . . . . 5-25
Security Light . . . . . . . . . . . . . . . . 5-26
High-Beam On Light . . . . . . . . . 5-26
Front Fog Lamp Light . . . . . . . . 5-26
Lamps On Reminder . . . . . . . . . 5-26
Cruise Control Light . . . . . . . . . 5-27
Information Displays
Driver Information Center (DIC) . . . . . . . . . . . . . . . 5-27
Vehicle Messages
Vehicle Messages . . . . . . . . . . . 5-31
Battery Voltage and ChargingMessages . . . . . . . . . . . . . . . . . . 5-31
Brake System Messages . . . . 5-32
Compass Messages . . . . . . . . . 5-33
Cruise Control Messages . . . . 5-34
Door Ajar Messages . . . . . . . . . 5-34
Engine Cooling System Messages . . . . . . . . . . . . . . . . . . 5-34
Engine Oil Messages . . . . . . . . 5-35
Engine Power Messages . . . . 5-36
Fuel System Messages . . . . . . 5-36
Key and Lock Messages . . . . . 5-36
Lamp Messages . . . . . . . . . . . . . 5-39
Object Detection System Messages . . . . . . . . . . . . . . . . . . 5-39
Ride Control System Messages . . . . . . . . . . . . . . . . . . 5-40
Airbag System Messages . . . . 5-42
Security Messages . . . . . . . . . . 5-42
Service Vehicle Messages . . . 5-43
Tire Messages . . . . . . . . . . . . . . . 5-43
Page 128 of 478

Black plate (6,1)Cadillac CTS/CTS-V Owner Manual - 2013 - crc2 - 8/22/12
5-6 Instruments and Controls
Wagon Model
Pull the lever toward you to spray
washer fluid on the windshield. The
spray continues until the lever is
released. The wipers will run a few
times.
WASHER FLUID LOW ADD FLUID
displays on the Driver Information
Center (DIC) when the washer fluid
is low. SeeWasher Fluid Messages
on page 5‑45.
See Washer Fluid on page 10‑23 for
information on filling the windshield
washer fluid reservoir.
If the headlamps are on while the
windshield is being washed, the
headlamp washers, if the vehicle
has them, will also turn on. See
“Headlamp Washer” following for
more information.
Wiper Activated Headlamps
This feature activates the
headlamps and parking lamps after
the windshield wipers have been in use for about six seconds. For this
feature to work, the exterior lamp
control must be in AUTO.
The wiper-activated headlamps
immediately turn off, when the
ignition is turned to LOCK/OFF or
the windshield wiper control is
turned off.
Rear Window Wiper/
Washer
For vehicles with a rear window
wiper/washer, the controls are on
the end of the windshield wiper
lever.Press the upper or lower portion of
the button to control the rear wiper
and rear wiper delay.
The system turns off when the
button is returned to the middle
position.
Z(Rear Wiper Delay Short):
Sets a five‐second delay between
wipes.
5(Rear Wiper Delay Long): Sets
a 10‐second delay between wipes.
Page 129 of 478

Black plate (7,1)Cadillac CTS/CTS-V Owner Manual - 2013 - crc2 - 8/22/12
Instruments and Controls 5-7
=(Rear Washer):Push the
windshield wiper lever forward to
spray washer fluid on the rear
window. The lever returns to its
starting position when released.
The windshield washer reservoir is
used for the windshield and the rear
window. Check the fluid level in the
reservoir if either washer is not
working. See Washer Fluid on
page 10‑23.
Headlamp Washer
For vehicles with headlamp washers
they clear debris from the headlamp
lenses.
The headlamp washers are beneath
the headlamps.
Press the washer button at the end
of the windshield wiper lever to
wash the headlamps. Both the
headlamps and the windshield will
be washed. After the first wash, the
headlamps will not be washed until
the fifth press of the windshield
washer button.
The headlamps must be on to be
washed. If the headlamps are off,
only the windshield will be washed when the washer button is pressed.
If the washer fluid is low, the
headlamp washers will not work.
See
Windshield Wiper/Washer on
page 5‑4 for more information.
Compass
The vehicle may have a compass in
the Driver Information Center (DIC).
Compass Zone
The zone is set to zone eight. If you
do not live in zone eight or drive out
of the area, the variance needs to
be changed to the appropriate zone.
Page 131 of 478

Black plate (9,1)Cadillac CTS/CTS-V Owner Manual - 2013 - crc2 - 8/22/12
Instruments and Controls 5-9
Compass Calibration Procedure
1. Before calibrating the compass,check that the compass is set to
the correct variance zone. See
“Compass Variance (Zone)
Procedure” earlier in this
section.
Do not operate any switches
such as window, sunroof,
climate controls, seats, etc.
during the calibration procedure.
2. Press
Tuntil PRESSVTO
CALIBRATE COMPASS
displays.
3. Press
Vto start the compass
calibration.
4. The DIC will display CALIBRATING DRIVE IN
CIRCLES. Drive the vehicle in
tight circles at less than
8 km/h (5 mph) to complete the
calibration. The DIC will display
CALIBRATION COMPLETE for a
few seconds then returns to the
PRESS
VTO CALIBRATE
COMPASS display.
Clock
The analog clock is on the
instrument panel above the radio.
The clock is not connected with any
other vehicle system and runs by
itself. To adjust the clock:
1. Locate the adjustment buttons directly below the clock.
2. Push and release the right adjustment button to move the
clock hands forward or the left
adjustment button to make the
clock hands go backward.
Holding either button down will
cause the clock to advance
faster. Release the button before
the desired time is reached.
3. Push and release either button to adjust the time by one minute
increments.
Power Outlets
Accessory power outlets can be
used to plug in electrical equipment,
such as a cell phone or MP3 player. There are three accessory power
outlets. The power outlets below the
climate control system, inside the
center console storage bin, and on
the rear of the center console are
powered while the vehicle is in ON/
RUN, START or ACC/ACCESSORY
mode, or until the driver door is
opened within 10 minutes of turning
off the vehicle.
On the CTS Wagon there is an
additional accessory power outlet
near the rear cargo net that is
powered at all times.
Remove the cover to access and
replace when not in use.
Notice:
Leaving electrical
equipment plugged in for an
extended period of time while the
vehicle is off will drain the
battery. Always unplug electrical
equipment when not in use and
do not plug in equipment that
exceeds the maximum 20 ampere
rating.
Page 186 of 478

Black plate (8,1)Cadillac CTS/CTS-V Owner Manual - 2013 - crc2 - 8/22/12
6-8 Lighting
Battery Load
Management
The vehicle has Electric Power
Management (EPM) that estimates
the battery's temperature and state
of charge. It then adjusts the voltage
for best performance and extended
life of the battery.
When the battery's state of charge
is low, the voltage is raised slightly
to quickly bring the charge back up.
When the state of charge is high,
the voltage is lowered slightly to
prevent overcharging. If the vehicle
has a voltmeter gauge or a voltage
display on the Driver Information
Center (DIC), you may see the
voltage move up or down. This is
normal. If there is a problem, an
alert will be displayed.
The battery can be discharged at
idle if the electrical loads are very
high. This is true for all vehicles.
This is because the generator
(alternator) may not be spinning fastenough at idle to produce all the
power that is needed for very high
electrical loads.
A high electrical load occurs when
several of the following are on, such
as: headlamps, high beams, fog
lamps, rear window defogger,
climate control fan at high speed,
heated seats, engine cooling fans,
trailer loads, and loads plugged into
accessory power outlets.
EPM works to prevent excessive
discharge of the battery. It does this
by balancing the generator's output
and the vehicle's electrical needs.
It can increase engine idle speed to
generate more power, whenever
needed. It can temporarily reduce
the power demands of some
accessories.
Normally, these actions occur in
steps or levels, without being
noticeable. In rare cases at the
highest levels of corrective action,
this action may be noticeable to the
driver. If so, a Driver Information
Center (DIC) message might bedisplayed, such as BATTERY
SAVER ACTIVE or BATTERY
VOLTS LOW. If this message is
displayed, it is recommended that
the driver reduce the electrical loads
as much as possible. See
Driver
Information Center (DIC) on
page 5‑27.
Battery Power Protection
This feature helps to prevent battery
drain if accessory lamps are left on.
If accessory lamps such as the
vanity mirror, cargo, reading,
console, or glove box are left on,
they automatically time out after
about 20 minutes. To reset the
battery protection, all of the above
lamps must be turned off or the
ignition must be in the ACC/
ACCESSORY position.
Page 203 of 478

Black plate (15,1)Cadillac CTS/CTS-V Owner Manual - 2013 - crc2 - 8/22/12
Infotainment System 7-15
Radio Reception
Frequency interference and static
can occur during normal radio
reception if items such as phone
chargers, vehicle convenience
accessories, and external electronic
devices are plugged into the
accessory power outlet. If there is
interference or static, unplug the
item from the accessory power
outlet.
FM
FM signals only reach about 16 to
65 km (10 to 40 mi). Although the
radio has a built-in electronic circuit
that automatically works to reduce
interference, some static can occur,
especially around tall buildings or
hills, causing the sound to fade in
and out.
AM
The range for most AM stations is
greater than for FM, especially at
night. The longer range can cause
station frequencies to interfere with
each other. Static can also occurwhen things like storms and power
lines interfere with radio reception.
When this happens, try reducing the
treble on the radio.
SiriusXM Satellite Radio
Service
SiriusXM Satellite Radio Service
provides digital radio reception. Tall
buildings or hills can interfere with
satellite radio signals, causing the
sound to fade in and out. In
addition, traveling or standing under
heavy foliage, bridges, garages,
or tunnels may cause loss of the
SiriusXM signal for a period of time.
Cell Phone Usage
Cell phone usage, such as making
or receiving phone calls, charging,
or just having the phone on may
cause static interference in the
radio. Unplug the phone or turn it off
if this happens.
Backglass Antenna
The AM-FM antenna is integrated
with the rear window defogger in the
rear window. Do not scratch the
inside surface or damage the lines
in the glass. If the inside surface is
damaged, it could interfere with
radio reception. For proper radio
reception, the antenna connector
needs to be properly attached to the
post on the glass.
If attaching a cell phone antenna to
the glass, attach it between the grid
lines.
Notice:
Using a razor blade or
sharp object to clear the inside
rear window can damage the rear
window antenna and/or the rear
window defogger. Repairs would
not be covered by the vehicle
warranty. Do not clear the inside
rear window with sharp objects.
Page 236 of 478

Black plate (2,1)Cadillac CTS/CTS-V Owner Manual - 2013 - crc2 - 8/22/12
8-2 Climate Controls
11. Outside Air
12. Rear Window Defogger
Automatic Operation
AUTO (Automatic):The system
automatically controls fan speed, air
delivery, and air conditioning in
order to heat or cool the vehicle to
the desired temperature. When the
indicator light is on, the system is in
full automatic operation. If the air
delivery mode or fan setting is
manually adjusted, the auto
indicator turns off and displays will
show the selected settings.
1. Press the AUTO button.
2. Adjust the temperature to a comfortable setting between
21°C (70°F) and 27°C (80°F).
Choosing the coldest or warmest
temperature setting will not
cause the system to heat or cool
any faster.
To avoid blowing cold air in cold
weather, the system delays
turning on the fan until warm air is available. The system starts
out blowing air at the floor, but
can automatically change modes
as the vehicle warms up to
maintain the chosen temperature
setting. The length of time
needed for warm up depends on
the outside temperature and the
length of time that has elapsed
since the vehicle was last driven.
3. Wait for the system to regulate. This may take from 10 to
30 minutes. Then adjust the
temperature, if necessary.
English can be changed to metric
units through the Driver Information
Center (DIC). See Driver
Information Center (DIC) on
page 5‑27.
Q/R(Temperature Control): The
temperature can be adjusted
separately for the driver and the
passenger. Press to increase or
decrease the automatic temperature
settings. PASS (Passenger Climate
Control):
Press to set a different
temperature for the passenger.
Then adjust the passenger
temperature buttons to a
comfortable setting.
Pressing the PASS button again
automatically sets the passenger's
temperature to the driver's setting.
Turning the passenger's
temperature display off does not
shut the passenger's climate control
system off.
Manual Operation
O(Power): Press to turn the
climate control system on or off.
When the climate control system is
turned off the air inlet defaults to
outside air.
D C(Fan Control): Press the
buttons to increase or decrease the
fan speed. Pressing either button
cancels automatic fan control. Press
AUTO to return to automatic