buttons CADILLAC CTS 2018 Owner's Manual
[x] Cancel search | Manufacturer: CADILLAC, Model Year: 2018, Model line: CTS, Model: CADILLAC CTS 2018Pages: 394, PDF Size: 6.48 MB
Page 14 of 394
Cadillac CTS/CTS-V Owner Manual (GMNA-Localizing-U.S./Canada/Mexico-
11349156) - 2018 - CRC - 9/29/17
IN BRIEF 13
Back Bolster Support
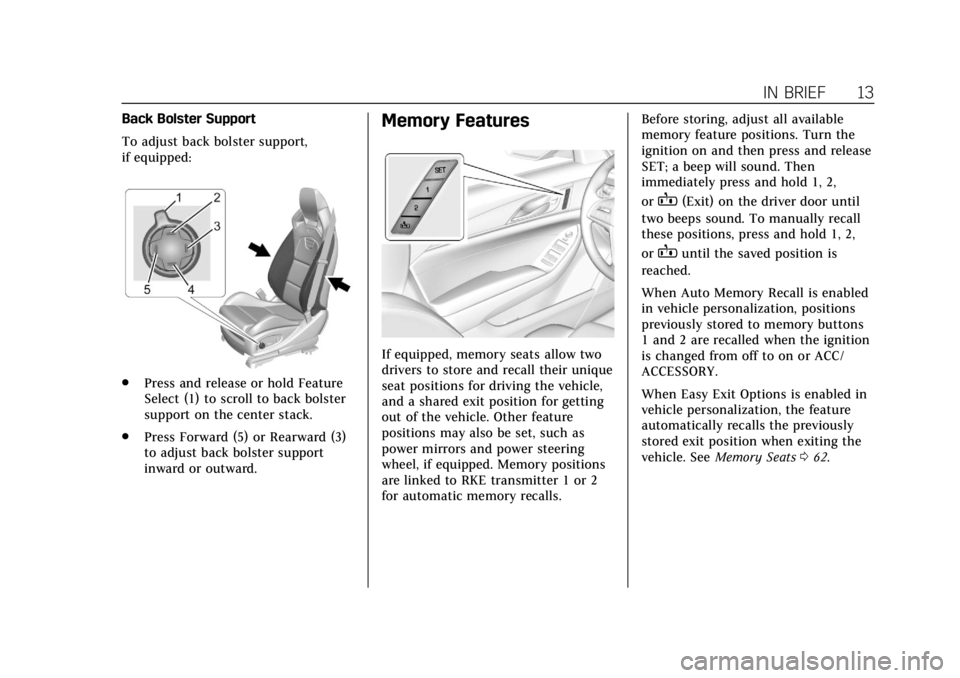
To adjust back bolster support,
if equipped:
.Press and release or hold Feature
Select (1) to scroll to back bolster
support on the center stack.
. Press Forward (5) or Rearward (3)
to adjust back bolster support
inward or outward.
Memory Features
If equipped, memory seats allow two
drivers to store and recall their unique
seat positions for driving the vehicle,
and a shared exit position for getting
out of the vehicle. Other feature
positions may also be set, such as
power mirrors and power steering
wheel, if equipped. Memory positions
are linked to RKE transmitter 1 or 2
for automatic memory recalls. Before storing, adjust all available
memory feature positions. Turn the
ignition on and then press and release
SET; a beep will sound. Then
immediately press and hold 1, 2,
or
B(Exit) on the driver door until
two beeps sound. To manually recall
these positions, press and hold 1, 2,
or
Buntil the saved position is
reached.
When Auto Memory Recall is enabled
in vehicle personalization, positions
previously stored to memory buttons
1 and 2 are recalled when the ignition
is changed from off to on or ACC/
ACCESSORY.
When Easy Exit Options is enabled in
vehicle personalization, the feature
automatically recalls the previously
stored exit position when exiting the
vehicle. See Memory Seats 062.
Page 15 of 394

Cadillac CTS/CTS-V Owner Manual (GMNA-Localizing-U.S./Canada/Mexico-
11349156) - 2018 - CRC - 9/29/17
14 IN BRIEF
Heated and Ventilated
Seats
Uplevel Buttons Shown, Base ButtonsSimilar
If equipped, the buttons are near the
climate controls on the center stack.
To operate, the ignition must be on.
Press
Jorzto heat the driver or
passenger seat cushion and seatback.
Press
Cor{to ventilate the driver
or passenger seat.
Press the button once for the highest
setting. With each press of the button,
the seat will change to the next lower setting, and then to the off setting.
The indicator lights above the buttons
indicate three for the highest setting
and one for the lowest. If the front
heated seats are on high, the level
may automatically be lowered after
approximately 30 minutes.
See
Heated and Ventilated Front Seats
0 64.
Auto Heated and Ventilated
Seats
When the vehicle is on, this feature
will automatically activate the heated
or ventilated seats at the level
required by the vehicle’s interior
temperature.
The active high, medium, low, or off
heated or ventilated seat level will be
indicated by the manual heated or
ventilated seat buttons on the center
stack. Use the manual heated or
ventilated seat buttons on the center
stack to turn auto heated or ventilated
seats off.
If the passenger seat is unoccupied,
the auto heated or ventilated seats
feature will not activate that seat. The auto heated or ventilated seats feature
can be programmed to always be
enabled when the vehicle is on.
The heated or ventilated seats will not
turn on during a remote start unless
they are enabled in the vehicle
personalization menu.
See
Vehicle Personalization 0144.
Head Restraint Adjustment
If equipped with base seats, the
vehicle’s front seats have adjustable
head restraints in the outboard
seating positions.
If equipped with high performance
seats, the vehicle’s front seats have
head restraints in the outboard
seating positions that cannot be
adjusted.
Do not drive until the head restraints
for all occupants are installed and
adjusted properly.
To achieve a comfortable seating
position, change the seatback recline
angle as little as necessary while
keeping the seat and the head
restraint height in the proper position.
Page 20 of 394

Cadillac CTS/CTS-V Owner Manual (GMNA-Localizing-U.S./Canada/Mexico-
11349156) - 2018 - CRC - 9/29/17
IN BRIEF 19
Climate Controls
The climate control buttons on the center stack and on the climate control
display are used to adjust the heating, cooling, and ventilation.
Center Stack Climate Controls
1. Driver and Passenger Temperature Controls
2. Fan Control
3. OFF (Fan)
4. Driver and Passenger Heated and Ventilated Seats (If Equipped) 5. Recirculation
6. Rear Window Defogger
7. Defrost
8. AUTO (Automatic Operation)
Climate Control Display
1. Driver and Passenger Temperature Controls
2. Fan Controls
3. Rear (Rear Climate Control Display, If Equipped)
4. Sync (Synchronize Driver and Passenger Temperature)
5. Recirculation
6. Air Delivery Mode Control
7. Auto (Automatic Operation)
8. A/C (Air Conditioning)
9. On/Off
Page 28 of 394

Cadillac CTS/CTS-V Owner Manual (GMNA-Localizing-U.S./Canada/Mexico-
11349156) - 2018 - CRC - 9/29/17
IN BRIEF 27
as 87 may be used, but it will reduce
performance and fuel economy. See
Fuel0242.
Fuel (LF3 3.6L V6 Twin
Turbo and LT4 6.2L
V8 Engines)
Premium Required Fuel
Use premium 93 octane unleaded
gasoline in your vehicle. Unleaded
gasoline with a 91 octane rating may
be used, but it will reduce
performance and fuel economy. See
Fuel 0242.
E85 or FlexFuel
No E85 or FlexFuel
Gasoline-ethanol fuel blends greater
than E15 (15% ethanol by volume),
such as E85, cannot be used in this
vehicle.
Engine Oil Life System
The engine oil life system calculates
engine oil life based on vehicle use
and displays the CHANGE ENGINE
OIL SOON message when it is time to
change the engine oil and filter. The
oil life system should be reset to 100%
only following an oil change.
Resetting the Oil Life System
1. Using the DIC buttons, display REMAINING OIL LIFE on the
DIC. See Driver Information Center
(DIC) 0137. 2. Press and hold SEL to clear the
CHANGE ENGINE OIL SOON
message and reset the oil life
at 100%.
Be careful not to reset the oil life
display accidentally at any time
other than after the oil is
changed. It cannot be reset
accurately until the next oil
change.
The oil life system can also be reset as
follows: 1. Using the DIC buttons, display REMAINING OIL LIFE on the
DIC. See Driver Information Center
(DIC) 0137.
2. Fully press and release the accelerator pedal three times
within five seconds.
If the CHANGE ENGINE OIL
SOON message is not on, the
system is reset.
See Engine Oil Life System 0265.
Page 66 of 394

Cadillac CTS/CTS-V Owner Manual (GMNA-Localizing-U.S./Canada/Mexico-
11349156) - 2018 - CRC - 9/29/17
SEATS AND RESTRAINTS 65
If equipped, the buttons are near the
climate controls on the center stack.
To operate, the ignition must be on.
Press
Jorzto heat the driver or
passenger seat cushion and seatback.
Press
Cor{to ventilate the driver
or passenger seat.
Press the button once for the highest
setting. With each press of the button,
the seat will change to the next lower
setting, and then to the off setting.
The indicator lights next to the
buttons indicate three for the highest
setting and one for the lowest. If the front heated seats are on high, the
level may automatically be lowered
after approximately 30 minutes.
When this feature is off, the heated
and ventilated seat symbols on the
buttons are white. A ventilated seat
has a fan that pulls or pushes air
through the seat. The air is not
cooled. When a heated seat is turned
on, the symbol turns red. When a
ventilated seat is turned on, the
symbol turns blue.
The passenger seat may take longer to
heat up.
Auto Heated and Ventilated Seats
If the vehicle is equipped with auto
heated or ventilated seats, and the
ignition is on, this feature will
automatically activate the heated or
ventilated seats at the level required
by the vehicle's interior temperature.
The active high, medium, low, or off
heated or ventilated seat level will be
indicated by the manual heated and
ventilated seat buttons on the center
stack. Use the manual heated and
ventilated seat buttons on the center
stack to turn auto heated or ventilatedseats off. If the passenger seat is
unoccupied, the auto heated or
ventilated seats feature will not
activate that seat. The auto heated
and ventilated seats feature can be
programmed to always be enabled
when the vehicle is on. If equipped
with a heated steering wheel, the auto
heated steering wheel activation will
follow the heated seat auto activation
and the heated wheel indicator will
follow the state of the steering
wheel heat.
See
Vehicle Personalization 0144.
Remote Start Heated and Ventilated
Seats
If equipped, the heated seats will turn
on automatically during a remote
start if it is cold outside and the
ventilated seats will turn on
automatically if it is hot outside.
If equipped, the heated steering wheel
will turn on automatically during a
remote start if it is cold outside. The
heated and ventilated seat indicators
and heated steering wheel indicator
may not come on during this
operation.
Page 69 of 394
Cadillac CTS/CTS-V Owner Manual (GMNA-Localizing-U.S./Canada/Mexico-
11349156) - 2018 - CRC - 9/29/17
68 SEATS AND RESTRAINTS
Raising the Seatback
{Warning
If either seatback is not locked, it
could move forward in a sudden
stop or crash. That could cause
injury to the person sitting there.
Always push and pull on the
seatbacks to be sure they are
locked.
{Warning
A seat belt that is improperly
routed, not properly attached,
or twisted will not provide the
protection needed in a crash. The
person wearing the belt could be
seriously injured. After raising the
rear seatback, always check to be
sure that the seat belts are properly
routed and attached, and are not
twisted.To raise a seatback:
1. Lift the seatback up. Make sure the center seat belt and latch do
not get trapped behind the seat.
Push the seatback rearward to
secure it in place.
A red tab near the seatback lever
retracts when the seatback is in
place.
2. Push and pull the top of the seatback to be sure it is in
position.
3. Lock the seatback using the vehicle key in the cylinder.
4. Reconnect the center seat belt mini-latch to the mini-buckle. Do
not let the belt twist.
5. Pull on the center seat belt to make sure the mini-latch is
secure.
6. Repeat the steps to raise the other seatback, if necessary.
When the seat is not in use, it should
be kept in the upright, locked position.
Heated Rear Seats
{Warning
If temperature change or pain to
the skin cannot be felt, the seat
heater may cause burns. See the
Warning under Heated and
Ventilated Front Seats 064.
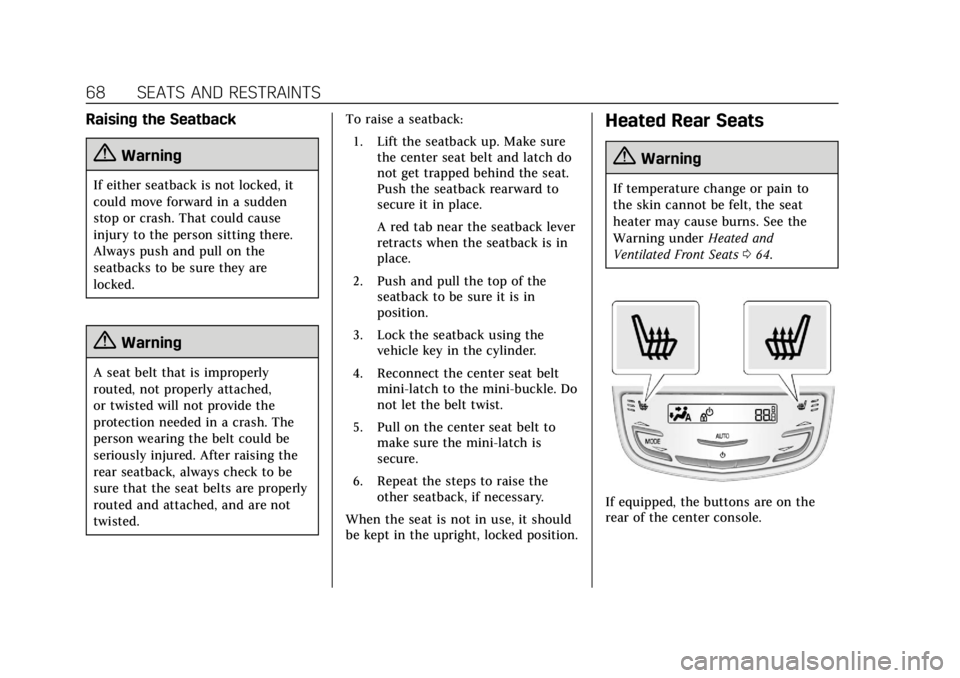
If equipped, the buttons are on the
rear of the center console.
Page 146 of 394
Cadillac CTS/CTS-V Owner Manual (GMNA-Localizing-U.S./Canada/Mexico-
11349156) - 2018 - CRC - 9/29/17
INSTRUMENTS AND CONTROLS 145
Steering
This setting adjusts how the steering
feels from a lighter to a reduced assist
for more steering feel.
Touch Auto (Follows the MODE
switch), Tour, Sport, or Track.
Suspension
This setting adjusts the suspension
from a comfortable to a more
responsive tune.
Touch Auto (Follows the MODE
switch), Tour, Sport, or Track.
Climate and Air Quality
Touch and the following may display:
.Auto Fan Speed
. Air Quality Sensor
. Auto Cooled Seats
. Auto Heated Seats
. Auto Defog
. Auto Rear Defog Auto Fan Speed
This setting specifies the amount of
airf low when the climate control fan
setting is Auto Fan.
Touch Low, Medium, or High.
Air Quality Sensor
This setting switches the system into
Recirculation Mode based on the
quality of the outside air.
Touch Off, Low Sensitivity, or High
Sensitivity.
Auto Cooled Seats
This setting automatically turns on
and regulates the ventilated seats
when the cabin temperature is warm.
See
Heated and Ventilated Front Seats
0 64.
Touch Off or On.
Auto Heated Seats
This setting automatically turns on
and regulates the heated seats when
the cabin temperature is cool. The
auto heated seats can be turned off by using the heated seat buttons on the
center stack. See
Heated and Ventilated
Front Seats 064.
If equipped with Auto Heated Steering
Wheel, this feature will turn on when
the Auto Heated Seats turn on.
Touch Off or On.
Auto Defog
This setting automatically turns the
front defogger on when the engine is
started.
Touch Off or On.
Auto Rear Defog
This setting automatically turns the
rear defogger on when the engine is
started.
Touch Off or On.
Collision / Detection Systems
Touch and the following may display:
. Alert Type
. Forward Collision System
. Connected Vehicle Braking Alert
. Traffic and Roadside Information
Page 150 of 394

Cadillac CTS/CTS-V Owner Manual (GMNA-Localizing-U.S./Canada/Mexico-
11349156) - 2018 - CRC - 9/29/17
INSTRUMENTS AND CONTROLS 149
Passive Door Lock
This setting specifies if the vehicle will
automatically lock, or lock and
provide an alert after all the doors are
closed, and you walk away from the
vehicle with the RKE transmitter. See
Remote Keyless Entry (RKE) System
Operation030.
Touch Off, On with Horn Chirp, or On.
Remote Left in Vehicle Alert
This feature sounds an alert when the
RKE transmitter is left in the vehicle.
This menu also enables Remote No
Longer in Vehicle Alert.
Touch Off or On.
Teen Driver
See “Teen Driver” under“Settings ”in
the infotainment manual.
Valet Mode
This will lock the infotainment system
and steering wheel controls. It may
also limit access to vehicle storage
locations, if equipped.
To enable valet mode:
1. Enter a four-digit code on the keypad.
2. Touch Enter to go to the confirmation screen.
3. Re-enter the four-digit code.
Touch Lock or Unlock to lock or
unlock the system. Touch Back to go
back to the previous menu.
Universal Remote
System
See Radio Frequency Statement 0367.
Universal Remote System
Programming
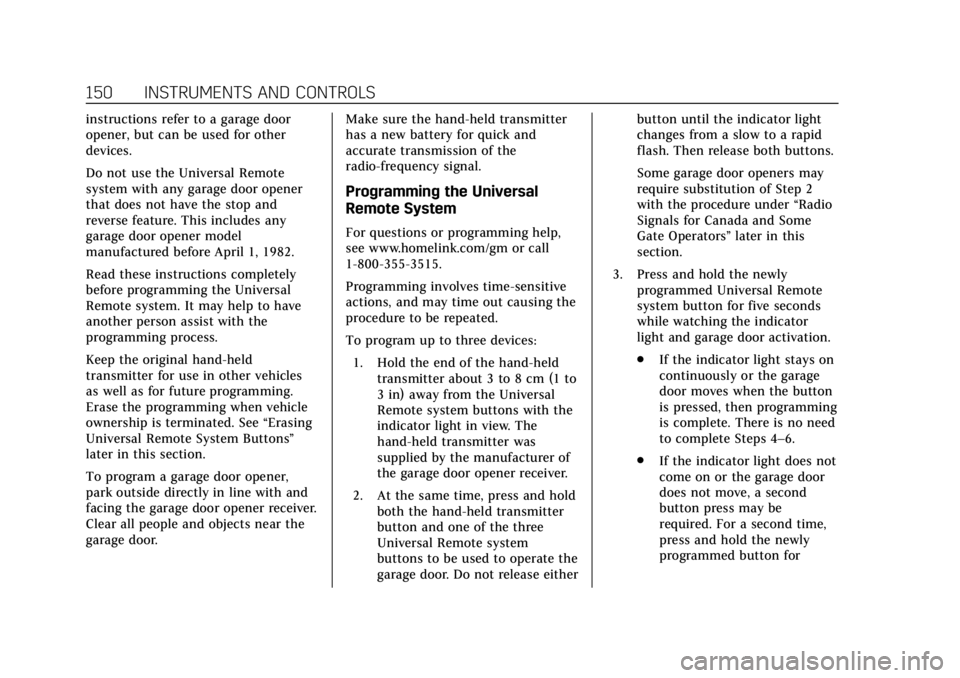
If equipped, these buttons are in the
overhead console.
This system can replace up to three
remote control transmitters used to
activate devices such as garage door
openers, security systems, and home
automation devices. These
Page 151 of 394
Cadillac CTS/CTS-V Owner Manual (GMNA-Localizing-U.S./Canada/Mexico-
11349156) - 2018 - CRC - 9/29/17
150 INSTRUMENTS AND CONTROLS
instructions refer to a garage door
opener, but can be used for other
devices.
Do not use the Universal Remote
system with any garage door opener
that does not have the stop and
reverse feature. This includes any
garage door opener model
manufactured before April 1, 1982.
Read these instructions completely
before programming the Universal
Remote system. It may help to have
another person assist with the
programming process.
Keep the original hand-held
transmitter for use in other vehicles
as well as for future programming.
Erase the programming when vehicle
ownership is terminated. See“Erasing
Universal Remote System Buttons”
later in this section.
To program a garage door opener,
park outside directly in line with and
facing the garage door opener receiver.
Clear all people and objects near the
garage door. Make sure the hand-held transmitter
has a new battery for quick and
accurate transmission of the
radio-frequency signal.
Programming the Universal
Remote System
For questions or programming help,
see www.homelink.com/gm or call
1-800-355-3515.
Programming involves time-sensitive
actions, and may time out causing the
procedure to be repeated.
To program up to three devices:
1. Hold the end of the hand-held transmitter about 3 to 8 cm (1 to
3 in) away from the Universal
Remote system buttons with the
indicator light in view. The
hand-held transmitter was
supplied by the manufacturer of
the garage door opener receiver.
2. At the same time, press and hold both the hand-held transmitter
button and one of the three
Universal Remote system
buttons to be used to operate the
garage door. Do not release either button until the indicator light
changes from a slow to a rapid
flash. Then release both buttons.
Some garage door openers may
require substitution of Step 2
with the procedure under
“Radio
Signals for Canada and Some
Gate Operators” later in this
section.
3. Press and hold the newly programmed Universal Remote
system button for five seconds
while watching the indicator
light and garage door activation.
.If the indicator light stays on
continuously or the garage
door moves when the button
is pressed, then programming
is complete. There is no need
to complete Steps 4–6.
. If the indicator light does not
come on or the garage door
does not move, a second
button press may be
required. For a second time,
press and hold the newly
programmed button for
Page 152 of 394
Cadillac CTS/CTS-V Owner Manual (GMNA-Localizing-U.S./Canada/Mexico-
11349156) - 2018 - CRC - 9/29/17
INSTRUMENTS AND CONTROLS 151
five seconds. If the light stays
on or the garage door moves,
programming is complete.
. If the indicator light blinks
rapidly for two seconds, then
changes to a solid light and
the garage door does not
move, continue with
programming Steps 4–6.
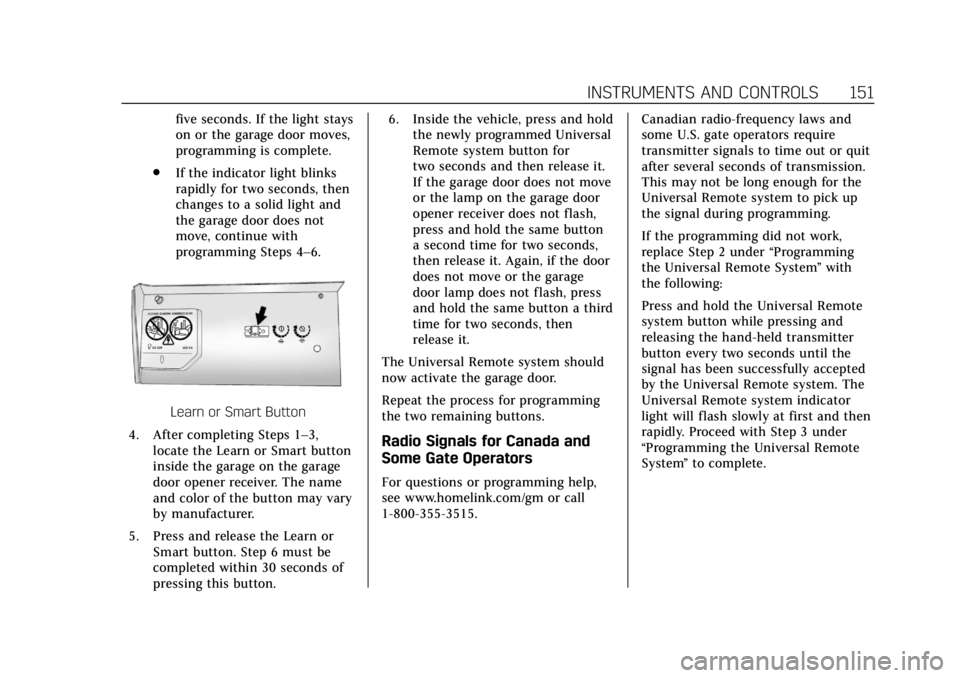
Learn or Smart Button
4. After completing Steps 1–3, locate the Learn or Smart button
inside the garage on the garage
door opener receiver. The name
and color of the button may vary
by manufacturer.
5. Press and release the Learn or Smart button. Step 6 must be
completed within 30 seconds of
pressing this button. 6. Inside the vehicle, press and hold
the newly programmed Universal
Remote system button for
two seconds and then release it.
If the garage door does not move
or the lamp on the garage door
opener receiver does not flash,
press and hold the same button
a second time for two seconds,
then release it. Again, if the door
does not move or the garage
door lamp does not flash, press
and hold the same button a third
time for two seconds, then
release it.
The Universal Remote system should
now activate the garage door.
Repeat the process for programming
the two remaining buttons.
Radio Signals for Canada and
Some Gate Operators
For questions or programming help,
see www.homelink.com/gm or call
1-800-355-3515. Canadian radio-frequency laws and
some U.S. gate operators require
transmitter signals to time out or quit
after several seconds of transmission.
This may not be long enough for the
Universal Remote system to pick up
the signal during programming.
If the programming did not work,
replace Step 2 under
“Programming
the Universal Remote System ”with
the following:
Press and hold the Universal Remote
system button while pressing and
releasing the hand-held transmitter
button every two seconds until the
signal has been successfully accepted
by the Universal Remote system. The
Universal Remote system indicator
light will flash slowly at first and then
rapidly. Proceed with Step 3 under
“Programming the Universal Remote
System ”to complete.