display CADILLAC CTS V 2017 3.G Repair Manual
[x] Cancel search | Manufacturer: CADILLAC, Model Year: 2017, Model line: CTS V, Model: CADILLAC CTS V 2017 3.GPages: 352, PDF Size: 3.99 MB
Page 166 of 352
Cadillac CTS/CTS-V Owner Manual (GMNA-Localizing-MidEast-10293089) -
2017 - crc - 6/22/16
INFOTAINMENT SYSTEM 165
Infotainment System
Introduction
Infotainment . . . . . . . . . . . . . . . . . . . . . 165
Performance Data
Recorder (PDR)
Performance DataRecorder (PDR) . . . . . . . . . . . . . . . . . 165
Introduction
Infotainment
See the infotainment manual for
information on the radio, audio
players, phone, navigation system, and
voice or speech recognition,
if equipped. It also includes
information on settings.
Performance Data
Recorder (PDR)
If equipped, the PDR icon displays on
the Home Page.
Important Information
Read before using PDR. All or some of
the information may apply to your
country:
. Use of the Performance Data
Recorder (PDR System) may be
prohibited or legally restricted in
certain countries and situations.
It is your own responsibility to
ensure compliance with applicable
laws and regulations, including
but not limited to privacy laws,
laws related to camera
surveillance and recordings, road
traffic and security laws, and laws
on the protection of publicity and
personality rights.
. You are solely liable for operation
of your vehicle and use of the PDR
System, including all related legal
responsibilities. Use of the PDR
System may be prohibited or
legally restricted in certain
Page 167 of 352
Cadillac CTS/CTS-V Owner Manual (GMNA-Localizing-MidEast-10293089) -
2017 - crc - 6/22/16
166 INFOTAINMENT SYSTEM
countries and situations. Vehicles
equipped with the PDR System are
intended for use on private tracks
only and may under local laws and
regulations be restricted or
completely excluded from use in
areas accessible by the public,
such as public roads. It is your
own responsibility to ensure
compliance with applicable laws
and regulations, including but not
limited to privacy laws, laws
related to camera surveillance and
recordings, road traffic and
security laws, and laws on the
protection of publicity and
personality rights. You may need a
permit, license, or other approval
from local authorities in order to
comply with applicable laws and
regulations.
. Do not use the PDR System if this
could distract your attention from
traffic or entail other risks.
. Do not rely exclusively on camera
footage for steering the vehicle.
. Comply with any notice and
consent requirements before
capturing and/or recording the voices or images of other persons
or collecting other personal data
with the PDR System.
. Notify other drivers of your
vehicle of the above rules and
require them to comply with them.
. General Motors does not accept
any responsibility or liability in
connection with an impermissible
use of the PDR System.
. Please note that law enforcement
authorities may have the right to
seize video recordings and use
them as evidence of criminal/
driving offences against you or
third parties.
. The PDR System captures and
records any sound perceivable
within the vehicle, including any
conversations among vehicle
occupants. Hidden recording of
conversations may be an offence
under certain jurisdictions.
Therefore, all vehicle users and
occupants must be informed about
ongoing audio recording upon
activation of the PDR System. The PDR records video, audio, and
vehicle data. This data is stored on a
removable SD card in the glove box.
The recorded data is not stored
anywhere else and is only accessible
from the SD card.
To begin, insert a FAT32 formatted SD
card, Class 10 required, 8, 16, or 32 GB
recommended, into the glove box SD
card reader.
Touch the PDR icon to access the PDR
menu. The options displayed are:
Start Recording
If the system is unable to begin
recording, the Start Recording button
is grayed out.
Page 168 of 352
Cadillac CTS/CTS-V Owner Manual (GMNA-Localizing-MidEast-10293089) -
2017 - crc - 6/22/16
INFOTAINMENT SYSTEM 167
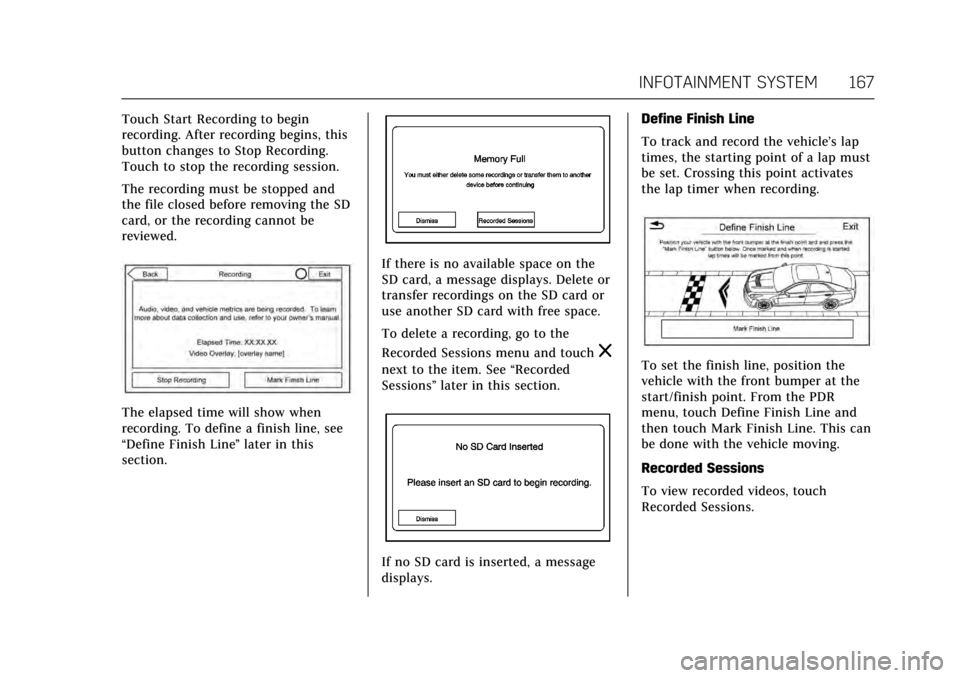
Touch Start Recording to begin
recording. After recording begins, this
button changes to Stop Recording.
Touch to stop the recording session.
The recording must be stopped and
the file closed before removing the SD
card, or the recording cannot be
reviewed.
The elapsed time will show when
recording. To define a finish line, see
“Define Finish Line”later in this
section.
If there is no available space on the
SD card, a message displays. Delete or
transfer recordings on the SD card or
use another SD card with free space.
To delete a recording, go to the
Recorded Sessions menu and touch
z
next to the item. See “Recorded
Sessions” later in this section.
If no SD card is inserted, a message
displays. Define Finish Line
To track and record the vehicle’s lap
times, the starting point of a lap must
be set. Crossing this point activates
the lap timer when recording.
To set the finish line, position the
vehicle with the front bumper at the
start/finish point. From the PDR
menu, touch Define Finish Line and
then touch Mark Finish Line. This can
be done with the vehicle moving.
Recorded Sessions
To view recorded videos, touch
Recorded Sessions.
Page 169 of 352
Cadillac CTS/CTS-V Owner Manual (GMNA-Localizing-MidEast-10293089) -
2017 - crc - 6/22/16
168 INFOTAINMENT SYSTEM
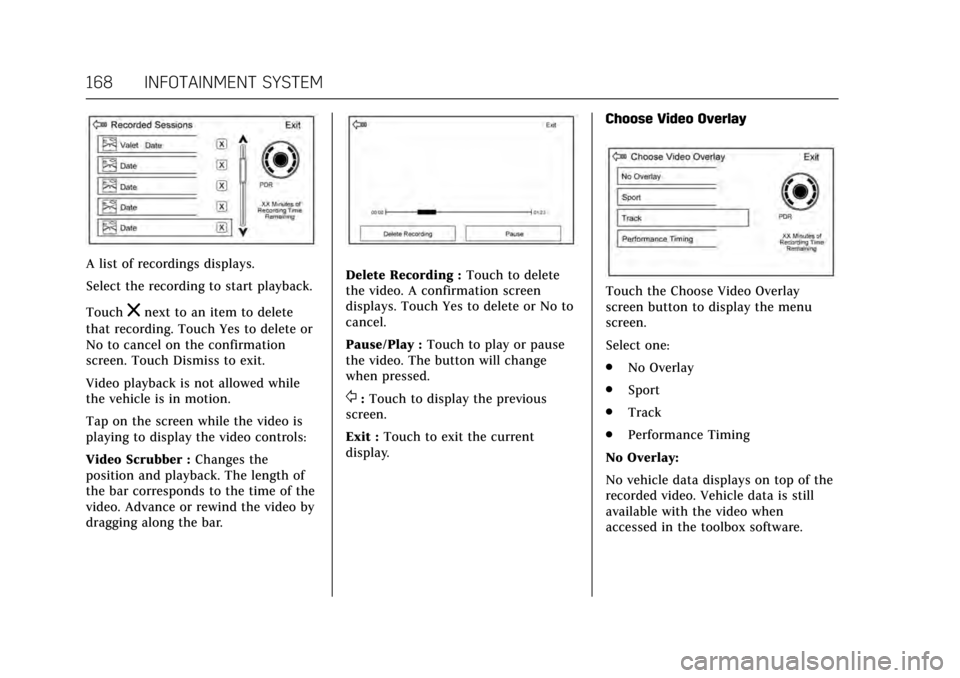
A list of recordings displays.
Select the recording to start playback.
Touch
znext to an item to delete
that recording. Touch Yes to delete or
No to cancel on the confirmation
screen. Touch Dismiss to exit.
Video playback is not allowed while
the vehicle is in motion.
Tap on the screen while the video is
playing to display the video controls:
Video Scrubber : Changes the
position and playback. The length of
the bar corresponds to the time of the
video. Advance or rewind the video by
dragging along the bar.
Delete Recording : Touch to delete
the video. A confirmation screen
displays. Touch Yes to delete or No to
cancel.
Pause/Play : Touch to play or pause
the video. The button will change
when pressed.
/: Touch to display the previous
screen.
Exit : Touch to exit the current
display. Choose Video Overlay
Touch the Choose Video Overlay
screen button to display the menu
screen.
Select one:
.
No Overlay
. Sport
. Track
. Performance Timing
No Overlay:
No vehicle data displays on top of the
recorded video. Vehicle data is still
available with the video when
accessed in the toolbox software.
Page 170 of 352
Cadillac CTS/CTS-V Owner Manual (GMNA-Localizing-MidEast-10293089) -
2017 - crc - 6/22/16
INFOTAINMENT SYSTEM 169
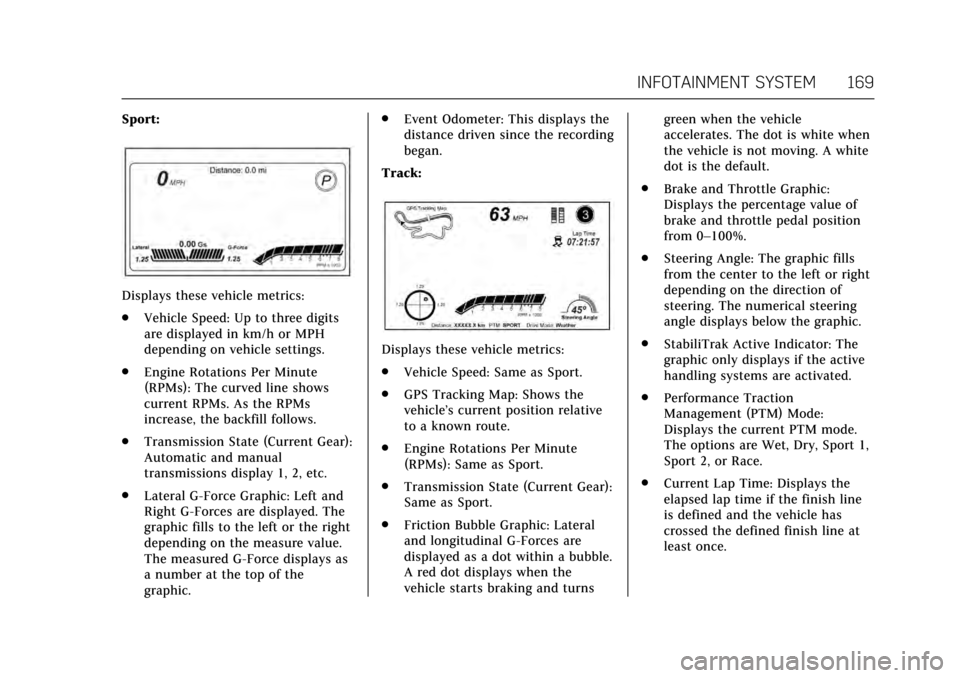
Sport:
Displays these vehicle metrics:
.Vehicle Speed: Up to three digits
are displayed in km/h or MPH
depending on vehicle settings.
. Engine Rotations Per Minute
(RPMs): The curved line shows
current RPMs. As the RPMs
increase, the backfill follows.
. Transmission State (Current Gear):
Automatic and manual
transmissions display 1, 2, etc.
. Lateral G-Force Graphic: Left and
Right G-Forces are displayed. The
graphic fills to the left or the right
depending on the measure value.
The measured G-Force displays as
a number at the top of the
graphic. .
Event Odometer: This displays the
distance driven since the recording
began.
Track:
Displays these vehicle metrics:
. Vehicle Speed: Same as Sport.
. GPS Tracking Map: Shows the
vehicle’s current position relative
to a known route.
. Engine Rotations Per Minute
(RPMs): Same as Sport.
. Transmission State (Current Gear):
Same as Sport.
. Friction Bubble Graphic: Lateral
and longitudinal G-Forces are
displayed as a dot within a bubble.
A red dot displays when the
vehicle starts braking and turns green when the vehicle
accelerates. The dot is white when
the vehicle is not moving. A white
dot is the default.
. Brake and Throttle Graphic:
Displays the percentage value of
brake and throttle pedal position
from 0–100%.
. Steering Angle: The graphic fills
from the center to the left or right
depending on the direction of
steering. The numerical steering
angle displays below the graphic.
. StabiliTrak Active Indicator: The
graphic only displays if the active
handling systems are activated.
. Performance Traction
Management (PTM) Mode:
Displays the current PTM mode.
The options are Wet, Dry, Sport 1,
Sport 2, or Race.
. Current Lap Time: Displays the
elapsed lap time if the finish line
is defined and the vehicle has
crossed the defined finish line at
least once.
Page 171 of 352
Cadillac CTS/CTS-V Owner Manual (GMNA-Localizing-MidEast-10293089) -
2017 - crc - 6/22/16
170 INFOTAINMENT SYSTEM
.Event Odometer: Displays the
distance driven since the recording
began.
. Drive Mode: Displays the vehicle’s
current drive mode.
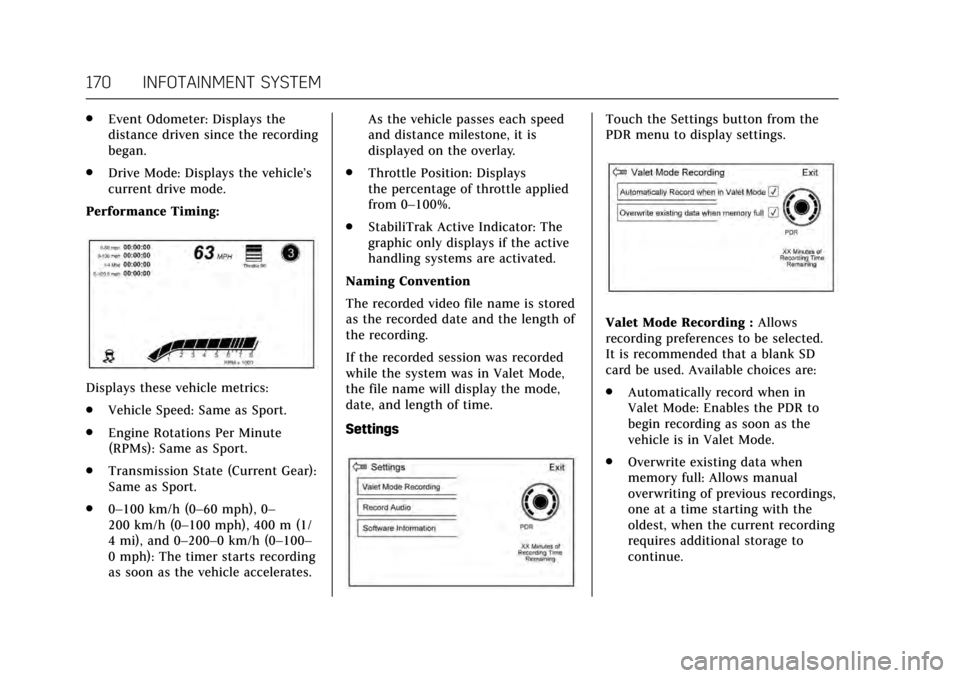
Performance Timing:
Displays these vehicle metrics:
. Vehicle Speed: Same as Sport.
. Engine Rotations Per Minute
(RPMs): Same as Sport.
. Transmission State (Current Gear):
Same as Sport.
. 0–100 km/h (0–60 mph), 0–
200 km/h (0–100 mph), 400 m (1/
4 mi), and 0–200–0 km/h (0–100–
0 mph): The timer starts recording
as soon as the vehicle accelerates. As the vehicle passes each speed
and distance milestone, it is
displayed on the overlay.
. Throttle Position: Displays
the percentage of throttle applied
from 0–100%.
. StabiliTrak Active Indicator: The
graphic only displays if the active
handling systems are activated.
Naming Convention
The recorded video file name is stored
as the recorded date and the length of
the recording.
If the recorded session was recorded
while the system was in Valet Mode,
the file name will display the mode,
date, and length of time.
Settings
Touch the Settings button from the
PDR menu to display settings.
Valet Mode Recording : Allows
recording preferences to be selected.
It is recommended that a blank SD
card be used. Available choices are:
. Automatically record when in
Valet Mode: Enables the PDR to
begin recording as soon as the
vehicle is in Valet Mode.
. Overwrite existing data when
memory full: Allows manual
overwriting of previous recordings,
one at a time starting with the
oldest, when the current recording
requires additional storage to
continue.
Page 172 of 352
Cadillac CTS/CTS-V Owner Manual (GMNA-Localizing-MidEast-10293089) -
2017 - crc - 6/22/16
INFOTAINMENT SYSTEM 171
Audio will not record during
Valet Mode.
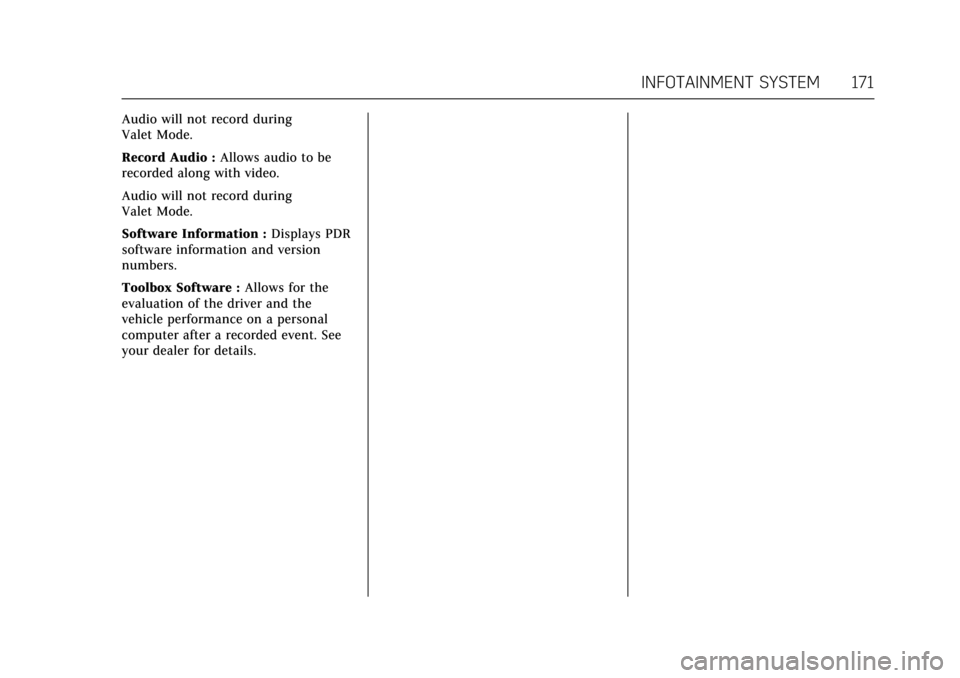
Record Audio :Allows audio to be
recorded along with video.
Audio will not record during
Valet Mode.
Software Information : Displays PDR
software information and version
numbers.
Toolbox Software : Allows for the
evaluation of the driver and the
vehicle performance on a personal
computer after a recorded event. See
your dealer for details.
Page 174 of 352
Cadillac CTS/CTS-V Owner Manual (GMNA-Localizing-MidEast-10293089) -
2017 - crc - 6/22/16
CLIMATE CONTROLS 173
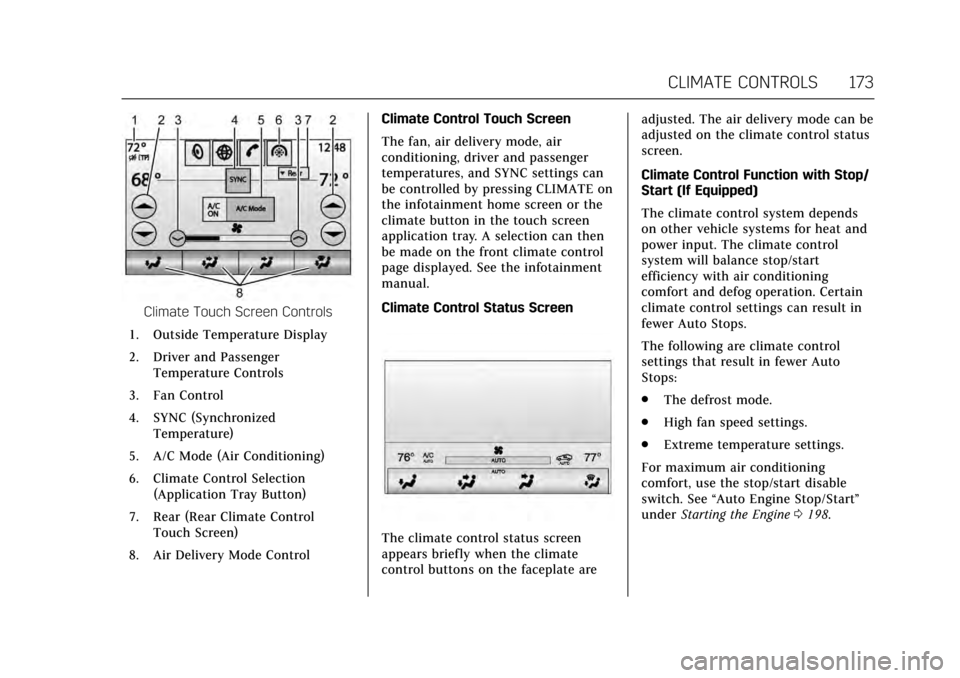
Climate Touch Screen Controls
1. Outside Temperature Display
2. Driver and Passenger Temperature Controls
3. Fan Control
4. SYNC (Synchronized Temperature)
5. A/C Mode (Air Conditioning)
6. Climate Control Selection (Application Tray Button)
7. Rear (Rear Climate Control Touch Screen)
8. Air Delivery Mode Control Climate Control Touch Screen
The fan, air delivery mode, air
conditioning, driver and passenger
temperatures, and SYNC settings can
be controlled by pressing CLIMATE on
the infotainment home screen or the
climate button in the touch screen
application tray. A selection can then
be made on the front climate control
page displayed. See the infotainment
manual.
Climate Control Status Screen
The climate control status screen
appears briefly when the climate
control buttons on the faceplate are adjusted. The air delivery mode can be
adjusted on the climate control status
screen.
Climate Control Function with Stop/
Start (If Equipped)
The climate control system depends
on other vehicle systems for heat and
power input. The climate control
system will balance stop/start
efficiency with air conditioning
comfort and defog operation. Certain
climate control settings can result in
fewer Auto Stops.
The following are climate control
settings that result in fewer Auto
Stops:
.
The defrost mode.
. High fan speed settings.
. Extreme temperature settings.
For maximum air conditioning
comfort, use the stop/start disable
switch. See “Auto Engine Stop/Start ”
under Starting the Engine 0198.
Page 175 of 352
Cadillac CTS/CTS-V Owner Manual (GMNA-Localizing-MidEast-10293089) -
2017 - crc - 6/22/16
174 CLIMATE CONTROLS
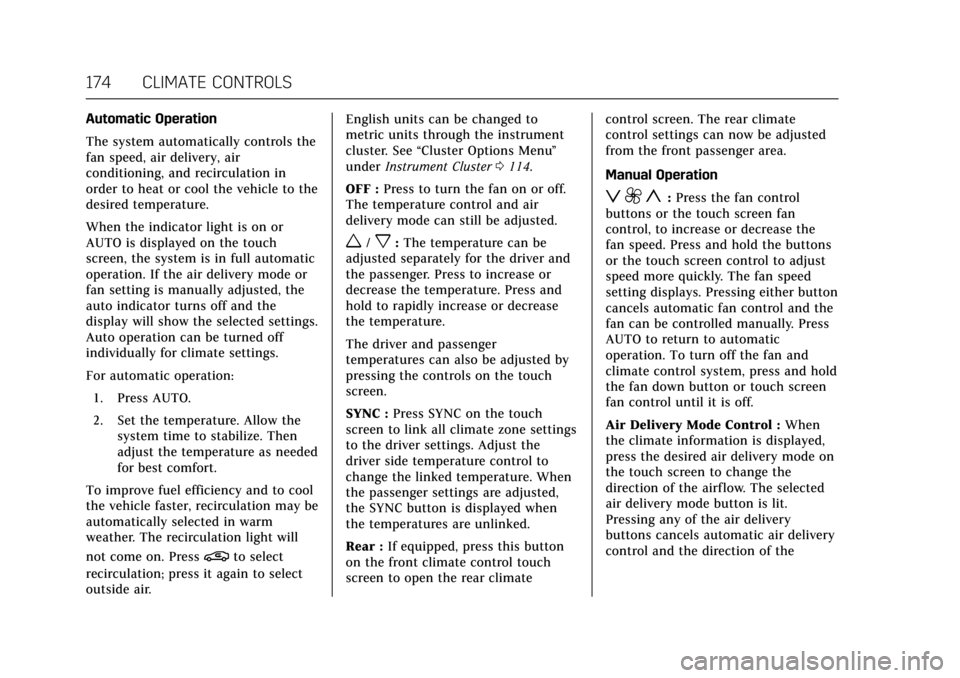
Automatic Operation
The system automatically controls the
fan speed, air delivery, air
conditioning, and recirculation in
order to heat or cool the vehicle to the
desired temperature.
When the indicator light is on or
AUTO is displayed on the touch
screen, the system is in full automatic
operation. If the air delivery mode or
fan setting is manually adjusted, the
auto indicator turns off and the
display will show the selected settings.
Auto operation can be turned off
individually for climate settings.
For automatic operation:1. Press AUTO.
2. Set the temperature. Allow the system time to stabilize. Then
adjust the temperature as needed
for best comfort.
To improve fuel efficiency and to cool
the vehicle faster, recirculation may be
automatically selected in warm
weather. The recirculation light will
not come on. Press
@to select
recirculation; press it again to select
outside air. English units can be changed to
metric units through the instrument
cluster. See
“Cluster Options Menu ”
under Instrument Cluster 0114.
OFF : Press to turn the fan on or off.
The temperature control and air
delivery mode can still be adjusted.
w/x: The temperature can be
adjusted separately for the driver and
the passenger. Press to increase or
decrease the temperature. Press and
hold to rapidly increase or decrease
the temperature.
The driver and passenger
temperatures can also be adjusted by
pressing the controls on the touch
screen.
SYNC : Press SYNC on the touch
screen to link all climate zone settings
to the driver settings. Adjust the
driver side temperature control to
change the linked temperature. When
the passenger settings are adjusted,
the SYNC button is displayed when
the temperatures are unlinked.
Rear : If equipped, press this button
on the front climate control touch
screen to open the rear climate control screen. The rear climate
control settings can now be adjusted
from the front passenger area.
Manual Operation
z 9 y:
Press the fan control
buttons or the touch screen fan
control, to increase or decrease the
fan speed. Press and hold the buttons
or the touch screen control to adjust
speed more quickly. The fan speed
setting displays. Pressing either button
cancels automatic fan control and the
fan can be controlled manually. Press
AUTO to return to automatic
operation. To turn off the fan and
climate control system, press and hold
the fan down button or touch screen
fan control until it is off.
Air Delivery Mode Control : When
the climate information is displayed,
press the desired air delivery mode on
the touch screen to change the
direction of the airflow. The selected
air delivery mode button is lit.
Pressing any of the air delivery
buttons cancels automatic air delivery
control and the direction of the
Page 178 of 352
Cadillac CTS/CTS-V Owner Manual (GMNA-Localizing-MidEast-10293089) -
2017 - crc - 6/22/16
CLIMATE CONTROLS 177
The climate control system uses the
sensor information to adjust the
temperature, fan speed, recirculation,
and air delivery mode for best
comfort.
If the sensor is covered, the automatic
climate control system may not work
properly.
Air Quality Sensor
If equipped with an air quality sensor,
the climate control system adjusts to
limit some exhaust fumes from being
pulled inside the vehicle.
Press the AUTO button on the climate
control to activate the air quality
sensor. Recirculation is automatically
selected when poor quality air is
detected. The air quality sensor will
not maintain recirculation for an
extended period to prevent the air
inside the vehicle from becoming too
dry or stuffy.
Under certain conditions, the air
quality sensor will not activate, such
as during cold weather or with
extreme odors. Press
@to activate
recirculation. The air quality sensor system does not
protect against carbon monoxide (CO),
which you cannot see or smell. See
Engine Exhaust
0202. The air quality
sensor operation can be adjusted, See
“Climate and Air Quality” under
Vehicle Personalization 0149.
Rear Climate Control
System
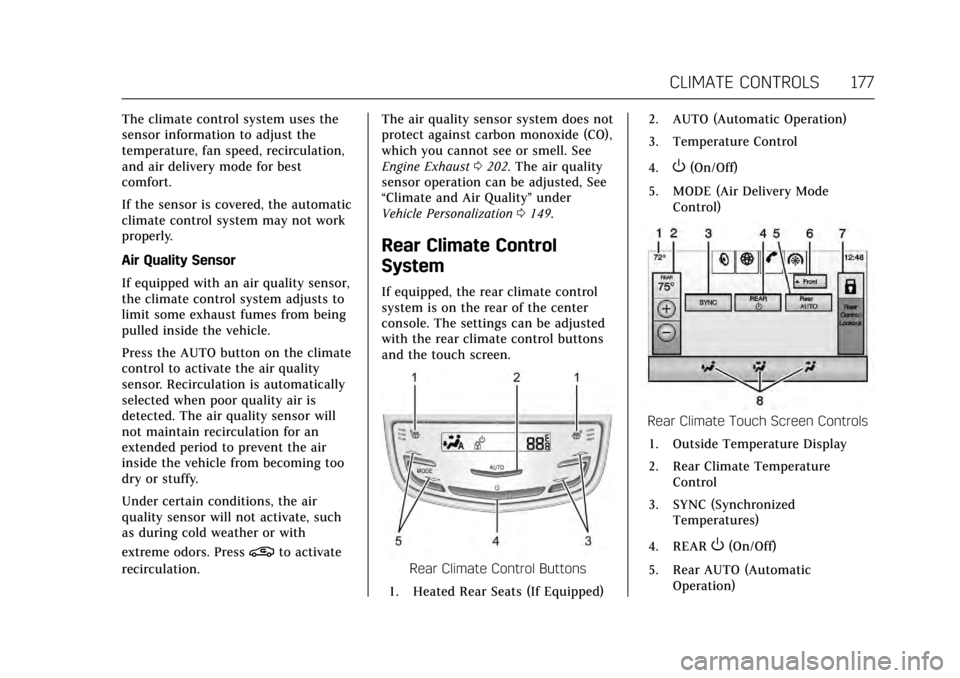
If equipped, the rear climate control
system is on the rear of the center
console. The settings can be adjusted
with the rear climate control buttons
and the touch screen.
Rear Climate Control Buttons
1. Heated Rear Seats (If Equipped) 2. AUTO (Automatic Operation)
3. Temperature Control
4.
O(On/Off)
5. MODE (Air Delivery Mode Control)
Rear Climate Touch Screen Controls
1. Outside Temperature Display
2. Rear Climate Temperature Control
3. SYNC (Synchronized Temperatures)
4. REAR
O(On/Off)
5. Rear AUTO (Automatic Operation)