reset CADILLAC DEVILLE 1998 7.G Owners Manual
[x] Cancel search | Manufacturer: CADILLAC, Model Year: 1998, Model line: DEVILLE, Model: CADILLAC DEVILLE 1998 7.GPages: 386, PDF Size: 22.36 MB
Page 30 of 386
Downloaded from www.Manualslib.com manuals search engine a ..
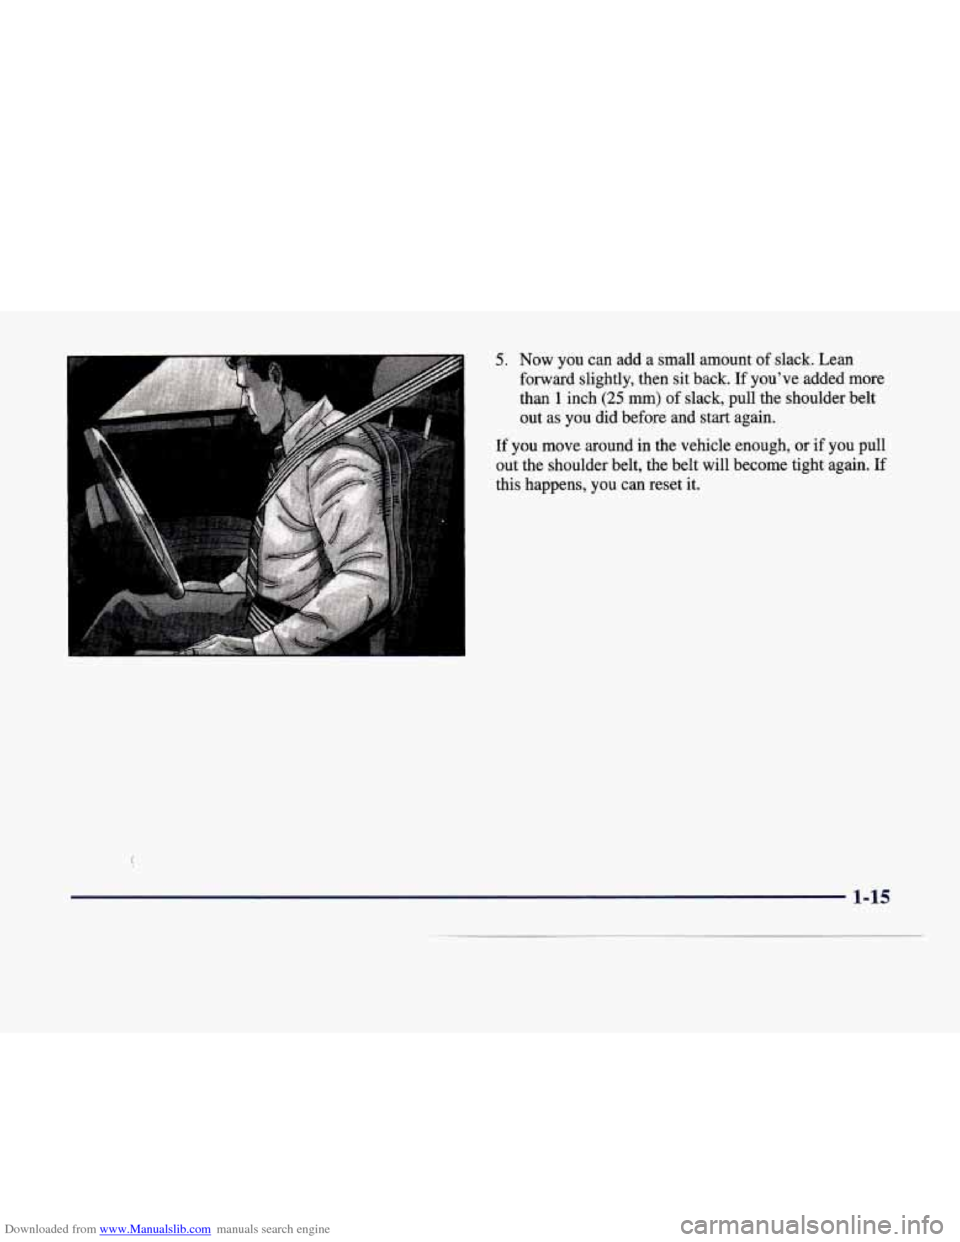
5. Now you can add a small amount of slack. Lean
forward slightly, then sit back.
If you've added more
than
1 inch (25 mm) of slack, pull the shoulder belt
out as you did before and start again.
If you move around in the vehicle enough, or if you pull
out the shoulder belt, the belt will become tight again.
If
this happens, you can reset it.
Page 79 of 386
Downloaded from www.Manualslib.com manuals search engine Operation
When you press this symbol to unlock the driver’s
door, the parking lamps on your vehicle will blink twice.
(You can program your vehicle
so the parking lamps
will not flash. For more information, see “LocMUnlock
Confirmation” later in
this section.) Pressing this
symbol again within five seconds will unlock the other
doors. Pressing
this symbol will also disarm the optional
theft-deterrent system and turn on the interior lamps
at night.
8 When you press this symbol to lock the doors, the
parking lamps will blink once. (You can program your
vehicle
so the parking lamps will not flash. For more
information, see “LocMUnlock Confirmation”
later in this section.) This also arms the optional
theft-deterrent system.
Press this symbol to open the trunk. (The valet
lockout button must be
off for this feature to work.)
Press this button to open the fuel door.
(The valet lockout button must be
off for this feature
to work.) The
remote keyless entry transmitter can also be used to
recall the memory settings for up to two drivers.
For
more information, see “Memory Seat and Mirrors” in
the Index.
Note that pressing the transmitter buttons numerous
times (approximately
500 times) out of the vehicle’s
operating range may cause the transmitter not to work.
Replacing the battery and pressing the transmitter
buttons 10 or more times out of range will also cause the
transmitter not to work. To reset the transmitter, you
must be within the vehicle’s operating range. Press and
hold the trunk button, and within one second, press and
hold the lock button. Continue to hold both buttons for
approximately three seconds. See your dealer for service
if your transmitter still doesn’t work properly.
Matching Transmitter(s) To Your Vehicle
Each remote keyless entry transmitter is coded to
prevent another transmitter from unlocking your vehicle.
If a transmitter is lost or stolen, a replacement can be
purchased through your dealer. Once your dealer has
coded the new transmitter, the lost transmitter will not
unlock your vehicle. Each vehicle can have only two
transmitters matched to it.
2-8
Page 84 of 386

Downloaded from www.Manualslib.com manuals search engine Trunk Lid Automatic Pull-Down Feature
Your car has an automatic pull-down feature that
helps close the trunk electronically. Your fingers
can be trapped under the trunk lid as it goes
down. Your fingers could be injured, and you
would need someone
to help you free them. Keep
your fingers away from the trunk lid
as you close
it and as it is going down.
With the automatic pull-down feature, you never have to
slam the trunk lid in order to close the trunk. Instead,
gently lower the trunk lid until it is nearly shut
-- the
automatic pull-down unit will take over and lock the
trunk firmly.
/A
/-
B
A. Trunk Lid
B. Lever
If for some reason me trunk lid
(A) will not close, it may
be because the trunk pull-down unit was accidently
bumped. Even though the trunk lid remains open, the
motor from the pull-down unit has already cycled down.
If this happens, press the lever
(B) on the trunk lid. The
pull-down unit motor will reset itself allowing the trunk lid to close when lowered.
2-13
Page 109 of 386
Downloaded from www.Manualslib.com manuals search engine The Rainsense wipers operate in a delay mode as well as
a continuous low or high speed depending on the
amount of moisture and the sensitivity level. The MIST
and “wash” cycles operate as normal and
are not
affected by the Rainsense function.
NOTICE:
The wipers must be turned off when going
through a car wash to avoid damage.
It is important to note that the Rainsense wiping feature
(AUTO
DELAY) can be overridden at any time by
manually changing the wiper control to
LO or HI speed.
Note that if you ever need
to replace the windshield,
make sure it is Rainsense compatible.
Windshield Washer
In freezing weather, don’t use your washer until
the windshield is warmed. Otherwise the washer
fluid can
form ice on the windshield, blocking
your vision.
At the top of the turn signaVmultifunction lever, there is
a paddle with the word PUSH on it. To spray washer
fluid
on the windshield, press and release this paddle.
The wipers will clear the windshield and either
stop or
return to your preset speed. For more washer cycles,
press and hold the paddle.
LOW WASHER FLUID will be displayed on the Driver
Information Center
(DIC) when the washer fluid reaches
a low level.
2-38
Page 111 of 386
Downloaded from www.Manualslib.com manuals search engine Setting Cruise Control
If you leave your cruise control switch on when
you’re not using cruise, you might hit a button
and
go into cruise when you don’t want to. You
could be startled and even lose control. Keep the
cruise control switch
off until you want to use it.
1. Move the cruise control switch to ON.
2. Accelerate to the speed you want.
3. Press the SET CRUISE button at the end of the lever
and release it. The CRUISE ENGAGED message
will display on the Driver Information Center (DIC).
4. Remove your foot from the accelerator pedal.
Resuming a Set Speed
Setting the cruise control at a desired speed and then
applying the brake will end the cruise function. Once you’re going about
25 mph (40 km/h) or
more,
you can move the cruise control switch
from ON to
R/A (Resume/Accelerate) for about half a second to
reset.
This returns you to your desired preset speed. Also
note that the Driver Information Center (DIC) will
display the CRUISE ENGAGED message again.
Remember, if you hold the switch at R/A longer than
half a second, the vehicle will accelerate until
you
release the switch or apply the brake. So unless you
want to go faster, don’t hold the switch at R/A.
Increasing Speed While Using Cruise Control
There are two ways to go to a higher speed:
Use the accelerator pedal to get to the higher speed.
Push the button at the end of the lever and then
release the button and the accelerator pedal. You’ll
now cruise at the higher speed.
0 Move the cruise switch fiom ON to FUA. Hold it there
until you reach a desired
speed and then release the
switch.
(To increase your speed in very small amounts,
move the switch to R/A. Each time you do this, your
vehicle
will go about 1 mph (1.6 km/h) faster.)
The accelerate feature will only work after you have set the cruise control speed by pushing the SET
CRUISE button.
2-40
Page 137 of 386
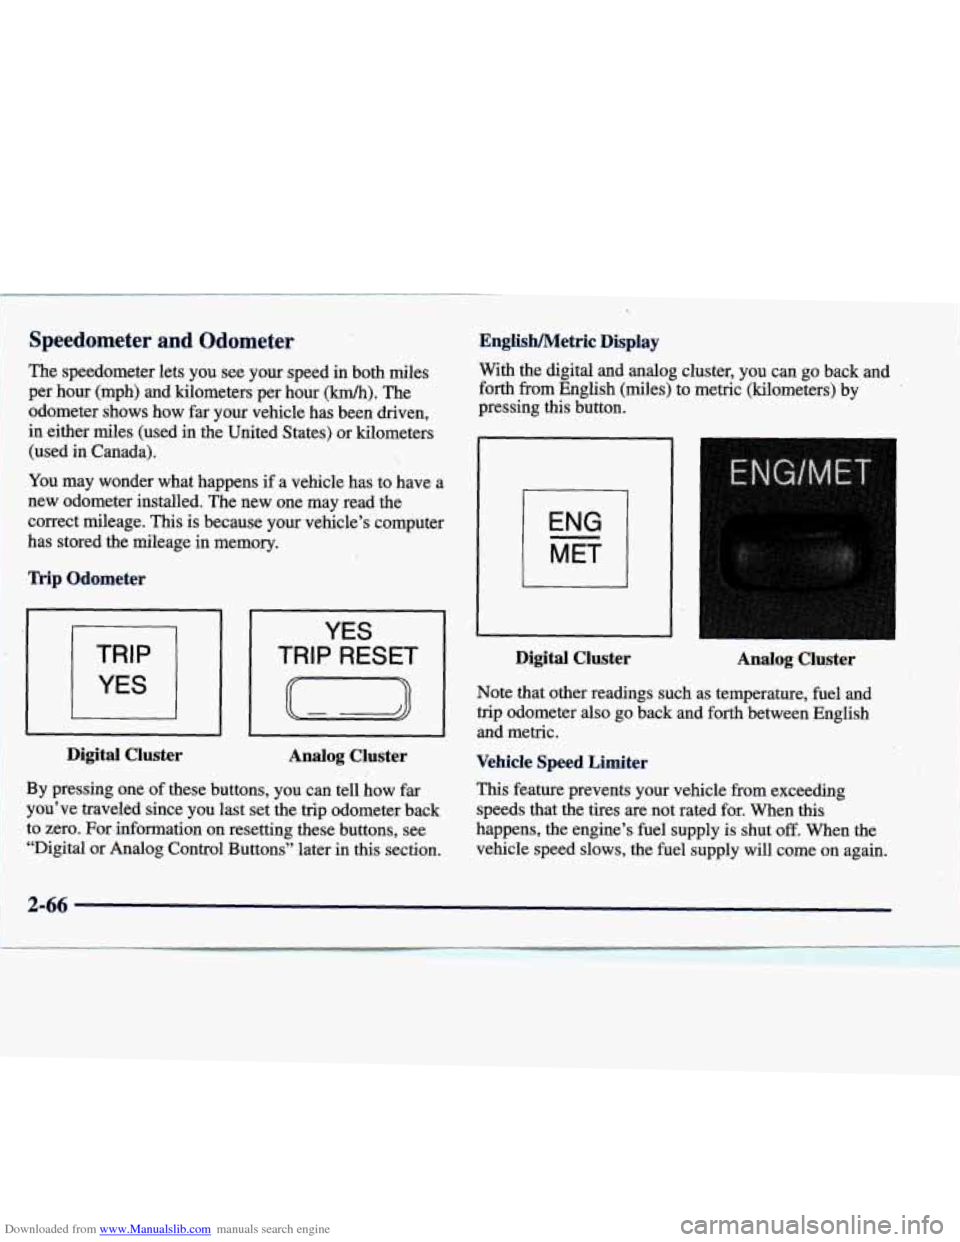
Downloaded from www.Manualslib.com manuals search engine English/Metric Display
With the digital and analog cluster, you can go back and
forth from English (miles) to metric (kilometers) by
pressing this button.
Speedometer ar Odometer
The speedometer lets you see your speed in both miles
per hour (mph) and kilometers per hour
(km/h). The
odometer shows how far your vehicle has been driven,
in either miles (used in the United States) or kilometers
(used in Canada).
You may wonder what happens if a vehicle has to have a
new odometer installed. The new one may read the
correct mileage. This is because your vehicle’s computer
has stored the mileage in memory.
-1
! 1-1
I MET I Trip Odometer
I
Digital Cluster
YES
TRIP RESET Analog Cluster TRIP
YES Note that other readings such as temperature, fuel and
trip odometer also go back and forth between English
and metric.
Analog Cluster Vehicle Speed Limiter
Digital Cluster
This feature prevents your vehicle from exceeding
speeds that the tires are not rated for. When
this
happens, the engine’s fuel supply is shut off. When the
vehicle speed slows, the fuel supply will come on again.
By pressing
one of these buttons, you can tell, how far
you’ve traveled since you last set the trip odometer back
to zero. For,information on resetting these buttons, see
“Digital or Analog Control Buttons’’ later in this sect\
ion.
2-66
Page 142 of 386
Downloaded from www.Manualslib.com manuals search engine Anti-Lock Brake System Warning Light
ANTI -
LOCK
Digital Cluster
LOCK
ANT’- (e)
Analog Cluster
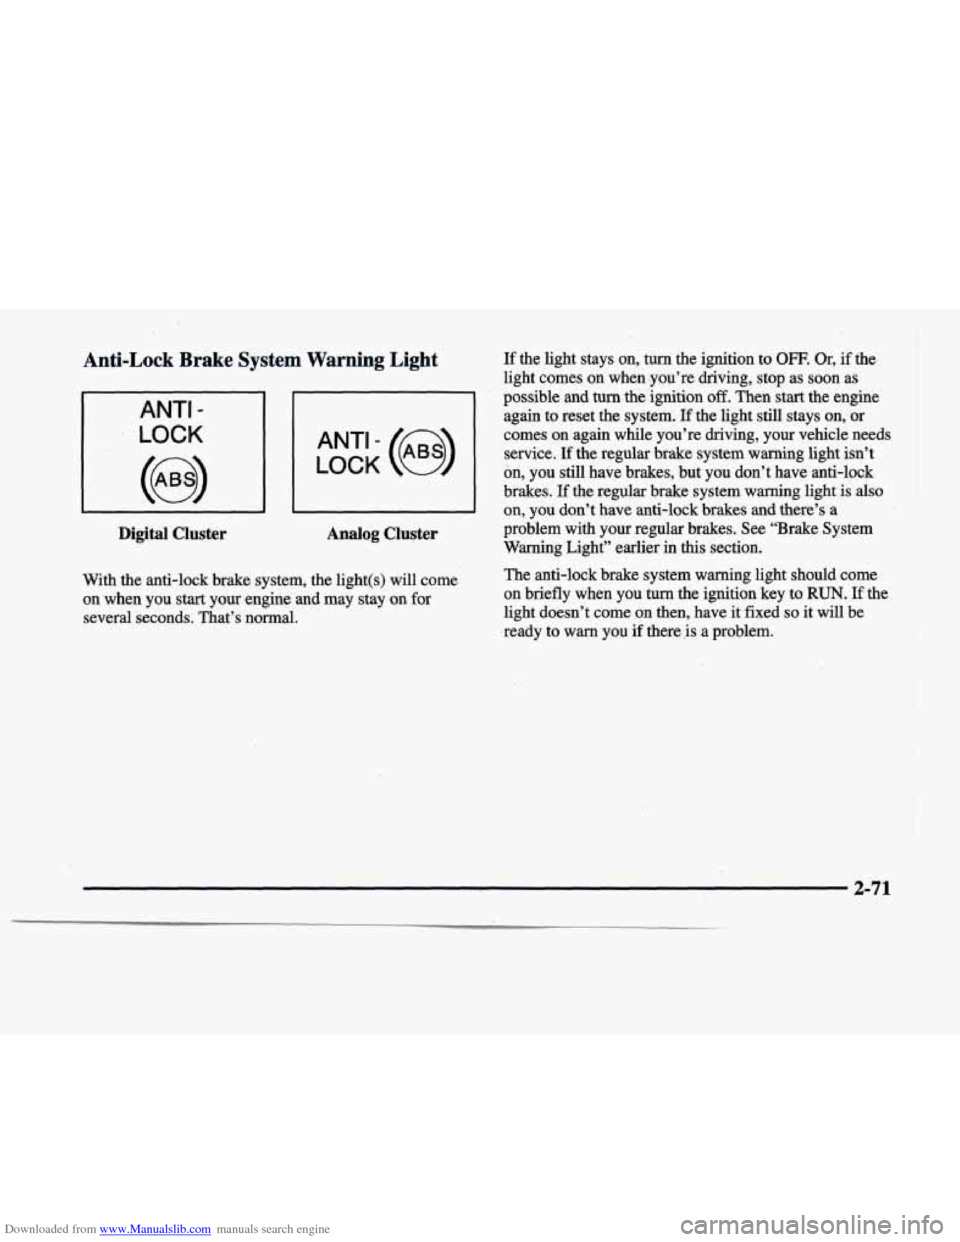
If the light stays on, twn the ignition to OFF. Or, if the
light comes on when ,you’re driving, stop as soon as
possible and
turn the ignition off. Then start the engine
again to reset the system.
If the light still stays on, or
comes on again while you’re driving, your vehicle needs service.
If the regular brake system waming light isn’t
on, you still have brakes, but you don’t have anti-lock
brakes.
If the regular brake system warning light is also
on, you don’t have anti-lock brakes and there’s a
problem with your regular brakes. See “Brake System
Warning Light” earlier in
this section.
With the anti-lock brake system, the light(s) will come The
anti-lock brake system warning light should come
on when you
start your engine and may stay on for on
briefly when you turn the ignition key to RUN. If the
several seconds. That’s normal. light doesn’t come on then, have it fixed so it
will be
.ready
to warn you if there is a problem.
2-71
Page 149 of 386

Downloaded from www.Manualslib.com manuals search engine Fuel Data Panel Press the AVG button to display the average
mile-per-gallon (AVG MPG).
You can also display it in
metric units by pressing the ENG MET button.
-1
When AVG MPG is selected, the total distance is
divided by the total fuel used.
When the INST button (Instantaneous Fuel Economy) is
selected, you will see what the fuel economy is at that
instant. The computer takes a new reading twice every
second. It will show economy up to
70 miles-per-gallon
(or
2 L per 100 km).
To reset the average fuel economy, press the INFORMATION button until the AVG MPG is
displayed on the Driver Information Center (DIC). Press and hold the
RESET button until both the fuel data
center and DIC display reads
0.0.
Digital Cluster
For vehicles equipped with an analog cluster (not shown), fuel data can be obtained by pressing the
INFO button. See “Analog Control Buttons’’ later
in this section.
The fuel data panel tells you all you need to know about
the fuel economy and how far you can travel with the
he1 remaining. The
RANGE display shows how far the computer thinks
you can travel with the fuel that is in the tank. The
computer does not know what driving conditions will be
like for the rest of your trip,
so the range is estimated
based on the recent fuel economy. Therefore,
the range
reading may change as your driving habits change. Going from city to highway driving may increase the
range reading.
If the range display shows
LO, you should stop for fuel
as soon as possible.
2-78.
Page 150 of 386
Downloaded from www.Manualslib.com manuals search engine Driver Information Center (DIC)
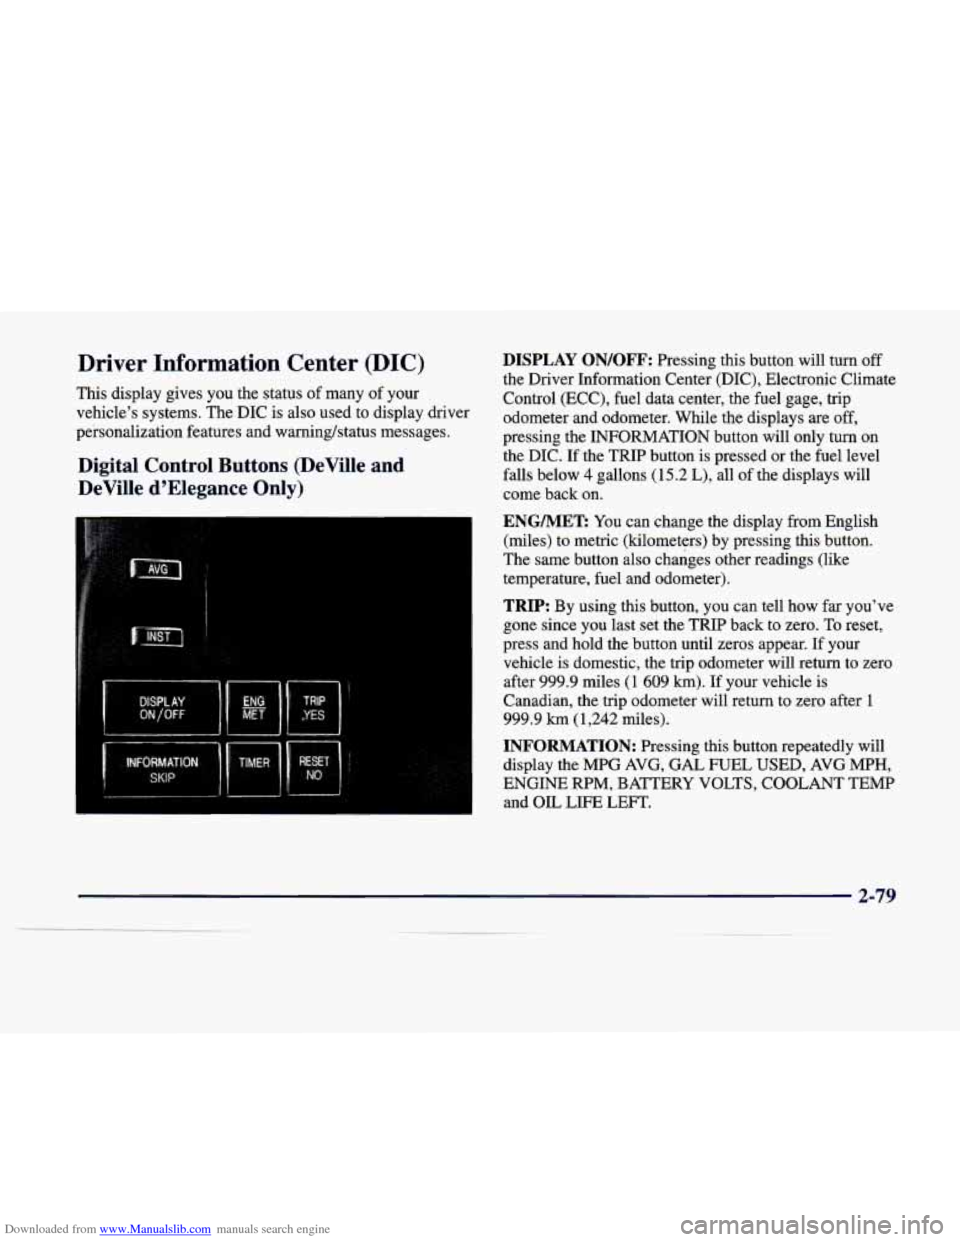
This display gives you the status of many of your
vehicle’s systems. The DIC is also used to display driver
personalization features and warningktatus messages.
Digital Control Buttons (DeVille and
DeVille d’Elegance Only)
DISPLAY ON/OFF: Pressing this button will turn off
the Driver Information Center (DIC), Electronic Climate
Control (ECC), fuel data center, the fuel gage, trip
odometer and odometer. While the displays are off,
pressing the INFORMATION button will only turn on
the DIC. If the TRIP button is pressed or the fuel level
falls below
4 gallons (15.2 L), all of the displays will
come back on.
ENGMET: You can change the display from English
(miles) to metric (kilometers) by pressing this button.
The same button also changes other readings (like
temperature, fuel and odometer).
TRIP: By using this button, you can tell how far you’ve
gone since you last set the TRIP back to zero. To reset,
press and hold the button until zeros appear. If your
vehicle is domestic, the trip odometer will return to zero
after 999.9 miles
(1 609 km). If your vehicle is
Canadian, the trip odometer will return
to zero after 1
999.9 km (1,242 miles).
INFORMATION: Pressing this button repeatedly will
display the MPG AVG,
GAL FUEL USED, AVG MPH,
ENGINE RPM, BATTERY VOLTS, COOLANT TEMP
and OIL LIFE LEFT.
Page 151 of 386
Downloaded from www.Manualslib.com manuals search engine TIMER: This feature is like a stopwatch, in that
you
can clock the time it takes to get from one point
to another.
To operate, press the TIMER button until TIMER
OFF
0O:OO:OO is displayed on the Driver Information Center
@IC). Each of the fields for the hours, minutes and
seconds are two numeric digits.
Once TIMER
OFF 0O:OO:OO is displayed, press the
TIMER button to start the timing feature. Press the
TIMER button again to stop it.
If you will be starting
and stopping your vehicle
-- during a trip for
instance
-- the TIMER feature will automatically start
timing where it left
off when you last stopped. To reset
it, press and hold the RESET button until the display
reads TIMER
0O:OO:OO. Press the INFORMATION
button
to exit from the TIMER function.
RESET Pressing this button will reset the MPG AVG,
GAL FUEL USED, AVG
MPH and OIL LIFE LEFT.
Pressing RESET when a non-resettable display appears
will cause a “recall” mode to occur. When this happens,
all Driver Information Center (DIC) warning messages
that have been displayed since the ignition key was
turned to
RUN will redisplay. If no messages were
displayed, a MONITORED SYSTEMS
OK message
will appear.
MPG AVG (Reset): Press the INFORMATION button
to display the MPG AVG (Average Fuel Economy), then
press and hold the RESET button until
0.0 MPG AVG
is displayed.
GAL FUEL USED (Reset): Press the INFORMATION
button to display the GAL FUEL
USED on the Driver
Information Center (DIC), then press and hold the
RESET button until
0.0 GAL FUEL USED is displayed.
AVG MPH (Reset): Press the INFORMATION
button to display the AVG MPH (Average Speed), then
press and hold the RESET button until
0.0 AVG MPH
is displayed.
OIL LIFE LEFT (Reset): Press the INFORMATION
button
to display the OIL LIFE LEFT, then press and
hold the RESET button until
100% OIL LIFE LEFT is
displayed. (This only needs to be reset after you have
had the oil changed.)
2-80