clock CADILLAC DTS 2009 1.G User Guide
[x] Cancel search | Manufacturer: CADILLAC, Model Year: 2009, Model line: DTS, Model: CADILLAC DTS 2009 1.GPages: 462, PDF Size: 2.46 MB
Page 237 of 462
For a Six-Disc CD Player
To turn the radio clock display on or off:
1. Turn the radio on.
2. Press the MENU button until
His displayed
3. Press the pushbutton located under
Huntil the
clock and date settings appear.
4. Press the pushbutton located under the forward
arrow tab until the menu for default clock and
date settings appear.
5. Press the pushbutton located under the currently
displayed status of either ON or OFF. The ON
display indicates the radio clock display is disabled
and the OFF display indicates the radio clock display
is enabled. Press this pushbutton to toggle the radio
clock display on or off.
If the radio clock display is turned on, the screen
displays Radio Clock ON for 10 seconds, then
returns to the original clock display menu.
If the radio clock display is turned off, the
screen displays Radio Clock OFF for 10 seconds.
The menus for clock and date settings are removed,
and ON displays as a current status indicating that
the clock display can be turned on, if desired.
Setting the Time and Date
For the Single CD Player
This type of radio has aHbutton for setting the time
and date. To set the time and date:
1. Turn the radio on.
2. Press
Hand HR, MIN, MM, DD, YYYY
(hour, minute, month, day, and year) displays.
3. Press the pushbutton located under any one of
the tabs that you want to change. Every time the
pushbutton is pressed again, the time or the date
if selected, increases by one.
Another way to increase the time or date, is to
press the right SEEK arrow or the
\FWD
button.
To decrease the time or date, press the left SEEK
arrow or the
sREV button. You can also turn
the
aknob, located on the upper right side of the
radio faceplate, to adjust the selected setting.
3-97
Page 238 of 462
For a Six-Disc CD Player
This type of radio has a MENU button for setting the
time and date. To set the time and date:
1. Turn the radio on.
2. Press the MENU button until
Hoption is displayed.
3. Press the pushbutton located under
Hand the
HR, MIN, MM, DD, YYYY (hour, minute, month,
day, and year) displays.
4. Press the pushbutton located under any one of
the tabs that you want to change. Every time the
pushbutton is pressed again, the time or the date
if selected, increases by one.
Another way to increase the time or date, is to
press the right SEEK arrow or the
\FWD
button.
To decrease the time or date, press the left SEEK
arrow or the
sREV button. You can also turn
the
aknob, located on the upper right side of the
radio faceplate, to adjust the selected setting.
Changing the Time and Date Default
Setting
For the Single CD Player
To change the time and date default setting:
1. Change the time default setting from 12 hour to
24 hour or the date default setting from month/day/
year to day/month/year, by pressing the
Hbutton.
2. Once the clock and date settings display along with
the forward arrow tab, press the pushbutton located
under the forward arrow tab until the time 12H and
24H, and the date MM/DD/YYYY (month, day, and
year) and DD/MM/YYYY (day, month, and year)
displays.
3. Press the pushbutton located under the desired
option, then press the
Hbutton again to apply
the selected default, or let the screen time out.
3-98
Page 248 of 462
RDM (Random) (Radio with Six-Disc CD Player):
With the random setting, CD tracks can be played
in random, rather than sequential order, on one CD
or all CDs in a six-disc CD player. To use random:
Press the pushbutton positioned under the RDM tab
until Randomize Current Disc displays to play the
tracks in random order from the CD that is currently
playing. Press again to turn off random play.
Press the pushbutton positioned under the RDM tab
until Randomize All Discs displays to play tracks
from all CDs loaded in a six-disc CD player in
random order. Press again to turn off random play.
4(Information):Press to switch the display between
the track number, elapsed time of the track, and the
time. When the ignition is off, press to display the time
(if the clock display is enabled). See “Enabling/Disabling
the Digital Radio Clock” under,Setting the Clock on
page 3-96for more information.
BAND:Press to listen to the radio when a CD is
playing. The CD remains inside the radio for future
listening.
CD/AUX (CD/Auxiliary):Press to play a CD when
listening to the radio. The CD icon and track number
displays when a CD is in the player. Press again and
the system automatically searches for an auxiliary input
device, such as a portable audio player. If a portable
audio player is not connected, “No Aux Input Device
Found” displays.
Playing an MP3/WMA CD-R or
CD-RW Disc
Radios with the MP3 feature are capable of playing an
MP3/WMA CD-R or CD-RW disc. For more information
on how to play an MP3/WMA CD-R or CD-RW disc,
seeUsing an MP3 on page 3-110later in this section.
CD Messages
DISC ERROR:If this message displays and/or the CD
ejects, it could be for one of the following reasons:
The radio system does not support the playlist
format, the compressed audio format, or the data
�le format.
It is very hot. When the temperature returns to
normal, the CD should play.
You are driving on a very rough road. When the
road becomes smoother, the CD should play.
The CD is dirty, scratched, wet, or upside down.
The air is very humid. If so, wait about an hour and
try again.
There could have been a problem while burning
the CD.
The label could be caught in the CD player.
If the CD is not playing correctly, for any other reason,
try a known good CD.
3-108
Page 279 of 462
Steering in Emergencies
There are times when steering can be more effective
than braking. For example, you come over a hill and �nd
a truck stopped in your lane, or a car suddenly pulls
out from nowhere, or a child darts out from between
parked cars and stops right in front of you. These
problems can be avoided by braking — if you can stop
in time. But sometimes you cannot stop in time
because there is no room. That is the time for evasive
action — steering around the problem.
The vehicle can perform very well in emergencies like
these. First apply the brakes. SeeBraking on page 4-4.
It is better to remove as much speed as possible
from a collision. Then steer around the problem, to the
left or right depending on the space available.
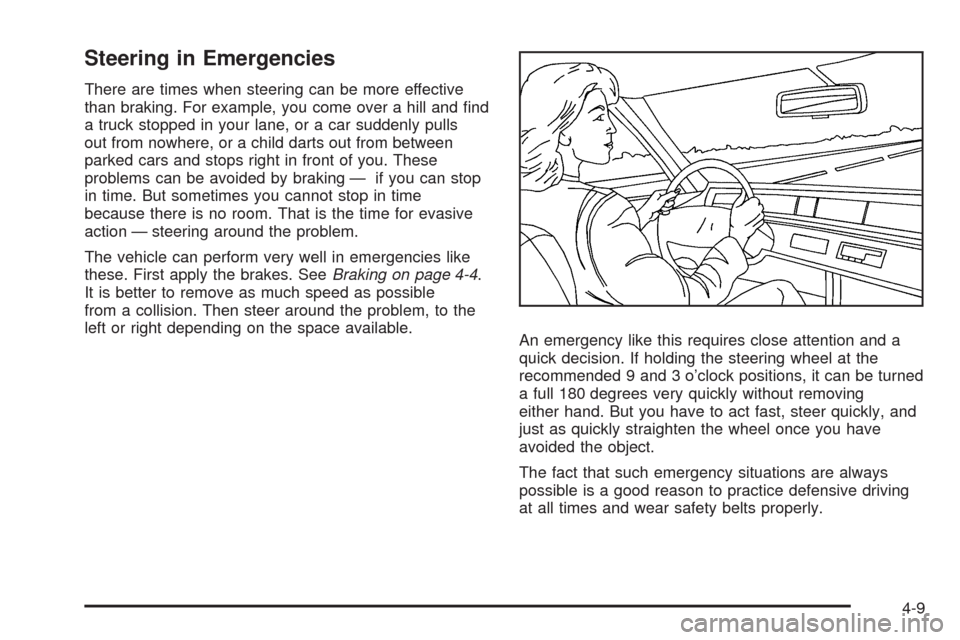
An emergency like this requires close attention and a
quick decision. If holding the steering wheel at the
recommended 9 and 3 o’clock positions, it can be turned
a full 180 degrees very quickly without removing
either hand. But you have to act fast, steer quickly, and
just as quickly straighten the wheel once you have
avoided the object.
The fact that such emergency situations are always
possible is a good reason to practice defensive driving
at all times and wear safety belts properly.
4-9
Page 312 of 462
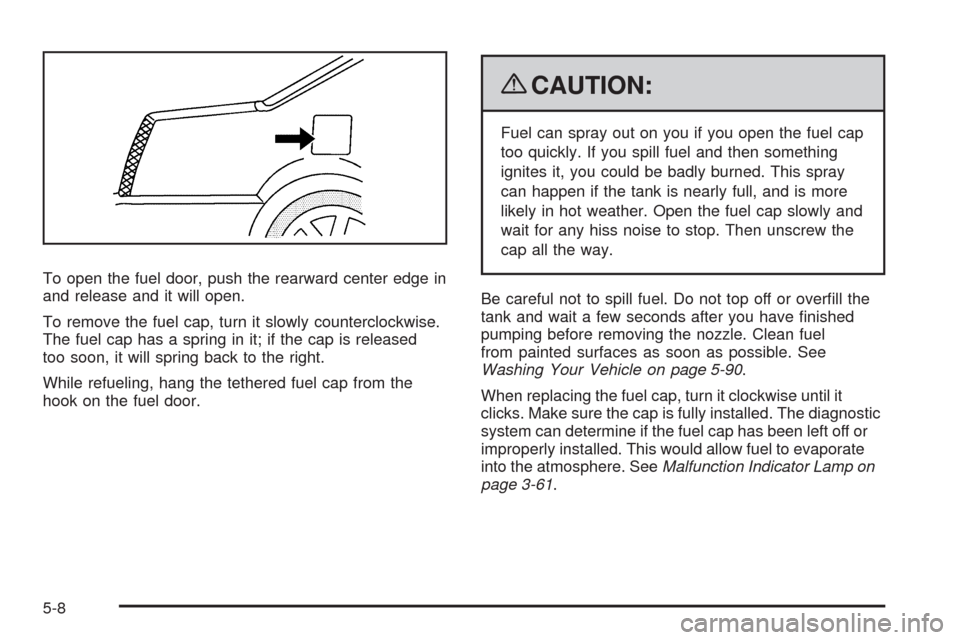
To open the fuel door, push the rearward center edge in
and release and it will open.
To remove the fuel cap, turn it slowly counterclockwise.
The fuel cap has a spring in it; if the cap is released
too soon, it will spring back to the right.
While refueling, hang the tethered fuel cap from the
hook on the fuel door.
{CAUTION:
Fuel can spray out on you if you open the fuel cap
too quickly. If you spill fuel and then something
ignites it, you could be badly burned. This spray
can happen if the tank is nearly full, and is more
likely in hot weather. Open the fuel cap slowly and
wait for any hiss noise to stop. Then unscrew the
cap all the way.
Be careful not to spill fuel. Do not top off or over�ll the
tank and wait a few seconds after you have �nished
pumping before removing the nozzle. Clean fuel
from painted surfaces as soon as possible. See
Washing Your Vehicle on page 5-90.
When replacing the fuel cap, turn it clockwise until it
clicks. Make sure the cap is fully installed. The diagnostic
system can determine if the fuel cap has been left off or
improperly installed. This would allow fuel to evaporate
into the atmosphere. SeeMalfunction Indicator Lamp on
page 3-61.
5-8
Page 324 of 462

Checking the Fluid Level
Prepare the vehicle as follows:
1. Park the vehicle on a level place. Keep the engine
running.
2. With the parking brake applied, place the shift lever
in P (Park).
3. With your foot on the brake pedal, move the shift
lever through each gear range, pausing for about
three seconds in each range. Then, position
the shift lever in P (Park).
4. Let the engine run at idle for three to �ve minutes.
Then, without shutting off the engine, follow these steps:
1. Locate the transmission �uid cap which is located
next to the radiator hose and below the engine air
cleaner/�lter assembly on the driver side of the
vehicle. The cap is marked TRANS FLUID.
SeeEngine Compartment Overview on page 5-12
for more information on location.
2. After removing the engine air cleaner/�lter assembly
to reach the transmission �uid cap, turn the cap
counterclockwise to remove. Pull out the dipstick
and wipe it with a clean rag or paper towel.
3. Push it back in all the way, wait three seconds, and
then pull it back out again.4. Check both sides of the dipstick and read the
lower level. The �uid level must be in the
cross-hatched area.
5. If the �uid level is in the acceptable range, push
the dipstick back in all the way and turn the
handle clockwise.
6. Reinstall the engine air cleaner/�lter assembly.
5-20
Page 325 of 462

How to Add Automatic Transmission
Fluid
Refer to the Maintenance Schedule to determine what
kind of transmission �uid to use. SeeRecommended
Fluids and Lubricants on page 6-11.
If the �uid level is low, add only enough of the proper
�uid to bring the level into the cross-hatched area on the
dipstick.
1. Pull out the dipstick.
2. Using a long-neck funnel, add enough �uid at the
dipstick hole to bring it to the proper level.
It does not take much �uid, generally less than
one pint (0.5 L). Do not over�ll.Notice:Use of the incorrect automatic transmission
�uid may damage the vehicle, and the damages
may not be covered by the vehicle’s warranty.
Always use the automatic transmission �uid listed
inRecommended Fluids and Lubricants on
page 6-11.
3. After adding �uid, recheck the �uid level as
described under “How to Check Automatic
Transmission Fluid,” earlier in this section.
4. When the correct �uid level is obtained, push the
dipstick back in all the way and turn the handle
clockwise.
5-21
Page 330 of 462
{CAUTION:
Steam and scalding liquids from a hot cooling
system can blow out and burn you badly. They are
under pressure, and if you turn the surge tank
pressure cap — even a little — they can come out
at high speed. Never turn the cap when the
cooling system, including the surge tank pressure
cap, is hot. Wait for the cooling system and surge
tank pressure cap to cool if you ever have to turn
the pressure cap.
If no coolant is visible in the surge tank, add coolant as
follows:
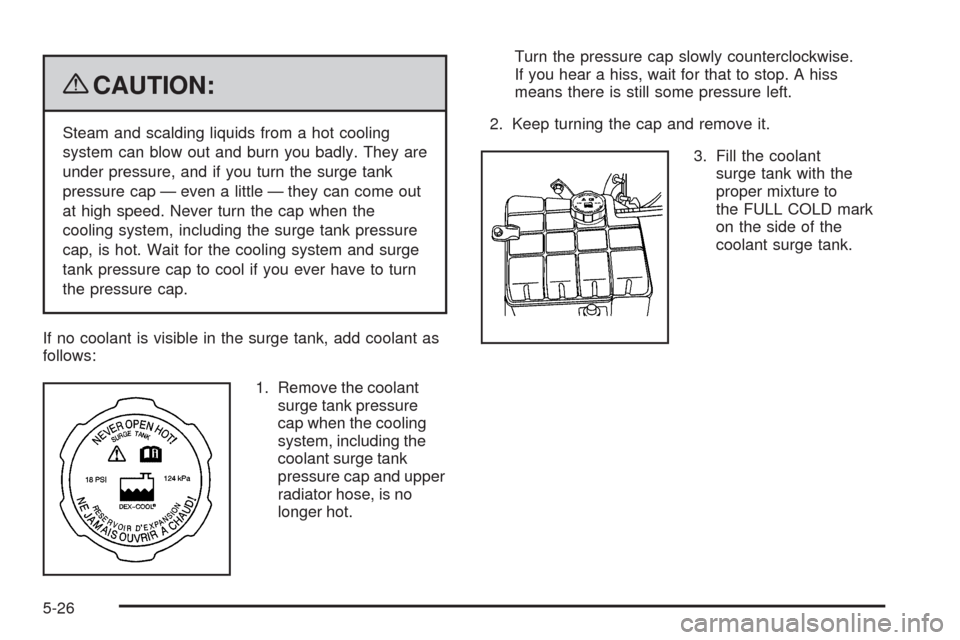
1. Remove the coolant
surge tank pressure
cap when the cooling
system, including the
coolant surge tank
pressure cap and upper
radiator hose, is no
longer hot.Turn the pressure cap slowly counterclockwise.
If you hear a hiss, wait for that to stop. A hiss
means there is still some pressure left.
2. Keep turning the cap and remove it.
3. Fill the coolant
surge tank with the
proper mixture to
the FULL COLD mark
on the side of the
coolant surge tank.
5-26
Page 349 of 462

7. Locate the vertical headlamp aiming screws. They
are located under the hood near each headlamp
assembly. First lift the �ap to access either of them.
Each one is the top outboard screw by the “V” on the
cover panel next to the aiming �ap.
The adjustment screw can be turned witha6mm
hex wrench.
8. Turn the vertical aiming screw until the headlamp
beam is aimed to the horizontal tape line. Turn it
clockwise or counterclockwise to raise or lower the
angle of the beam.
The top edge of the cut-off should be positioned at
the bottom edge of the horizontal tape line.9. Make sure that the light from the headlamp is
positioned at the bottom edge of the horizontal tape
line. The lamp on the left (A) shows the correct
headlamp aim. The lamp on the right (B) shows the
incorrect headlamp aim.
10. Repeat Steps 7 through 9 for the opposite
headlamp.
5-45
Page 383 of 462
{CAUTION:
Getting under a vehicle when it is jacked up is
dangerous. If the vehicle slips off the jack, you
could be badly injured or killed. Never get under a
vehicle when it is supported only by a jack.
{CAUTION:
Raising your vehicle with the jack improperly
positioned can damage the vehicle and even make
the vehicle fall. To help avoid personal injury and
vehicle damage, be sure to �t the jack lift head into
the proper location before raising the vehicle.
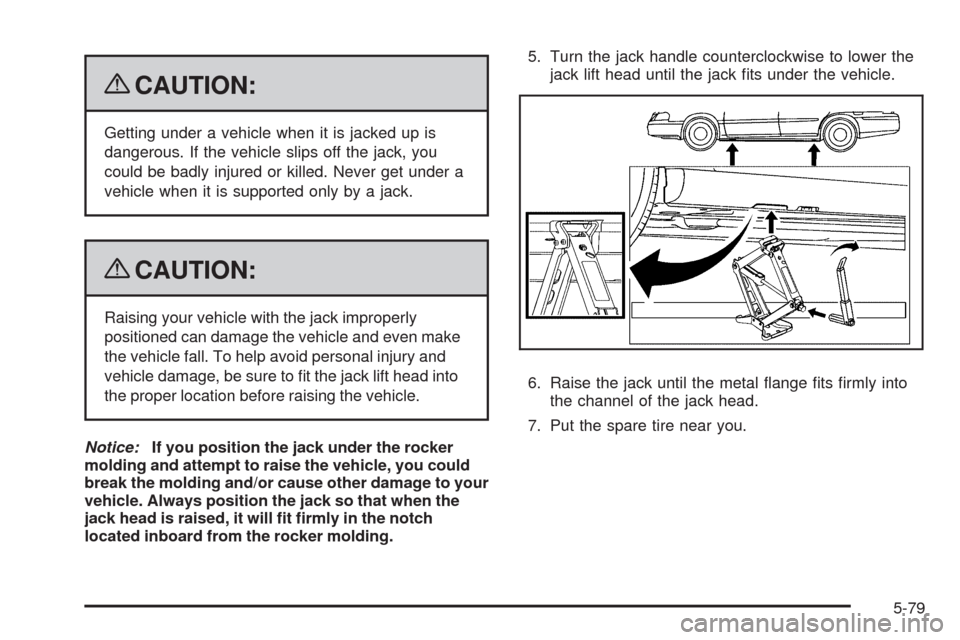
Notice:If you position the jack under the rocker
molding and attempt to raise the vehicle, you could
break the molding and/or cause other damage to your
vehicle. Always position the jack so that when the
jack head is raised, it will �t �rmly in the notch
located inboard from the rocker molding.5. Turn the jack handle counterclockwise to lower the
jack lift head until the jack �ts under the vehicle.
6. Raise the jack until the metal �ange �ts �rmly into
the channel of the jack head.
7. Put the spare tire near you.
5-79