power CADILLAC DTS 2011 1.G Owners Manual
[x] Cancel search | Manufacturer: CADILLAC, Model Year: 2011, Model line: DTS, Model: CADILLAC DTS 2011 1.GPages: 470, PDF Size: 4.72 MB
Page 5 of 470
Black plate (5,1)Cadillac DTS Owner Manual - 2011
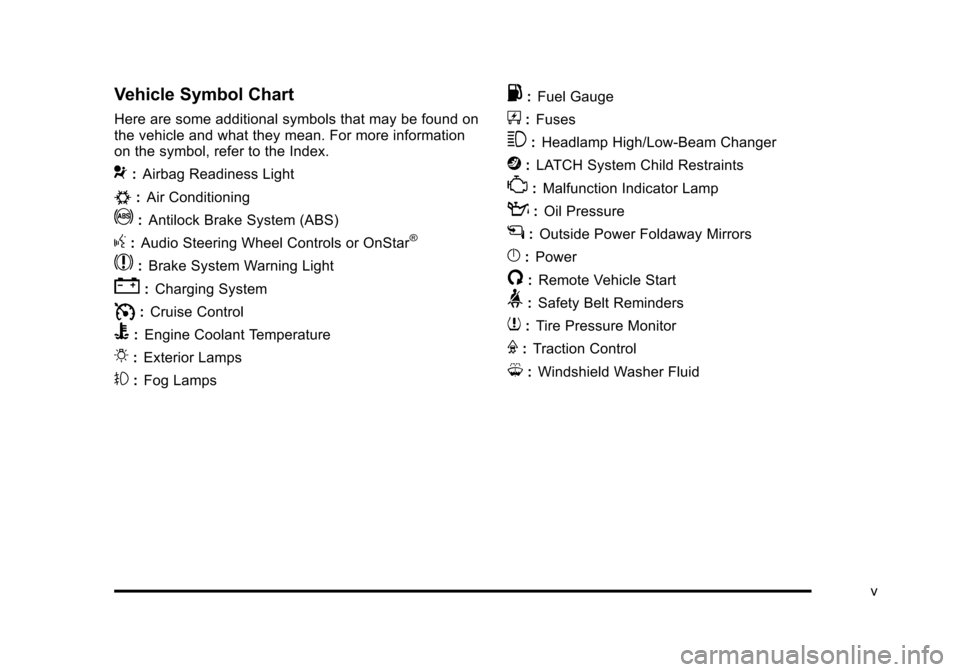
Vehicle Symbol Chart
Here are some additional symbols that may be found on
the vehicle and what they mean. For more information
on the symbol, refer to the Index.
9:Airbag Readiness Light
#:Air Conditioning
!:Antilock Brake System (ABS)
g:Audio Steering Wheel Controls or OnStar®
$: Brake System Warning Light
":Charging System
I:Cruise Control
B: Engine Coolant Temperature
O:Exterior Lamps
#:Fog Lamps
.: Fuel Gauge
+:Fuses
3: Headlamp High/Low-Beam Changer
j:LATCH System Child Restraints
*: Malfunction Indicator Lamp
::Oil Pressure
g:Outside Power Foldaway Mirrors
}:Power
/:Remote Vehicle Start
>:Safety Belt Reminders
7:Tire Pressure Monitor
F:Traction Control
M:Windshield Washer Fluid
v
Page 7 of 470
Black plate (1,1)Cadillac DTS Owner Manual - 2011
Section 1 In Brief
Instrument Panel. . . . . . . . . . . . . . . . . . . . . . . . . . . . . . . . . . . 1-2
Initial Drive Information . . . . . . . . . . . . . . . . . . . . . . . . . . . 1-4
Remote Keyless Entry (RKE) System . . . . . . . . . . . 1-4
Remote Vehicle Start . . . . . . . . . . . . . . . . . . . . . . . . . . . 1-4
Door Locks . . . . . . . . . . . . . . . . . . . . . . . . . . . . . . . . . . . . . 1-5
Trunk Release . . . . . . . . . . . . . . . . . . . . . . . . . . . . . . . . . . 1-5
Windows . . . . . . . . . . . . . . . . . . . . . . . . . . . . . . . . . . . . . . . . 1-6
Seat Adjustment . . . . . . . . . . . . . . . . . . . . . . . . . . . . . . . . 1-6
Memory Features . . . . . . . . . . . . . . . . . . . . . . . . . . . . . . . 1-8
Heated and Ventilated Seats . . . . . . . . . . . . . . . . . . . . 1-9
Head Restraint Adjustment . . . . . . . . . . . . . . . . . . . . . . 1-9
Safety Belt . . . . . . . . . . . . . . . . . . . . . . . . . . . . . . . . . . . . . 1-10
Sensing System for Passenger Airbag . . . . . . . . . 1-10
Mirror Adjustment . . . . . . . . . . . . . . . . . . . . . . . . . . . . . . 1-11
Steering Wheel Adjustment . . . . . . . . . . . . . . . . . . . . 1-12
Interior Lighting . . . . . . . . . . . . . . . . . . . . . . . . . . . . . . . . 1-13
Exterior Lighting . . . . . . . . . . . . . . . . . . . . . . . . . . . . . . . 1-13
Windshield Wiper/Washer . . . . . . . . . . . . . . . . . . . . . . 1-14
Climate Controls . . . . . . . . . . . . . . . . . . . . . . . . . . . . . . . 1-14 Vehicle Features
. . . . . . . . . . . . . . . . . . . . . . . . . . . . . . . . . . 1-15
Radio(s) . . . . . . . . . . . . . . . . . . . . . . . . . . . . . . . . . . . . . . . 1-15
Satellite Radio . . . . . . . . . . . . . . . . . . . . . . . . . . . . . . . . . 1-17
Portable Audio Devices . . . . . . . . . . . . . . . . . . . . . . . . 1-17
Steering Wheel Controls . . . . . . . . . . . . . . . . . . . . . . . 1-18
Bluetooth
®. . . . . . . . . . . . . . . . . . . . . . . . . . . . . . . . . . . . . 1-18
Navigation System . . . . . . . . . . . . . . . . . . . . . . . . . . . . . 1-18
Driver Information Center (DIC) . . . . . . . . . . . . . . . . 1-19
Cruise Control . . . . . . . . . . . . . . . . . . . . . . . . . . . . . . . . . 1-20
Power Outlets . . . . . . . . . . . . . . . . . . . . . . . . . . . . . . . . . 1-20
Performance and Maintenance . . . . . . . . . . . . . . . . . .1-21
Traction Control System (TCS) . . . . . . . . . . . . . . . . 1-21
StabiliTrak
®System . . . . . . . . . . . . . . . . . . . . . . . . . . . 1-21
Tire Pressure Monitor . . . . . . . . . . . . . . . . . . . . . . . . . . 1-21
Tire Sealant and Compressor Kit . . . . . . . . . . . . . . 1-22
Engine Oil Life System . . . . . . . . . . . . . . . . . . . . . . . . 1-22
Driving for Better Fuel Economy . . . . . . . . . . . . . . . 1-22
Roadside Service . . . . . . . . . . . . . . . . . . . . . . . . . . . . . . 1-23
OnStar
®. . . . . . . . . . . . . . . . . . . . . . . . . . . . . . . . . . . . . . . 1-23
1-1
Page 9 of 470

Black plate (3,1)Cadillac DTS Owner Manual - 2011
A.Outlet Adjustment on page 4‑40.
B. Driver Information Center (DIC) Buttons. See Driver Information Center (DIC) on page 4‑59.
C. Exterior Lamps on page 4‑25.
D. Instrument Panel Cluster on page 4‑45.
E. Horn on page 4‑3.
F. Audio Steering Wheel Controls on page 4‑114.
G. Ultrasonic Front and Rear Parking Assist (UFRPA)
on page 3‑38.
Adaptive Cruise Control
on page 4‑14(If Equipped).
H. Analog Clock on page 4‑34.
I. Hazard Warning Flashers on page 4‑3.
J. Audio System(s) on page 4‑86.
K. Trunk Release Button. See Trunk on page 3‑12.
L. Instrument Panel Brightness on page 4‑30.
M. Lane Departure Warning (LDW) on page 3‑45.
N. Turn Signal/Multifunction Lever on page 4‑5.
Windshield Wipers on page 4‑10. O.
Hood Release on page 6‑13.
P. Parking Brake on page 3‑29.
Q. Data Link Connector (DLC). See Malfunction
Indicator Lamp on page 4‑54.
R. Heated Steering Wheel
on page 4‑4(If Equipped).
S. Cruise Control
on page 4‑12(If Equipped).
Adaptive Cruise Control
on page 4‑14(If Equipped).
T. Tilt Wheel
on page 4‑3.
Power Tilt Wheel and Telescopic Steering Column
on page 4‑4(If Equipped).
U. Dual Climate Control System on page 4‑34.
V. Traction Control System Button (Console-Shift Vehicles). See Traction Control System (TCS)
on
page 5‑6.
W. Shift Lever. See Automatic Transmission Operation
on page 3‑26.
X. Accessory Power Outlet(s) on page 4‑33.
Y. Glove Box
on page 3‑54.
Valet Lockout Switch on page 3‑18.
1-3
Page 11 of 470
Black plate (5,1)Cadillac DTS Owner Manual - 2011
When the vehicle starts, the parking lamps will turn on
and remain on as long as the engine is running. The
doors will be locked and the climate control system may
come on.
The engine will continue to run for 10 minutes. Repeat
the steps for a 10-minute time extension. Remote start
can be extended only once.
Canceling a Remote Start
To cancel a remote start:
.Aim the RKE transmitter at the vehicle and press
and hold
/until the parking lamps turn off.
.Turn on the hazard warning flashers.
.Turn the ignition on and then back off.
See Remote Vehicle Start on page 3‑7.
Door Locks
From the outside, unlock the door using either the key
or the RKE transmitter.
From the inside, use the power door lock switches or
manual lock knobs located at the top of the door panel
near the window.
Power Door Locks
On vehicles with power door locks, the switches are
located on the front doors.
"(Unlock): Press to unlock the doors.
Q(Lock):Remove the key from the ignition and press
to lock the doors.
For more information, see:
.Door Locks on page 3‑9.
.Power Door Locks on page 3‑10.
.Remote Keyless Entry (RKE) System Operationon page 3‑4.
Trunk Release
In addition to the trunk release button on the RKE
transmitter, there is a remote release
Vbutton
located to the left of the steering wheel, next to the
instrument panel brightness control. Press to open the
trunk.
See Trunk on page 3‑12.
1-5
Page 12 of 470
Black plate (6,1)Cadillac DTS Owner Manual - 2011
Windows
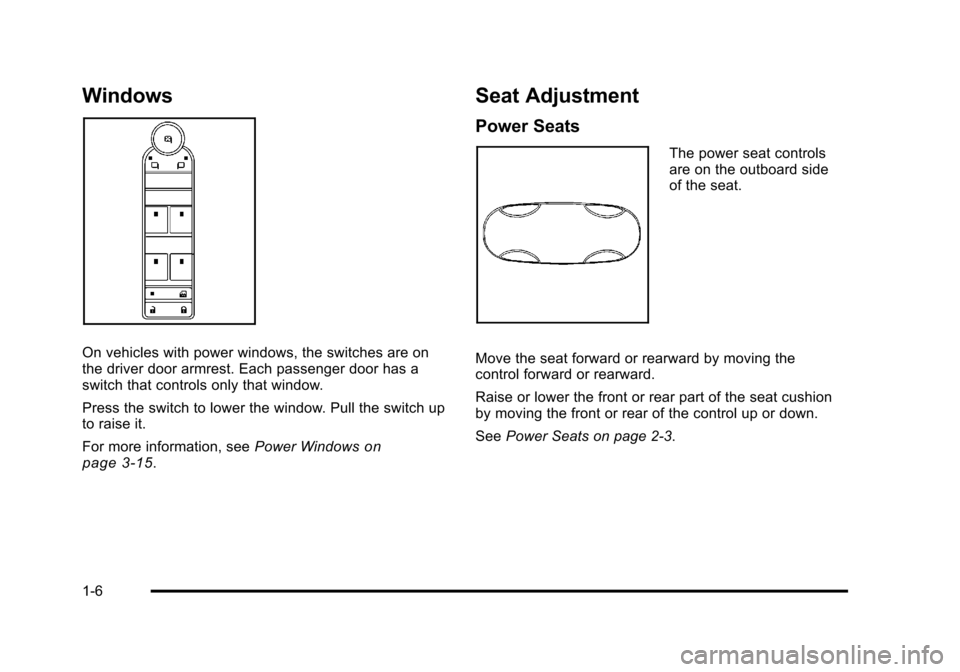
On vehicles with power windows, the switches are on
the driver door armrest. Each passenger door has a
switch that controls only that window.
Press the switch to lower the window. Pull the switch up
to raise it.
For more information, seePower Windows
on
page 3‑15.
Seat Adjustment
Power Seats
The power seat controls
are on the outboard side
of the seat.
Move the seat forward or rearward by moving the
control forward or rearward.
Raise or lower the front or rear part of the seat cushion
by moving the front or rear of the control up or down.
See Power Seats on page 2‑3.
1-6
Page 13 of 470
Black plate (7,1)Cadillac DTS Owner Manual - 2011
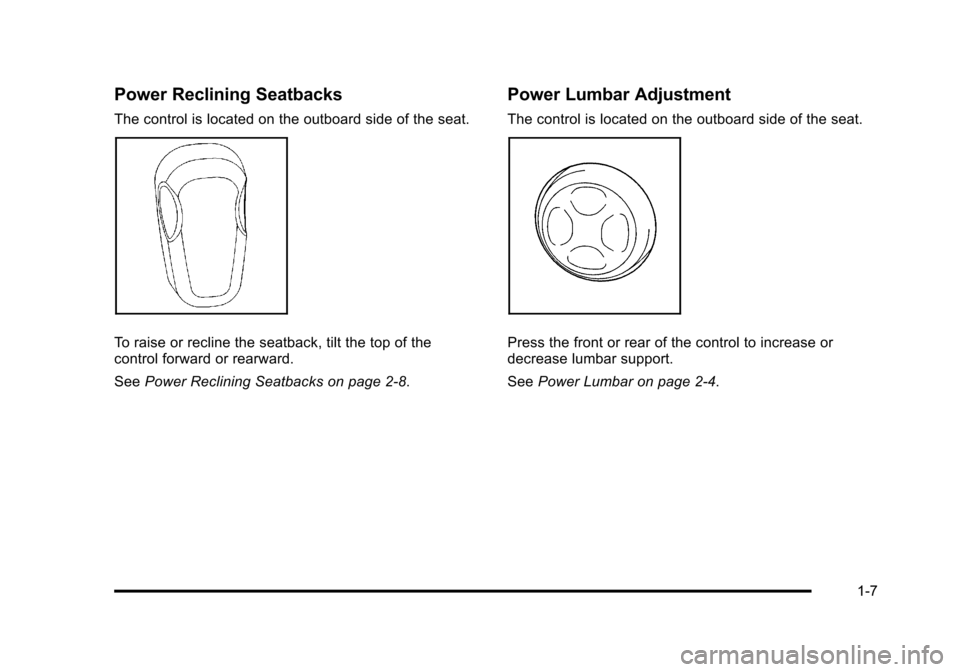
Power Reclining Seatbacks
The control is located on the outboard side of the seat.
To raise or recline the seatback, tilt the top of the
control forward or rearward.
SeePower Reclining Seatbacks on page 2‑8.
Power Lumbar Adjustment
The control is located on the outboard side of the seat.
Press the front or rear of the control to increase or
decrease lumbar support.
SeePower Lumbar on page 2‑4.
1-7
Page 14 of 470
Black plate (8,1)Cadillac DTS Owner Manual - 2011
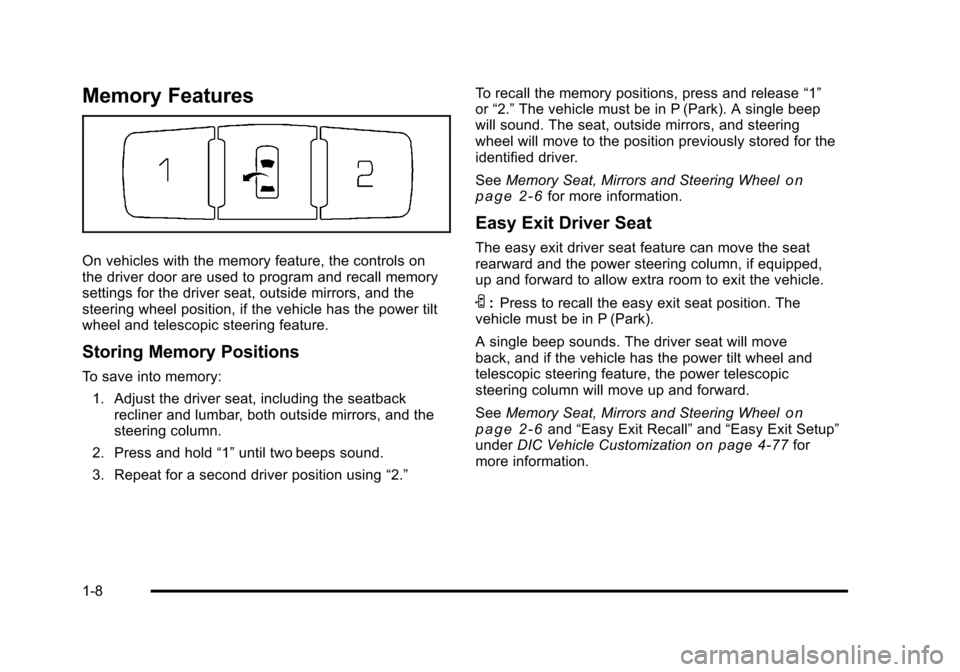
Memory Features
On vehicles with the memory feature, the controls on
the driver door are used to program and recall memory
settings for the driver seat, outside mirrors, and the
steering wheel position, if the vehicle has the power tilt
wheel and telescopic steering feature.
Storing Memory Positions
To save into memory:1. Adjust the driver seat, including the seatback recliner and lumbar, both outside mirrors, and the
steering column.
2. Press and hold “1”until two beeps sound.
3. Repeat for a second driver position using “2.”To recall the memory positions, press and release
“1”
or “2.” The vehicle must be in P (Park). A single beep
will sound. The seat, outside mirrors, and steering
wheel will move to the position previously stored for the
identified driver.
See Memory Seat, Mirrors and Steering Wheel
on
page 2‑6for more information.
Easy Exit Driver Seat
The easy exit driver seat feature can move the seat
rearward and the power steering column, if equipped,
up and forward to allow extra room to exit the vehicle.
S: Press to recall the easy exit seat position. The
vehicle must be in P (Park).
A single beep sounds. The driver seat will move
back, and if the vehicle has the power tilt wheel and
telescopic steering feature, the power telescopic
steering column will move up and forward.
See Memory Seat, Mirrors and Steering Wheel
on
page 2‑6and “Easy Exit Recall” and“Easy Exit Setup”
under DIC Vehicle Customizationon page 4‑77for
more information.
1-8
Page 15 of 470

Black plate (9,1)Cadillac DTS Owner Manual - 2011
Heated and Ventilated Seats
On vehicles with heated and ventilated seats, the
buttons are on the front doors. The ignition must be on
to use this feature.
J:Press to heat the seat and seatback.
I: Press to heat the seatback.
H:Press to cool the seat and seatback.
For more information see Heated and Ventilated Seats
on page 2‑5.
Head Restraint Adjustment
The vehicle's front seats have adjustable head
restraints in the outboard seating positions.
Do not drive until the head restraints for all occupants
are installed and adjusted properly.
To achieve a comfortable seating position, change the
seatback recline angle as little as necessary while
keeping the seat and the head restraint height in the
proper position.
For more information seeHead Restraints
on
page 2‑2and Power Seats on page 2‑3.
1-9
Page 17 of 470

Black plate (11,1)Cadillac DTS Owner Manual - 2011
Mirror Adjustment
Exterior Mirrors
Controls for the outside
power folding mirrors are
located on the driver door
armrest.
Press the selector switch (A) or (B) to choose either the
left or right outside mirror. Then press the control pad to
move the mirror to the desired direction. To fold the mirrors:
Press the selector switch (C) to fold the mirrors out,
then press (D) to fold the mirror toward the vehicle.
The vehicle may also have an automatic dimming
feature on the driver side mirror that adjusts for the
glare of headlamps behind you. This feature is
controlled by the on and off settings on the automatic
dimming inside rearview mirror.
For more information, see:
.Outside Power Foldaway Mirrors on page 3‑36
.Automatic Dimming Rearview Mirror on page 3‑35
Interior Mirror
The vehicle has an automatic dimming inside rearview
mirror. Automatic dimming reduces the glare of lights
from behind the vehicle. The dimming feature comes on
and the indicator light illuminates each time the vehicle
is started.
See
Automatic Dimming Rearview Mirror on page 3‑35.
1-11
Page 18 of 470
Black plate (12,1)Cadillac DTS Owner Manual - 2011
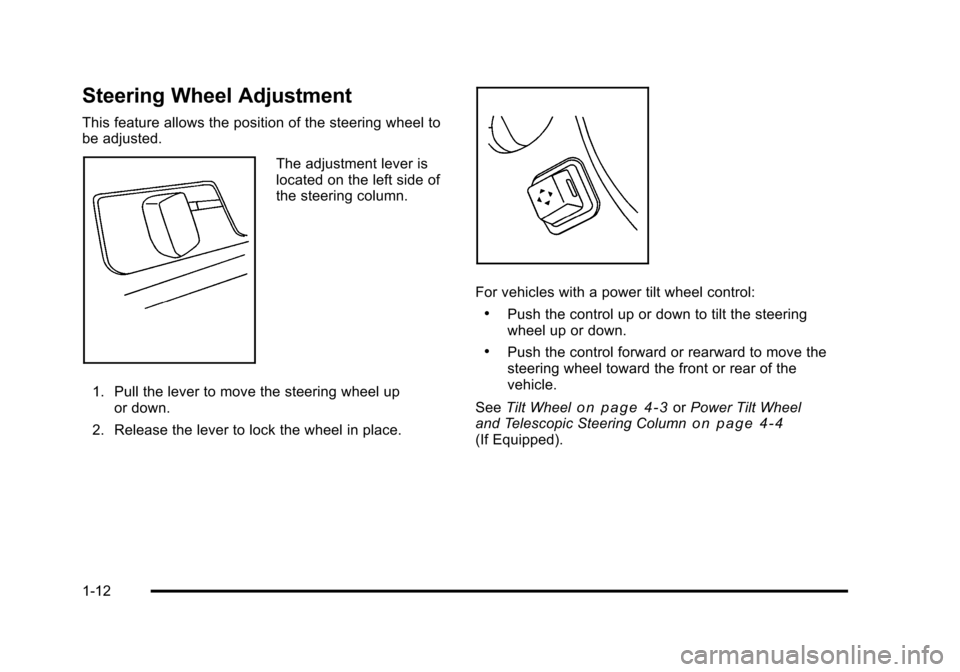
Steering Wheel Adjustment
This feature allows the position of the steering wheel to
be adjusted.
The adjustment lever is
located on the left side of
the steering column.
1. Pull the lever to move the steering wheel up or down.
2. Release the lever to lock the wheel in place.
For vehicles with a power tilt wheel control:
.Push the control up or down to tilt the steering
wheel up or down.
.Push the control forward or rearward to move the
steering wheel toward the front or rear of the
vehicle.
See Tilt Wheel
on page 4‑3orPower Tilt Wheel
and Telescopic Steering Columnon page 4‑4(If Equipped).
1-12