CADILLAC ELDORADO 1993 10.G Owners Manual
Manufacturer: CADILLAC, Model Year: 1993, Model line: ELDORADO, Model: CADILLAC ELDORADO 1993 10.GPages: 398, PDF Size: 20.66 MB
Page 171 of 398
Downloaded from www.Manualslib.com manuals search engine FWD (Forward)
Push the FWD button to move forward rapidly to another part of the
tape. The radio will play during fast forward. To stop the tape push the
same button and the tape will start to play again.
REV (Reverse)
Push the REV button to move the tape rapidly backward. To stop the
tape, push the same button lightly or any of the other buttons. The radio
will play during this reve.rse function.
To go from one side of the tape to the other, push in the upper knob on
your radio.
To remove the tape, push EJCT. The tape can be ejected when
the ignition is turned
off.
NEXT
Push the NEXT button up to jump quickly to the next selection. If the
selection is at the end
of the tape, the tapc will reverse directions and
begin playing at
a normal speed.
PREV
Push the PREV button up to quickly go to the beginning of the last
selcction.
If the player has played less than 10 seconds into the current selection:
depressing the PREV button
will cause the player to find the beginning of
the previous selection and resume play from that point. If the player is
more than
10 seconds into the current selection, pressing PREV button
will cause the player to find the beginning of the current selection and
resume play from that point.
If PREV is issued while the first selection on
the tape is being played, the player will return to the beginning of that
side of the tape.
S TIPL (Stop-Play)
Press ST/PL to switch back to the radio without ejecting the tape. Press it
a second time to start playing it again.
157
Page 172 of 398
Downloaded from www.Manualslib.com manuals search engine EJCT (Eject Tape)
Press this button to remove the tape.
The Delco Bose Gold Series Music System
This optional sound system combines an AM/FM stereo radio with a
cassette tape player and a compact disc player
in a single unit.
To operate the radio and cassette tape player portion of this music
system, please read the beginning
of this section. “How To Operate Your
Sound System” and “Your Cassette Tape Player.”
To Play the Disc Player
Before you begin, please note: don’t use the mini-discs that are called
“singles” (even with an adapter). They won’t eject.
Use full-size compact
discs only.
Turn the radio on.
Insert a disc (label side up) partway into the slot. The player will pull
it in. Wait a few seconds and the disc will play. Then only the time
of
day and “CD” will display.
If the disc comes back out, check to see if:
The disc is upside down.
The disc is dirty, scratched, or wet.
There’s too much moisture in the air. (If there is, wait about one hour
and try again).
“Err” (Error Detection)
If this message is displayed, you have a condition of either extreme
temperature, moisture,
or an incorrect disc. The disc will automatically be
ejected. When conditions are back to normal, the disc should play again.
RCLIPROG (RecalllProgram)
0 Press once to see what track is being played.
158
Page 173 of 398
Downloaded from www.Manualslib.com manuals search engine Within 5 seconds press it a second time to see how long the disc has
been playing.
Press it a third time to see the time of day.
Rev (Reverse)
Push and hold REV to return rapidly within a track. Release it to play the
passage.
The elapsed time will be displayed to show the reverse progress
of the CD.
FWD (Fast Forward)
Press and hold FWD to advance quickly within a track. Release it to
resume playing. Elapsed time will be displayed to show the forward
progress
of the CD.
Prev (Previous)
Push this button to go back to the beginning of the track or push it again
to a favorite track.
Next
Push this button to advance to the next track.
STIPL (StopjPlay)
Press this button and the disc or tape will stop without ejecting it and the
radio will start to play. Press it again and the disc or tape will start to play
again.
E JCT (Eject)
Press this button to eject the disc or tape. If you have both a CD and a
tape in the player, then the other playback media will start to play. Press
it again and the other media will eject.
159
Page 174 of 398
Downloaded from www.Manualslib.com manuals search engine Comp (Compression)
Pressing COMP makes soft and loud passages more nearly equal in
volume. For example, playing classical or jazz music with very quiet and
very loud passages
in the same tune. The COMP display will light as long
as COMP is on.
Setting The Clock
Turn the ignition on. Then:
To Set the Hour:
0 Press SET, and within 5 seconds,
0 Press and hold SEEK. When the clock gets to the correct hour, let go.
To Set the Minutes:
Press SET, and within 5 seconds,
Press and hold SCAN. When the clock gets to the correct minute, let
Your clock
is set.
go*
Care of Your Cassette Tape Player
A tape player that is not cleaned regularly can cause reduced sound
quality, ruined cassettes, or a damaged mechanism. Cassette tapes should
be stored
in their cases away from contaminants, direct sunlight, and
extreme heat. If they aren’t, they may not operate properly or cause
failure of the tape player.
Your tape player should be cleaned regularly each month or after every
15 hours of use. If you notice a reduction in sound quality, try a known
good cassette to see
if the tape or the tape player is at fault. If this other
cassette has
no improvement in sound quality, clean the tape player.
Clean your tape player with a wiping-action, non-abrasive cleaning
cassette, and follow the directions provided with it.
Cassettes are subject to wear and the sound quality may degrade over
time. Always make sure that the cassette tape is
in good condition before
you have your tape player serviced.
160
Page 175 of 398
Downloaded from www.Manualslib.com manuals search engine Care of Your Compact Discs
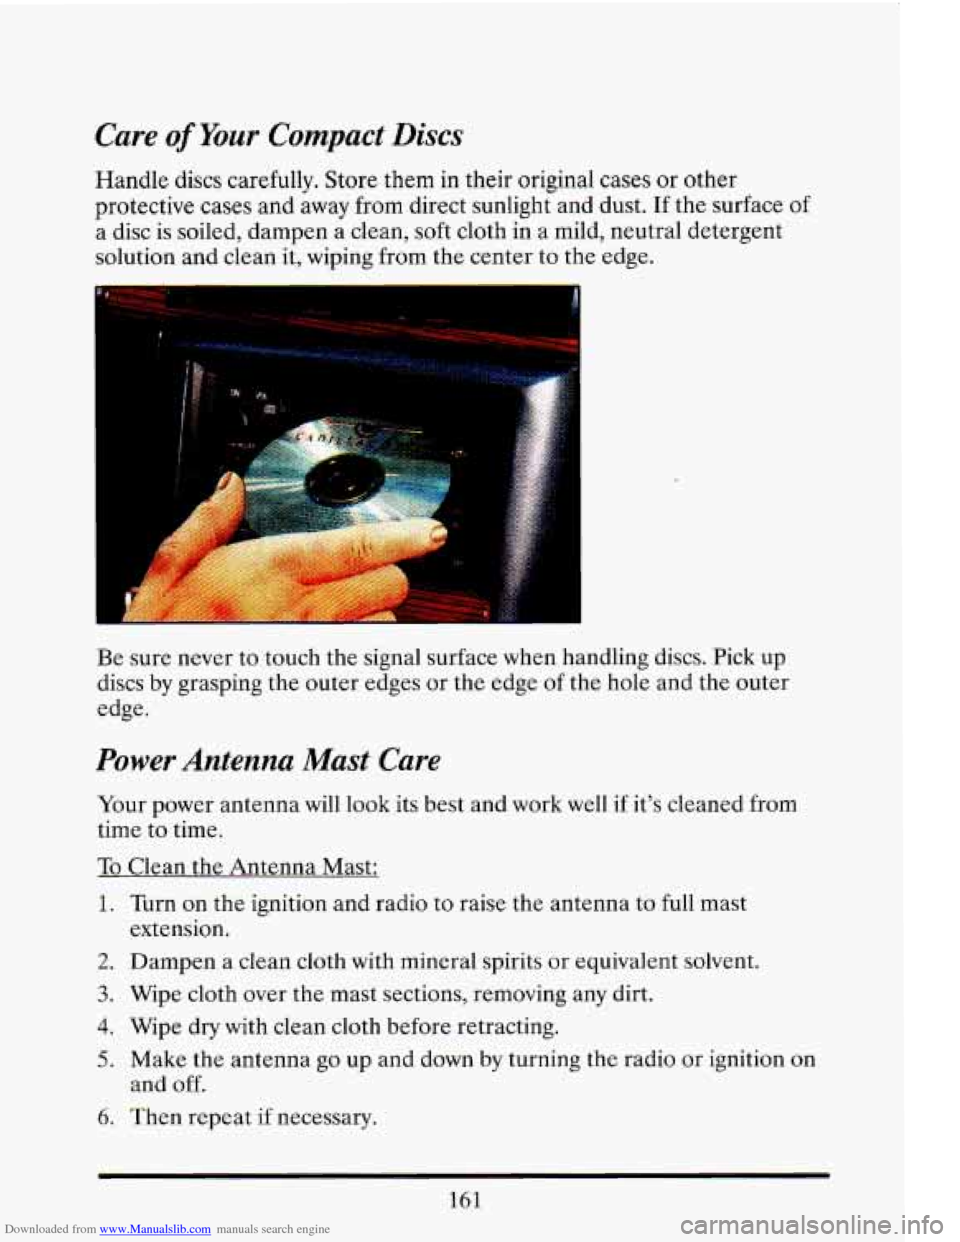
Handle discs carefully. Store them in their original cases or other
protective
cases and away from direct sunlight and dust. If the surface of
a disc is soiled, dampen a clean, soft cloth in a mild, neutral detergent
solution and clean it, wiping from the center to the edge.
L
.
Be sure never to touch the signal surface when handling discs. Pick up
discs by grasping the outer edges or the edge of the hole and the outer
edge.
Power Antenna Mast Care
Your power antenna will look its best and work well if it's cleaned from
time to time.
To Clean the Antenna Mast:
1. Turn on the ignition and radio to raise the antenna to full mast
2. Dampen a clean cloth with mineral spirits or equivalent solvent.
3. Wipe cloth over the mast sections, removing any dirt.
4. Wipe dry with clean cloth before retracting.
5. Make the antenna go up and down by turning the radio or ignition on
6. Then repeat if necessary.
extension.
and
off.
161
Page 176 of 398
Downloaded from www.Manualslib.com manuals search engine 162
Page 177 of 398
Downloaded from www.Manualslib.com manuals search engine Y coi
YOUR DRIVING AND THE ROAD
Ir
i
Here you’ll find information about driving on different kinds of roads and
in varying weather conditions. We’ve also included many other useful tips
on driving.
ROAD SIGNS
The road signs you see everywhere are coded by color, shape and
symbols. It’s a good idea to know these codes
so that you can quickly
grasp the basic meaning or intent of the sign even before you have a
chance to read it.
163
Page 178 of 398
Downloaded from www.Manualslib.com manuals search engine Color of Road Signs
A
A
STOP1
L A
A
I Y
WRONG
WAY
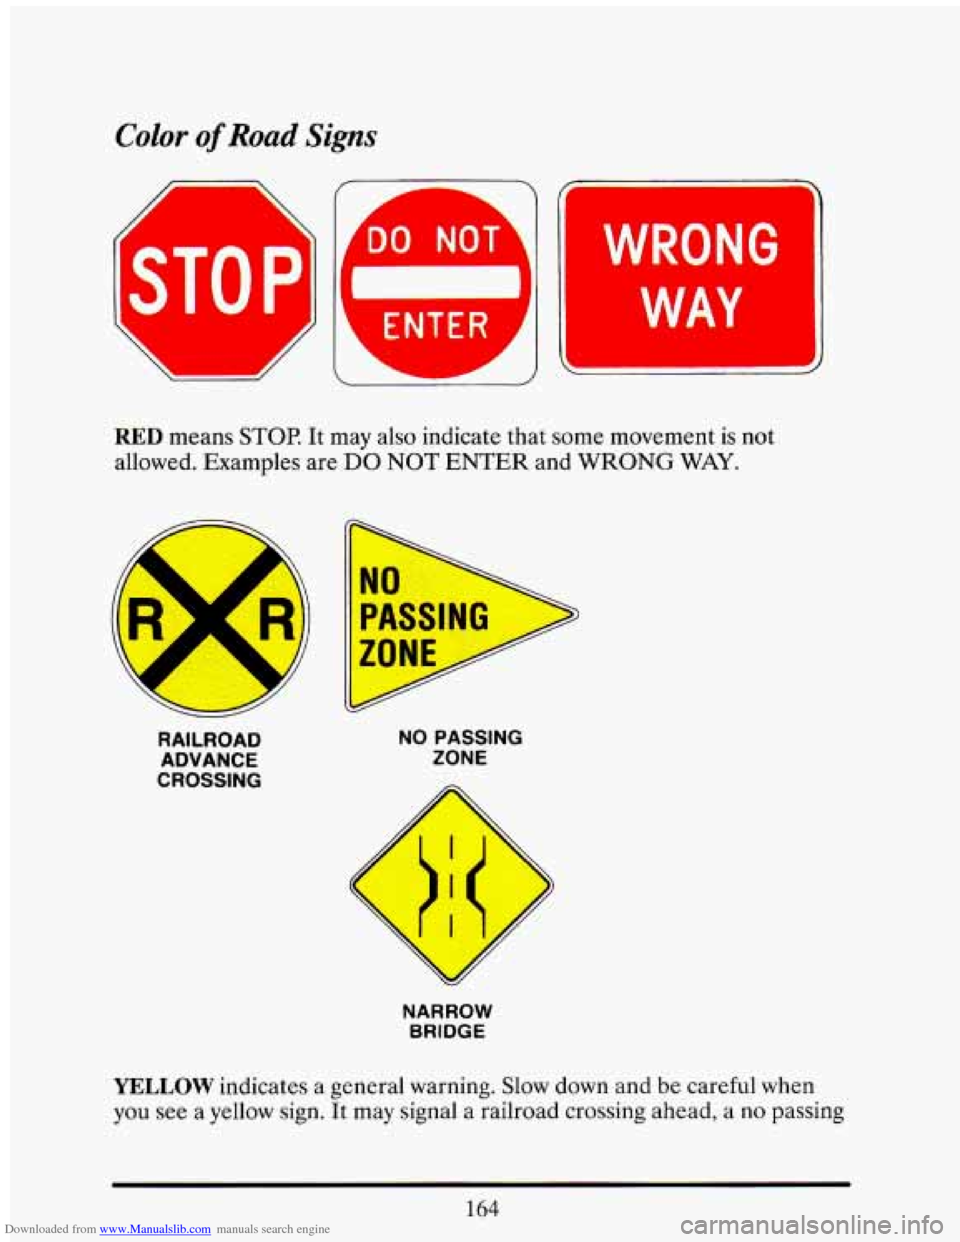
RED means STOP. It may also indicate that some movement is not
allowed. Examples are
DO NOT ENTER and WRONG WAY.
.
RAILROAD
ADVANCE
CROSSING NO PASSING
ZONE
NARROW
BRIDGE
YELLOW indicates a general warning. Slow down and be careful when
you
see a yellow sign. It may signal a railroad crossing ahead, a no passing
164
Page 179 of 398
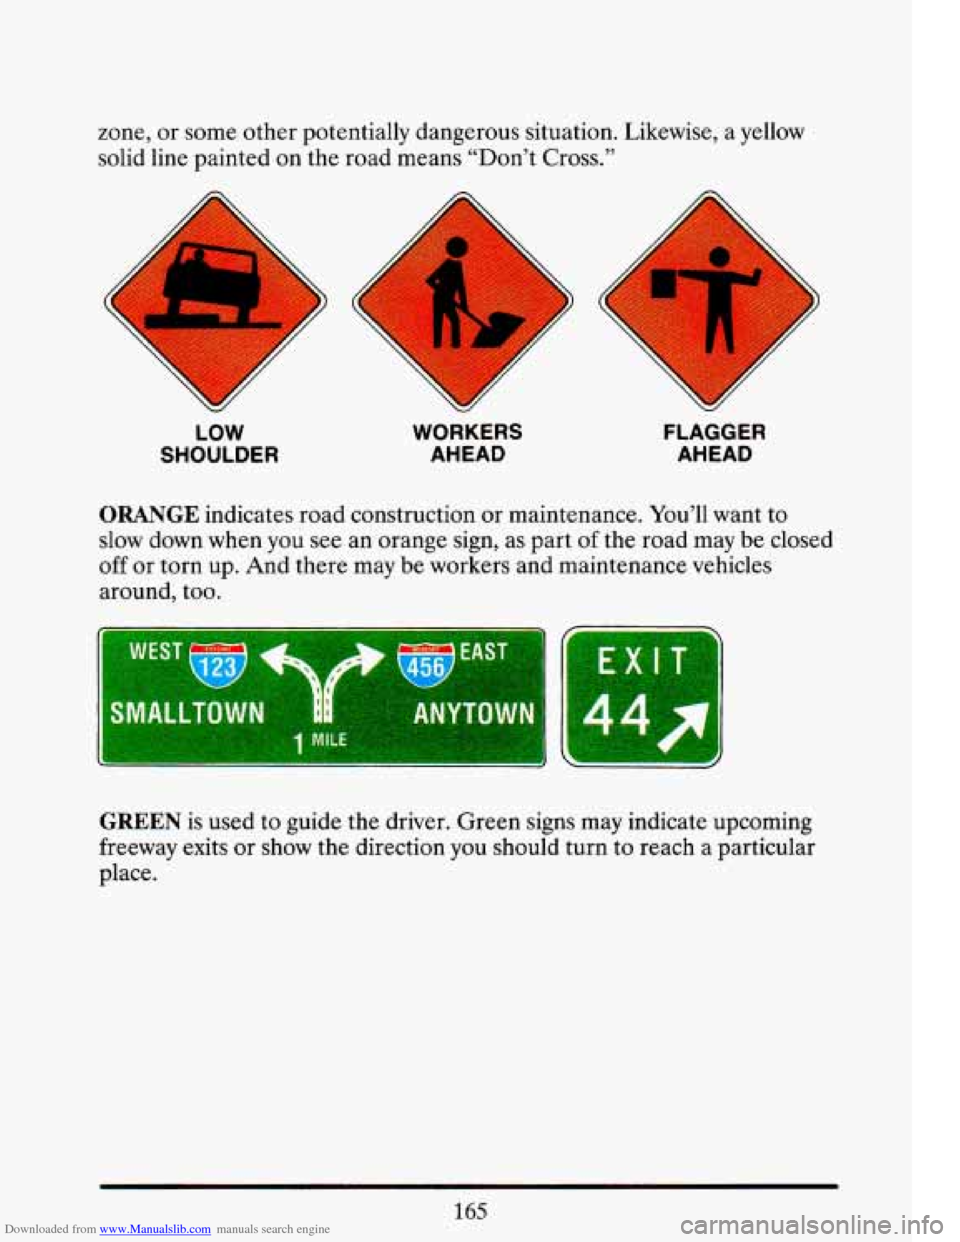
Downloaded from www.Manualslib.com manuals search engine zone, or some other potentially dangerous situation. Likewise, a yellow
solid
line painted on the road means “Don’t Cross.”
LOW
SHOULDER WORKERS
AHEAD FLAGGER
AHEAD
ORANGE indicates road construction or maintenance. You’ll want to
slow down when
you see an orange sign, as part of the road may be closed
off or torn up. And there may be workers and maintenance vehicles
around,
too.
WES
SMAl
1 MILE
GREEN is used to guide the driver. Green signs may indicate upcoming
freeway exits or show the direction you should turn to reach a particular
place.
165
Page 180 of 398
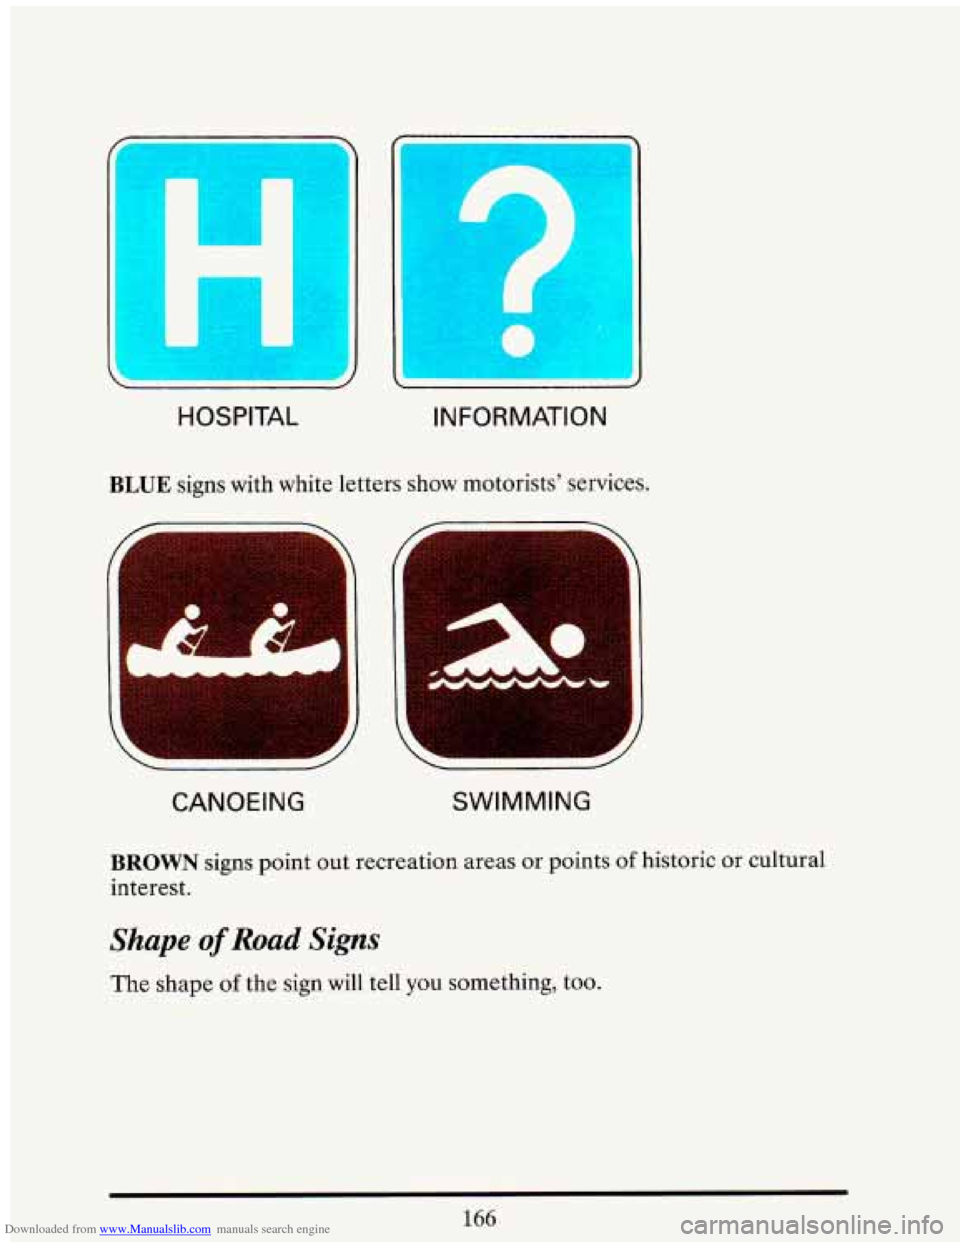
Downloaded from www.Manualslib.com manuals search engine I=!!
HOSPITAL
A
INFORMATION
BLUE signs with white letters show r - ' s' services. ..
d
CANOEING
/
SWIMMING
BROWN signs point out recreation areas or points of historic or cultural
interest.
Shape of Road Signs
The shape of the sign will tell you something, too.
166