light CADILLAC ELR 2014 Convenience & Personalization Guide
[x] Cancel search | Manufacturer: CADILLAC, Model Year: 2014, Model line: ELR, Model: CADILLAC ELR 2014Pages: 20, PDF Size: 4.25 MB
Page 3 of 20
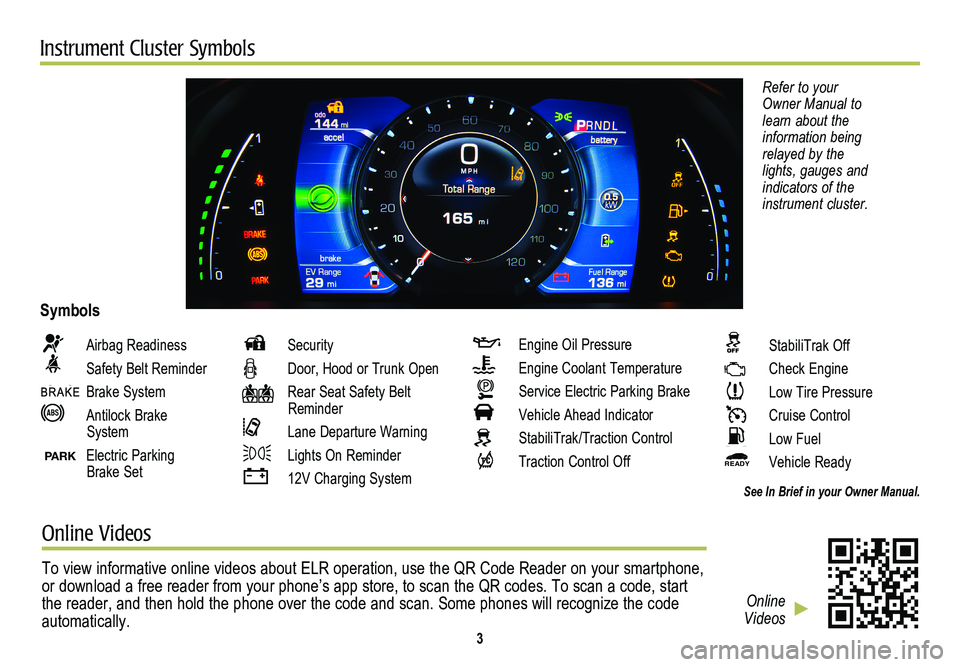
Instrument Cluster Symbols
Refer to your Owner Manual to learn about the information being relayed by the lights, gauges and indicators of the instrument cluster.
Airbag Readiness
Safety Belt Reminder
Brake System
Antilock Brake System
PARK Electric Parking Brake Set
Security
Door, Hood or Trunk Open
Rear Seat Safety Belt Reminder
Lane Departure Warning
Lights On Reminder
12V Charging System
Engine Oil Pressure
Engine Coolant Temperature
Service Electric Parking Brake
Vehicle Ahead Indicator
StabiliTrak/Traction Control
Traction Control Off
Symbols
See In Brief in your Owner Manual.
StabiliTrak Off
Check Engine
Low Tire Pressure
Cruise Control
Low Fuel
READY Vehicle Ready
Online Videos
To view informative online videos about ELR operation, use the QR Code R\
eader on your smartphone, or download a free reader from your phone’s app store, to scan the QR\
codes. To scan a code, start the reader, and then hold the phone over the code and scan. Some phones \
will recognize the code automatically. 3
Online Videos
Page 5 of 20
POWER Button
5
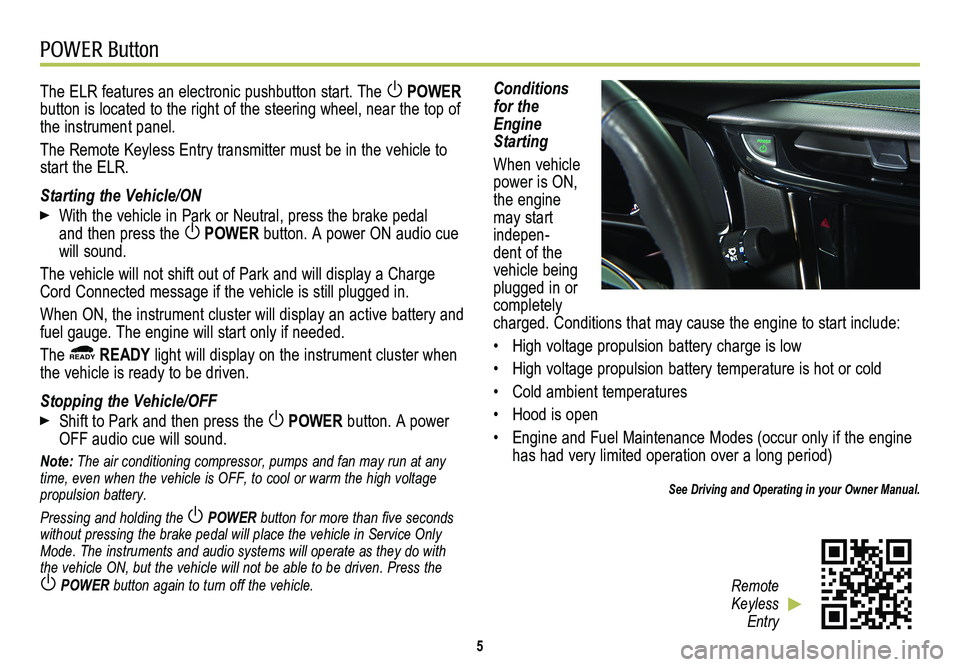
The ELR features an electronic pushbutton start. The POWER button is located to the right of the steering wheel, near the top of the instrument panel.
The Remote Keyless Entry transmitter must be in the vehicle to start the ELR.
Starting the Vehicle/ON
With the vehicle in Park or Neutral, press the brake pedal and then press the POWER button. A power ON audio cue will sound.
The vehicle will not shift out of Park and will display a Charge Cord Connected message if the vehicle is still plugged in.
When ON, the instrument cluster will display an active battery and fuel gauge. The engine will start only if needed.
The READY READY light will display on the instrument cluster when the vehicle is ready to be driven.
Stopping the Vehicle/OFF
Shift to Park and then press the POWER button. A power OFF audio cue will sound.
Note: The air conditioning compressor, pumps and fan may run at any time, even when the vehicle is OFF, to cool or warm the high voltage propulsion battery.
Pressing and holding the POWER button for more than five seconds without pressing the brake pedal will place the vehicle in Service Only \
Mode. The instruments and audio systems will operate as they do with the vehicle ON, but the vehicle will not be able to be driven. Press the
POWER button again to turn off the vehicle.
Conditions for the Engine Starting
When vehicle power is ON, the engine may start indepen-dent of the vehicle being plugged in or completely charged. Conditions that may cause the engine to start include:
• High voltage propulsion battery charge is low
• High voltage propulsion battery temperature is hot or cold
• Cold ambient temperatures
• Hood is open
• Engine and Fuel Maintenance Modes (occur only if the engine has had very limited operation over a long period)
See Driving and Operating in your Owner Manual.
Remote Keyless Entry
Page 7 of 20
7
Instrument Cluster Display
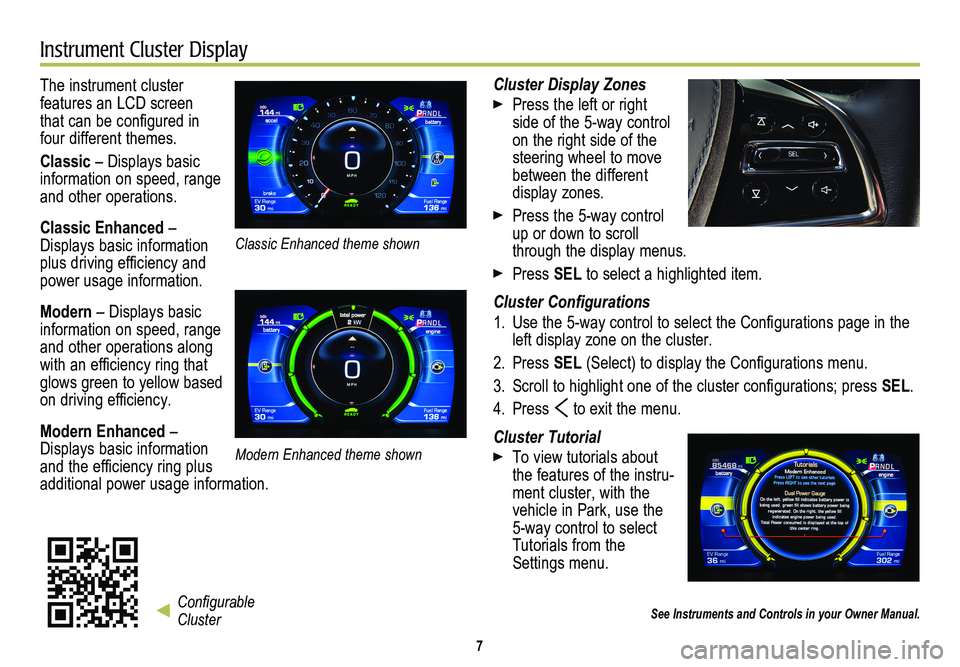
The instrument cluster
features an LCD screen that can be configured in four different themes.
Classic – Displays basic information on speed, range and other operations.
Classic Enhanced – Displays basic information plus driving efficiency and power usage information.
Modern – Displays basic information on speed, range and other operations along with an efficiency ring that glows green to yellow based on driving efficiency.
Modern Enhanced – Displays basic information and the efficiency ring plus additional power usage information.
Cluster Display Zones
Press the left or right side of the 5-way control on the right side of the steering wheel to move between the different display zones.
Press the 5-way control up or down to scroll through the display menus.
Press SEL to select a highlighted item.
Cluster Configurations
1. Use the 5-way control to select the Configurations page in the left display zone on the cluster.
2. Press SEL (Select) to display the Configurations menu.
3. Scroll to highlight one of the cluster configurations; press SEL.
4. Press to exit the menu.
Cluster Tutorial
To view tutorials about the features of the instru-ment cluster, with the vehicle in Park, use the 5-way control to select Tutorials from the Settings menu.
See Instruments and Controls in your Owner Manual.Configurable Cluster
Classic Enhanced theme shown
Modern Enhanced theme shown
Page 8 of 20
8
Efficiency
Driving Style
Your driving style plays a large role in the efficiency of the vehicle. Avoid rapid acceleration or deceleration to help maximize energy efficiency and range. Electric range is maximized at 50 mph and below; higher speeds use more energy and significantly reduce electric range.
Driver-Selected Operating Modes
Press the MODE button on the center console to scroll through a menu of operating modes when more performance is needed. After three seconds, the highlighted mode will become active.
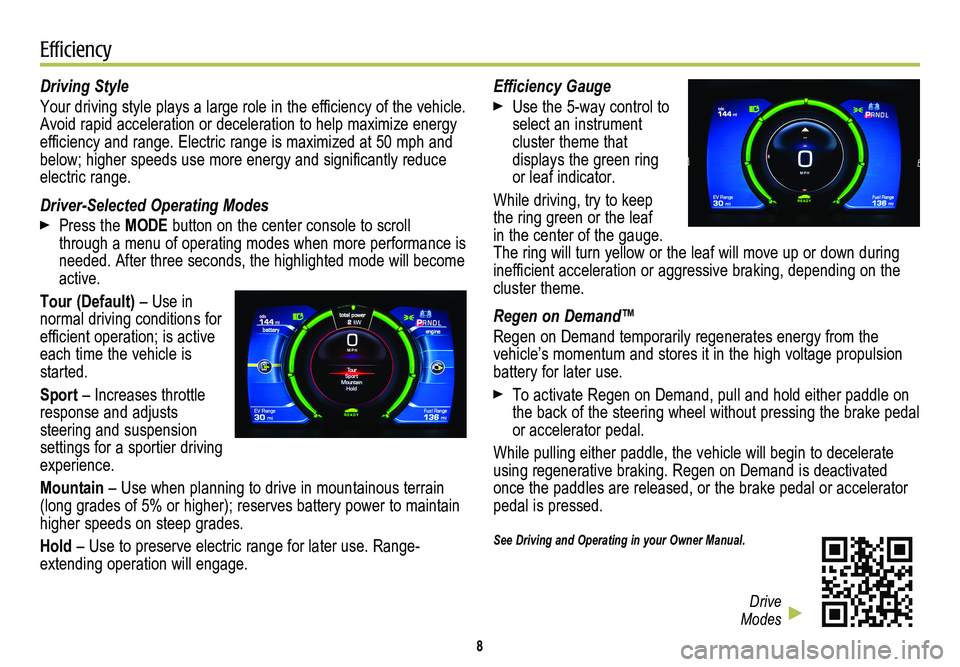
Tour (Default) – Use in normal driving conditions for efficient operation; is active each time the vehicle is started.
Sport – Increases throttle response and adjusts
steering and suspension settings for a sportier driving experience.
Mountain – Use when planning to drive in mountainous terrain (long grades of 5% or higher); reserves battery power to maintain higher speeds on steep grades.
Hold – Use to preserve electric range for later use. Range-extending operation will engage.
Efficiency Gauge
Use the 5-way control to select an instrument
cluster theme that
displays the green ring or leaf indicator.
While driving, try to keep the ring green or the leaf in the center of the gauge. The ring will turn yellow or the leaf will move up or down during inefficient acceleration or aggressive braking, depending on the cluster theme.
Regen on Demand™
Regen on Demand temporarily regenerates energy from the vehicle’s momentum and stores it in the high voltage propulsion battery for later use.
To activate Regen on Demand, pull and hold either paddle on the back of the steering wheel without pressing the brake pedal or accelerator pedal.
While pulling either paddle, the vehicle will begin to decelerate using regenerative braking. Regen on Demand is deactivated once the paddles are released, or the brake pedal or accelerator pedal is pressed.
See Driving and Operating in your Owner Manual.
Drive Modes
Page 9 of 20
9
Efficiency
Information Displays
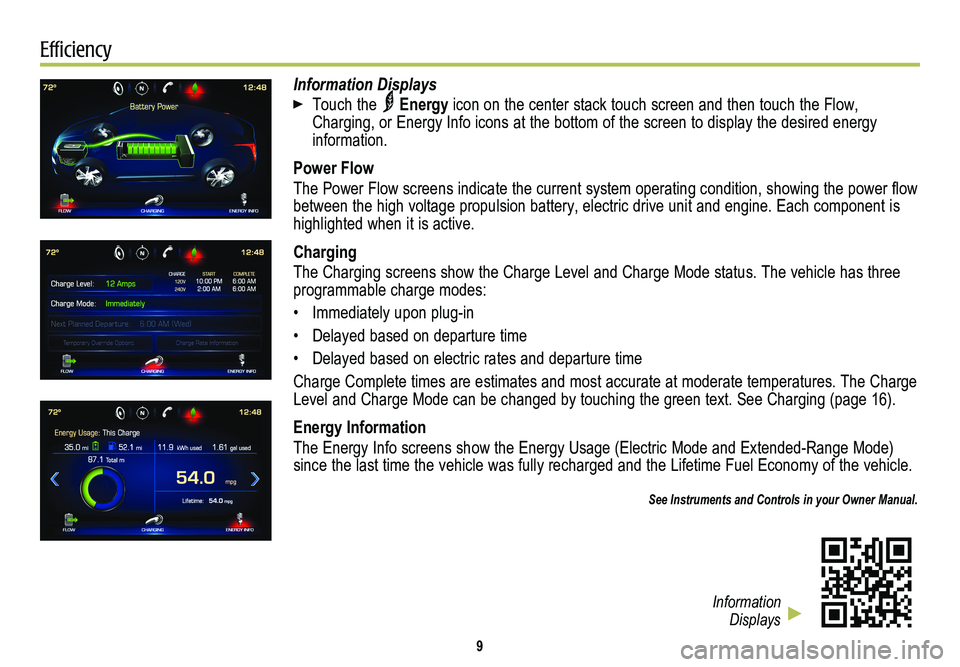
Touch the Energy icon on the center stack touch screen and then touch the Flow, Charging, or Energy Info icons at the bottom of the screen to display the desired energy information.
Power Flow
The Power Flow screens indicate the current system operating condition, showing the power flow between the high voltage propulsion battery, electric drive unit and eng\
ine. Each component is highlighted when it is active.
Charging
The Charging screens show the Charge Level and Charge Mode status. The v\
ehicle has three programmable charge modes:
• Immediately upon plug-in
• Delayed based on departure time
• Delayed based on electric rates and departure time
Charge Complete times are estimates and most accurate at moderate temperatures. The Charge Level and Charge Mode can be changed by touching the green text. See Cha\
rging (page 16).
Energy Information
The Energy Info screens show the Energy Usage (Electric Mode and Extend\
ed-Range Mode) since the last time the vehicle was fully recharged and the Lifetime Fuel Economy of the vehicle.
See Instruments and Controls in your Owner Manual.
Information Displays
Page 11 of 20
11
CUE System
Refer to your Owner Manual for important safety information about using \
the infotainment system while driving.
Portable Audio Devices
Two USB ports, an SD media card slot, and an auxiliary audio input jack are located in the center console storage compartment.
Connect an iPod®, iPhone®, MP3 player, a USB flash drive or a USB mass storage device to the USB port or insert an SD media card into the card slot.
Touch Media until the connected device is shown. CUE will read the device and build a list of voice commands.
Bluetooth® System
Before using a Bluetooth-enabled device in the vehicle, it must be paired with the in-vehicle Bluetooth system. Not all
devices will support all functions. The pairing process is disabled when the vehicle is moving. For more information, visit www.gmtotalconnect.com.
Pair a Phone
1. To use voice recognition, press the Push to Talk button on the steering wheel; after the beep, say “Pair phone,” or
Use the touch screen to select the Phone icon > Phones > Pair Device.
2. Start the pairing process on the phone. Locate Cadillac CUE on the phone.
3. Enter the four-digit code that appears on the touch screen into the phone or confirm the six-digit code on the phone.
4. If your phone prompts you to accept the connection or phone book download, click “yes” and always allow.
See your CUE Infotainment System Manual.
The touch screen in the center stack can be used to display and adjust Infotainment, Vehicle Personalization and Climate Control settings.
Use the controls on the center stack and the touch screen to access the various menus and settings.
The center stack controls only need a light touch to operate and work best with bare hands. Use the finger pad rather than the fingertip to minimize response time. The controls work with most gloves but may take longer to respond. Remove gloves if necessary.
In the screen menus, a check mark next to an item indicates it is selected/on.
Infotainment
CUE uses a Bluetooth or USB connection to link a smartphone, cell phone, USB flash drive or portable audio player/iPod® to the touch screen infotainment display. It offers a variety of
entertainment options, including streaming audio from the Internet through a smartphone, and features enhanced hands- free voice control, music information and the ability to play music files from a USB flash drive or an SD media card. For assistance, call 1-855-4-CUE-NOW (1-855-428-3669) or visit www.cadillac.com/cue.
Page 13 of 20
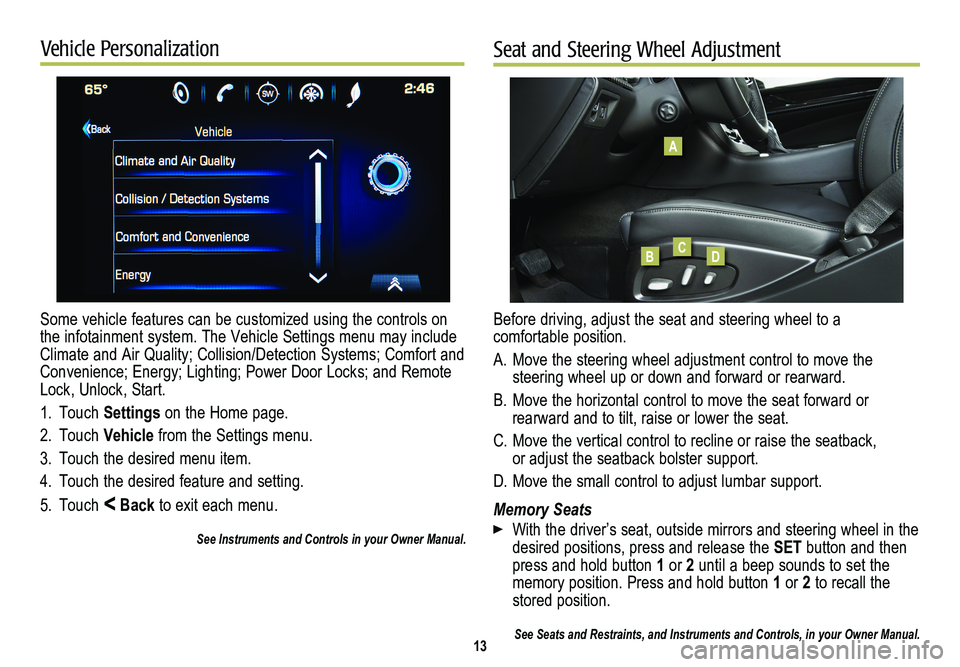
Some vehicle features can be customized using the controls on the infotainment system. The Vehicle Settings menu may include Climate and Air Quality; Collision/Detection Systems; Comfort and Convenience; Energy; Lighting; Power Door Locks; and Remote Lock, Unlock, Start.
1. Touch Settings on the Home page.
2. Touch Vehicle from the Settings menu.
3. Touch the desired menu item.
4. Touch the desired feature and setting.
5. Touch < Back to exit each menu.
See Instruments and Controls in your Owner Manual.
13
Vehicle PersonalizationSeat and Steering Wheel Adjustment
Before driving, adjust the seat and steering wheel to a comfortable position.
A. Move the steering wheel adjustment control to move the
steering wheel up or down and forward or rearward.
B. Move the horizontal control to move the seat forward or
rearward and to tilt, raise or lower the seat.
C. Move the vertical control to recline or raise the seatback, or adjust the seatback bolster support.
D. Move the small control to adjust lumbar support.
Memory Seats
With the driver’s seat, outside mirrors and steering wheel in the desired positions, press and release the SET button and then press and hold button 1 or 2 until a beep sounds to set the memory position. Press and hold button 1 or 2 to recall the stored position.
See Seats and Restraints, and Instruments and Controls, in your Owner Ma\
nual.
A
BCD
Page 15 of 20
Low Ground Clearance
The low ground clear-ance of the ELR aids its aerodynamic efficiency. As a result, the flexible air deflector under the front fascia (bumper) may contact a parking block or curb if the vehicle is parked too closely. Use care when parking to avoid damage.
See Vehicle Care in your Owner Manual.
Electric Parking Brake
To apply the parking brake, pull the Parking Brake switch on the left side of the instrument panel.
To release the parking brake, with the ignition in the ON or Accessory position, press the brake pedal and press the
Parking Brake switch.
See Driving and Operating in your Owner Manual.
Pedestrian Safety Signal
The vehicle is equipped with an automatic sound generator and a manual alert. The automatic sound is generated at speeds below 20 mph to indicate the vehicle’s presence to pedestrians.
To activate the additional manual alert, with the vehicle in gear, pull the turn signal lever toward you. The high-beam headlamps will flash and a soft-note alert will sound.
See Instruments and Controls in your Owner Manual.
15
ParkingFueling
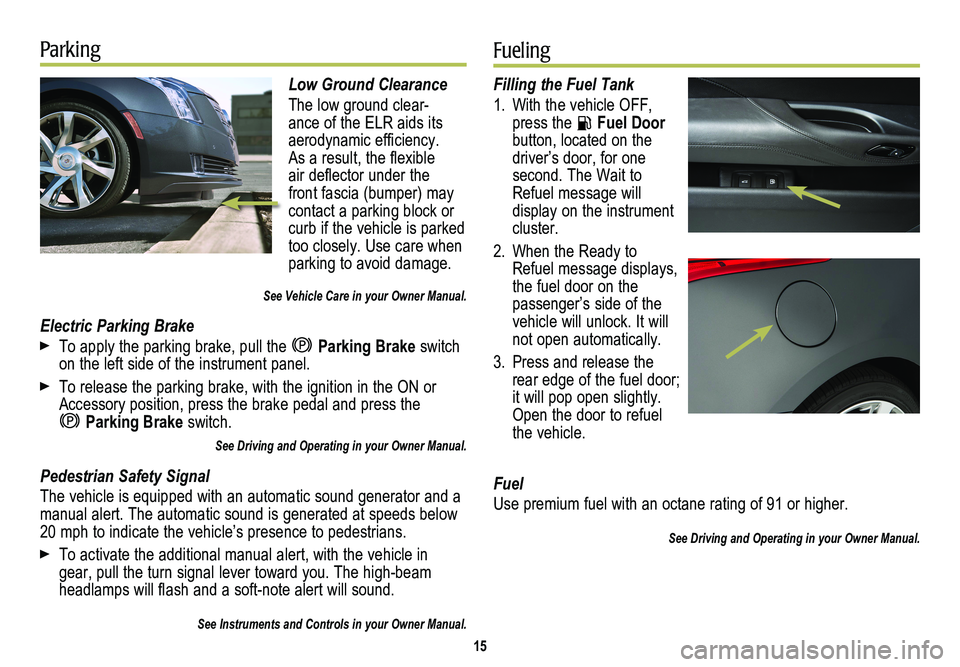
Filling the Fuel Tank
1. With the vehicle OFF, press the Fuel Door button, located on the driver’s door, for one
second. The Wait to Refuel message will display on the instrument cluster.
2. When the Ready to Refuel message displays, the fuel door on the passenger’s side of the vehicle will unlock. It will not open automatically.
3. Press and release the rear edge of the fuel door; it will pop open slightly. Open the door to refuel the vehicle.
Fuel
Use premium fuel with an octane rating of 91 or higher.
See Driving and Operating in your Owner Manual.
Page 16 of 20
Battery
The ELR is powered by a lithium-ion high voltage battery pack, which holds its charge efficiently and has no memory effect (so it doesn’t have to be run down completely before recharging). Keep the vehicle plugged in, even when fully charged, to keep the battery temperature ready for the next drive.
Charging Time
The ELR can be programmed for three charging modes: Immediately upon plug-in; Delayed based on departure time; and Delayed (Electric Rate and Departure Time).
Using a 120-volt standard outlet will take approximately 12.5 hours to charge the ELR at the 12 amp setting, or 18 hours at the 8 amp default setting. Using a 240-volt charging station will take approximately 5 hours. Charge times will vary with outside temperature.
Touch the Energy icon on the touch screen and then touch the Charging icon to view the current Charge Level and Charge Mode status.
Touch the green Charge Level text to select a different charge level.
Touch the green Charge Mode text to select a different charge mode.
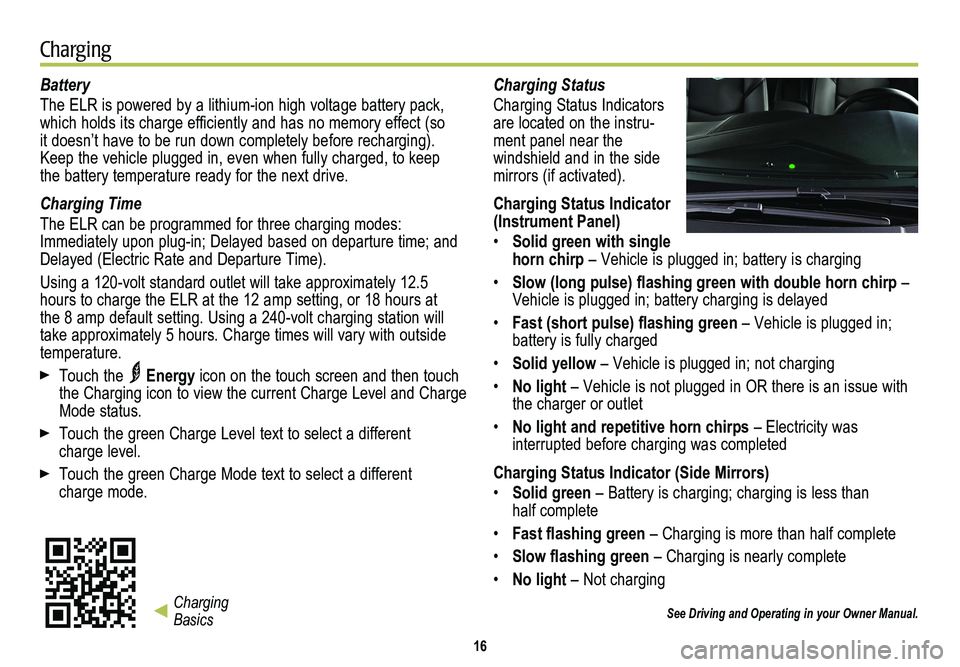
Charging Status
Charging Status Indicators are located on the instru-ment panel near the
windshield and in the side mirrors (if activated).
Charging Status Indicator (Instrument Panel)
• Solid green with single horn chirp – Vehicle is plugged in; battery is charging
• Slow (long pulse) flashing green with double horn chirp – Vehicle is plugged in; battery charging is delayed
• Fast (short pulse) flashing green – Vehicle is plugged in; battery is fully charged
• Solid yellow – Vehicle is plugged in; not charging
• No light – Vehicle is not plugged in OR there is an issue with the charger or outlet
• No light and repetitive horn chirps – Electricity was
interrupted before charging was completed
Charging Status Indicator (Side Mirrors)
• Solid green – Battery is charging; charging is less than half complete
• Fast flashing green – Charging is more than half complete
• Slow flashing green – Charging is nearly complete
• No light – Not charging
See Driving and Operating in your Owner Manual.
16
Charging
Charging Basics
Page 17 of 20
17
Start Charging
The provided 120-volt travel charge cord is located in the storage compartment under the cargo floor.
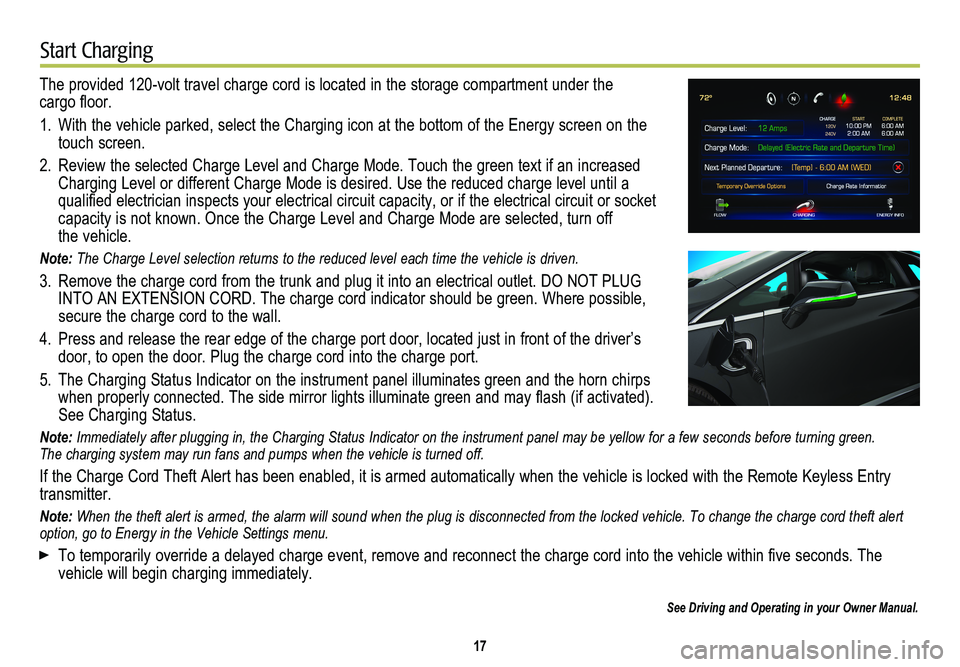
1. With the vehicle parked, select the Charging icon at the bottom of the Energy screen on t\
he touch screen.
2. Review the selected Charge Level and Charge Mode. Touch the green text i\
f an increased Charging Level or different Charge Mode is desired. Use the reduced char\
ge level until a
qualified electrician inspects your electrical circuit capacity, or if the electrical circuit or socket capacity is not known. Once the Charge Level and Charge Mode are selected, turn off the vehicle.
Note: The Charge Level selection returns to the reduced level each time the ve\
hicle is driven.
3. Remove the charge cord from the trunk and plug it into an electrical outlet. DO NOT PLUG INTO AN EXTENSION CORD. The charge cord indicator should be green. Where possible, secure the charge cord to the wall.
4. Press and release the rear edge of the charge port door, located just in\
front of the driver’s door, to open the door. Plug the charge cord into the charge port.
5. The Charging Status Indicator on the instrument panel illuminates green and the horn chirps when properly connected. The side mirror lights illuminate green and may flash (if activated).See Charging Status.
Note: Immediately after plugging in, the Charging Status Indicator on the inst\
rument panel may be yellow for a few seconds before turning green. The charging system may run fans and pumps when the vehicle is turned off.
If the Charge Cord Theft Alert has been enabled, it is armed automatical\
ly when the vehicle is locked with the Remote Keyless Entry transmitter.
Note: When the theft alert is armed, the alarm will sound when the plug is dis\
connected from the locked vehicle. To change the charge cord theft alert option, go to Energy in the Vehicle Settings menu.
To temporarily override a delayed charge event, remove and reconnect the charge cord into the vehicle within five seconds. The
vehicle will begin charging immediately.
See Driving and Operating in your Owner Manual.