lock CADILLAC ELR 2014 Convenience & Personalization Guide
[x] Cancel search | Manufacturer: CADILLAC, Model Year: 2014, Model line: ELR, Model: CADILLAC ELR 2014Pages: 20, PDF Size: 4.25 MB
Page 3 of 20
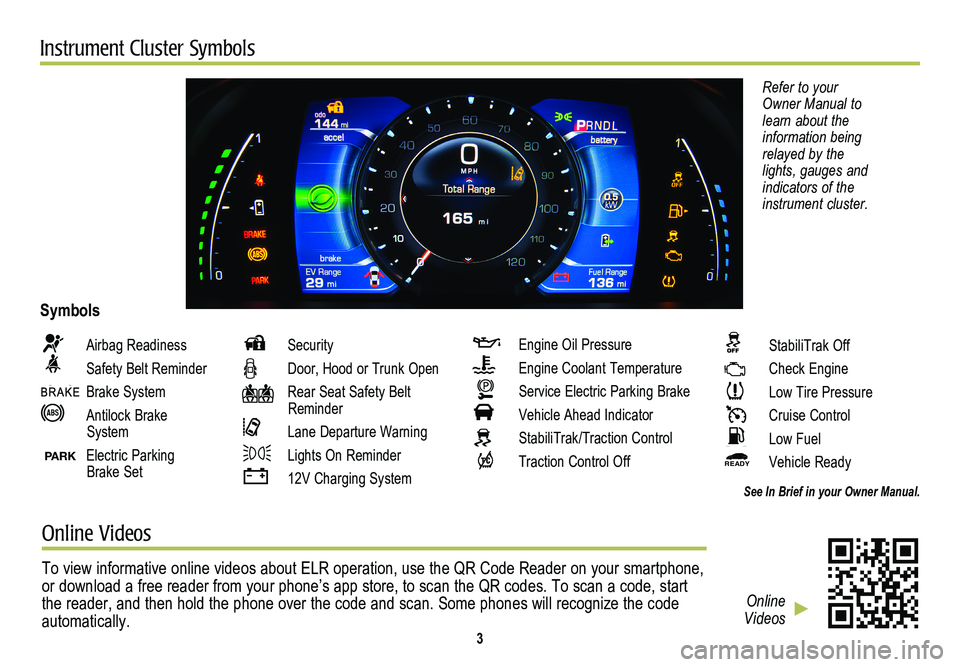
Instrument Cluster Symbols
Refer to your Owner Manual to learn about the information being relayed by the lights, gauges and indicators of the instrument cluster.
Airbag Readiness
Safety Belt Reminder
Brake System
Antilock Brake System
PARK Electric Parking Brake Set
Security
Door, Hood or Trunk Open
Rear Seat Safety Belt Reminder
Lane Departure Warning
Lights On Reminder
12V Charging System
Engine Oil Pressure
Engine Coolant Temperature
Service Electric Parking Brake
Vehicle Ahead Indicator
StabiliTrak/Traction Control
Traction Control Off
Symbols
See In Brief in your Owner Manual.
StabiliTrak Off
Check Engine
Low Tire Pressure
Cruise Control
Low Fuel
READY Vehicle Ready
Online Videos
To view informative online videos about ELR operation, use the QR Code R\
eader on your smartphone, or download a free reader from your phone’s app store, to scan the QR\
codes. To scan a code, start the reader, and then hold the phone over the code and scan. Some phones \
will recognize the code automatically. 3
Online Videos
Page 4 of 20
4
Remote Keyless Entry Transmitter (Key Fob)
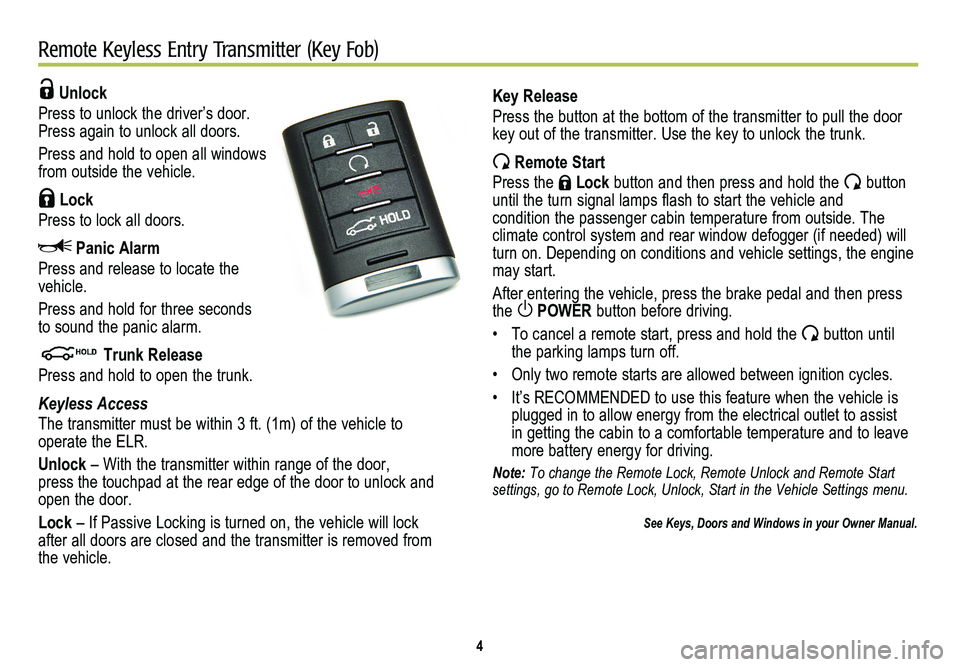
Unlock
Press to unlock the driver’s door. Press again to unlock all doors.
Press and hold to open all windows from outside the vehicle.
Lock
Press to lock all doors.
Panic Alarm
Press and release to locate the vehicle.
Press and hold for three seconds to sound the panic alarm.
Trunk Release
Press and hold to open the trunk.
Keyless Access
The transmitter must be within 3 ft. (1m) of the vehicle to
operate the ELR.
Unlock – With the transmitter within range of the door, press the touchpad at the rear edge of the door to unlock and open the door.
Lock – If Passive Locking is turned on, the vehicle will lock after all doors are closed and the transmitter is removed from the vehicle.
Key Release
Press the button at the bottom of the transmitter to pull the door key out of the transmitter. Use the key to unlock the trunk.
Remote Start
Press the Lock button and then press and hold the button until the turn signal lamps flash to start the vehicle and condition the passenger cabin temperature from outside. The
climate control system and rear window defogger (if needed) will turn on. Depending on conditions and vehicle settings, the engine may start.
After entering the vehicle, press the brake pedal and then press the POWER button before driving.
• To cancel a remote start, press and hold the button until the parking lamps turn off.
• Only two remote starts are allowed between ignition cycles.
• It’s RECOMMENDED to use this feature when the vehicle is plugged in to allow energy from the electrical outlet to assist in getting the cabin to a comfortable temperature and to leave more battery energy for driving.
Note: To change the Remote Lock, Remote Unlock and Remote Start settings, go to Remote Lock, Unlock, Start in the Vehicle Settings menu.\
See Keys, Doors and Windows in your Owner Manual.
Page 13 of 20
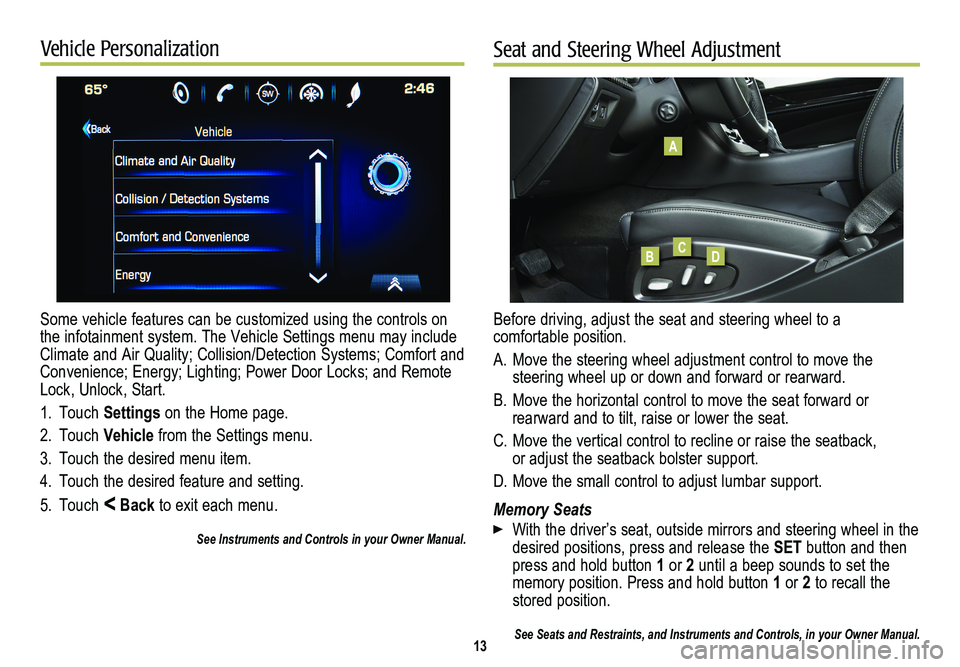
Some vehicle features can be customized using the controls on the infotainment system. The Vehicle Settings menu may include Climate and Air Quality; Collision/Detection Systems; Comfort and Convenience; Energy; Lighting; Power Door Locks; and Remote Lock, Unlock, Start.
1. Touch Settings on the Home page.
2. Touch Vehicle from the Settings menu.
3. Touch the desired menu item.
4. Touch the desired feature and setting.
5. Touch < Back to exit each menu.
See Instruments and Controls in your Owner Manual.
13
Vehicle PersonalizationSeat and Steering Wheel Adjustment
Before driving, adjust the seat and steering wheel to a comfortable position.
A. Move the steering wheel adjustment control to move the
steering wheel up or down and forward or rearward.
B. Move the horizontal control to move the seat forward or
rearward and to tilt, raise or lower the seat.
C. Move the vertical control to recline or raise the seatback, or adjust the seatback bolster support.
D. Move the small control to adjust lumbar support.
Memory Seats
With the driver’s seat, outside mirrors and steering wheel in the desired positions, press and release the SET button and then press and hold button 1 or 2 until a beep sounds to set the memory position. Press and hold button 1 or 2 to recall the stored position.
See Seats and Restraints, and Instruments and Controls, in your Owner Ma\
nual.
A
BCD
Page 15 of 20
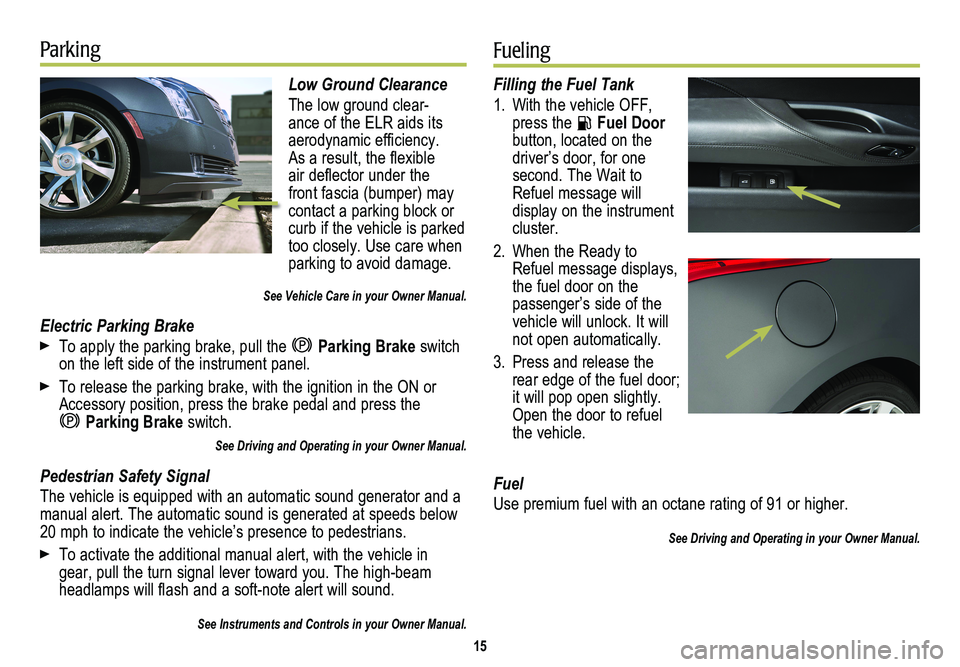
Low Ground Clearance
The low ground clear-ance of the ELR aids its aerodynamic efficiency. As a result, the flexible air deflector under the front fascia (bumper) may contact a parking block or curb if the vehicle is parked too closely. Use care when parking to avoid damage.
See Vehicle Care in your Owner Manual.
Electric Parking Brake
To apply the parking brake, pull the Parking Brake switch on the left side of the instrument panel.
To release the parking brake, with the ignition in the ON or Accessory position, press the brake pedal and press the
Parking Brake switch.
See Driving and Operating in your Owner Manual.
Pedestrian Safety Signal
The vehicle is equipped with an automatic sound generator and a manual alert. The automatic sound is generated at speeds below 20 mph to indicate the vehicle’s presence to pedestrians.
To activate the additional manual alert, with the vehicle in gear, pull the turn signal lever toward you. The high-beam headlamps will flash and a soft-note alert will sound.
See Instruments and Controls in your Owner Manual.
15
ParkingFueling
Filling the Fuel Tank
1. With the vehicle OFF, press the Fuel Door button, located on the driver’s door, for one
second. The Wait to Refuel message will display on the instrument cluster.
2. When the Ready to Refuel message displays, the fuel door on the passenger’s side of the vehicle will unlock. It will not open automatically.
3. Press and release the rear edge of the fuel door; it will pop open slightly. Open the door to refuel the vehicle.
Fuel
Use premium fuel with an octane rating of 91 or higher.
See Driving and Operating in your Owner Manual.
Page 17 of 20
17
Start Charging
The provided 120-volt travel charge cord is located in the storage compartment under the cargo floor.
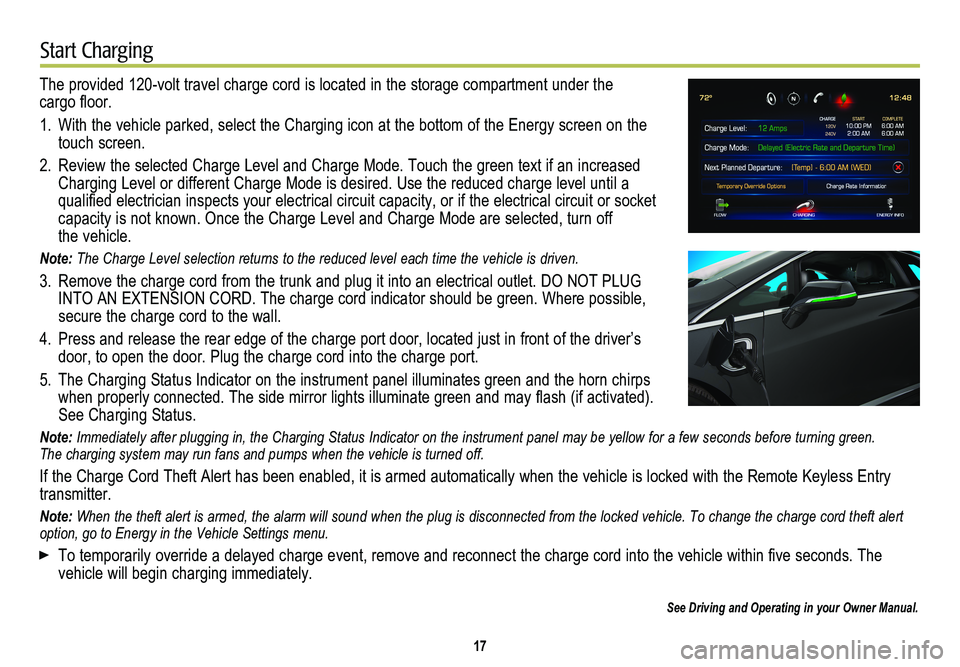
1. With the vehicle parked, select the Charging icon at the bottom of the Energy screen on t\
he touch screen.
2. Review the selected Charge Level and Charge Mode. Touch the green text i\
f an increased Charging Level or different Charge Mode is desired. Use the reduced char\
ge level until a
qualified electrician inspects your electrical circuit capacity, or if the electrical circuit or socket capacity is not known. Once the Charge Level and Charge Mode are selected, turn off the vehicle.
Note: The Charge Level selection returns to the reduced level each time the ve\
hicle is driven.
3. Remove the charge cord from the trunk and plug it into an electrical outlet. DO NOT PLUG INTO AN EXTENSION CORD. The charge cord indicator should be green. Where possible, secure the charge cord to the wall.
4. Press and release the rear edge of the charge port door, located just in\
front of the driver’s door, to open the door. Plug the charge cord into the charge port.
5. The Charging Status Indicator on the instrument panel illuminates green and the horn chirps when properly connected. The side mirror lights illuminate green and may flash (if activated).See Charging Status.
Note: Immediately after plugging in, the Charging Status Indicator on the inst\
rument panel may be yellow for a few seconds before turning green. The charging system may run fans and pumps when the vehicle is turned off.
If the Charge Cord Theft Alert has been enabled, it is armed automatical\
ly when the vehicle is locked with the Remote Keyless Entry transmitter.
Note: When the theft alert is armed, the alarm will sound when the plug is dis\
connected from the locked vehicle. To change the charge cord theft alert option, go to Energy in the Vehicle Settings menu.
To temporarily override a delayed charge event, remove and reconnect the charge cord into the vehicle within five seconds. The
vehicle will begin charging immediately.
See Driving and Operating in your Owner Manual.
Page 18 of 20

Charging equipment with a rating of at least 240 volt/ 20 amp will provide the
fastest charging time to recharge the high voltage propulsion battery.
Contact your dealer or an ELR Concierge
representative, or go to www.cadillaccharging.com, for more information about an available 240V home charging station.
See Driving and Operating in your Owner Manual.
18
End ChargingHome Charging Station
1. Unlock the vehicle with the RKE transmitter to disarm the charge cord theft alert.
2. Unplug the charge cord from the vehicle by
pressing the plug button and close the charge port door.
3. Unplug the charge cord from the electrical outlet.
4. Properly stow the charge cord in the trunk.
See Driving and Operating in your Owner Manual.
Page 19 of 20
19
Auxiliary Door ReleasesMobile Apps
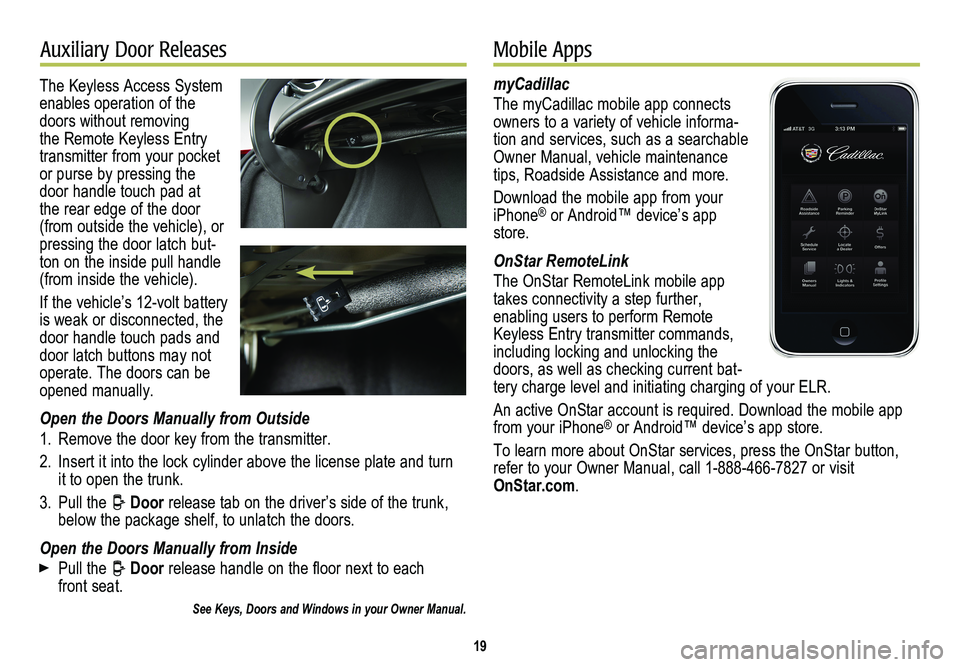
The Keyless Access System enables operation of the doors without removing the Remote Keyless Entry transmitter from your pocket or purse by pressing the door handle touch pad at the rear edge of the door (from outside the vehicle), or pressing the door latch but-ton on the inside pull handle (from inside the vehicle).
If the vehicle’s 12-volt battery is weak or disconnected, the door handle touch pads and door latch buttons may not operate. The doors can be opened manually.
Open the Doors Manually from Outside
1. Remove the door key from the transmitter.
2. Insert it into the lock cylinder above the license plate and turn it to open the trunk.
3. Pull the Door release tab on the driver’s side of the trunk, below the package shelf, to unlatch the doors.
Open the Doors Manually from Inside
Pull the Door release handle on the floor next to each front seat.
See Keys, Doors and Windows in your Owner Manual.
myCadillac
The myCadillac mobile app connects owners to a variety of vehicle informa-tion and services, such as a searchable Owner Manual, vehicle maintenance tips, Roadside Assistance and more.
Download the mobile app from your iPhone® or Android™ device’s app store.
OnStar RemoteLink
The OnStar RemoteLink mobile app takes connectivity a step further, enabling users to perform Remote Keyless Entry transmitter commands, including locking and unlocking the doors, as well as checking current bat-tery charge level and initiating charging of your ELR.
An active OnStar account is required. Download the mobile app from your iPhone® or Android™ device’s app store.
To learn more about OnStar services, press the OnStar button, refer to your Owner Manual, call 1-888-466-7827 or visit OnStar.com.
Page 20 of 20

!22900401=A!
Certain restrictions, precautions and safety procedures apply to your vehicle. Please read your Owner Manual for complete instructions\
. All information contained herein is based on the latest information available at the time of printing and is subject to change without notice. Copyright 2013 by General Motors. All rights reserved.
We recommend always using ACDelco or genuine GM service parts.
Owner Privileges™
CADILLAC CONCIERGE 1-855-4-CAD-ELR (1-855-422-3357)
Should you need to ask a question, make a comment, or request additional information about your Cadillac ELR, contact your Cadillac Concierge.
CADILLAC ONLINE OWNER CENTER
Visit my.cadillac.com for access to the Cadillac Owner Center, which features online Owner Manuals, maintenance information, service records, and more.
CUE SUPPORT
For information or assistance operating the CUE infotainment
system, call 1-885-4-CUE-NOW (1-855-428-3669).
ROADSIDE ASSISTANCE 1-800-224-1400 TTY Users: 1-888-889-2438
Roadside Assistance provides every Cadillac owner with the advantage of contacting a Cadillac advisor and, when appropri-ate, a Cadillac-trained dealer technician who can provide on-site
services, including towing service, battery jump-starting, lock-out service, fuel delivery and flat tire assistance. Services are
provided for up to 6 years/70,000 miles, whichever occurs first.
Roadside Assistance and OnStar®: If you have a current OnStar subscription, press the OnStar button and the vehicle will send your current GPS location to an OnStar Advisor who will speak to you, assess your problem, contact Roadside Assistance and relay your exact location so you will get the help you need.