headlamp CADILLAC ELR 2015 User Guide
[x] Cancel search | Manufacturer: CADILLAC, Model Year: 2015, Model line: ELR, Model: CADILLAC ELR 2015Pages: 407, PDF Size: 41.85 MB
Page 155 of 407

Black plate (46,1)Cadillac ELR Owner Manual (GMNA-Localizing-U.S./Canada-7695154) -
2015 - CRC - 4/25/14
5-46 Instruments and Controls
NO REMOTE PRESS BRAKE
TO RESTART
This message displays when
attempting to turn off the vehicle
and the RKE transmitter is no longer
detected. Restarting is allowed
without the RKE transmitter for
five minutes. Press the brake pedal
to restart the vehicle.
NUMBER OF KEYS
PROGRAMMED
This message displays when
programming new keys to the
vehicle.
REMOTE LEFT IN VEHICLE
This message displays when
leaving the vehicle with the RKE
transmitter still inside.
REPLACE BATTERY IN
REMOTE KEY
This message displays when the
battery in the RKE transmitter needs
to be replaced.
Lamp Messages
AUTOMATIC LIGHT CONTROL
ON/OFF
This message is displayed when the
automatic light control has been
turned on or off. SeeAutomatic
Headlamp System on page 6-4.
XX TURN INDICATOR FAILURE
When one of the turn signals is out,
this message displays to show
which bulb needs to be replaced.
See Bulb Replacement on
page 10-27 andReplacement Bulbs
on page 10-28.
TURN SIGNAL ON
This message is displayed if the
turn signal has been left on. Turn off
the turn signal.
Object Detection System
Messages
AUTOMATIC COLLISION
PREP OFF
This message displays when the
Active Emergency Braking System
has been turned off. See Active
Emergency Braking System on
page 9-53.
AUTOMATIC COLLISION PREP
REDUCED
This message displays when the
Active Emergency Braking System
has been set to the Alert setting.
This setting disables most automatic
braking functions of the Auto
Collision Preparation feature. Some
last-second automatic braking
capability is still provided with the
Alert setting, but braking is less
likely to occur. See Active
Emergency Braking System on
page 9-53.
ProCarManuals.com
Page 172 of 407
Black plate (1,1)Cadillac ELR Owner Manual (GMNA-Localizing-U.S./Canada-7695154) -
2015 - CRC - 4/25/14
Lighting 6-1
Lighting
Exterior Lighting
Exterior Lamp Controls . . . . . . . . 6-1
Exterior Lamps OffReminder . . . . . . . . . . . . . . . . . . . . 6-3
Headlamp High/Low-Beam Changer . . . . . . . . . . . . . . . . . . . . . 6-3
Flash-to-Pass . . . . . . . . . . . . . . . . . 6-4
Daytime Running Lamps (DRL) . . . . . . . . . . . . . . . . 6-4
Automatic Headlamp System . . . . . . . . . . . . . . . . . . . . . . 6-4
Hazard Warning Flashers . . . . . 6-5
Turn and Lane-Change Signals . . . . . . . . . . . . . . . . . . . . . . 6-5
Interior Lighting
Instrument Panel IlluminationControl . . . . . . . . . . . . . . . . . . . . . . 6-6
Courtesy Lamps . . . . . . . . . . . . . . 6-6
Dome Lamps . . . . . . . . . . . . . . . . . 6-6
Reading Lamps . . . . . . . . . . . . . . . 6-7
Lighting Features
Entry Lighting . . . . . . . . . . . . . . . . . 6-8
Exit Lighting . . . . . . . . . . . . . . . . . . . 6-8
Battery Power Protection . . . . . . 6-8
Exterior Lighting Battery Saver . . . . . . . . . . . . . . . . . . . . . . . . 6-8Exterior Lighting
Exterior Lamp Controls
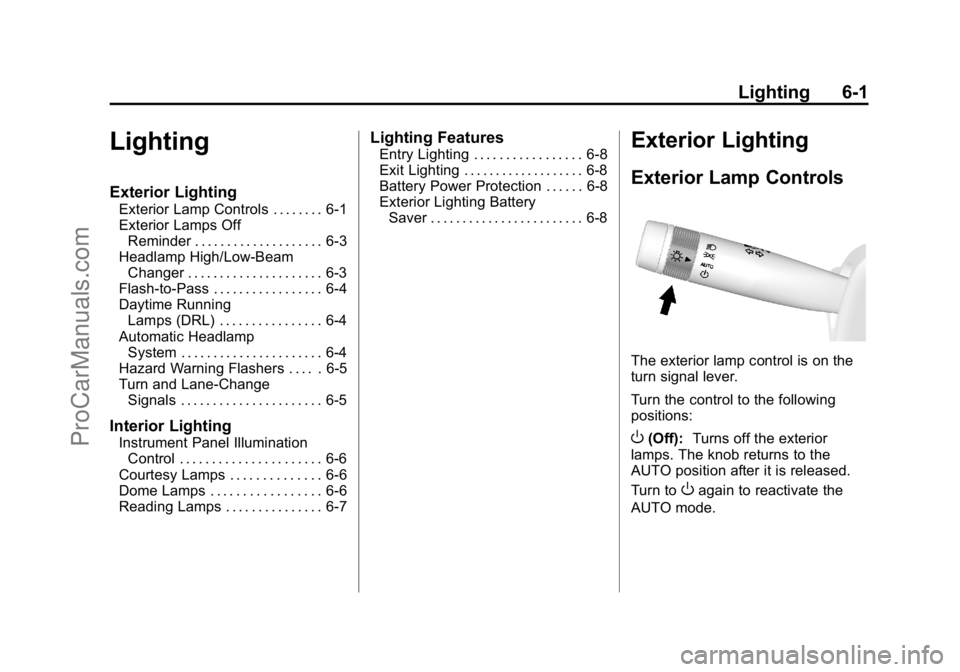
The exterior lamp control is on the
turn signal lever.
Turn the control to the following
positions:
O(Off): Turns off the exterior
lamps. The knob returns to the
AUTO position after it is released.
Turn to
Oagain to reactivate the
AUTO mode.
ProCarManuals.com
Page 173 of 407
Black plate (2,1)Cadillac ELR Owner Manual (GMNA-Localizing-U.S./Canada-7695154) -
2015 - CRC - 4/25/14
6-2 Lighting
In Canada, the headlamps will
automatically reactivate when the
vehicle is shifted out of P (Park).
AUTO (Automatic):Automatically
turns the exterior lamps on and off,
depending on outside lighting.
;(Parking Lamps): Turns on the
parking lamps including all lamps,
except the headlamps.
2(Headlamps): Turns on the
headlamps together with the parking
lamps and instrument panel lights.
IntelliBeam®System
If equipped, this system turns the
vehicle's high-beam headlamps on
and off according to surrounding
traffic conditions.
The system turns the high-beam
headlamps on when it is dark
enough and there is no other traffic
present.
This light comes on in the
instrument cluster when the
IntelliBeam system is enabled.
Turning On and Enabling
IntelliBeam
To enable the IntelliBeam system,
with the turn signal lever in the
neutral position, turn the exterior
lamp control to AUTO. The blue
high-beam on light appears on the
instrument cluster when the high
beams are on.
Driving with IntelliBeam
The system only activates the high
beams when driving over 40 km/h
(25 mph). There is a sensor near the top
center of the windshield that
automatically controls the system.
Keep this area of the windshield
clear of debris to allow for best
system performance.
The high-beam headlamps remain
on, under the automatic control,
until one of the following situations
occurs:
.The system detects an
approaching vehicle's
headlamps.
.The system detects a preceding
vehicle's taillamps.
.The outside light is bright
enough that high-beam
headlamps are not required.
.The vehicle's speed drops below
20 km/h (12 mph).
ProCarManuals.com
Page 174 of 407
Black plate (3,1)Cadillac ELR Owner Manual (GMNA-Localizing-U.S./Canada-7695154) -
2015 - CRC - 4/25/14
Lighting 6-3
.The IntelliBeam system can be
disabled by the High/Low-Beam
Changer or the Flash-to-Pass
feature. If this happens, the
High/Low-Beam Changer must
be activated two times within
five seconds to reactivate the
IntelliBeam system. The
instrument cluster light will come
on to indicate the IntelliBeam is
reactivated. SeeHeadlamp
High/Low-Beam Changer on
page 6-3 andFlash-to-Pass on
page 6-4.
The high beams may not turn off
automatically if the system cannot
detect another vehicle's lamps
because of any of the following:
.The other vehicle's lamps are
missing, damaged, obstructed
from view, or otherwise
undetected.
.The other vehicle's lamps are
covered with dirt, snow, and/or
road spray.
.The other vehicle's lamps cannot
be detected due to dense
exhaust, smoke, fog, snow, road
spray, mist, or other airborne
obstructions.
.The vehicle's windshield is dirty,
cracked, or obstructed by
something that blocks the view
of the light sensor.
.The vehicle is loaded such that
the front end points upward,
causing the light sensor to aim
high and not detect headlamps
and taillamps.
.The vehicle is being driven on
winding or hilly roads.
The automatic high-beam
headlamps may need to be disabled
if any of the above conditions exist.
This feature can be turned on or off
in vehicle personalization. See
Vehicle Personalization on
page 5-52.
Exterior Lamps Off
Reminder
A warning chime will sound if the
exterior lamp control is left on in
either the headlamp or parking lamp
position and the driver door is
opened with the ignition off.
Headlamp High/
Low-Beam Changer
2 3
(Headlamp High/Low-Beam
Changer): Push the turn signal
lever away from you and release, to
turn the high beams on. To return to
low beams, push the lever again or
pull it toward you and release.
This indicator light turns on in the
instrument cluster when the
high-beam headlamps are on.
ProCarManuals.com
Page 175 of 407
Black plate (4,1)Cadillac ELR Owner Manual (GMNA-Localizing-U.S./Canada-7695154) -
2015 - CRC - 4/25/14
6-4 Lighting
Flash-to-Pass
To flash the high beams, pull the
turn signal lever toward you, and
release.
Daytime Running
Lamps (DRL)
DRL can make it easier for others to
see the front of your vehicle during
the day. Fully functional DRL are
required on all vehicles first sold in
Canada.
The DRL will come on when all of
the following conditions are met:
.The ignition is on.
.The exterior lamp control is
in AUTO.
.The light sensor determines it is
daytime.
.The parking brake is released or
the vehicle is not in P (Park).
When the DRL are on, the taillamps,
instrument panel lights, and other
lamps will not be on. The DRL turn off when the
headlamps are turned to
Oor the
ignition is off.
Automatic Headlamp
System
When the exterior lamp control is
set to AUTO and it is dark enough
outside, the headlamps come on
automatically.
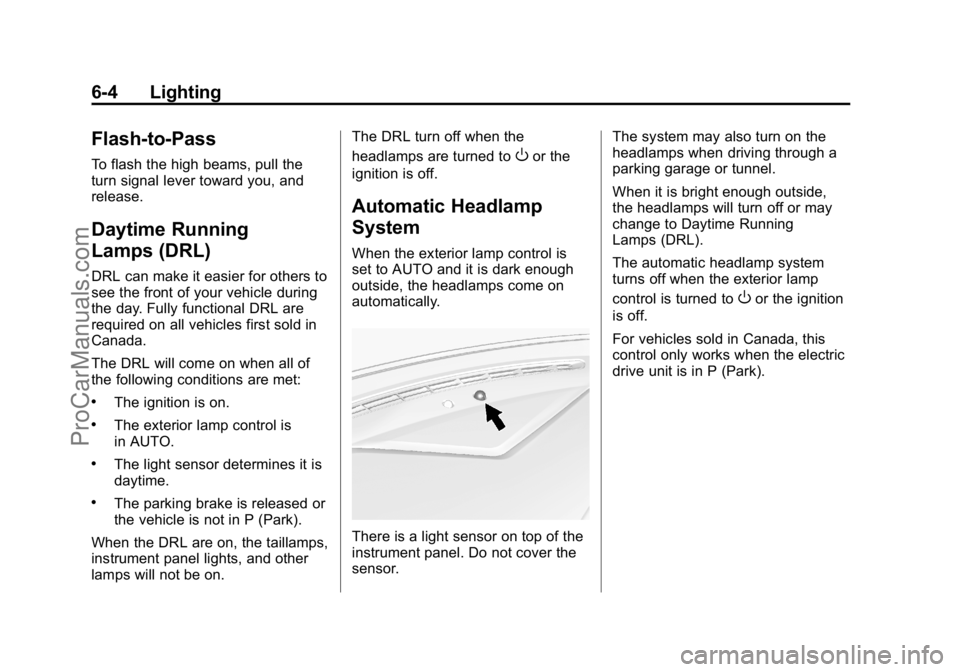
There is a light sensor on top of the
instrument panel. Do not cover the
sensor. The system may also turn on the
headlamps when driving through a
parking garage or tunnel.
When it is bright enough outside,
the headlamps will turn off or may
change to Daytime Running
Lamps (DRL).
The automatic headlamp system
turns off when the exterior lamp
control is turned to
Oor the ignition
is off.
For vehicles sold in Canada, this
control only works when the electric
drive unit is in P (Park).
ProCarManuals.com
Page 176 of 407

Black plate (5,1)Cadillac ELR Owner Manual (GMNA-Localizing-U.S./Canada-7695154) -
2015 - CRC - 4/25/14
Lighting 6-5
Lights On with Wipers
If the windshield wipers are
activated in daylight with the vehicle
on, and the exterior lamp control is
in AUTO, the headlamps, parking
lamps, and other exterior lamps
come on. The transition time for the
lamps coming on varies based on
wiper speed. When the wipers are
not operating, these lamps turn off.
Move the exterior lamp control to
O
or;to disable this feature.
Hazard Warning Flashers
|(Hazard Warning Flashers):
Press this button to make the front
and rear turn signal lamps flash on
and off. Press again to turn the
flashers off.
The hazard warning flashers turn on
automatically if the airbags deploy.
Turn and Lane-Change
Signals
Move the lever all the way up or
down to signal a turn.
An arrow on the instrument cluster
flashes in the direction of the turn or
lane change.
Raise or lower the lever until the
arrow starts to flash to signal a lane
change. Hold it there until the lane
change is completed. If the lever is
briefly pressed and released, the
turn signal flashes three times.
ProCarManuals.com
Page 179 of 407

Black plate (8,1)Cadillac ELR Owner Manual (GMNA-Localizing-U.S./Canada-7695154) -
2015 - CRC - 4/25/14
6-8 Lighting
Lighting Features
Entry Lighting
The headlamps, taillamps, back-up
lamps, license plate lamps, outside
mirror lamps, exterior door handle
lamps, dome lamps, and most of
the interior lights turn on briefly at
night or in areas of limited lighting
when
Kis pressed on the Remote
Keyless Entry (RKE) transmitter.
See Remote Keyless Entry (RKE)
System Operation on page 2-2.
When the driver door is opened, all
control lights, Driver Information
Center (DIC) lights, and door pocket
lights turn on. After about
30 seconds the exterior lamps turn
off, then the dome lamps and
remaining interior lights dim to off.
Entry lighting can be disabled
manually by changing the ignition
out of the OFF position, or by
pressing
Qon the RKE transmitter. This feature can be changed. See
“Vehicle Locator Lights”
under
Vehicle Personalization on
page 5-52.
Exit Lighting
The headlamps, taillamps, parking
lamps, backup lamps, outside mirror
lamps, license plate lamps, and
exterior door handle lamps come on
at night, or in areas with limited
lighting, when the driver door is
opened after the ignition is turned
off. The dome lamps come on after
the ignition is changed to the OFF
position. The exterior lamps and
dome lamps remain on for a set
amount of time, then automatically
turn off.
The exterior lamps turn off
immediately by turning the exterior
lamp control off.
This feature can be changed. See
Vehicle Personalization on
page 5-52.
Battery Power Protection
The battery saver feature is
designed to protect the vehicle's
battery.
If some interior lamps are left on
and the ignition is turned off, the
battery rundown protection system
automatically turns the lamp off after
some time.
Exterior Lighting Battery
Saver
The exterior lamps turn off about
10 minutes after the ignition is
turned off, if the parking lamps or
headlamps have been manually left
on. This protects against draining
the battery. To restart the 10-minute
timer, turn the exterior lamp control
to the off position and then back to
the parking lamp or headlamp
position.
To keep the lamps on for more than
10 minutes, the ignition must be in
the ACC/ACCESSORY or ON/RUN
position.
ProCarManuals.com
Page 240 of 407

Black plate (51,1)Cadillac ELR Owner Manual (GMNA-Localizing-U.S./Canada-7695154) -
2015 - CRC - 4/25/14
Driving and Operating 9-51
FCA detects vehicles within a
distance of approximately 60 m
(197 ft) and operates at speeds
above 40 km/h (25 mph). If the
vehicle has Adaptive Cruise Control
(ACC), it can detect vehicles to
distances of approximately 110 m
(360 ft) and operates at all speeds.
SeeAdaptive Cruise Control on
page 9-39.
{Warning
FCA is a warning system and
does not apply the brakes. When
approaching a slower-moving or
stopped vehicle ahead too rapidly,
or when following a vehicle too
closely, FCA may not provide a
warning with enough time to help
avoid a crash. FCA does not warn
of pedestrians, animals, signs,
guardrails, bridges, construction
barrels, or other objects. Be ready
to take action and apply the
brakes. For more information, see
Defensive Driving on page 9-5. FCA can be disabled with the FCA
steering wheel control, or if your
vehicle is equipped with Adaptive
Cruise Control (ACC), through
vehicle personalization. See the
“Auto Collision Preparation”
portion
of “Collision/Detection Systems”
under Vehicle Personalization on
page 5-52.
Detecting the Vehicle Ahead
FCA warnings will not occur unless
the FCA system detects a vehicle
ahead. When a vehicle is detected,
the vehicle-ahead indicator will
display green. Vehicles may not be
detected on curves, highway exit
ramps, or hills; or due to poor
visibility. FCA will not detect another
vehicle ahead until it is completely
in the driving lane.
{Warning
FCA does not provide a warning
to help avoid a crash, unless it
detects a vehicle. FCA may not
detect a vehicle ahead if the FCA
sensor is blocked by dirt, snow,
or ice, or if the windshield is
damaged. It may also not detect a
vehicle on winding or hilly roads,
or in conditions that can limit
visibility such as fog, rain,
or snow, or if the headlamps or
windshield are not cleaned or in
proper condition. Keep the
windshield, headlamps, and FCA
sensors clean and in good repair.
ProCarManuals.com
Page 246 of 407

Black plate (57,1)Cadillac ELR Owner Manual (GMNA-Localizing-U.S./Canada-7695154) -
2015 - CRC - 4/25/14
Driving and Operating 9-57
{Warning
The LDW system does not steer
the vehicle. The LDW system
may not:
.Provide enough time to avoid
a crash.
.Detect lane markings under
poor weather or visibility
conditions. This can occur if
the windshield or headlamps
are blocked by dirt, snow,
or ice; if they are not in
proper condition; or if the sun
shines directly into the
camera.
.Detect road edges.
.Detect lanes on winding or
hilly roads.
If LDW only detects lane
markings on one side of the road,
it will only warn you when
departing the lane on the side
where it has detected a lane (Continued)
Warning (Continued)
marking. Always keep your
attention on the road and
maintain proper vehicle position
within the lane, or vehicle
damage, injury, or death could
occur. Always keep the
windshield, headlamps, and
camera sensors clean and in
good repair. Do not use LDW in
bad weather conditions.
How the System Works
The LDW camera sensor is on the
windshield ahead of the rearview
mirror.
To turn LDW on and off, press
@on
the center stack. The control
indicator will light when LDW is on.
When LDW is on,@is green if
LDW is available to warn of a lane
departure. If the vehicle crosses a
detected lane marking without using
the turn signal in that direction,
@
changes to amber and flashes.
Additionally, there will be three
beeps, or the driver seat will pulse
three times, on the right or left,
depending on the lane departure
direction.
ProCarManuals.com
Page 262 of 407
Black plate (1,1)Cadillac ELR Owner Manual (GMNA-Localizing-U.S./Canada-7695154) -
2015 - CRC - 4/25/14
Vehicle Care 10-1
Vehicle Care
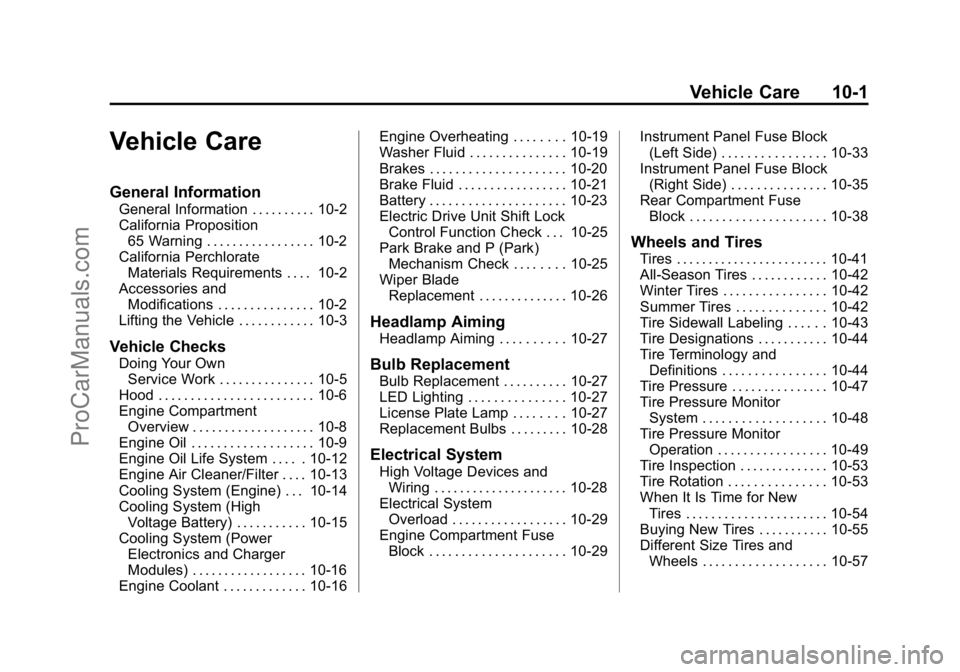
General Information
General Information . . . . . . . . . . 10-2
California Proposition65 Warning . . . . . . . . . . . . . . . . . 10-2
California Perchlorate Materials Requirements . . . . 10-2
Accessories and Modifications . . . . . . . . . . . . . . . 10-2
Lifting the Vehicle . . . . . . . . . . . . 10-3
Vehicle Checks
Doing Your Own Service Work . . . . . . . . . . . . . . . 10-5
Hood . . . . . . . . . . . . . . . . . . . . . . . . 10-6
Engine Compartment Overview . . . . . . . . . . . . . . . . . . . 10-8
Engine Oil . . . . . . . . . . . . . . . . . . . 10-9
Engine Oil Life System . . . . . 10-12
Engine Air Cleaner/Filter . . . . 10-13
Cooling System (Engine) . . . 10-14
Cooling System (High Voltage Battery) . . . . . . . . . . . 10-15
Cooling System (Power Electronics and Charger
Modules) . . . . . . . . . . . . . . . . . . 10-16
Engine Coolant . . . . . . . . . . . . . 10-16 Engine Overheating . . . . . . . . 10-19
Washer Fluid . . . . . . . . . . . . . . . 10-19
Brakes . . . . . . . . . . . . . . . . . . . . . 10-20
Brake Fluid . . . . . . . . . . . . . . . . . 10-21
Battery . . . . . . . . . . . . . . . . . . . . . 10-23
Electric Drive Unit Shift Lock
Control Function Check . . . 10-25
Park Brake and P (Park) Mechanism Check . . . . . . . . 10-25
Wiper Blade Replacement . . . . . . . . . . . . . . 10-26
Headlamp Aiming
Headlamp Aiming . . . . . . . . . . 10-27
Bulb Replacement
Bulb Replacement . . . . . . . . . . 10-27
LED Lighting . . . . . . . . . . . . . . . 10-27
License Plate Lamp . . . . . . . . 10-27
Replacement Bulbs . . . . . . . . . 10-28
Electrical System
High Voltage Devices andWiring . . . . . . . . . . . . . . . . . . . . . 10-28
Electrical System Overload . . . . . . . . . . . . . . . . . . 10-29
Engine Compartment Fuse Block . . . . . . . . . . . . . . . . . . . . . 10-29 Instrument Panel Fuse Block
(Left Side) . . . . . . . . . . . . . . . . 10-33
Instrument Panel Fuse Block (Right Side) . . . . . . . . . . . . . . . 10-35
Rear Compartment Fuse
Block . . . . . . . . . . . . . . . . . . . . . 10-38
Wheels and Tires
Tires . . . . . . . . . . . . . . . . . . . . . . . . 10-41
All-Season Tires . . . . . . . . . . . . 10-42
Winter Tires . . . . . . . . . . . . . . . . 10-42
Summer Tires . . . . . . . . . . . . . . 10-42
Tire Sidewall Labeling . . . . . . 10-43
Tire Designations . . . . . . . . . . . 10-44
Tire Terminology andDefinitions . . . . . . . . . . . . . . . . 10-44
Tire Pressure . . . . . . . . . . . . . . . 10-47
Tire Pressure Monitor
System . . . . . . . . . . . . . . . . . . . 10-48
Tire Pressure Monitor Operation . . . . . . . . . . . . . . . . . 10-49
Tire Inspection . . . . . . . . . . . . . . 10-53
Tire Rotation . . . . . . . . . . . . . . . 10-53
When It Is Time for New Tires . . . . . . . . . . . . . . . . . . . . . . 10-54
Buying New Tires . . . . . . . . . . . 10-55
Different Size Tires and Wheels . . . . . . . . . . . . . . . . . . . 10-57
ProCarManuals.com