Third row seat CADILLAC ESCALADE 2003 2.G Owners Manual
[x] Cancel search | Manufacturer: CADILLAC, Model Year: 2003, Model line: ESCALADE, Model: CADILLAC ESCALADE 2003 2.GPages: 486, PDF Size: 3.32 MB
Page 14 of 486
Rear Seats
Rear Seat Operation
Entering or Exiting the Third Row
Seats
Escalade:To enter or exit the third row seat you must
fold the second row seat down following the instructions
later in this section. See ªFolding the Seatbackº
under
60/40 Split Bench Seat on page 1-10.If you are exiting the third row seat with no assistance
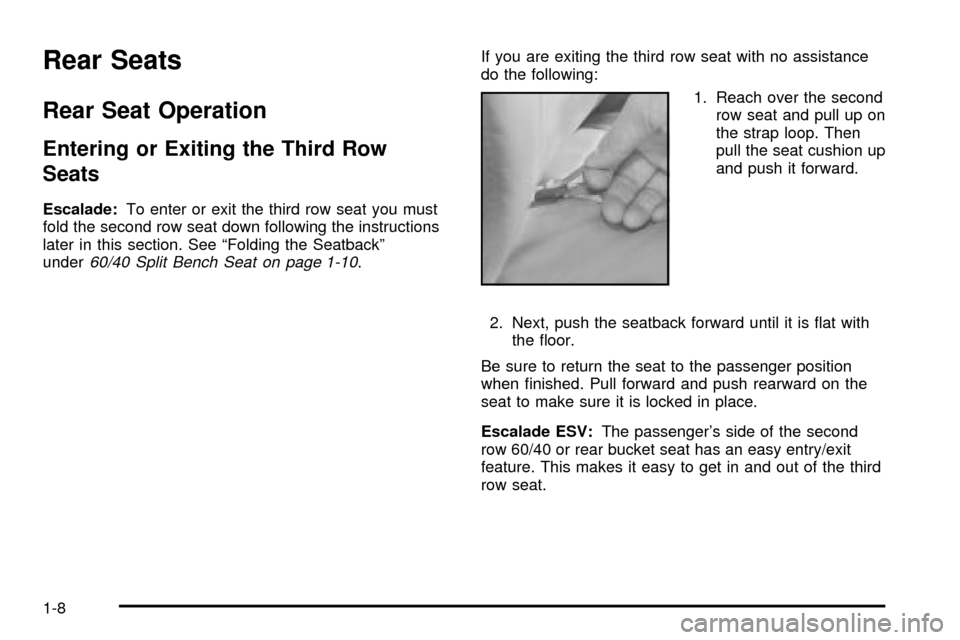
do the following:
1. Reach over the second
row seat and pull up on
the strap loop. Then
pull the seat cushion up
and push it forward.
2. Next, push the seatback forward until it is ¯at with
the ¯oor.
Be sure to return the seat to the passenger position
when ®nished. Pull forward and push rearward on the
seat to make sure it is locked in place.
Escalade ESV:The passenger's side of the second
row 60/40 or rear bucket seat has an easy entry/exit
feature. This makes it easy to get in and out of the third
row seat.
1-8
Page 15 of 486
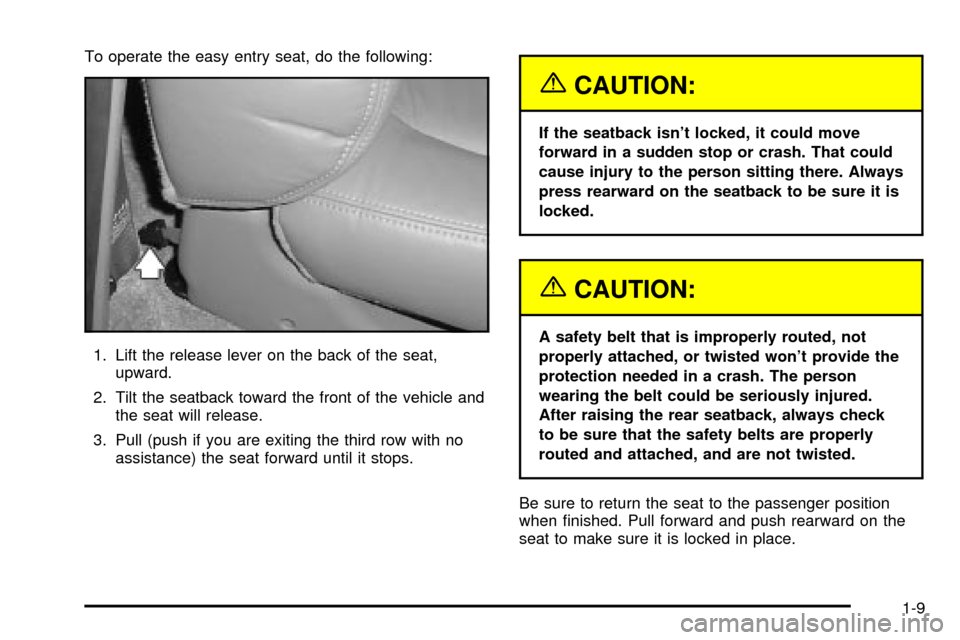
To operate the easy entry seat, do the following:
1. Lift the release lever on the back of the seat,
upward.
2. Tilt the seatback toward the front of the vehicle and
the seat will release.
3. Pull (push if you are exiting the third row with no
assistance) the seat forward until it stops.
{CAUTION:
If the seatback isn't locked, it could move
forward in a sudden stop or crash. That could
cause injury to the person sitting there. Always
press rearward on the seatback to be sure it is
locked.
{CAUTION:
A safety belt that is improperly routed, not
properly attached, or twisted won't provide the
protection needed in a crash. The person
wearing the belt could be seriously injured.
After raising the rear seatback, always check
to be sure that the safety belts are properly
routed and attached, and are not twisted.
Be sure to return the seat to the passenger position
when ®nished. Pull forward and push rearward on the
seat to make sure it is locked in place.
1-9
Page 27 of 486
Tilting the Full Bench Seat
{CAUTION:
If the seatback isn't locked, it could move
forward in a sudden stop or crash. That could
cause injury to the person sitting there. Always
press rearward on the seatback to be sure it is
locked.
1. Fold the seatbacks forward using the instructions
listed previously.
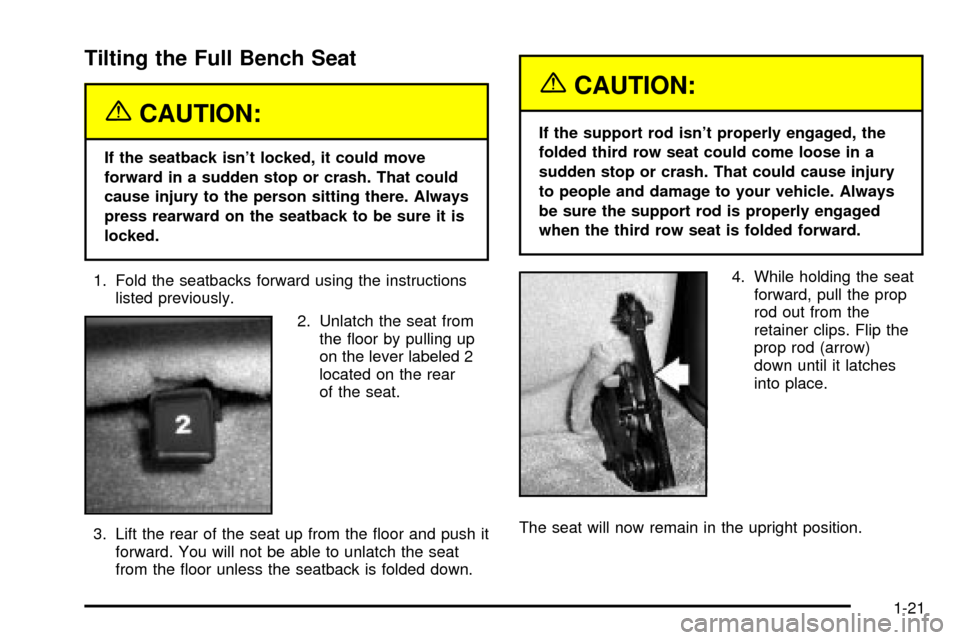
2. Unlatch the seat from
the ¯oor by pulling up
on the lever labeled 2
located on the rear
of the seat.
3. Lift the rear of the seat up from the ¯oor and push it
forward. You will not be able to unlatch the seat
from the ¯oor unless the seatback is folded down.
{CAUTION:
If the support rod isn't properly engaged, the
folded third row seat could come loose in a
sudden stop or crash. That could cause injury
to people and damage to your vehicle. Always
be sure the support rod is properly engaged
when the third row seat is folded forward.
4. While holding the seat
forward, pull the prop
rod out from the
retainer clips. Flip the
prop rod (arrow)
down until it latches
into place.
The seat will now remain in the upright position.
1-21
Page 49 of 486
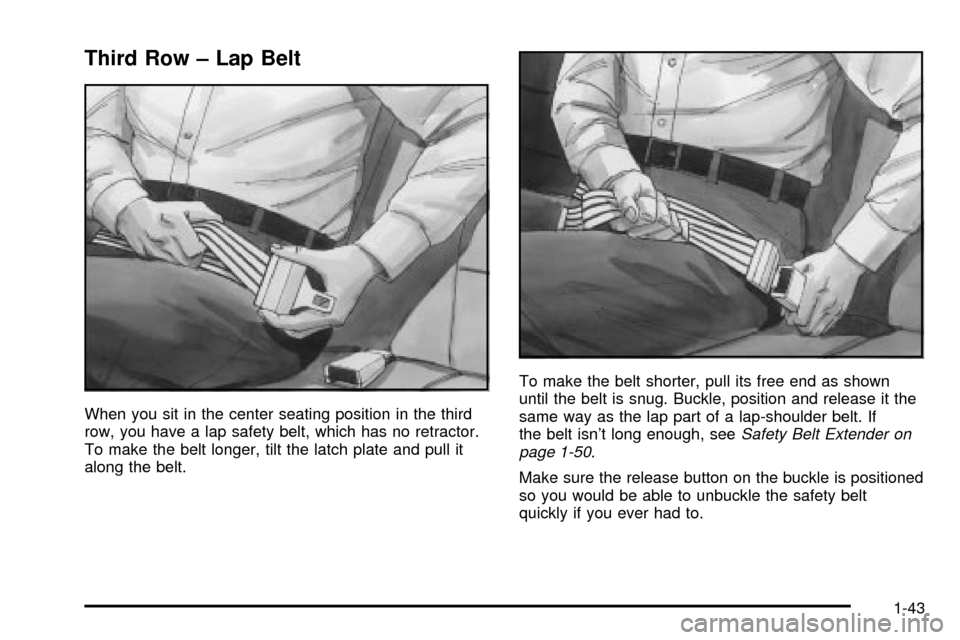
Third Row ± Lap Belt
When you sit in the center seating position in the third
row, you have a lap safety belt, which has no retractor.
To make the belt longer, tilt the latch plate and pull it
along the belt.To make the belt shorter, pull its free end as shown
until the belt is snug. Buckle, position and release it the
same way as the lap part of a lap-shoulder belt. If
the belt isn't long enough, see
Safety Belt Extender on
page 1-50.
Make sure the release button on the buckle is positioned
so you would be able to unbuckle the safety belt
quickly if you ever had to.
1-43
Page 54 of 486
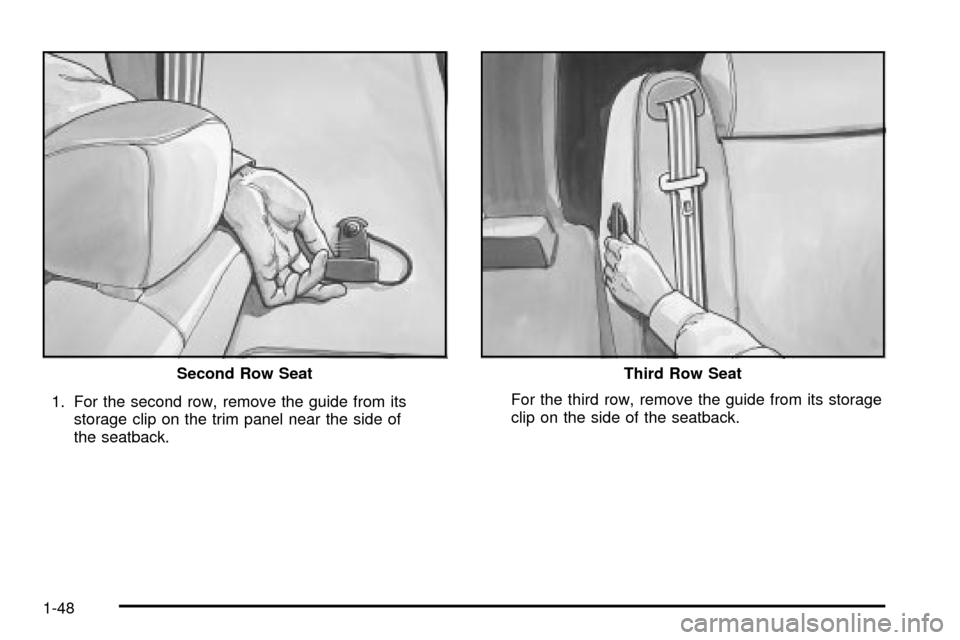
1. For the second row, remove the guide from its
storage clip on the trim panel near the side of
the seatback.For the third row, remove the guide from its storage
clip on the side of the seatback. Second Row Seat
Third Row Seat
1-48
Page 56 of 486
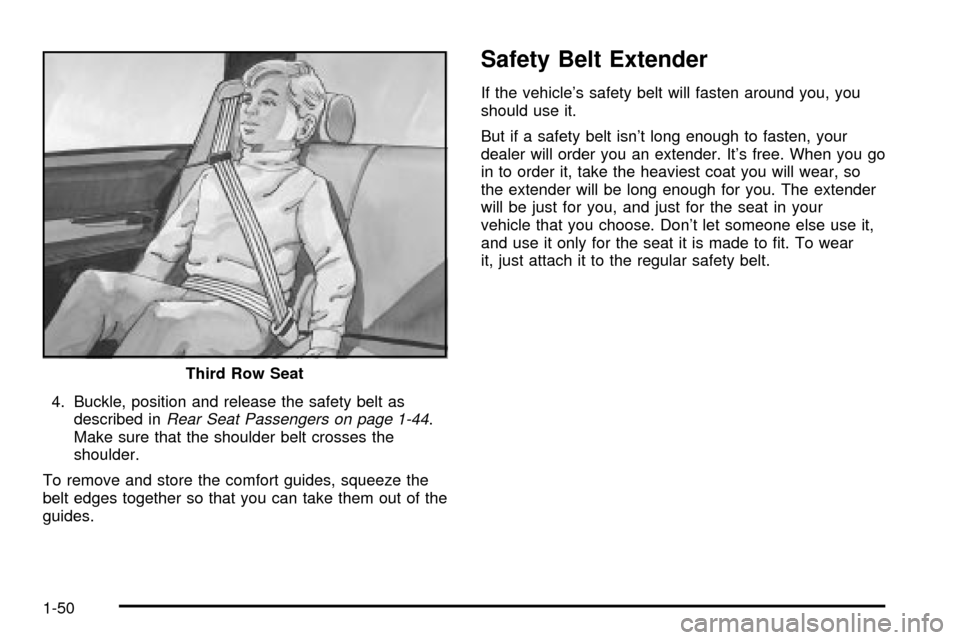
4. Buckle, position and release the safety belt as
described inRear Seat Passengers on page 1-44.
Make sure that the shoulder belt crosses the
shoulder.
To remove and store the comfort guides, squeeze the
belt edges together so that you can take them out of the
guides.
Safety Belt Extender
If the vehicle's safety belt will fasten around you, you
should use it.
But if a safety belt isn't long enough to fasten, your
dealer will order you an extender. It's free. When you go
in to order it, take the heaviest coat you will wear, so
the extender will be long enough for you. The extender
will be just for you, and just for the seat in your
vehicle that you choose. Don't let someone else use it,
and use it only for the seat it is made to ®t. To wear
it, just attach it to the regular safety belt.
Third Row Seat
1-50
Page 69 of 486
Top Strap Anchor Location
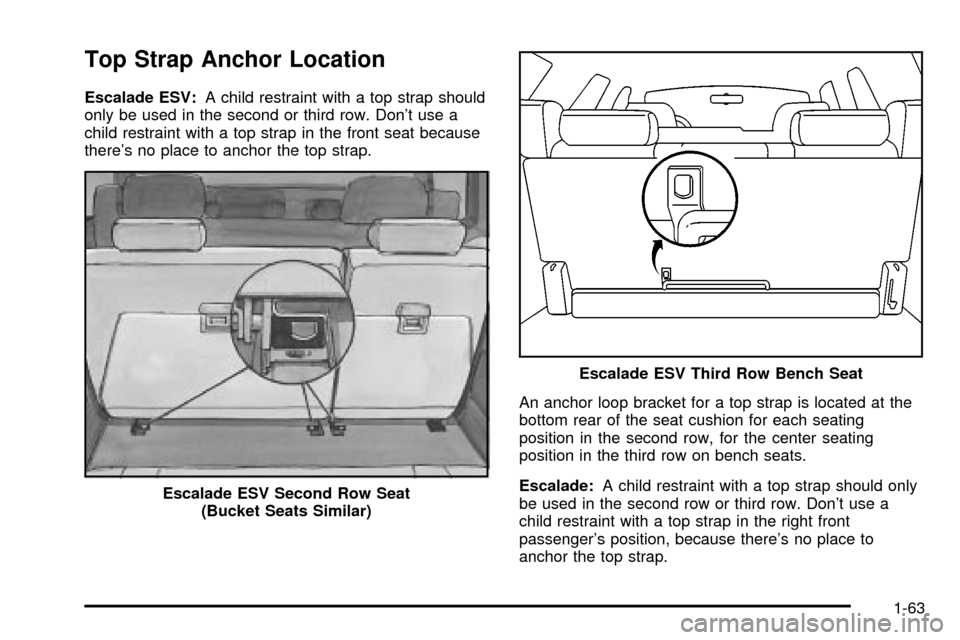
Escalade ESV:A child restraint with a top strap should
only be used in the second or third row. Don't use a
child restraint with a top strap in the front seat because
there's no place to anchor the top strap.
An anchor loop bracket for a top strap is located at the
bottom rear of the seat cushion for each seating
position in the second row, for the center seating
position in the third row on bench seats.
Escalade:A child restraint with a top strap should only
be used in the second row or third row. Don't use a
child restraint with a top strap in the right front
passenger's position, because there's no place to
anchor the top strap. Escalade ESV Second Row Seat
(Bucket Seats Similar)
Escalade ESV Third Row Bench Seat
1-63
Page 70 of 486
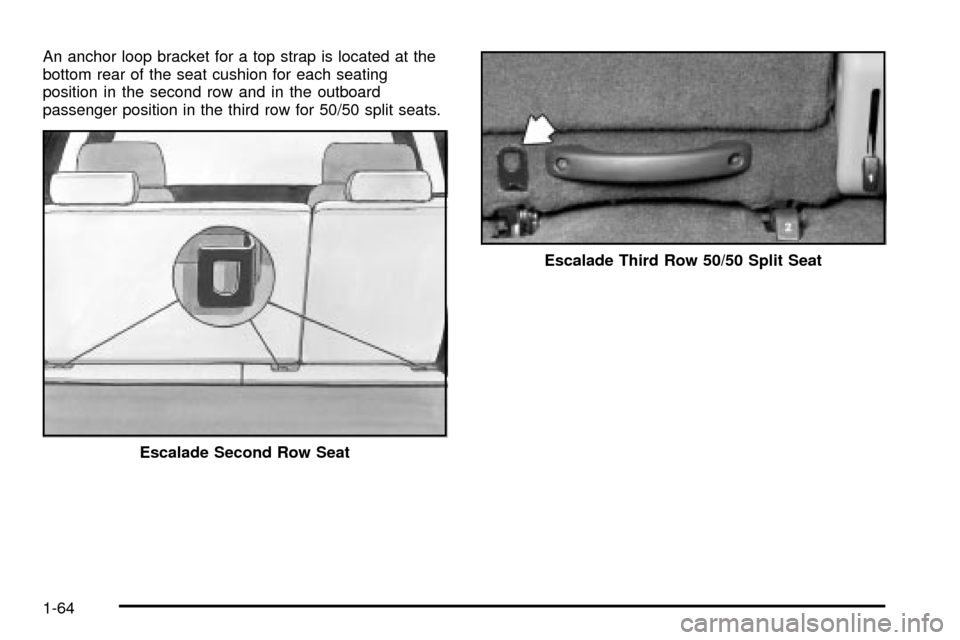
An anchor loop bracket for a top strap is located at the
bottom rear of the seat cushion for each seating
position in the second row and in the outboard
passenger position in the third row for 50/50 split seats.
Escalade Second Row Seat
Escalade Third Row 50/50 Split Seat
1-64
Page 74 of 486
There is no top strap anchor at the third row driver side
seating position. Do not secure a child seat in this
position if a national or local law requires that the top
strap be anchored or if the instructions that come
with the child restraint say that the top strap must be
anchored.
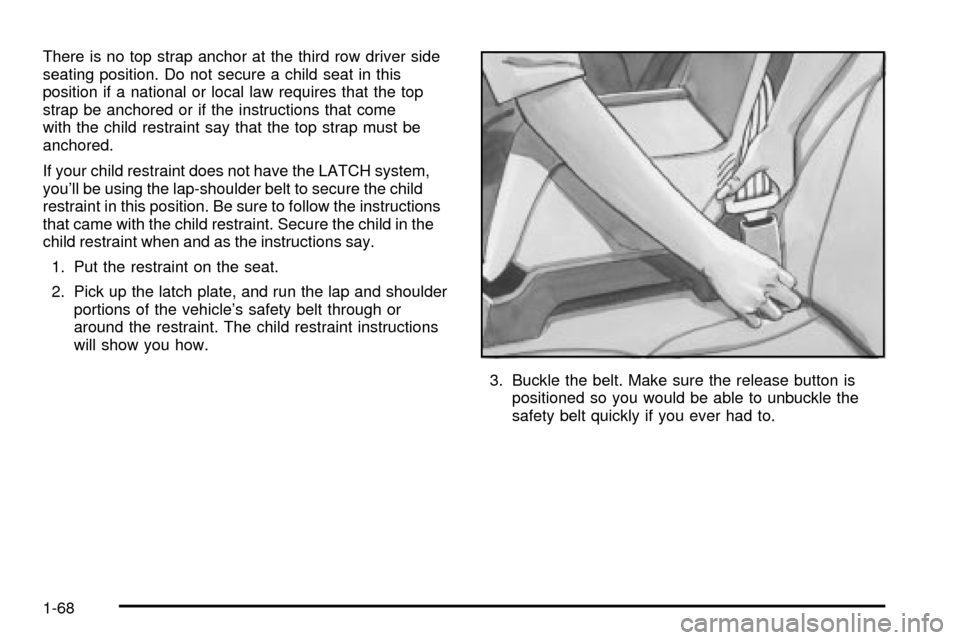
If your child restraint does not have the LATCH system,
you'll be using the lap-shoulder belt to secure the child
restraint in this position. Be sure to follow the instructions
that came with the child restraint. Secure the child in the
child restraint when and as the instructions say.
1. Put the restraint on the seat.
2. Pick up the latch plate, and run the lap and shoulder
portions of the vehicle's safety belt through or
around the restraint. The child restraint instructions
will show you how.
3. Buckle the belt. Make sure the release button is
positioned so you would be able to unbuckle the
safety belt quickly if you ever had to.
1-68
Page 76 of 486
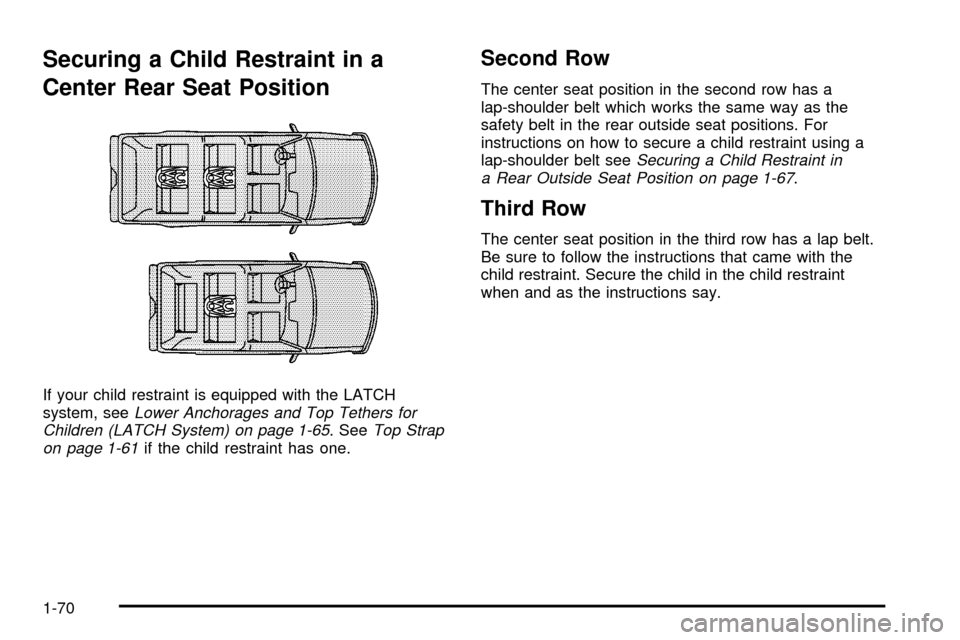
Securing a Child Restraint in a
Center Rear Seat Position
If your child restraint is equipped with the LATCH
system, seeLower Anchorages and Top Tethers for
Children (LATCH System) on page 1-65. SeeTop Strap
on page 1-61if the child restraint has one.
Second Row
The center seat position in the second row has a
lap-shoulder belt which works the same way as the
safety belt in the rear outside seat positions. For
instructions on how to secure a child restraint using a
lap-shoulder belt see
Securing a Child Restraint in
a Rear Outside Seat Position on page 1-67.
Third Row
The center seat position in the third row has a lap belt.
Be sure to follow the instructions that came with the
child restraint. Secure the child in the child restraint
when and as the instructions say.
1-70