transmission oil CADILLAC ESCALADE 2003 2.G Owners Manual
[x] Cancel search | Manufacturer: CADILLAC, Model Year: 2003, Model line: ESCALADE, Model: CADILLAC ESCALADE 2003 2.GPages: 486, PDF Size: 3.32 MB
Page 122 of 486
How long should you keep the coolant heater plugged
in? The answer depends on the outside temperature, the
kind of oil you have, and some other things. Instead
of trying to list everything here, we ask that you contact
your dealer in the area where you'll be parking your
vehicle. The dealer can give you the best advice for that
particular area.
Automatic Transmission Operation
Your vehicle has an electronic shift position indicator
within the instrument panel cluster.
There are several different positions for your shift lever.
PARK (P):This position locks your drive wheels. It's
the best position to use when you start your engine
because your vehicle can't move easily.
{CAUTION:
It is dangerous to get out of your vehicle if the
shift lever is not fully in PARK (P) with the
parking brake ®rmly set. Your vehicle can roll.
CAUTION: (Continued)
CAUTION: (Continued)
Don't leave your vehicle when the engine is
running unless you have to. If you have left the
engine running, the vehicle can move
suddenly. You or others could be injured. To
be sure your vehicle won't move, even when
you're on fairly level ground, always set your
parking brake and move the shift lever to
PARK (P). See ªShifting Into Park (P)º in the
Index. If you're pulling a trailer, see ªTowing a
Trailerº in the Index.
REVERSE (R):Use this gear to back up.
Notice:Shifting to REVERSE (R) while your vehicle
is moving forward could damage your transmission.
Shift to REVERSE (R) only after your vehicle is
stopped.
To rock your vehicle back and forth to get out of snow,
ice or sand without damaging your transmission,
see If You Are Stuck: In Sand, Mud, Ice or Snow on
page 4-48.
2-24
Page 151 of 486
Instrument Panel Overview...............................3-4
Hazard Warning Flashers................................3-6
Other Warning Devices...................................3-7
Horn.............................................................3-7
Tilt Wheel.....................................................3-7
Turn Signal/Multifunction Lever.........................3-8
Exterior Lamps.............................................3-15
Interior Lamps..............................................3-18
Ultrasonic Rear Parking Assist (URPA)............3-20
Accessory Power Outlets...............................3-23
Ashtrays and Cigarette Lighter........................3-23
Analog Clock...............................................3-24
Climate Controls............................................3-24
Automatic Climate Control System...................3-24
Outlet Adjustment.........................................3-31
Rear Climate Control System.........................3-31
Climate Controls Personalization.....................3-33
Warning Lights, Gages and Indicators.............3-34
Instrument Panel Cluster................................3-34
Speedometer and Odometer...........................3-36
Tachometer.................................................3-36
Safety Belt Reminder Light.............................3-36
Air Bag Readiness Light................................3-37
Passenger Air Bag Status Indicator.................3-38Charging System Light..................................3-39
Voltmeter Gage............................................3-40
Brake System Warning Light..........................3-40
Anti-Lock Brake System Warning Light.............3-42
Traction Off Light..........................................3-42
Engine Coolant Temperature Gage..................3-43
Transmission Temperature Gage.....................3-43
Malfunction Indicator Lamp.............................3-44
Oil Pressure Gage........................................3-48
Security Light...............................................3-49
Cruise Control Light......................................3-49
Tow/Haul Mode Light....................................3-49
Fuel Gage...................................................3-50
Low Fuel Warning Light.................................3-50
Driver Information Center (DIC).......................3-51
DIC Operation and Displays...........................3-51
DIC Warnings and Messages.........................3-62
Audio System(s).............................................3-70
Setting the Time...........................................3-70
Radio with Cassette and CD..........................3-71
Rear Seat Entertainment System....................3-85
Navigation/Radio System...............................3-96
Rear Seat Audio (RSA).................................3-97
CD Changer................................................3-99
Section 3 Instrument Panel
3-1
Page 318 of 486
Driving On Grades
Reduce speed and shift to a lower gearbeforeyou start
down a long or steep downgrade. If you don't shift
down, you might have to use your brakes so much that
they would get hot and no longer work well.
You can tow in DRIVE (D). You may want to shift the
transmission to THIRD (3) or, if necessary, a lower gear
selection if the transmission shifts too often (e.g.,
under heavy loads and/or hilly conditions).
You may also want to activate the tow/haul mode if the
transmission shifts too often. See ªTow/Haul Modeº
earlier.
When towing at high altitude on steep uphill grades,
consider the following: Engine coolant will boil at a lower
temperature than at normal altitudes. If you turn your
engine off immediately after towing at high altitude
on steep uphill grades, your vehicle may show signs
similar to engine overheating. To avoid this, let the
engine run while parked (preferably on level ground)
with the automatic transmission in PARK (P) for a
few minutes before turning the engine off. If you do get
the overheat warning, see
Engine Overheating on
page 5-28.
Parking on Hills
{CAUTION:
You really should not park your vehicle, with a
trailer attached, on a hill. If something goes
wrong, your rig could start to move. People
can be injured, and both your vehicle and the
trailer can be damaged.
But if you ever have to park your rig on a hill, here's
how to do it:
1. Apply your regular brakes, but don't shift into
PARK (P) yet.
2. Have someone place chocks under the trailer
wheels.
3. When the wheel chocks are in place, release the
regular brakes until the chocks absorb the load.
4. Reapply the regular brakes. Then apply your
parking brake and shift into PARK (P).
5. Release the regular brakes.
4-62
Page 319 of 486
When You Are Ready to Leave After
Parking on a Hill
1. Apply your regular brakes and hold the pedal down
while you:
·start your engine,
·shift into a gear, and
·release the parking brake.
2. Let up on the brake pedal.
3. Drive slowly until the trailer is clear of the chocks.
4. Stop and have someone pick up and store the
chocks.
Maintenance When Trailer Towing
Your vehicle will need service more often when you're
pulling a trailer. See the Maintenance Schedule for more
on this. Things that are especially important in trailer
operation are automatic transmission ¯uid (don't over®ll),
engine oil, axle lubricant, belts, cooling system and
brake system. Each of these is covered in this manual,
and the Index will help you ®nd them quickly. If
you're trailering, it's a good idea to review these sections
before you start your trip.
Check periodically to see that all hitch nuts and bolts
are tight.
4-63
Page 321 of 486
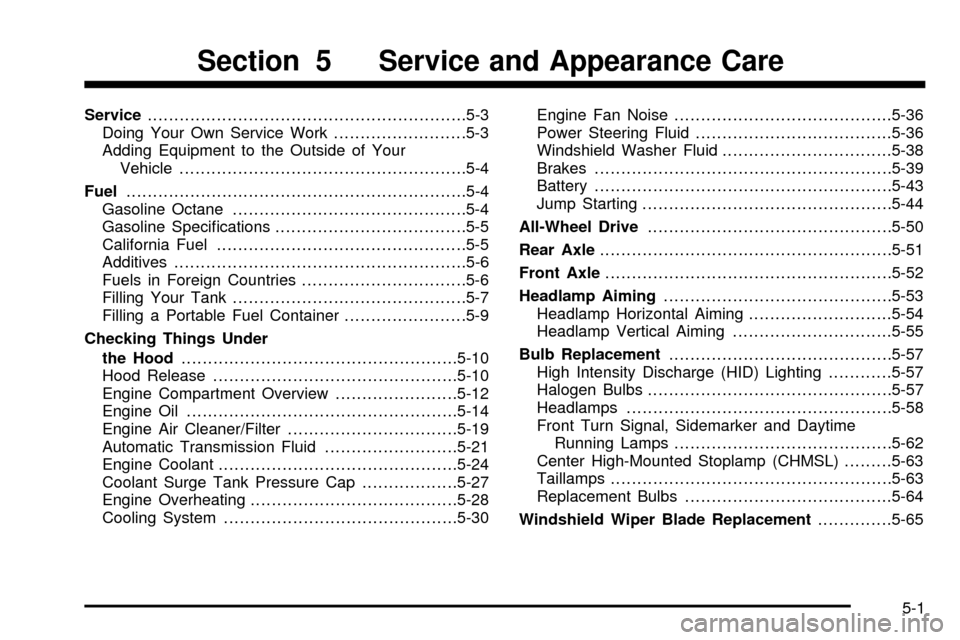
Service............................................................5-3
Doing Your Own Service Work.........................5-3
Adding Equipment to the Outside of Your
Vehicle......................................................5-4
Fuel................................................................5-4
Gasoline Octane............................................5-4
Gasoline Speci®cations....................................5-5
California Fuel...............................................5-5
Additives.......................................................5-6
Fuels in Foreign Countries...............................5-6
Filling Your Tank............................................5-7
Filling a Portable Fuel Container.......................5-9
Checking Things Under
the Hood....................................................5-10
Hood Release..............................................5-10
Engine Compartment Overview.......................5-12
Engine Oil...................................................5-14
Engine Air Cleaner/Filter................................5-19
Automatic Transmission Fluid.........................5-21
Engine Coolant.............................................5-24
Coolant Surge Tank Pressure Cap..................5-27
Engine Overheating.......................................5-28
Cooling System............................................5-30Engine Fan Noise.........................................5-36
Power Steering Fluid.....................................5-36
Windshield Washer Fluid................................5-38
Brakes........................................................5-39
Battery........................................................5-43
Jump Starting...............................................5-44
All-Wheel Drive..............................................5-50
Rear Axle.......................................................5-51
Front Axle......................................................5-52
Headlamp Aiming...........................................5-53
Headlamp Horizontal Aiming...........................5-54
Headlamp Vertical Aiming..............................5-55
Bulb Replacement..........................................5-57
High Intensity Discharge (HID) Lighting............5-57
Halogen Bulbs..............................................5-57
Headlamps..................................................5-58
Front Turn Signal, Sidemarker and Daytime
Running Lamps.........................................5-62
Center High-Mounted Stoplamp (CHMSL).........5-63
Taillamps.....................................................5-63
Replacement Bulbs.......................................5-64
Windshield Wiper Blade Replacement..............5-65
Section 5 Service and Appearance Care
5-1
Page 333 of 486
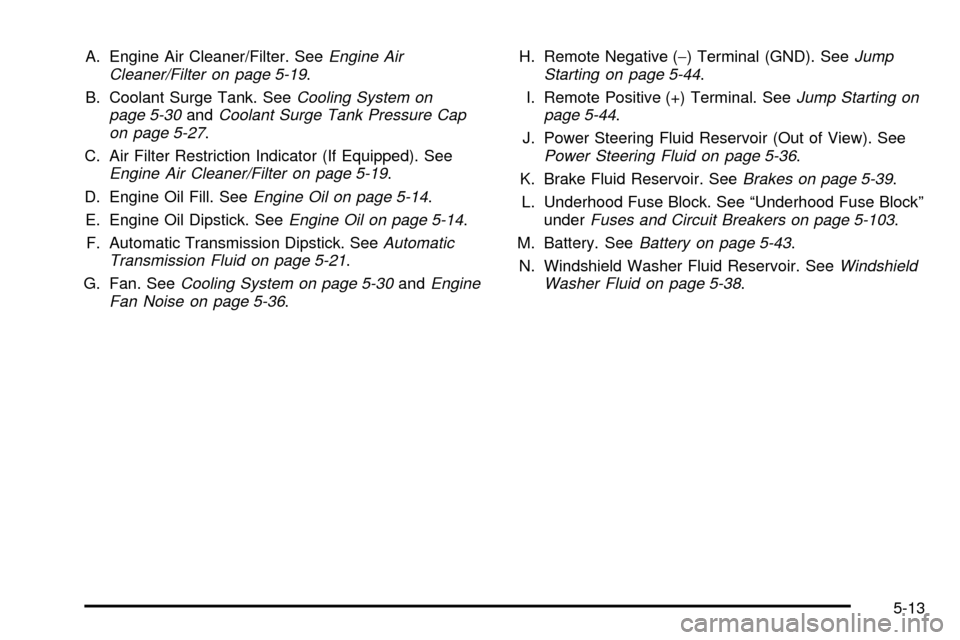
A. Engine Air Cleaner/Filter. SeeEngine Air
Cleaner/Filter on page 5-19.
B. Coolant Surge Tank. See
Cooling System on
page 5-30andCoolant Surge Tank Pressure Cap
on page 5-27.
C. Air Filter Restriction Indicator (If Equipped). See
Engine Air Cleaner/Filter on page 5-19.
D. Engine Oil Fill. See
Engine Oil on page 5-14.
E. Engine Oil Dipstick. See
Engine Oil on page 5-14.
F. Automatic Transmission Dipstick. See
Automatic
Transmission Fluid on page 5-21.
G. Fan. See
Cooling System on page 5-30andEngine
Fan Noise on page 5-36.H. Remote Negative (-) Terminal (GND). See
Jump
Starting on page 5-44.
I. Remote Positive (+) Terminal. See
Jump Starting on
page 5-44.
J. Power Steering Fluid Reservoir (Out of View). See
Power Steering Fluid on page 5-36.
K. Brake Fluid Reservoir. See
Brakes on page 5-39.
L. Underhood Fuse Block. See ªUnderhood Fuse Blockº
under
Fuses and Circuit Breakers on page 5-103.
M. Battery. See
Battery on page 5-43.
N. Windshield Washer Fluid Reservoir. See
Windshield
Washer Fluid on page 5-38.
5-13
Page 341 of 486
Automatic Transmission Fluid
When to Check and Change
A good time to check your automatic transmission ¯uid
level is when the engine oil is changed.
Change both the ¯uid and ®lter every 50,000 miles
(83 000 km) if the vehicle is mainly driven under one or
more of these conditions:
·In heavy city traffic where the outside temperature
regularly reaches 90ÉF (32ÉC) or higher.
·In hilly or mountainous terrain.
·When doing frequent trailer towing.
·Uses such as found in taxi, police or delivery
service.
If you do not use your vehicle under any of these
conditions, change the ¯uid and ®lter every
100,000 miles (166 000 km).
See
Part A: Scheduled Maintenance Services on
page 6-4.
How to Check
Because this operation can be a little difficult, you may
choose to have this done at the dealership service
department.
If you do it yourself, be sure to follow all the instructions
here, or you could get a false reading on the dipstick.
Notice:Too much or too little ¯uid can damage
your transmission. Too much can mean that some
of the ¯uid could come out and fall on hot engine
part or exhaust system parts, starting a ®re.
Too little ¯uid could cause the transmission to
overheat. Be sure to get an accurate reading if you
check your transmission ¯uid.
Wait at least 30 minutes before checking the
transmission ¯uid level if you have been driving:
·When outside temperatures are above 90ÉF (32ÉC).
·At high speed for quite a while.
·In heavy traffic ± especially in hot weather.
·While pulling a trailer.
To get the right reading, the ¯uid should be at normal
operating temperature, which is 180ÉF to 200ÉF
(82ÉC to 93ÉC).
5-21
Page 440 of 486
It is also important to check your oil regularly and keep
it at the proper level.
If the system is ever reset accidentally, you must
change your oil at 3,000 miles (5 000 km) since your
last oil change. Remember to reset the oil life system
whenever the oil is changed. See
Engine Oil on
page 5-14for information on resetting the system.
An Emission Control Service.
Lubricate chassis components with each engine oil
and ®lter change.
Lubricate the front suspension, ball joints, steering
linkage, transmission shift linkage and parking brake
cable guides. Ball joints should not be lubricated unless
their temperature is 10ÉF (-12ÉC) or higher, or they
could be damaged.
See the mileage intervals following for additional
services that may be performed with an engine oil
change and chassis lubrication. After the services are
performed, record the date, odometer reading and
who performed the service on the maintenance record
pages in Part E of this schedule.
7,500 Miles (12 500 km)
qCheck rear/front axle ¯uid level and add ¯uid as
needed. Check constant velocity joints and axle seals
for leaking.
qRotate tires. See
Tire Inspection and Rotation on
page 5-68for proper rotation pattern and additional
information.(See footnote +.)
15,000 Miles (25 000 km)
qInspect engine air cleaner ®lter or change indicator (if
equipped). If necessary, replace the ®lter. If vehicle is
driven in dusty/dirty conditions, inspect ®lter or
change indicator (if equipped) at every engine oil
change. See
Engine Air Cleaner/Filter on page 5-19for more information.An Emission Control Service.
(See footnote ².)
qCheck rear/front axle ¯uid level and add ¯uid as
needed. Check constant velocity joints and axle seals
for leaking.
qRotate tires. See
Tire Inspection and Rotation on
page 5-68for proper rotation pattern and additional
information.(See footnote +.)
6-6
Page 442 of 486
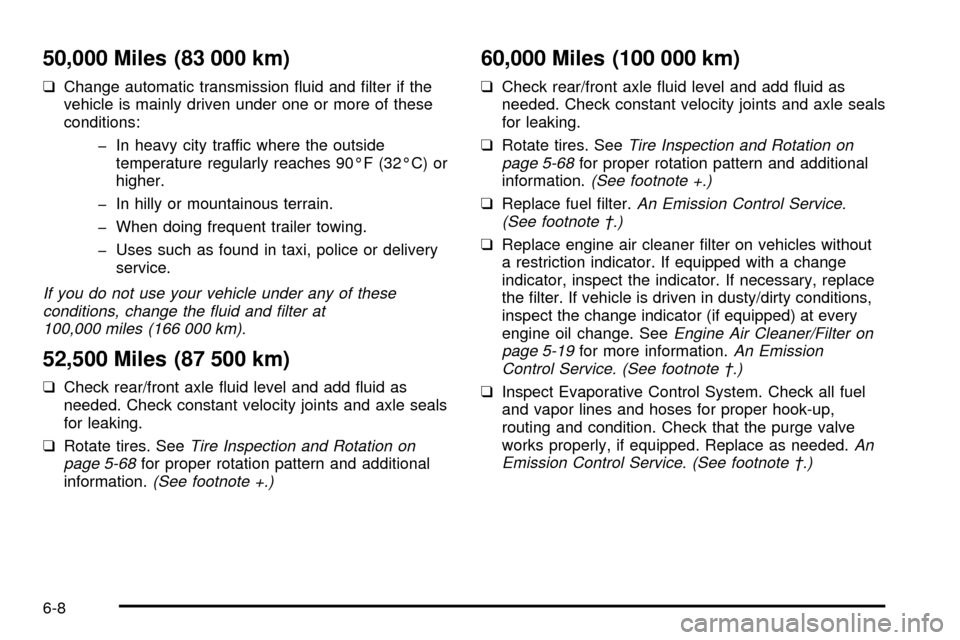
50,000 Miles (83 000 km)
qChange automatic transmission ¯uid and ®lter if the
vehicle is mainly driven under one or more of these
conditions:
þ In heavy city traffic where the outside
temperature regularly reaches 90ÉF (32ÉC) or
higher.
þ In hilly or mountainous terrain.
þ When doing frequent trailer towing.
þ Uses such as found in taxi, police or delivery
service.
If you do not use your vehicle under any of these
conditions, change the ¯uid and ®lter at
100,000 miles (166 000 km).
52,500 Miles (87 500 km)
qCheck rear/front axle ¯uid level and add ¯uid as
needed. Check constant velocity joints and axle seals
for leaking.
qRotate tires. See
Tire Inspection and Rotation on
page 5-68for proper rotation pattern and additional
information.(See footnote +.)
60,000 Miles (100 000 km)
qCheck rear/front axle ¯uid level and add ¯uid as
needed. Check constant velocity joints and axle seals
for leaking.
qRotate tires. See
Tire Inspection and Rotation on
page 5-68for proper rotation pattern and additional
information.(See footnote +.)
qReplace fuel ®lter.An Emission Control Service.
(See footnote ².)
qReplace engine air cleaner ®lter on vehicles without
a restriction indicator. If equipped with a change
indicator, inspect the indicator. If necessary, replace
the ®lter. If vehicle is driven in dusty/dirty conditions,
inspect the change indicator (if equipped) at every
engine oil change. See
Engine Air Cleaner/Filter on
page 5-19for more information.An Emission
Control Service. (See footnote ².)
qInspect Evaporative Control System. Check all fuel
and vapor lines and hoses for proper hook-up,
routing and condition. Check that the purge valve
works properly, if equipped. Replace as needed.
An
Emission Control Service. (See footnote ².)
6-8
Page 452 of 486
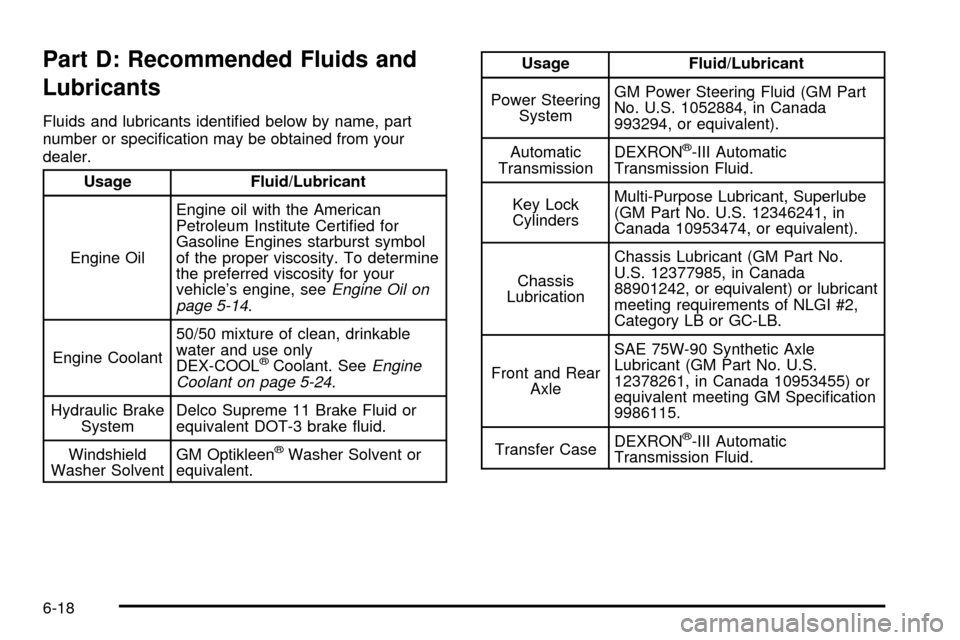
Part D: Recommended Fluids and
Lubricants
Fluids and lubricants identi®ed below by name, part
number or speci®cation may be obtained from your
dealer.
Usage Fluid/Lubricant
Engine OilEngine oil with the American
Petroleum Institute Certi®ed for
Gasoline Engines starburst symbol
of the proper viscosity. To determine
the preferred viscosity for your
vehicle's engine, see
Engine Oil on
page 5-14.
Engine Coolant50/50 mixture of clean, drinkable
water and use only
DEX-COOL
žCoolant. SeeEngine
Coolant on page 5-24.
Hydraulic Brake
SystemDelco Supreme 11 Brake Fluid or
equivalent DOT-3 brake ¯uid.
Windshield
Washer SolventGM Optikleen
žWasher Solvent or
equivalent.
Usage Fluid/Lubricant
Power Steering
SystemGM Power Steering Fluid (GM Part
No. U.S. 1052884, in Canada
993294, or equivalent).
Automatic
TransmissionDEXRON
ž-III Automatic
Transmission Fluid.
Key Lock
CylindersMulti-Purpose Lubricant, Superlube
(GM Part No. U.S. 12346241, in
Canada 10953474, or equivalent).
Chassis
LubricationChassis Lubricant (GM Part No.
U.S. 12377985, in Canada
88901242, or equivalent) or lubricant
meeting requirements of NLGI #2,
Category LB or GC-LB.
Front and Rear
AxleSAE 75W-90 Synthetic Axle
Lubricant (GM Part No. U.S.
12378261, in Canada 10953455) or
equivalent meeting GM Speci®cation
9986115.
Transfer CaseDEXRON
ž-III Automatic
Transmission Fluid.
6-18