CADILLAC ESCALADE 2007 3.G Owners Manual
Manufacturer: CADILLAC, Model Year: 2007, Model line: ESCALADE, Model: CADILLAC ESCALADE 2007 3.GPages: 574, PDF Size: 2.89 MB
Page 311 of 574
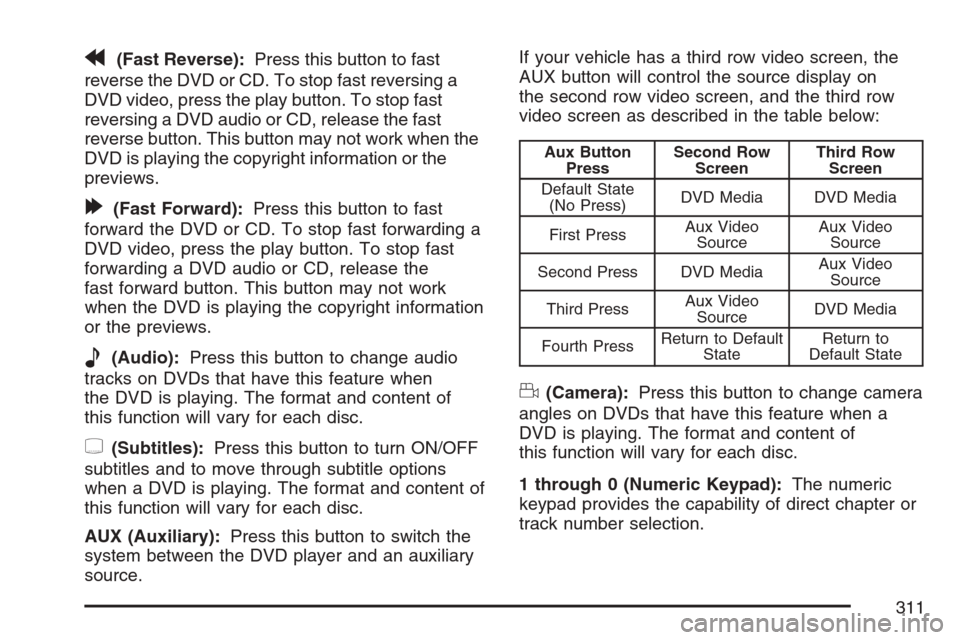
r(Fast Reverse):Press this button to fast
reverse the DVD or CD. To stop fast reversing a
DVD video, press the play button. To stop fast
reversing a DVD audio or CD, release the fast
reverse button. This button may not work when the
DVD is playing the copyright information or the
previews.
[(Fast Forward):Press this button to fast
forward the DVD or CD. To stop fast forwarding a
DVD video, press the play button. To stop fast
forwarding a DVD audio or CD, release the
fast forward button. This button may not work
when the DVD is playing the copyright information
or the previews.
e(Audio):Press this button to change audio
tracks on DVDs that have this feature when
the DVD is playing. The format and content of
this function will vary for each disc.
{(Subtitles):Press this button to turn ON/OFF
subtitles and to move through subtitle options
when a DVD is playing. The format and content of
this function will vary for each disc.
AUX (Auxiliary):Press this button to switch the
system between the DVD player and an auxiliary
source.If your vehicle has a third row video screen, the
AUX button will control the source display on
the second row video screen, and the third row
video screen as described in the table below:
Aux Button
PressSecond Row
ScreenThird Row
Screen
Default State
(No Press)DVD Media DVD Media
First PressAux Video
SourceAux Video
Source
Second Press DVD MediaAux Video
Source
Third PressAux Video
SourceDVD Media
Fourth PressReturn to Default
StateReturn to
Default State
d(Camera):Press this button to change camera
angles on DVDs that have this feature when a
DVD is playing. The format and content of
this function will vary for each disc.
1 through 0 (Numeric Keypad):The numeric
keypad provides the capability of direct chapter or
track number selection.
311
Page 312 of 574

\(Clear):Press this button within three seconds
after entering a numeric selection, to clear all
numeric inputs.
}10 (Double Digit Entries):Press this button to
select chapter or track numbers greater than 9.
Press this button before entering the number.
Battery Replacement
To change the remote control batteries, do the
following:
1. Remove the battery compartment door
located on the bottom of the remote control.
2. Replace the two AA batteries in the
compartment. Make sure that they are
installed correctly, using the diagram on
the inside of the battery compartment.
3. Close the battery door securely.
If the remote control is to be stored for a long
period of time, remove the batteries and keep them
in a cool, dry place.
Problem Recommended Action
No power. The ignition might not be
turned on or in accessory.
The picture does not �ll
the screen. There are
black borders on the
top and bottom or on
both sides or it looks
stretched out.Check the display mode
settings in the setup menu
by pressing the display
menu button on the
remote control.
In auxiliary mode, the
picture moves or scrolls.Check the auxiliary input
connections at both
devices.
The remote control does
not work.Check to make sure there
is no obstruction between
the remote control and
the transmitter window.
Check the batteries to
make sure they are not
dead or installed
incorrectly.
After stopping the
player, I push Play but
sometimes the DVD
starts where I left off
and sometimes at the
beginning.If the stop button was
pressed one time, the
DVD player will resume
playing where the DVD
was stopped. If the stop
button was pressed two
times the DVD player will
begin to play from the
beginning of the DVD.
312
Page 313 of 574
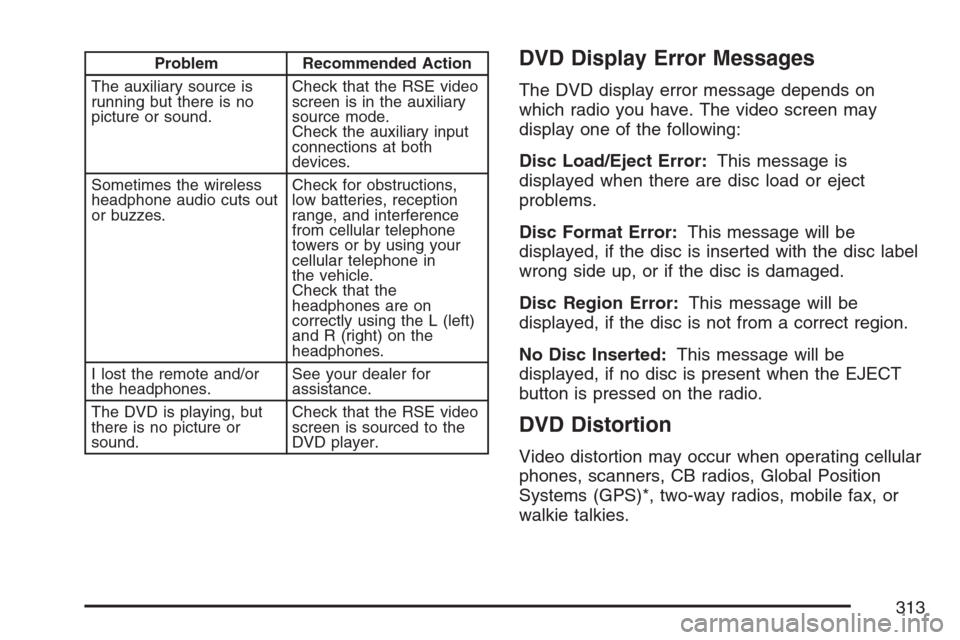
Problem Recommended Action
The auxiliary source is
running but there is no
picture or sound.Check that the RSE video
screen is in the auxiliary
source mode.
Check the auxiliary input
connections at both
devices.
Sometimes the wireless
headphone audio cuts out
or buzzes.Check for obstructions,
low batteries, reception
range, and interference
from cellular telephone
towers or by using your
cellular telephone in
the vehicle.
Check that the
headphones are on
correctly using the L (left)
and R (right) on the
headphones.
I lost the remote and/or
the headphones.See your dealer for
assistance.
The DVD is playing, but
there is no picture or
sound.Check that the RSE video
screen is sourced to the
DVD player.DVD Display Error Messages
The DVD display error message depends on
which radio you have. The video screen may
display one of the following:
Disc Load/Eject Error:This message is
displayed when there are disc load or eject
problems.
Disc Format Error:This message will be
displayed, if the disc is inserted with the disc label
wrong side up, or if the disc is damaged.
Disc Region Error:This message will be
displayed, if the disc is not from a correct region.
No Disc Inserted:This message will be
displayed, if no disc is present when the EJECT
button is pressed on the radio.
DVD Distortion
Video distortion may occur when operating cellular
phones, scanners, CB radios, Global Position
Systems (GPS)*, two-way radios, mobile fax, or
walkie talkies.
313
Page 314 of 574
It may be necessary to turn off the DVD player
when operating one of these devices in or near the
vehicle.
*Excludes the OnStar
®System.
Cleaning the RSE Overhead Console
When cleaning the RSE overhead console surface,
use only a clean cloth dampened with clean
water.
Cleaning the Video Screen
When cleaning the video screen, use only a clean
cloth dampened with clean water. Use care
when directly touching or cleaning the screen, as
damage may result.
Rear Seat Audio (RSA)
This feature allows rear seat passengers to listen
to and control any of the music sources: radio,
CDs, DVDs, or other auxiliary sources. The
rear seat passengers can control the same music
sources the front seat passengers are listening
to (dual control) or a different source. For example,
rear seat passengers can listen to and control a
CD through the headphones, while the driver
listens to the radio through the speakers. The rear
seat passengers have control of the volume for
each set of headphones.
You can operate the RSA functions even when
the main radio is off.
Audio can be heard through wired headphones
(not included) plugged into the jacks on the RSA.
If your vehicle has this feature, audio can also
be heard on Channel 2 of the wireless
headphones.
The audio system allows the rear speakers to
continue playing even when the RSA audio
is active through the headphones.
314
Page 315 of 574
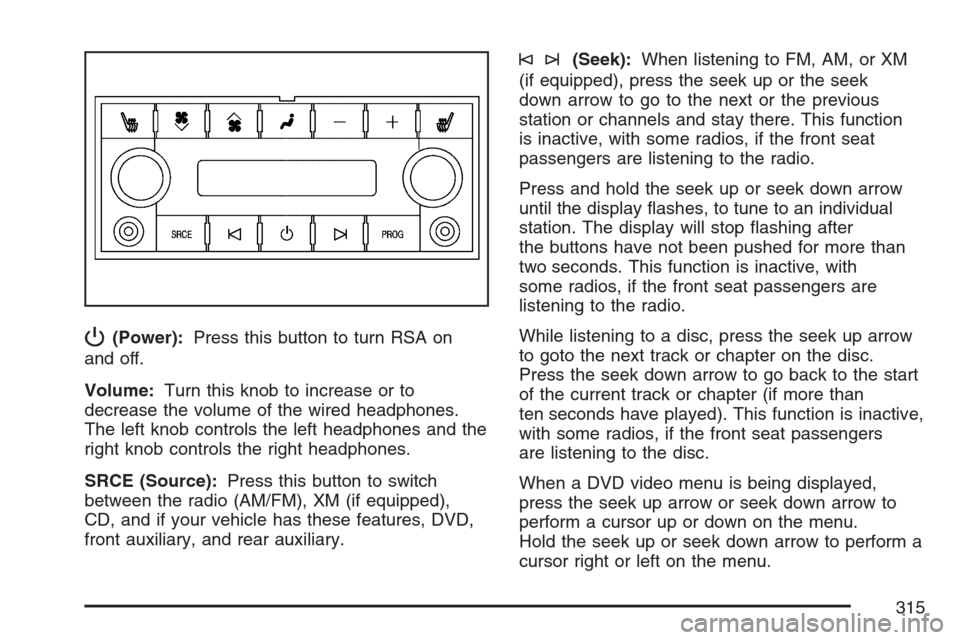
P(Power):Press this button to turn RSA on
and off.
Volume:Turn this knob to increase or to
decrease the volume of the wired headphones.
The left knob controls the left headphones and the
right knob controls the right headphones.
SRCE (Source):Press this button to switch
between the radio (AM/FM), XM (if equipped),
CD, and if your vehicle has these features, DVD,
front auxiliary, and rear auxiliary.
©¨(Seek):When listening to FM, AM, or XM
(if equipped), press the seek up or the seek
down arrow to go to the next or the previous
station or channels and stay there. This function
is inactive, with some radios, if the front seat
passengers are listening to the radio.
Press and hold the seek up or seek down arrow
until the display �ashes, to tune to an individual
station. The display will stop �ashing after
the buttons have not been pushed for more than
two seconds. This function is inactive, with
some radios, if the front seat passengers are
listening to the radio.
While listening to a disc, press the seek up arrow
to goto the next track or chapter on the disc.
Press the seek down arrow to go back to the start
of the current track or chapter (if more than
ten seconds have played). This function is inactive,
with some radios, if the front seat passengers
are listening to the disc.
When a DVD video menu is being displayed,
press the seek up arrow or seek down arrow to
perform a cursor up or down on the menu.
Hold the seek up or seek down arrow to perform a
cursor right or left on the menu.
315
Page 316 of 574
PROG (Program):Press this button to go to the
next preset radio station or channel set on the
main radio. This function is inactive, with
some radios, if the front seat passengers are
listening to the radio.
When a CD or DVD audio is playing, press this
button to go to the beginning of the CD or
DVD audio. This function is inactive, with some
radios, if the front seat passengers are listening to
the disc.
When a disc is playing in the CD or DVD changer,
press this button to select the next disc, if
multiple discs are loaded. This function is inactive,
with some radios, if the front seat passengers
are listening to the disc.
When a DVD video menu is being displayed,
press the PROG button to perform the menu
function, enter.Theft-Deterrent Feature
THEFTLOCK®is designed to discourage theft
of your vehicle’s radio. The feature works
automatically by learning a portion of the Vehicle
Identi�cation Number (VIN). If the radio is
moved to a different vehicle, it will not operate.
If the radio is removed from your vehicle, the
original VIN in the radio can be used to trace the
radio back to your vehicle.
With THEFTLOCK
®activated, the radio will not
operate if stolen.
316
Page 317 of 574
Audio Steering Wheel Controls
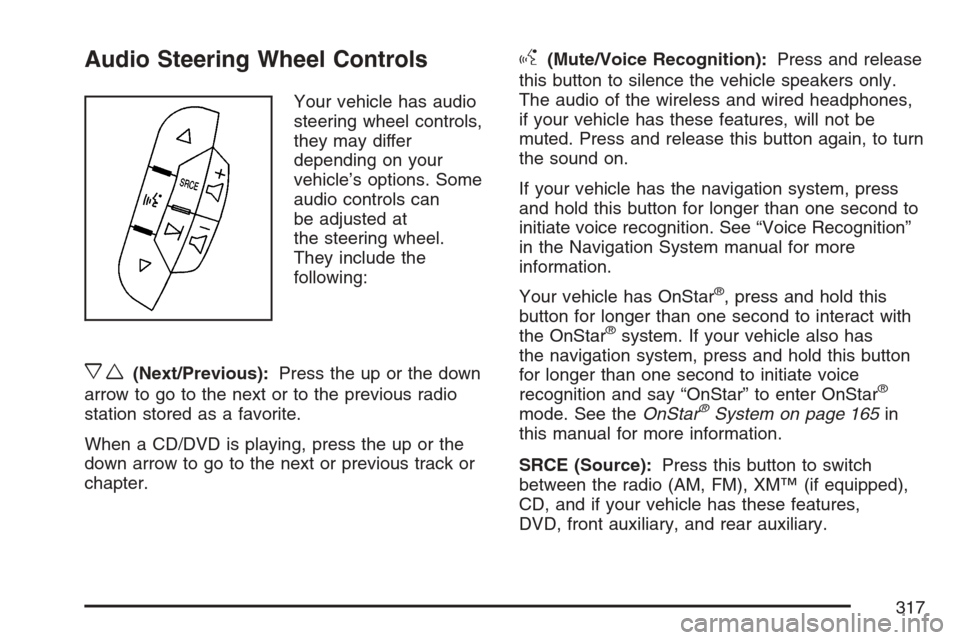
Your vehicle has audio
steering wheel controls,
they may differ
depending on your
vehicle’s options. Some
audio controls can
be adjusted at
the steering wheel.
They include the
following:
xw(Next/Previous):Press the up or the down
arrow to go to the next or to the previous radio
station stored as a favorite.
When a CD/DVD is playing, press the up or the
down arrow to go to the next or previous track or
chapter.
g(Mute/Voice Recognition):Press and release
this button to silence the vehicle speakers only.
The audio of the wireless and wired headphones,
if your vehicle has these features, will not be
muted. Press and release this button again, to turn
the sound on.
If your vehicle has the navigation system, press
and hold this button for longer than one second to
initiate voice recognition. See “Voice Recognition”
in the Navigation System manual for more
information.
Your vehicle has OnStar
®, press and hold this
button for longer than one second to interact with
the OnStar
®system. If your vehicle also has
the navigation system, press and hold this button
for longer than one second to initiate voice
recognition and say “OnStar” to enter OnStar
®
mode. See theOnStar®System on page 165in
this manual for more information.
SRCE (Source):Press this button to switch
between the radio (AM, FM), XM™ (if equipped),
CD, and if your vehicle has these features,
DVD, front auxiliary, and rear auxiliary.
317
Page 318 of 574
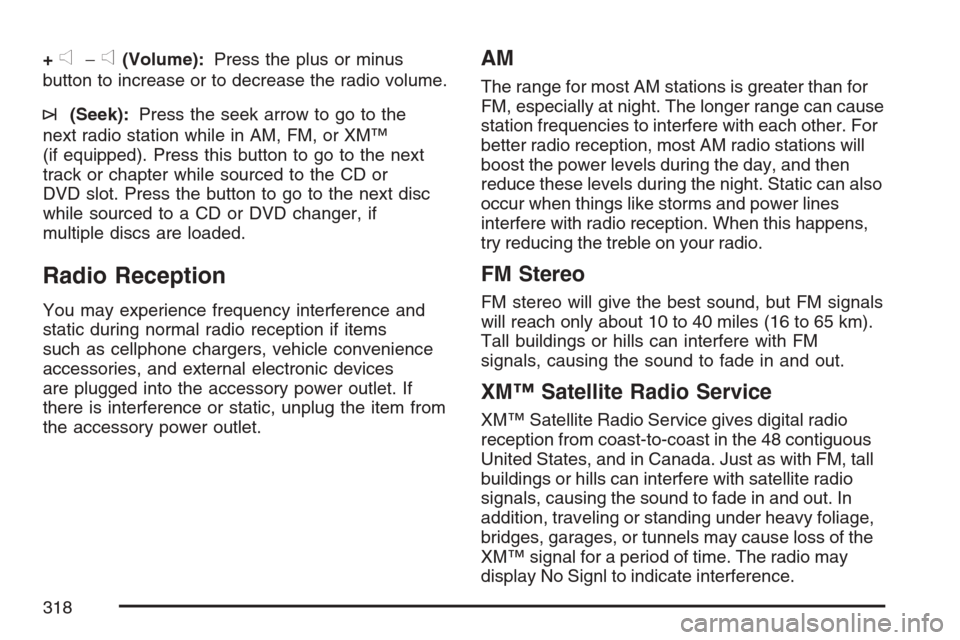
+e−e(Volume):Press the plus or minus
button to increase or to decrease the radio volume.
¨(Seek):Press the seek arrow to go to the
next radio station while in AM, FM, or XM™
(if equipped). Press this button to go to the next
track or chapter while sourced to the CD or
DVD slot. Press the button to go to the next disc
while sourced to a CD or DVD changer, if
multiple discs are loaded.
Radio Reception
You may experience frequency interference and
static during normal radio reception if items
such as cellphone chargers, vehicle convenience
accessories, and external electronic devices
are plugged into the accessory power outlet. If
there is interference or static, unplug the item from
the accessory power outlet.
AM
The range for most AM stations is greater than for
FM, especially at night. The longer range can cause
station frequencies to interfere with each other. For
better radio reception, most AM radio stations will
boost the power levels during the day, and then
reduce these levels during the night. Static can also
occur when things like storms and power lines
interfere with radio reception. When this happens,
try reducing the treble on your radio.
FM Stereo
FM stereo will give the best sound, but FM signals
will reach only about 10 to 40 miles (16 to 65 km).
Tall buildings or hills can interfere with FM
signals, causing the sound to fade in and out.
XM™ Satellite Radio Service
XM™ Satellite Radio Service gives digital radio
reception from coast-to-coast in the 48 contiguous
United States, and in Canada. Just as with FM, tall
buildings or hills can interfere with satellite radio
signals, causing the sound to fade in and out. In
addition, traveling or standing under heavy foliage,
bridges, garages, or tunnels may cause loss of the
XM™ signal for a period of time. The radio may
display No Signl to indicate interference.
318
Page 319 of 574
Care of Your CDs and DVDs
Handle CDs carefully. Store them in their original
cases or other protective cases and away from
direct sunlight and dust. The CD player scans the
bottom surface of the disc. If the surface of a
CD is damaged, such as cracked, broken,
or scratched, the CD will not play properly or not
at all. If the surface of a CD is soiled, take a
soft, lint free cloth or dampen a clean, soft cloth in
a mild, neutral detergent solution mixed with
water, and clean it. Make sure the wiping process
starts from the center to the edge.
Do not touch the bottom side of a CD while
handling it; this could damage the surface. Pick up
CDs by grasping the outer edges or the edge of
the hole and the outer edge.
Care of the CD and DVD Player
The use of CD lens cleaners for CDs is not
advised, due to the risk of contaminating the lens
of the CD optics with lubricants internal to the
CD mechanism.
Rear Side Window Antenna
Your AM-FM antenna is located in the passenger
rear side window. Be sure that the inside
surfaces of the rear side window is not scratched
and that the lines on the glass are not damaged.
If the inside surfaces are damaged, they could
interfere with radio reception.
Notice:Using a razor blade or sharp object
to clear the inside of the rear side windows
may affect radio reception or damage the
antenna. Repairs would not be covered by your
warranty. Do not clear the inside of the rear
side windows with sharp objects.
Notice:Do not apply aftermarket glass tinting
with metallic �lm. The metallic �lm in some
tinting materials will interfere with or distort
the incoming radio reception. Any damage
caused to your antenna due to metallic tinting
materials will not be covered by your
warranty.
Because this antenna is built into your rear side
window, there is a reduced risk of damage caused
by car washes and vandals.
319
Page 320 of 574
If you choose to add an aftermarket cellular
telephone to your vehicle, and the antenna needs
to be attached to the glass, be sure that you
do not damage the grid lines for the AM-FM
antennas or place the cellular telephone antenna
over the grid lines.
XM™ Satellite Radio Antenna
System
The XM™ Satellite Radio antenna is located on
the roof of your vehicle. Keep this antenna clear of
snow and ice build up for clear radio reception.
If your vehicle has a sunroof, the performance of
the XM™ system may be affected if the sunroof
is open.
Loading items onto the roof of your vehicle can
interfere with the performance of the XM™ system.
Make sure the XM™ Satellite Radio antenna is
not obstructed.
Chime Level Adjustment
The radio is used to adjust the vehicle’s chime
level. To change the volume level of the chime,
press and hold pushbutton 6 with the ignition
on and the radio power off. The volume level will
change from the normal level to loud, and
LOUD will appear on the radio display. To change
back to the default or normal setting, press and
hold pushbutton 6 again. The volume level
will change from the loud level to normal, and
NORMAL will appear on the radio display. Each
time the chime volume is changed, three
chimes will sound to indicate the new volume
selected. Removing the radio and not replacing it
with a factory radio or chime module will disable
vehicle chimes.
320