oil change CADILLAC ESCALADE 2008 3.G Owners Manual
[x] Cancel search | Manufacturer: CADILLAC, Model Year: 2008, Model line: ESCALADE, Model: CADILLAC ESCALADE 2008 3.GPages: 490, PDF Size: 2.65 MB
Page 123 of 490
Starting Procedure
1. With your foot off the accelerator pedal, turn the
ignition key to START. When the engine starts,
let go of the key. The idle speed will go down as
your engine gets warm. Do not race the engine
immediately after starting it. Operate the engine and
transmission gently to allow the oil to warm up
and lubricate all moving parts.
Your vehicle has a Computer-Controlled Cranking
System. This feature assists in starting the
engine and protects components. If the ignition key
is turned to the START position, and then released
when the engine begins cranking, the engine
will continue cranking for a few seconds or until the
vehicle starts. If the engine does not start and
the key is held in START for many seconds,
cranking will be stopped after 15 seconds to prevent
cranking motor damage. To prevent gear damage,
this system also prevents cranking if the engine
is already running. Engine cranking can be stopped
by turning the ignition switch to the
ACC/ACCESSORY or LOCK/OFF position.
Notice:Cranking the engine for long periods of
time, by returning the key to the START position
immediately after cranking has ended, can overheat
and damage the cranking motor, and drain the
battery. Wait at least 15 seconds between each try,
to let the cranking motor cool down.2. If the engine does not start after 5-10 seconds,
especially in very cold weather (below 0°F
or−18°C), it could be �ooded with too much
gasoline. Try pushing the accelerator pedal all the
way to the �oor and holding it there as you hold
the key in START for up to a maximum of
15 seconds. Wait at least 15 seconds between
each try, to allow the cranking motor to cool down.
When the engine starts, let go of the key and
accelerator. If the vehicle starts brie�y but then
stops again, do the same thing. This clears the extra
gasoline from the engine. Do not race the engine
immediately after starting it. Operate the engine and
transmission gently until the oil warms up and
lubricates all moving parts.
Notice:The engine is designed to work with the
electronics in your vehicle. If you add electrical
parts or accessories, you could change the way the
engine operates. Before adding electrical equipment,
check with your dealer/retailer. If you do not, your
engine might not perform properly. Any resulting
damage would not be covered by your vehicle’s
warranty.
2-27
Page 212 of 490
Timer
Press the trip/fuel button until TIMER displays.
This display can be used as a timer.
To start the timer, press the set/reset button while
TIMER is displayed. The display will show the amount
of time that has passed since the timer was last
reset, not including time the ignition is off. Time will
continue to be counted as long as the ignition is
on, even if another display is being shown on the
DIC. The timer will record up to 99 hours, 59 minutes
and 59 seconds (99:59:59) after which the display
will return to zero.
To stop the timer, press the set/reset button brie�y while
TIMER is displayed.
To reset the timer to zero, press and hold the set/reset
button while TIMER is displayed.
Transmission Temperature
Press the trip/fuel button until TRANS TEMP displays.
This display shows the temperature of the automatic
transmission �uid in either degrees Fahrenheit (°F)
or degrees Celsius (°C).
Blank Display
This display shows no information.
Vehicle Information Menu Items
T
(Vehicle Information):Press this button to scroll
through the following menu items:
Oil Life
Press the vehicle information button until OIL LIFE
REMAINING displays. This display shows an estimate of
the oil’s remaining useful life. If you see 99% OIL LIFE
REMAINING on the display, that means 99% of the
current oil life remains. The engine oil life system will alert
you to change the oil on a schedule consistent with your
driving conditions.
When the remaining oil life is low, the CHANGE ENGINE
OIL SOON message will appear on the display. See
“CHANGE ENGINE OIL SOON” underDIC Warnings
and Messages on page 3-52. You should change the
oil as soon as you can. SeeEngine Oil on page 5-14.
In addition to the engine oil life system monitoring the
oil life, additional maintenance is recommended in the
Maintenance Schedule in this manual. SeeScheduled
Maintenance on page 6-4for more information.
Remember, you must reset the OIL LIFE display yourself
after each oil change. It will not reset itself. Also, be
careful not to reset the OIL LIFE display accidentally at
any time other than when the oil has just been changed.
It cannot be reset accurately until the next oil change.
To reset the engine oil life system, seeEngine Oil Life
System on page 5-16.
3-50
Page 214 of 490
DIC Warnings and Messages
Messages are displayed on the DIC to notify the driver
that the status of the vehicle has changed and that
some action may be needed by the driver to correct the
condition. Multiple messages may appear one after
another.
Some messages may not require immediate action, but
you can press any of the DIC buttons on the instrument
panel to acknowledge that you received the messages
and to clear them from the display.
Some messages cannot be cleared from the DIC
display because they are more urgent. These messages
require action before they can be cleared. You should
take any messages that appear on the display seriously
and remember that clearing the messages will only
make the messages disappear, not correct the problem.
The following are the possible messages that can be
displayed and some information about them.
CHANGE ENGINE OIL SOON
This message displays when the engine oil needs to be
changed. When you change the engine oil, be sure
to reset the CHANGE ENGINE OIL SOON message.
SeeEngine Oil Life System on page 5-16for information
on how to reset the message. SeeEngine Oil on
page 5-14andScheduled Maintenance on page 6-4for
more information.
CHECK TIRE PRESSURE
This message displays when the pressure in one or
more of the vehicle’s tires needs to be checked.
This message also displays LEFT FRONT, RIGHT
FRONT, LEFT REAR, or RIGHT REAR to indicate which
tire needs to be checked. You can receive more than
one tire pressure message at a time. To read the other
messages that may have been sent at the same
time, press the set/reset button. If a tire pressure
message appears on the DIC, stop as soon as you can.
Have the tire pressures checked and set to those
shown on the Tire Loading Information label. SeeTires
on page 5-54,Loading Your Vehicle on page 4-35,
andInflation - Tire Pressure on page 5-60. The DIC also
shows the tire pressure values. SeeDIC Operation
and Displays on page 3-48. If the tire pressure is low,
the low tire pressure warning light comes on. See
Tire Pressure Light on page 3-42.
DRIVER DOOR OPEN
This message displays and a chime sounds if the driver
door is not fully closed and the vehicle is in a drive
gear. Stop and turn off the vehicle, check the door
for obstructions, and close the door again. Check to
see if the message still appears on the DIC.
3-52
Page 241 of 490
Using the Six-Disc CD Changer
The CD player can play the smaller 3 inch (8 cm)
single CDs with an adapter ring. Full-size CDs and
the smaller CDs are loaded in the same manner.
When a CD is inserted, the CD functions display
above the pushbuttons, in place of the preset stations,
if programmed.
M(Load):Press to load CDs into the CD player.
This CD player holds up to six CDs.
To insert one CD, do the following:
1. The ignition and the radio can be on or off.
2. Press and release the
Mbutton. Please Wait
displays.
3. When INSERT displays, insert a CD partway into
the slot, label side up. The player pulls the CD in.
When a CD is inserted, CD displays. The number of the
CD and the track number also displays if the radio is on.
If the radio is on, the CD begins to play automatically.
To insert multiple CDs, do the following:
1. The ignition and the radio can be on or off.
2. Press and hold the
Mbutton for two seconds.
Please Wait displays and a beep sounds.3. When INSERT displays, insert a CD partway into
the slot, label side up. The player pulls the CD in.
Do not load a CD until INSERT displays. The
CD player takes up to six CDs. Do not try to load
more than six. If you want to load less than six CDs,
load the desired amount. The CD player times
out when it does not receive any more CDs and the
last CD loaded begins to play.
If the radio is on, the last CD loaded begins to play
automatically.
Care of Your CDs
If playing a CD-R, the sound quality can be reduced due
to CD-R quality, the method of recording, the quality of
the music that has been recorded, and the way the CD-R
has been handled. Handle them carefully. Store CD-R(s)
in their original cases or other protective cases and away
from direct sunlight and dust. The CD and DVD player
scans the bottom surface of the disc. If the surface of a
CD is damaged, such as cracked, broken, or scratched,
the CD does not play properly or not at all. Do not touch
the bottom side of a CD while handling it; this could
damage the surface. Pick up CDs by grasping the outer
edges or the edge of the hole and the outer edge.
If the surface of a CD is soiled, take a soft, lint free cloth
or dampen a clean, soft cloth in a mild, neutral detergent
solution mixed with water, and clean it. Make sure the
wiping process starts from the center to the edge.
3-79
Page 322 of 490
Turn Signals When Towing a Trailer
The arrows on your instrument panel will �ash whenever
you signal a turn or lane change. Properly hooked up,
the trailer lamps will also �ash, telling other drivers you’re
about to turn, change lanes or stop.
When towing a trailer, the arrows on your instrument
panel will �ash for turns even if the bulbs on the trailer
are burned out. Thus, you may think drivers behind you
are seeing your signal when they are not. It’s important
to check occasionally to be sure the trailer bulbs are
still working.
Driving On Grades
Reduce speed and shift to a lower gearbeforeyou start
down a long or steep downgrade. If you don’t shift down,
you might have to use your brakes so much that they
would get hot and no longer work well.
You can tow in DRIVE (D). If the transmission shifts too
often (e.g., under heavy loads and/or hilly conditions)
you may want to shift the transmission to a lower gear
selection or enable the Tow/Haul mode. See “Tow/Haul
Mode” earlier in this section.
When towing at high altitude on steep uphill grades,
consider the following: Engine coolant at higher altitudes
will boil at a lower temperature than at or near sea level.
If you turn your engine off immediately after towing
at high altitude on steep uphill grades, your vehicle
may show signs similar to engine overheating.To avoid this, let the engine run while parked (preferably
on level ground) with the automatic transmission in
PARK (P) for at least �ve minutes before turning the
engine off. If you do get the overheat warning, see
Engine Overheating on page 5-26.
Parking on Hills
{CAUTION:
You really should not park your vehicle, with
a trailer attached, on a hill. If something goes
wrong, your rig could start to move. People can
be injured, and both your vehicle and the trailer
can be damaged.
But if you ever have to park your rig on a hill, here’s
how to do it:
1. Apply your regular brakes, but don’t shift into
PARK (P) yet.
2. Have someone place chocks under the trailer wheels.
3. When the wheel chocks are in place, release the
regular brakes until the chocks absorb the load.
4. Reapply the regular brakes. Then apply your
parking brake and shift into PARK (P).
5. Release the regular brakes.
4-54
Page 340 of 490
Your vehicle’s engine is �lled at the factory with a
Mobil 1®synthetic oil, which meets all requirements for
your vehicle.
Substitute Engine Oil: When adding oil to maintain
engine oil level, oil meeting GM Standard GM4718M
may not be available. You can add substitute oil
designated SAE 5W-30 with the starburst symbol at all
temperatures. Substitute oil not meeting GM Standard
GM4718M should not be used for an oil change.
Engine Oil Additives
Do not add anything to the oil. The recommended oils
with the starburst symbol that meet GM standards are all
you need for good performance and engine protection.
Engine Oil Life System
When to Change Engine Oil
Your vehicle has a computer system that lets you know
when to change the engine oil and �lter. This is based
on engine revolutions and engine temperature, and not
on mileage. Based on driving conditions, the mileage
at which an oil change will be indicated can vary
considerably. For the oil life system to work properly,
you must reset the system every time the oil is changed.When the system has calculated that oil life has been
diminished, it will indicate that an oil change is
necessary. A CHANGE ENGINE OIL SOON message
will come on. SeeDIC Warnings and Messages on
page 3-52. Change the oil as soon as possible within the
next 600 miles (1 000 km). It is possible that, if you
are driving under the best conditions, the oil life system
might not indicate that an oil change is necessary for
over a year. However, the engine oil and �lter must be
changed at least once a year and at this time the
system must be reset. Your dealer/retailer has trained
service people who will perform this work using genuine
parts and reset the system. It is also important to
check the oil regularly and keep it at the proper level.
If the system is ever reset accidentally, you must change
the oil at 3,000 miles (5 000 km) since your last oil
change. Remember to reset the oil life system whenever
the oil is changed.How to Reset the Engine Oil Life System
The Engine Oil Life System calculates when to
change the engine oil and �lter based on vehicle use.
Whenever the oil is changed, reset the system so it can
calculate when the next oil change is required. If a
situation occurs where you change the oil prior to a
CHANGE ENGINE OIL SOON message being
turned on, reset the system.
5-16
Page 341 of 490
Always reset the engine oil life to 100% after every oil
change. It will not reset itself. To reset the Engine
Oil Life System:
1. Display the OIL LIFE REMAINING on the DIC.
2. Press and hold the SET/RESET button on the DIC
for more than �ve seconds. The oil life will change
to 100%.
If the CHANGE ENGINE OIL SOON message comes
back on when you start your vehicle, the Engine Oil Life
System has not reset. Repeat the procedure.
What to Do with Used Oil
Used engine oil contains certain elements that can be
unhealthy for your skin and could even cause cancer.
Do not let used oil stay on your skin for very long.
Clean your skin and nails with soap and water, or a good
hand cleaner. Wash or properly dispose of clothing or
rags containing used engine oil. See the manufacturer’s
warnings about the use and disposal of oil products.
Used oil can be a threat to the environment. If you
change your own oil, be sure to drain all the oil from the
�lter before disposal. Never dispose of oil by putting it in
the trash, pouring it on the ground, into sewers, or into
streams or bodies of water. Instead, recycle it by taking it
to a place that collects used oil. If you have a problem
properly disposing of used oil, ask your dealer/retailer,
a service station, or a local recycling center for help.
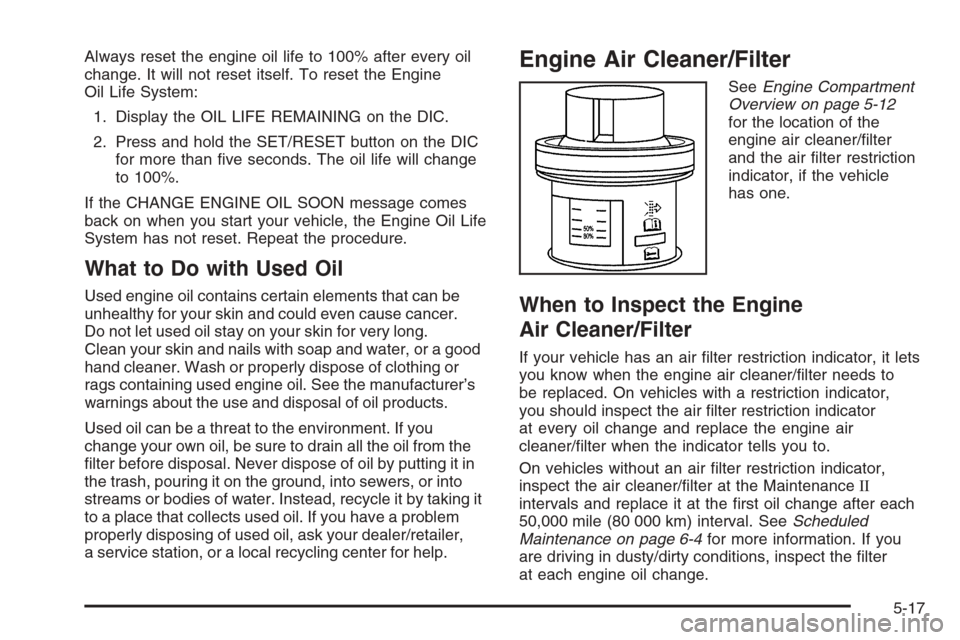
Engine Air Cleaner/Filter
SeeEngine Compartment
Overview on page 5-12
for the location of the
engine air cleaner/�lter
and the air �lter restriction
indicator, if the vehicle
has one.
When to Inspect the Engine
Air Cleaner/Filter
If your vehicle has an air �lter restriction indicator, it lets
you know when the engine air cleaner/�lter needs to
be replaced. On vehicles with a restriction indicator,
you should inspect the air �lter restriction indicator
at every oil change and replace the engine air
cleaner/�lter when the indicator tells you to.
On vehicles without an air �lter restriction indicator,
inspect the air cleaner/�lter at the MaintenanceII
intervals and replace it at the �rst oil change after each
50,000 mile (80 000 km) interval. SeeScheduled
Maintenance on page 6-4for more information. If you
are driving in dusty/dirty conditions, inspect the �lter
at each engine oil change.
5-17
Page 352 of 490
Overheated Engine Protection
Operating Mode
If an overheated engine condition exists and the
ENGINE POWER IS REDUCED message is displayed,
an overheat protection mode which alternates �ring
groups of cylinders helps prevent engine damage.
In this mode, you will notice a loss in power and
engine performance. This operating mode allows your
vehicle to be driven to a safe place in an emergency.
Driving extended miles (km) and/or towing a trailer in
the overheat protection mode should be avoided.
Notice:After driving in the overheated engine
protection operating mode, to avoid engine damage,
allow the engine to cool before attempting any
repair. The engine oil will be severely degraded.
Repair the cause of coolant loss, change the oil
and reset the oil life system. SeeEngine Oil
on page 5-14.
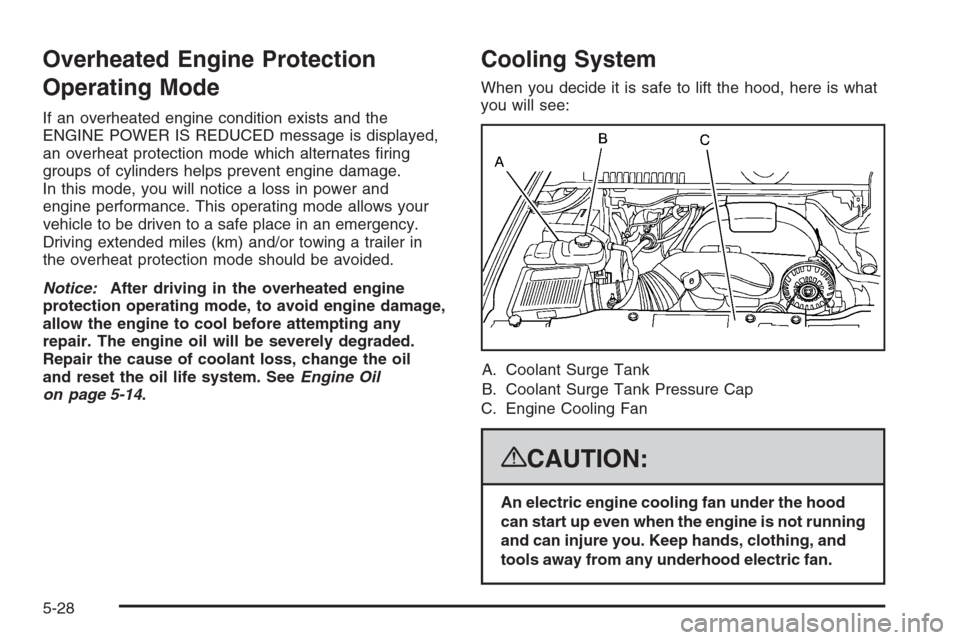
Cooling System
When you decide it is safe to lift the hood, here is what
you will see:
A. Coolant Surge Tank
B. Coolant Surge Tank Pressure Cap
C. Engine Cooling Fan
{CAUTION:
An electric engine cooling fan under the hood
can start up even when the engine is not running
and can injure you. Keep hands, clothing, and
tools away from any underhood electric fan.
5-28
Page 410 of 490
{CAUTION:
Rust or dirt on a wheel, or on the parts to
which it is fastened, can make wheel nuts
become loose after time. The wheel could
come off and cause an accident. When you
change a wheel, remove any rust or dirt from
places where the wheel attaches to the vehicle.
In an emergency, you can use a cloth or a
paper towel to do this; but be sure to use a
scraper or wire brush later, if needed, to get all
the rust or dirt off. SeeChanging a Flat Tire on
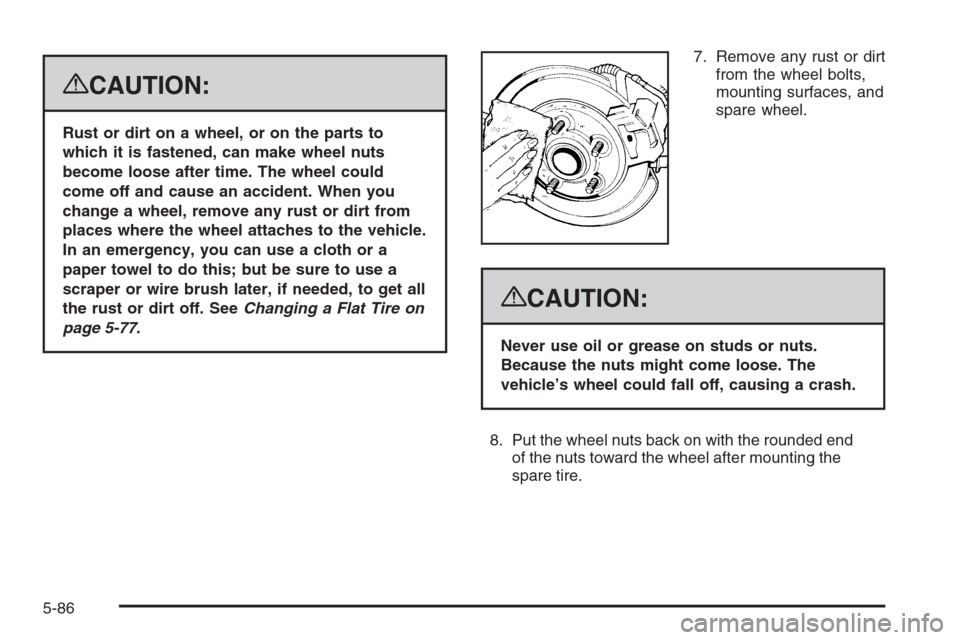
page 5-77.7. Remove any rust or dirt
from the wheel bolts,
mounting surfaces, and
spare wheel.
{CAUTION:
Never use oil or grease on studs or nuts.
Because the nuts might come loose. The
vehicle’s wheel could fall off, causing a crash.
8. Put the wheel nuts back on with the rounded end
of the nuts toward the wheel after mounting the
spare tire.
5-86
Page 422 of 490
To clean:
1. Saturate a lint-free, clean white cloth with water or
club soda.
2. Wring the cloth to remove excess moisture.
3. Start on the outside edge of the soil and gently rub
toward the center. Continue cleaning, using a clean
area of the cloth each time it becomes soiled.
4. Continue to gently rub the soiled area until the
cleaning cloth remains clean.
5. If the soil is not completely removed, use a mild
soap solution and repeat the cleaning process
that was used with plain water.
If any of the soil remains, a commercial fabric cleaner or
spot lifter may be necessary. When a commercial
upholstery cleaner or spot lifter is to be used, test a
small hidden area for colorfastness �rst. If the locally
cleaned area gives any impression that a ring formation
may result, clean the entire surface.
After the cleaning process has been completed, a paper
towel can be used to blot excess moisture from the
fabric or carpet.Leather
A soft cloth dampened with water can be used to
remove dust. If a more thorough cleaning is necessary,
a soft cloth dampened with a mild soap solution can
be used. Allow the leather to dry naturally. Do not
use heat to dry. Never use steam to clean leather.
Never use spot lifters or spot removers on leather.
Many commercial leather cleaners and coatings that are
sold to preserve and protect leather may permanently
change the appearance and feel of your leather and are
not recommended. Do not use silicone or wax-based
products, or those containing organic solvents to clean
your vehicle’s interior because they can alter the
appearance by increasing the gloss in a non-uniform
manner. Never use shoe polish on leather.
Instrument Panel, Vinyl, and Other
Plastic Surfaces
A soft cloth dampened with water may be used to
remove dust. If a more thorough cleaning is necessary,
a clean soft cloth dampened with a mild soap solution
can be used to gently remove dust and dirt.
Never use spot lifters or removers on plastic surfaces.
5-98