display CADILLAC ESCALADE 2009 3.G Owners Manual
[x] Cancel search | Manufacturer: CADILLAC, Model Year: 2009, Model line: ESCALADE, Model: CADILLAC ESCALADE 2009 3.GPages: 586, PDF Size: 4.47 MB
Page 355 of 586
r(Rewind):Touch and hold this button to rewind
quickly through a track selection. You will hear sound at a
reduced volume. Release this button to stop rewinding.
The display will show the elapsed time of the track.
[(Forward):Touch and hold this button to fast
forward quickly through a track selection. You will hear
sound at a reduced volume. Release this button to
stop fast forwarding. The display will show the elapsed
time of the track.
qr(Folder/Artist/Album):Select the left or right
arrow to go to the previous or next folder, artist,
or album on the disc.
Press the middle screen button, with the folder, artist,
or album name, to sort the MP3 by folder, artist, or
album. It may take a few minutes for the system to sort
the MP3.
y©¨z(Seek):To seek tracks, press the up
arrow to go to the next track. Press the down arrow to
go to the start of the current track, if more than eight
seconds have played. If either arrow is pressed
more than once, the player will continue moving
backward or forward through the CD. The sound will
mute while seeking.
w(Tuning Knob):Turn this knob counterclockwise
one notch to go to the start of the current track, turn it
again to go to the previous track. Turn this knob
clockwise to go to the next track.
When playing an MP3 the rear seat operator can power
on the RSE video screen and use the remote control
to navigate through the MP3.
CD Messages
If Disc Read Error appears on the display and/or the CD
comes out, it could be for one of the following reasons:
If a disc was inserted with an invalid or unknown
format.
If the map DVD disc was installed into the CD slot.
See “Installing the Map DVD” underMaps on
page 4-14for more information.
It is very hot. When the temperature returns to
normal, the CD should play.
You are driving on a very rough road. When the
road becomes smoother, the CD should play.
The CD is dirty, scratched, wet, or upside down.
The air is very humid. If so, wait about an hour and
try again.
There may have been a problem while burning
the CD.
The label may be caught in the CD player.
4-73
Page 356 of 586
If the CD is not playing correctly, for any other reason,
try a known good CD.
If any error occurs repeatedly or if an error cannot be
corrected, contact your dealer/retailer.
DVD Player
The player can be used for DVD audio and DVD video.
DVD video will not display on the navigation screen
unless the vehicle is in PARK (P). It will operate on the
rear seat entertainment screens while the vehicle is
moving. The Rear Seat Entertainment (RSE) video
screen will start play of the DVD when a DVD video has
been inserted into the navigation system. The DVD
player can be controlled by the buttons on the navigation
system, the Rear Seat Audio (RSA) system, and the
remote control. The DVD player can also be used for the
rear seat passengers with the radio off. The rear seat
passengers can power on the video screen and use the
remote control to navigate the disc. See “Rear Seat
Entertainment System” in the Index of your vehicle’s
owner manual for more information.
The DVD player is only compatible with DVDs of the
appropriate region code that is printed on the jacket of
most DVDs.
The DVD slot is compatible with most audio CDs, CD-R,
CD-RW, DVD-Video, DVD-Audio, DVD-R/RW,
DVD+R/RW media along with MP3 and WMA formats.If an error appears on the display, see “DVD Messages”
later in this section.
M(Load):To load one disc, do the following:
1. Press the load hard key and follow the screen
message displayed.
2. When the system displays “Insert Disc (number)”,
insert the disc partway into the slot, label side up.
The system will pull it into the �rst available slot and
start playing. The system will display the type of
disc inserted.
To load multiple discs, do the following:
1. Press and hold the load hard key and follow the
screen message displayed.
2. When the system displays “Insert Disc (number)”,
insert the disc partway into the slot, label side up.
The system will pull it in.
3. Once a disc is loaded, the system will display
“Insert Disc (number)” again. Load the next
disc. Repeat this procedure for each disc. The
player takes up to six discs, do not try to load more
than six. The system will not display the disc
types when loading all, until the discs have been
read by the system.
Once all discs have been inserted, the system will
start playing the last loaded disc.
4-74
Page 357 of 586
Z(Eject):To eject a disc, do the following:
1. Press the eject hard key.
2. The system will display “Ejecting Disc”.
Press the DISC screen button to display the Disc
Changer screen. Select the disc to eject. If a
selection is not made, the system will eject the disc
from the current slot. If the disc is not removed
from the slot, the system will pull it back in
after 10 seconds and start playing it.
To eject all discs at once, press and hold the eject hard
key. The system will display the disc number being
ejected.
Playing a DVD
There are three ways to play a DVD:
Once a DVD is inserted, the system will
automatically start play of the DVD.
If you are on a map screen, touch the DVD screen
button.
Press the AUDIO hard key, then touch the DVD
screen button.
When a DVD is loaded, the rear seat passengers can
power on the RSE video screen and use the remote
control to navigate through the DVD.
O/3(Power/Volume):Press this knob to turn the
system on and off. Turn the knob to increase or
decrease the volume of the audio system.
Press and hold this knob for more than two seconds to
turn off the navigation system, RSE video screen,
and RSA. If the vehicle has not been tuned off, the RSE
and the RSA can be turned back on by pressing this
knob and will continue play of the last active source.
DVD Menu Options
Once a DVD starts to play, the menu options and cursor
screen buttons will automatically appear. To display
the menu Options screen button while a DVD is playing,
touch anywhere on the screen.
Options:Select this screen button to view the menu
option screen buttons. Menu options are available when
they are highlighted. Some menu options are only
available when the DVD is not playing.
Cursor:Touch this button to access the cursor menu.
The arrows and other cursor options allow you to
navigate the DVD menu options. The cursor menu
options are only available if a DVD has a menu.
Use the cursor menu to start a DVD video from the
disc main menu.
q,Q,r,R(Arrow Buttons):Use these arrow
buttons to move around the DVD menu.
4-75
Page 358 of 586
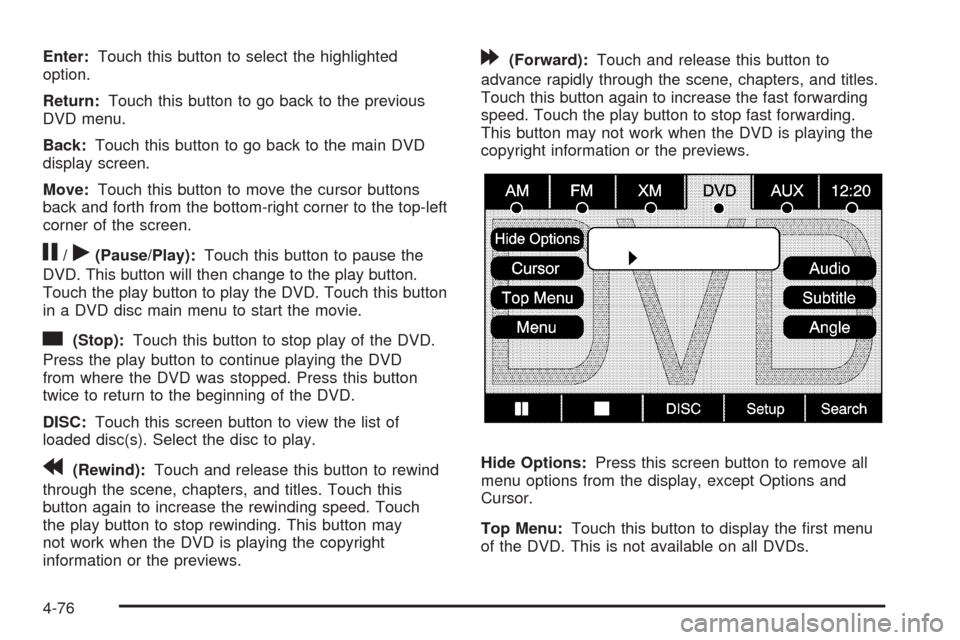
Enter:Touch this button to select the highlighted
option.
Return:Touch this button to go back to the previous
DVD menu.
Back:Touch this button to go back to the main DVD
display screen.
Move:Touch this button to move the cursor buttons
back and forth from the bottom-right corner to the top-left
corner of the screen.
j/r(Pause/Play):Touch this button to pause the
DVD. This button will then change to the play button.
Touch the play button to play the DVD. Touch this button
in a DVD disc main menu to start the movie.
c(Stop):Touch this button to stop play of the DVD.
Press the play button to continue playing the DVD
from where the DVD was stopped. Press this button
twice to return to the beginning of the DVD.
DISC:Touch this screen button to view the list of
loaded disc(s). Select the disc to play.
r(Rewind):Touch and release this button to rewind
through the scene, chapters, and titles. Touch this
button again to increase the rewinding speed. Touch
the play button to stop rewinding. This button may
not work when the DVD is playing the copyright
information or the previews.
[(Forward):Touch and release this button to
advance rapidly through the scene, chapters, and titles.
Touch this button again to increase the fast forwarding
speed. Touch the play button to stop fast forwarding.
This button may not work when the DVD is playing the
copyright information or the previews.
Hide Options:Press this screen button to remove all
menu options from the display, except Options and
Cursor.
Top Menu:Touch this button to display the �rst menu
of the DVD. This is not available on all DVDs.
4-76
Page 359 of 586
Menu:Touch this button to display the DVD menu of
the current area of the DVD that is playing. This
button is not available for DVD audio.
Audio:Press this button to display the audio options.
Select the audio options that best improve sound quality.
This is not available on all DVDs or when the DVD is
stopped. This button is not available for DVD audio.
Subtitle:Touch this button to playback the video with
subtitles. This is not available on all DVDs or when
the DVD is stopped. This button is not available for
DVD audio.
Angle:Touch this button to adjust the viewing angle
of the DVD. Repeatedly press this button to toggle
through the angles. This is not available on all DVDs or
when the DVD is stopped. This button is not available
for DVD audio.
q(Previous Scene):Press this button to go to the
previous scene. This button does not work when
the DVD is stopped. This button is not available for
DVD video.
r(Next Scene):Press this button to go to the next
scene. This button does not work when the DVD is
stopped. This button is not available for DVD video.Search:Touch this button to display the search screen.
Select Title or Chapter Search for DVD video and
Group or Track for DVD audio. The keyboard allows
you to type in the title/chapter/group/track number that
you would like to watch or listen to. This button does
not work when the DVD is stopped.
Setup:Touch this button to display the DVD Setup
screen. This button is only available when the DVD is
not playing. The DVD Setup screen allows you to
change the brightness, contrast, and mode, change
the viewing on the monitor and to change the initial
settings; language, parental level, and aspect.
!(Brightness):Touch the up or down screen arrows
to increase or decrease the brightness of the navigation
screen.
_(Contrast):Touch the up or down screen arrows to
increase or decrease the contrast of the navigation
screen.
Auto (Automatic):Touch this screen button for the
system to automatically adjust the navigation screen
background depending on exterior lighting conditions.
Night:Touch this screen button and the system
will make the navigation screen background brighten.
4-77
Page 361 of 586
Menu Language:Touch English, Francais, Espanol,
Italiano, or Deutsch to change the default language
of the DVD video menus. The menu language must be
available on the disc. The menu language may vary
for each DVD.
Parental Level:Touch this button to change the rating
level to only allow the play of DVDs with a certain
rating. The rating selection is 1 through 8, with 1 Kids
Safe being a G rating. If the 1 is selected, any DVD with
a rating above G will not be able to be viewed without
entering a password.
When the parental level is �rst entered a keyboard will
appear on the display and a four-digit password will
need to be created. Type in a password that you will be
able to remember. Once the password is created,
you can then select a rating level.
If you would like to change the rating level, press the
Parental Level button, then press the Password button.
Type in the password and then change the rating level.
If the password has been forgotten, contact your
dealer/retailer.
This may not be available on all DVDs.Aspect:Touch this button to change the aspect ratio of
the DVD. This may not be available on all DVDs.
y(Next Track/Chapter):Press this hard key to go to
the next track or chapter. This button may not work
when the DVD is playing the copyright information or the
previews.
z(Previous Track/Chapter):Press this hard key to
return to the start of the current track or chapter.
Press this button again to go to the previous track or
chapter. This button may not work when the DVD
is playing the copyright information or the previews.
w(Tuning Knob):Turn this knob counterclockwise
one notch to go to the start of the current chapter/track,
turn it again to go to the previous chapter/track. Turn
this knob clockwise to go to the next chapter/track.
4-79
Page 362 of 586
DVD Messages
If Disc Read Error appears on the display and/or the
DVD comes out, it could be for one of the following
reasons:
If a disc was inserted with an invalid or unknown
format.
If the disc is not from a correct region.
If the map DVD disc was installed into the DVD
audio/video slot. See “Installing the Map DVD”
underMaps on page 4-14for more information.
It is very hot. When the temperature returns to
normal, the DVD should play.
You are driving on a very rough road. When the
road becomes smoother, the DVD should play.
The DVD is dirty, scratched, wet, or upside down.
The air is very humid. If so, wait about an hour and
try again.
There may have been a problem while burning
the DVD.
The label may be caught in the DVD player.
If the DVD is not playing correctly, for any other reason,
try a known good DVD.
If any error occurs repeatedly or if an error cannot be
corrected, contact your dealer/retailer.
Care of Your CDs and DVDs
If playing recorded media such as a CD or DVD, the
sound quality may be reduced due to CD or DVD quality,
the method of recording, the quality of the music that has
been recorded, recording speed. Max media recording
speed, and the way the CD or DVD has been handled.
There may be an increase in skipping, difficulty in �nding
tracks, and/or difficulty in loading and ejecting. If these
problems occur, check the bottom surface of the CD or
DVD. If the surface is damaged, such as cracked, broken,
or scratched, it will not play properly. If the surface is
soiled, see “Care of Your CDs and DVDs” in the Index of
the vehicle’s owner manual.
If there is no apparent damage, try a known good
CD or DVD.
Notice:If a label is added to a CD or DVD, or more
than one CD or DVD is inserted into the slot at a
time, or an attempt is made to play scratched
or damaged CDs or DVDs, the player could be
damaged. While using the CD or DVD player, use
only CDs or DVDs in good condition without
any label, load one CD or DVD at a time, and keep
the player and the loading slot free of foreign
materials, liquids, and debris.
4-80
Page 364 of 586
3. For the second row display select the Rear AUX
screen button next to Rear Display 1 and for the
third row display select the Rear AUX screen button
next to Rear Display 2. Each screen works
independently of the other. The second row screen
can watch a DVD while the third row screen can
use the auxiliary device.
The rear seat passengers can also use the remote
control to change the functions of the RSE. SeeRear
Seat Entertainment (RSE) System (Overhead) on
page 3-85orRear Seat Entertainment (RSE) System
(Headrest DVD) on page 3-95for more information.
Voice Recognition
The navigation system’s voice recognition allows for
hands-free operation of the navigation system,
audio system, and OnStar
®features. The DVD map
disc must be installed in the navigation system for voice
recognition to work. See “Installing the DVD Map
Disc” underMaps on page 4-14for more information.
Voice recognition can be used when the ignition is on or
when Retained Accessory Power (RAP) is active. See
“Retained Accessory Power (RAP)” in the Index of
your vehicle’s owner manual for more information.To use voice recognition, do the following:
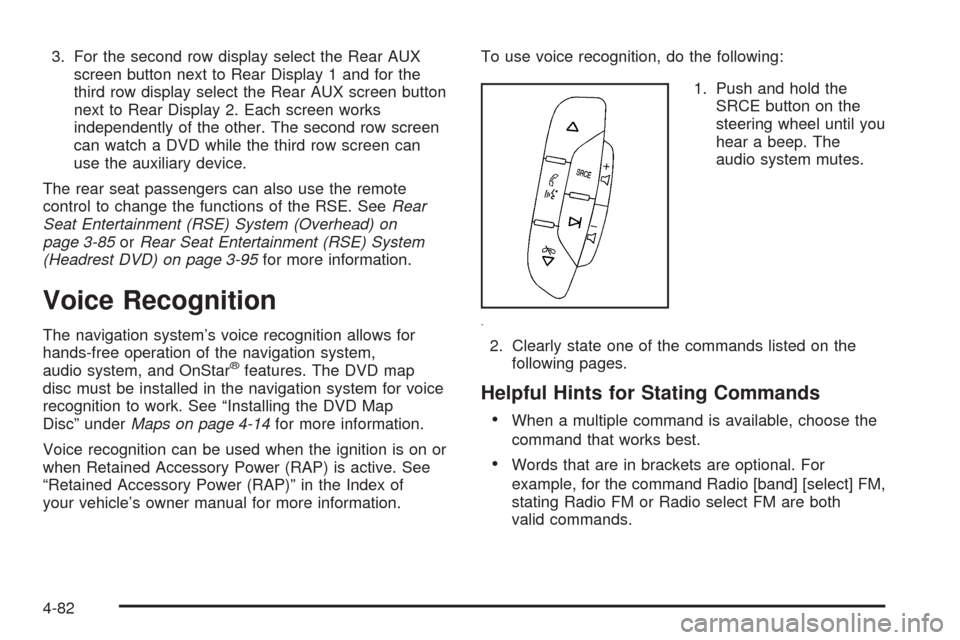
1. Push and hold the
SRCE button on the
steering wheel until you
hear a beep. The
audio system mutes.
2. Clearly state one of the commands listed on the
following pages.
Helpful Hints for Stating Commands
When a multiple command is available, choose the
command that works best.
Words that are in brackets are optional. For
example, for the command Radio [band] [select] FM,
stating Radio FM or Radio select FM are both
valid commands.
4-82
Page 366 of 586
Storing Voice Tags
From the address book entry information page, press
the Add Voice tag screen button. The system responds
“Name Please?” and you will have four seconds to
record a name. The system asks for con�rmation of the
name before saving it as a voice tag.
Navigation Help
Navigation Help:This command instructs the system
to assist with navigation commands.
Display Commands
Use the following display commands to set the
display mode.
Display [set] day [mode]:Sets the display to
daytime mode.
Display [set] night [mode]:Sets the display to
night mode.
Display [set] auto [mode]:Sets the display to
automatic mode. The system changes between
day and night mode automatically.
System help:Instructs the system to assist with
display commands.
Radio Commands
The following are radio commands that can be accessed
by clearly stating the commands exactly as they are
written.
Radio [band] [select] AM, radio [band] [select] FM,
radio [band] [select] XM, radio [band] [select]
satellite:Instructs the system to go to either the AM,
FM, or XM (if equipped).
Radio [select] (frequency) AM, radio [select]
(frequency) FM:Instructs the system to go to a speci�c
frequency on either AM or FM.
Radio [select] (channel) XM, radio [select] (channel)
satellite:Instructs the system to go to a speci�c
channel on the XM™ band (if equipped).
Radio help:Instructs the system to assist with radio
commands.
4-84
Page 375 of 586

If the system fails to turn on or activate, the StabiliTrak
light along with one of the following messages will
be displayed on the Driver Information Center (DIC):
TRACTION CONTROL OFF, SERVICE TRACTION
CONTROL, STABILITRAK OFF, SERVICE
STABILITRAK. If these DIC messages appear, make
sure the StabiliTrak system has not been turned
off using the StabiliTrak on/off button. Then turn the
steering wheel clockwise from the nine o’clock position
to the three o’clock position. If this clears the
message(s), the vehicle does not need servicing. If this
does not clear the message(s), then turn the vehicle
off, wait 15 seconds, and then turn it back on again to
reset the system. If any of these messages still
appear on the Driver Information Center (DIC), the
vehicle should be taken in for service. For more
information on the DIC messages, seeDriver
Information Center (DIC) on page 3-46.
The StabiliTrak light will
�ash on the instrument
panel cluster when
the system is both on
and activated.
The system may be heard or felt while it is working;
this is normal.The traction control disable
button is located on the
instrument panel below the
climate controls.
The traction control part of StabiliTrak can be turned off
by pressing and releasing the StabiliTrak button if
both systems (traction control and StabiliTrak) were
previously on. To disable both traction control and
StabiliTrak, press and hold the button for �ve seconds.
Traction control and StabiliTrak can be turned on by
pressing and releasing the StabiliTrak button if not
automatically shut off for any other reason.
When the TCS or StabiliTrak system is turned off, the
StabiliTrak light and the appropriate TCS off or
StabiliTrak off message will be displayed on the DIC to
warn the driver. The vehicle will still have brake-traction
control when traction control is off, but will not be
able to use the engine speed management system. See
“Traction Control Operation” next for more information.
When the traction control system has been turned
off, system noises may still be heard as a result of the
brake-traction control coming on.
5-7