manual radio set CADILLAC ESCALADE 2014 Owner's Manual
[x] Cancel search | Manufacturer: CADILLAC, Model Year: 2014, Model line: ESCALADE, Model: CADILLAC ESCALADE 2014Pages: 508, PDF Size: 7.64 MB
Page 42 of 508
Black plate (14,1)Cadillac Escalade/Escalade ESV Owner Manual (GMNA-Localizing-U.S./
Canada/Mexico-6081529) - 2014 - CRC 1st Edition - 4/23/13
2-14 Keys, Doors, and Windows
4. Then reach in through thewindow, unlock the door with the
manual door lock and open the
door. This should set off the
alarm.
While the alarm is set, the power
door unlock switch will not work.
If the alarm does not sound when it
should but the headlamps flash,
check to see if the horn works. The
horn fuse may be blown. To replace
the fuse, see Fuses and Circuit
Breakers on page 10-32.
If the alarm does not sound or the
headlamps do not flash, the vehicle
should be serviced by your dealer.
Immobilizer
See Radio Frequency Statement on
page 13-15.
Immobilizer Operation
This vehicle has PASS-Key®III+
(Personalized Automotive Security
System) theft-deterrent system.
PASS-Key III+ is a passive
theft-deterrent system.
The system is automatically armed
when the key is removed from the
ignition.
The system is automatically
disarmed when the key is turned to
ON/RUN, ACC/ACCESSORY,
or START from the LOCK/OFF
position.
You do not have to manually arm or
disarm the system.
The security light will come on if
there is a problem with arming or
disarming the theft-deterrent
system.
When the PASS-Key III+ system
senses that someone is using the
wrong key, it prevents the vehicle
from starting. Anyone using a
trial-and-error method to start the vehicle will be discouraged because
of the high number of electrical key
codes.
If the engine does not start and the
security light on the instrument
panel cluster comes on when trying
to start the vehicle, there may be a
problem with the theft-deterrent
system. Turn the ignition off and try
again.
If the engine still does not start, and
the key appears to be undamaged,
try another ignition key. At this time,
you may also want to check the
fuse. See
Fuses and Circuit
Breakers on page 10-32. If the
engine still does not start with the
other key, the vehicle needs service.
If the vehicle does start, the first key
may be faulty. See your dealer who
can service the PASS-Key III+ to
have a new key made.
It is possible for the PASS-Key III+
decoder to learn the transponder
value of a new or replacement key.
Up to 10 keys may be programmed
for the vehicle. The following
Page 156 of 508
Black plate (44,1)Cadillac Escalade/Escalade ESV Owner Manual (GMNA-Localizing-U.S./
Canada/Mexico-6081529) - 2014 - CRC 1st Edition - 4/23/13
5-44 Instruments and Controls
.The trip/fuel or vehicle
information DIC buttons are
pressed.
.The end of the feature settings
menu is reached and exited.
.A 40-second time period has
elapsed with no selection made.
Universal Remote
System
SeeRadio Frequency Statement on
page 13-15.
Universal Remote System
Programming
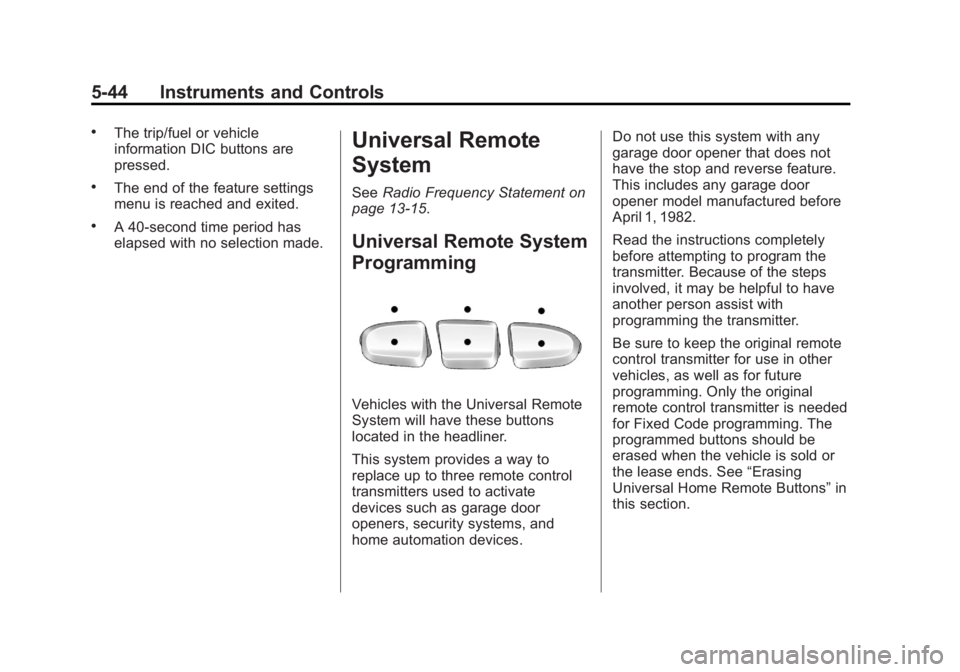
Vehicles with the Universal Remote
System will have these buttons
located in the headliner.
This system provides a way to
replace up to three remote control
transmitters used to activate
devices such as garage door
openers, security systems, and
home automation devices. Do not use this system with any
garage door opener that does not
have the stop and reverse feature.
This includes any garage door
opener model manufactured before
April 1, 1982.
Read the instructions completely
before attempting to program the
transmitter. Because of the steps
involved, it may be helpful to have
another person assist with
programming the transmitter.
Be sure to keep the original remote
control transmitter for use in other
vehicles, as well as for future
programming. Only the original
remote control transmitter is needed
for Fixed Code programming. The
programmed buttons should be
erased when the vehicle is sold or
the lease ends. See
“Erasing
Universal Home Remote Buttons” in
this section.
Page 175 of 508

Black plate (3,1)Cadillac Escalade/Escalade ESV Owner Manual (GMNA-Localizing-U.S./
Canada/Mexico-6081529) - 2014 - CRC 1st Edition - 4/23/13
Infotainment System 7-3
When the navigation system is
turned on, a screen may appear
with information that must be read
and acknowledged before accessing
some navigation features.
After acknowledging the start up
information, the NAV (Navigation)
and DEST (Destination) functions
are accessible. Information can now
be entered or deleted, and other
functions accessed. See
instructions later in this section.Every 50 times the vehicle is started
and the navigation system is turned
on, the Caution screen appears.
After reading the caution, select OK
to load the map DVD information.
If OK is not selected, all control
buttons except for NAV (Navigation)
and DEST (Destination) can be
accessed.
When getting started, set your
preferences or delete information in
the navigation system using various
options.Theft-Deterrent Feature
TheftLock®is designed to
discourage theft of the vehicle's
radio by learning a portion of the
Vehicle Identification Number (VIN).
The radio does not operate if it is
stolen or moved to a different
vehicle.
Page 177 of 508
Black plate (5,1)Cadillac Escalade/Escalade ESV Owner Manual (GMNA-Localizing-U.S./
Canada/Mexico-6081529) - 2014 - CRC 1st Edition - 4/24/13
Infotainment System 7-5
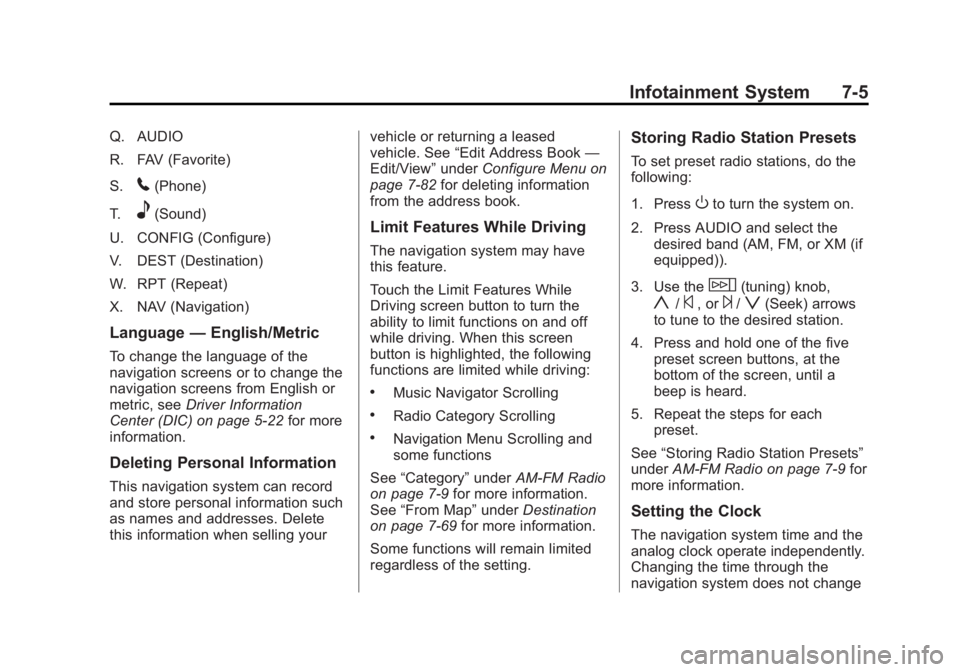
Q. AUDIO
R. FAV (Favorite)
S.
5(Phone)
T.
e(Sound)
U. CONFIG (Configure)
V. DEST (Destination)
W. RPT (Repeat)
X. NAV (Navigation)
Language —English/Metric
To change the language of the
navigation screens or to change the
navigation screens from English or
metric, see Driver Information
Center (DIC) on page 5-22 for more
information.
Deleting Personal Information
This navigation system can record
and store personal information such
as names and addresses. Delete
this information when selling your vehicle or returning a leased
vehicle. See
“Edit Address Book —
Edit/View” underConfigure Menu on
page 7-82 for deleting information
from the address book.
Limit Features While Driving
The navigation system may have
this feature.
Touch the Limit Features While
Driving screen button to turn the
ability to limit functions on and off
while driving. When this screen
button is highlighted, the following
functions are limited while driving:
.Music Navigator Scrolling
.Radio Category Scrolling
.Navigation Menu Scrolling and
some functions
See “Category” underAM-FM Radio
on page 7-9 for more information.
See “From Map” underDestination
on page 7-69 for more information.
Some functions will remain limited
regardless of the setting.
Storing Radio Station Presets
To set preset radio stations, do the
following:
1. Press
Oto turn the system on.
2. Press AUDIO and select the desired band (AM, FM, or XM (if
equipped)).
3. Use the
w(tuning) knob,
y/©, or¨/z(Seek) arrows
to tune to the desired station.
4. Press and hold one of the five preset screen buttons, at the
bottom of the screen, until a
beep is heard.
5. Repeat the steps for each preset.
See “Storing Radio Station Presets”
under AM-FM Radio on page 7-9 for
more information.
Setting the Clock
The navigation system time and the
analog clock operate independently.
Changing the time through the
navigation system does not change
Page 184 of 508
Black plate (12,1)Cadillac Escalade/Escalade ESV Owner Manual (GMNA-Localizing-U.S./
Canada/Mexico-6081529) - 2014 - CRC 1st Edition - 4/23/13
7-12 Infotainment System
Add Artist:Press to save the song
that is currently playing by the
artist's name.
Clear All: Press and Hold the
Clear All screen button to clear the
stored favorite songs.
Del: Press the Del screen button to
del the song that is associated to
that button.
Popup Notifications: Once a song
or songs are stored, a notification
popup alerts the listener if a stored
song is playing. Press to turn
notification on or off.While a notification popup alert
screen displays, press the screen
button showing the station or press
Ignore.
Storing Radio Station Presets
This feature stores a mix of up to 30
AM, FM, and XM (if equipped)
preset stations. To store presets:
1. Press
Oto turn the system on.
2. If viewing a map screen, press AUDIO, FAV or press the source
screen button.
3. Select the band.
4.
y/©,¨/z, or tune to the
desired station, to select the
station.
5. Press and hold one of the preset screen buttons for more than
two seconds or until a beep is
heard.
6. Repeat the steps for each preset.
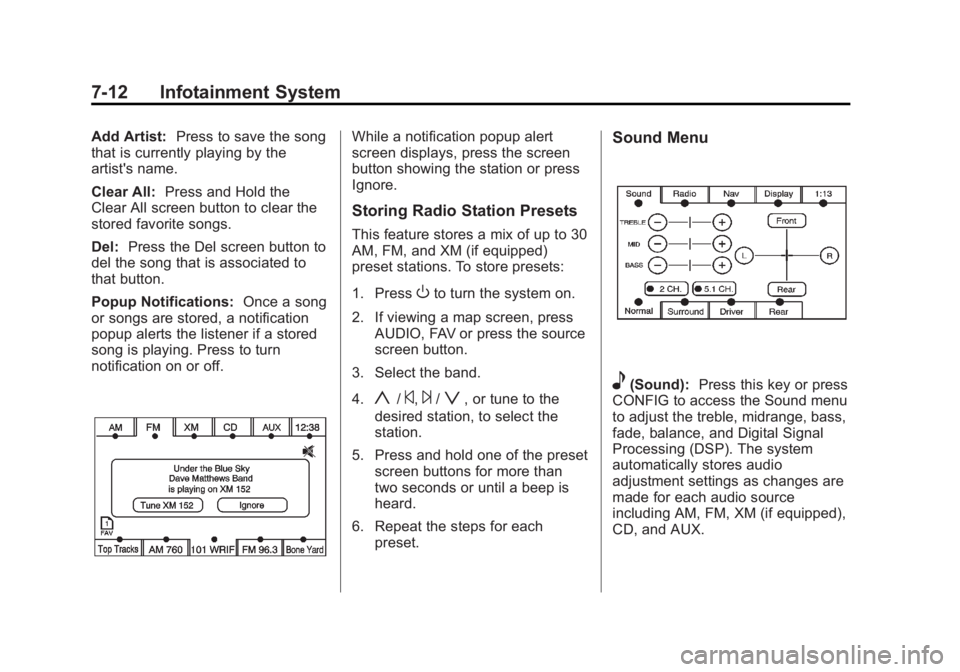
Sound Menu
e(Sound): Press this key or press
CONFIG to access the Sound menu
to adjust the treble, midrange, bass,
fade, balance, and Digital Signal
Processing (DSP). The system
automatically stores audio
adjustment settings as changes are
made for each audio source
including AM, FM, XM (if equipped),
CD, and AUX.
Page 185 of 508
Black plate (13,1)Cadillac Escalade/Escalade ESV Owner Manual (GMNA-Localizing-U.S./
Canada/Mexico-6081529) - 2014 - CRC 1st Edition - 4/23/13
Infotainment System 7-13
Setting the Tone
TREBLE:Press + or−to increase
or decrease the treble. If a station is
weak or has static, decrease the
treble.
MID (Midrange): Press + or−to
increase or decrease the midrange.
BASS: Press + or −to increase or
decrease the bass.
Adjusting the Speakers
L/R (Left/Right) (Balance): To
adjust the balance between the left
and the right speakers, press and
hold the L or R screen buttons.
Front/Rear (Fade): To adjust the
fade between the front and the rear
speakers, press and hold the Front
or Rear screen buttons.
Digital Signal Processing (DSP)
The system has Digital Signal
Processing (DSP). DSP provides a
choice of four different listening
experiences. DSP can be used
while listening to the audio system.
Not all DSP modes are available for all source types. The type of DSP
selected is displayed on the
status line.
Select from the following DSP
settings:
Normal:
Adjusts the audio for
normal mode. This provides the best
sound quality for all seating
positions.
Surround (Centerpoint
®): Enables
Bose®Centerpoint signal
processing that produces a
surround sound listening experience
from a CD or XM (if equipped)
stereo digital audio source.
Centerpoint delivers five
independent audio channels from
conventional two channel stereo
recordings (not available for AM
or FM).
Driver: Adjusts the audio to give
the driver the best possible sound
quality.
Rear: Adjusts the audio to give the
rear seat occupants the best
possible sound quality. 2 CH. (Channel):
Enhances
surround sound.
5.1 CH. (Channel): Gives a full
affect of surround sound listening.
This button is only available when
playing DVD video discs that
support 5.1 audio and if the RSA
is off.
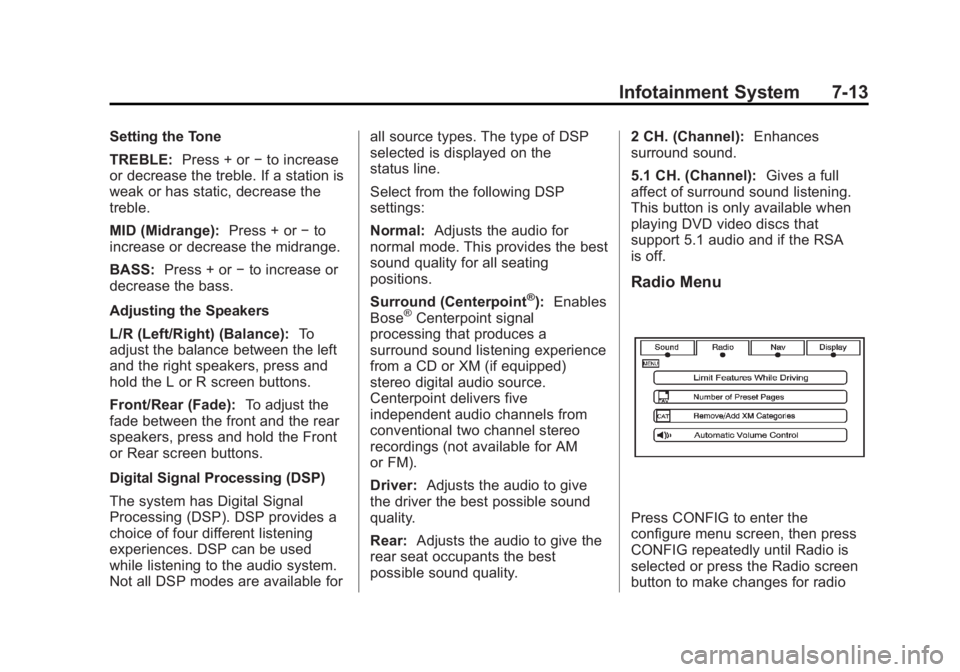
Radio Menu
Press CONFIG to enter the
configure menu screen, then press
CONFIG repeatedly until Radio is
selected or press the Radio screen
button to make changes for radio
Page 186 of 508
Black plate (14,1)Cadillac Escalade/Escalade ESV Owner Manual (GMNA-Localizing-U.S./
Canada/Mexico-6081529) - 2014 - CRC 1st Edition - 4/23/13
7-14 Infotainment System
information displayed or to limit
features while driving, number of
preset pages, XM (if equipped)
categories, and Bose AudioPilot
®.
Limit Features While Driving
Press the Limit Features While
Driving screen button to turn on and
off the ability to limit functions while
driving. When this screen button is
highlighted, the following functions
are limited while driving:
.Music Navigator Scrolling
.Radio Category Scrolling
.Navigation Menu Scrolling and
some functions
Number of Preset Pages
Press the Number of Preset Pages
screen button to change the number
of preset pages, 1 through 6. Each
preset page can contain five preset
stations. Press the desired
numbered screen button. Bose AudioPilot
AudioPilot:
The Bose AudioPilot
noise compensation technology.
To use AudioPilot
®:
1. Press CONFIG to enter the menu screen, then press
CONFIG repeatedly until Radio
is selected or press the Radio
screen button
2. Press Automatic Volume Control to access the AudioPilot menu.
3. Press ON.
To turn it off, press OFF. When on,
AudioPilot continuously adjusts the
audio system equalization, to
compensate for background noise,
so that the music sound is
consistent at the set volume level.
This feature is most effective at
lower volume settings where
background noise can affect how
well the music being played is heard
through the vehicle's audio system.
At higher volume settings, where
the music is much louder than the
background noise, there may be little or no adjustments by
AudioPilot. For more information on
AudioPilot, visit www.bose.com/
audiopilot.
Remove/Add XM Categories (US
and Canada)
Press the Remove/Add XM
Categories screen button to remove
or add XM categories when
selecting XM categories from the
category list screen. The list of XM
categories appear on the screen.
Use the arrow screen buttons to
scroll through the list. The
categories to remove are highlighted
and the categories to add are dark
in color. Press the category to be
added or removed. Press the
Restore All Categories screen
button to add all categories that
have been removed.
Page 190 of 508
Black plate (18,1)Cadillac Escalade/Escalade ESV Owner Manual (GMNA-Localizing-U.S./
Canada/Mexico-6081529) - 2014 - CRC 1st Edition - 4/23/13
7-18 Infotainment System
Satellite Radio Antenna
The XM Satellite Radio antenna is
located on the roof of the vehicle.
Keep the antenna clear of
obstructions for clear radio
reception.
If the vehicle has a sunroof, the
performance of the XM system (if
equipped) may be affected if the
sunroof is open.
Audio Players
CD/DVD Player
The player can be used for CD,
MP3, and as a DVD video player.
Read this section for more
information about DVD video.
When playing an audio CD the rear
seat operator can power on the
RSE video screen and use the
remote control to navigate through
the tracks on the CD.
CD Player
While playing a CD, the navigation
system is available.
When you insert a CD, the CD tab
displays. If a DSP setting is
selected for the CD, it activates
each time you play a CD.If the ignition or radio is turned off
with a CD in the player, it stays in
the player. When the ignition or
radio is turned on, the CD starts
playing where it stopped, if it was
the last selected audio source.
As each new track starts to play, the
track number displays.
If an error appears on the display,
see
“CD/DVD Messages” in this
section.
If viewing a map screen, press the
CD screen button. The display splits
between the audio screen and the
map screen. If you do not want to
view a split screen or you are not on
a map screen, press AUDIO then
press AUDIO again, repeatedly until
CD is selected or press the CD
screen button.
Z(Eject): To eject a disc:
1. Press
Z.
2. The system displays “Ejecting Disc.”
Page 200 of 508
Black plate (28,1)Cadillac Escalade/Escalade ESV Owner Manual (GMNA-Localizing-U.S./
Canada/Mexico-6081529) - 2014 - CRC 1st Edition - 4/23/13
7-28 Infotainment System
radio displays the file name without
the extension (such as .mp3) as the
track name.
Track names longer than
32 characters or four pages are
shortened. The display does not
show parts of words on the last
page of text and the extension of
the filename does not display.
Playing an MP3
While playing a CD, the navigation
system is available.
When you insert a CD, the CD tab
displays. If a DSP setting is
selected for the CD, it will be
activated each time you play a CD.
If you turn off the ignition or radio
with a CD in the player, it stays in
the player. When you turn on the
ignition or radio, the CD starts
playing where it stopped, if it was
the last selected audio source.
As each new track starts to play, the
track number appears on the
display.If an error appears on the display,
see
“CD/DVD Messages” in this
section.
If viewing a map screen, press the
CD screen button. The display splits
between the audio screen and the
map screen. If you do not want to
view a split screen or you are not on
a map screen, press AUDIO, then
press AUDIO again, repeatedly until
CD is selected or press the CD
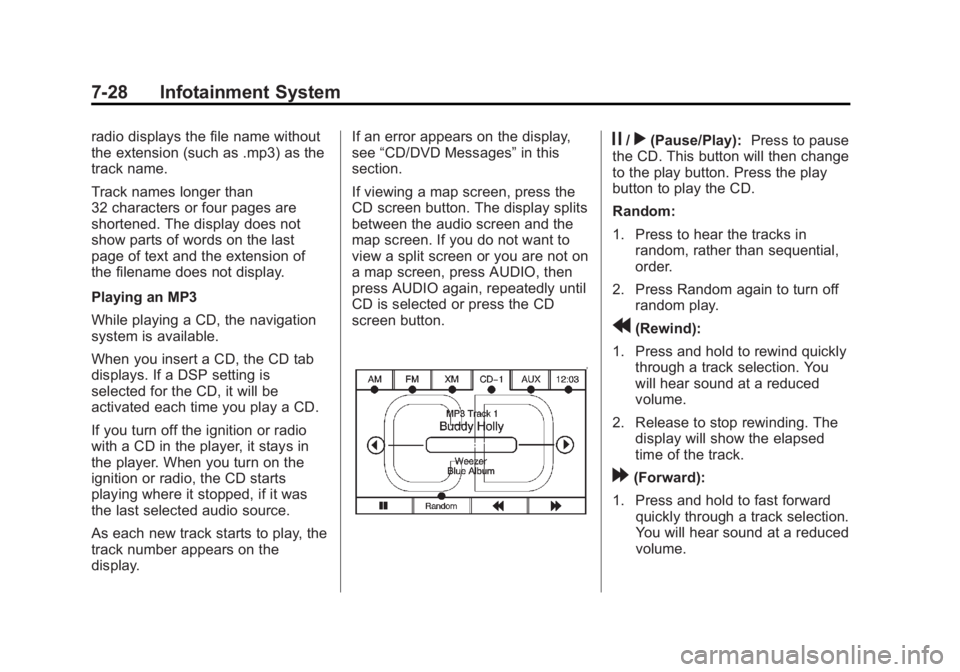
screen button.j/r(Pause/Play): Press to pause
the CD. This button will then change
to the play button. Press the play
button to play the CD.
Random:
1. Press to hear the tracks in random, rather than sequential,
order.
2. Press Random again to turn off random play.
r(Rewind):
1. Press and hold to rewind quickly through a track selection. You
will hear sound at a reduced
volume.
2. Release to stop rewinding. The display will show the elapsed
time of the track.
[(Forward):
1. Press and hold to fast forward quickly through a track selection.
You will hear sound at a reduced
volume.
Page 201 of 508
Black plate (29,1)Cadillac Escalade/Escalade ESV Owner Manual (GMNA-Localizing-U.S./
Canada/Mexico-6081529) - 2014 - CRC 1st Edition - 4/23/13
Infotainment System 7-29
2. Release to stop fast forwarding.The display shows the elapsed
time of the track.
q r(Folder/Artist/Album):
1. Select the left or right arrow to go to the previous or next folder,
artist, or album on the disc.
2. Press the middle screen button, with the folder, artist, or album
name, to sort the MP3 by folder,
artist, or album. It may take a
few minutes for the system to
sort the MP3.
y/©or¨/z(Seek/Scan):
1. To seek tracks, press the up arrow to go to the next track.
2. Press the down arrow to go to the start of the current track,
if more than eight seconds have
played.
3. If either arrow is pressed more than once, the player continues
moving backward or forward
through the CD. The sound
mutes while seeking.
w(Tuning Knob):
1. Turn counterclockwise one notch to go to the start of the current
track, turn it again to go to the
previous track.
2. Turn clockwise to go to the next track.
When playing an MP3 the rear seat
operator can power on the RSE
video screen and use the remote
control to navigate through the MP3.
Auxiliary Devices
Using the Auxiliary Input Jack
The navigation system has an
auxiliary input jack located on the
faceplate and in the center console.
This is not an audio output; do not
plug the headphone set into the
front auxiliary input jack. An external
audio device such as an iPod,
laptop computer, MP3 player, CD
player, or cassette tape player, etc.
can be connected to the auxiliary
input jack for use as another audio
source. Drivers are encouraged to set up
any auxiliary device while the
vehicle is in P (Park). See
Defensive
Driving on page 9-3 for more
information on driver distraction.
To use a portable audio player,
connect a 3.5 mm (1/8 in) cable to
the radio's front auxiliary input jack.
When a device is connected, press
AUDIO, then press AUDIO again
until AUX is selected or press the
AUX screen button to begin playing
audio from the device over the
vehicle speakers.
For optimal sound quality, increase
the portable audio device's volume
to the loudest level.
It is always best to power the
portable audio device through its
own battery while playing.
The vehicle may have a rear
entertainment system (RSE) with a
second and third row screen. The
RSE has audio adapters to allow
you to connect auxiliary devices.
The audio can be heard through the
speakers or through the wireless or