tow CADILLAC ESCALADE ESV 2005 2.G Owners Manual
[x] Cancel search | Manufacturer: CADILLAC, Model Year: 2005, Model line: ESCALADE ESV, Model: CADILLAC ESCALADE ESV 2005 2.GPages: 470, PDF Size: 2.86 MB
Page 1 of 470
Seats and Restraint Systems........................... 1-1
Front Seats
............................................... 1-3
Rear Seats
............................................... 1-8
Safety Belts
.............................................1-26
Child Restraints
.......................................1-47
Airbag System
.........................................1-70
Restraint System Check
............................1-85
Features and Controls..................................... 2-1
Keys
........................................................ 2-3
Doors and Locks
....................................... 2-8
Windows
.................................................2-14
Theft-Deterrent Systems
............................2-16
Starting and Operating Your Vehicle
...........2-18
Mirrors
....................................................2-29
OnStar
®System
......................................2-35
HomeLink®Wireless Control System
...........2-36
Storage Areas
.........................................2-40
Sunroof
..................................................2-44
Vehicle Personalization
.............................2-45
Instrument Panel............................................. 3-1
Instrument Panel Overview
.......................... 3-4
Climate Controls
......................................3-22
Warning Lights, Gages, and Indicators
........3-31
Driver Information Center (DIC)
..................3-49
Audio System(s)
.......................................3-69Driving Your Vehicle....................................... 4-1
Your Driving, the Road, and Your Vehicle
..... 4-2
Towing
...................................................4-49
Service and Appearance Care.......................... 5-1
Service
..................................................... 5-3
Fuel
......................................................... 5-5
Checking Things Under the Hood
...............5-10
All-Wheel Drive
........................................5-45
Rear Axle
...............................................5-45
Front Axle
...............................................5-46
Headlamp Aiming
.....................................5-48
Bulb Replacement
....................................5-51
Windshield Wiper Blade Replacement
.........5-58
Tires
......................................................5-59
Appearance Care
.....................................5-97
Vehicle Identi�cation
...............................5-105
Electrical System
....................................5-106
Capacities and Speci�cations
...................5-117
Maintenance Schedule..................................... 6-1
Maintenance Schedule
................................ 6-2
Customer Assistance and Information.............. 7-1
Customer Assistance and Information
........... 7-2
Reporting Safety Defects
...........................7-10
Index................................................................ 1
2005 Cadillac Escalade/Escalade ESV Owner ManualM
Page 9 of 470
Front Seats
Power Seats
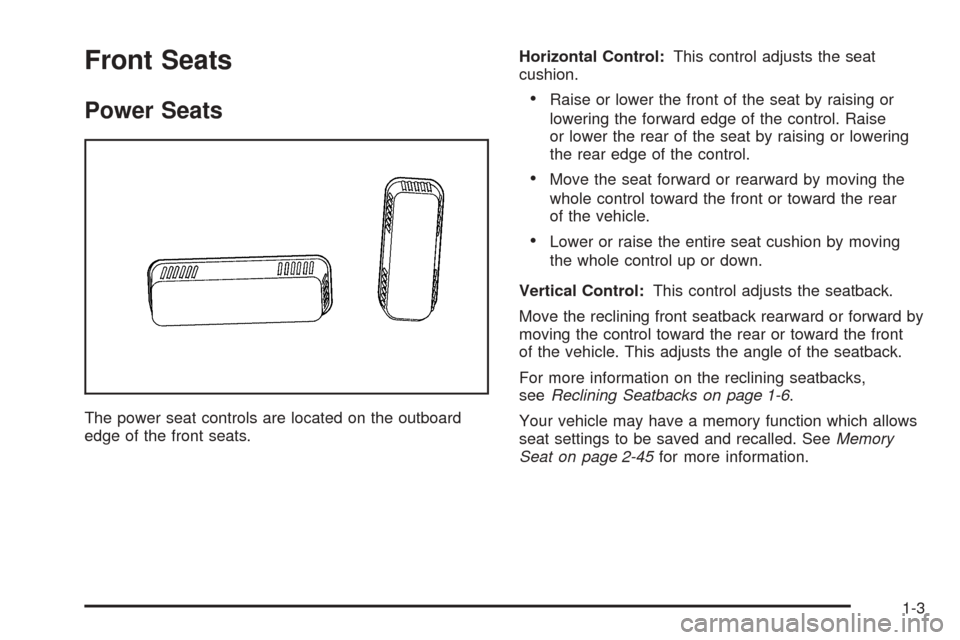
The power seat controls are located on the outboard
edge of the front seats.Horizontal Control:This control adjusts the seat
cushion.
Raise or lower the front of the seat by raising or
lowering the forward edge of the control. Raise
or lower the rear of the seat by raising or lowering
the rear edge of the control.
Move the seat forward or rearward by moving the
whole control toward the front or toward the rear
of the vehicle.
Lower or raise the entire seat cushion by moving
the whole control up or down.
Vertical Control:This control adjusts the seatback.
Move the reclining front seatback rearward or forward by
moving the control toward the rear or toward the front
of the vehicle. This adjusts the angle of the seatback.
For more information on the reclining seatbacks,
seeReclining Seatbacks on page 1-6.
Your vehicle may have a memory function which allows
seat settings to be saved and recalled. SeeMemory
Seat on page 2-45for more information.
1-3
Page 13 of 470
Head Restraints
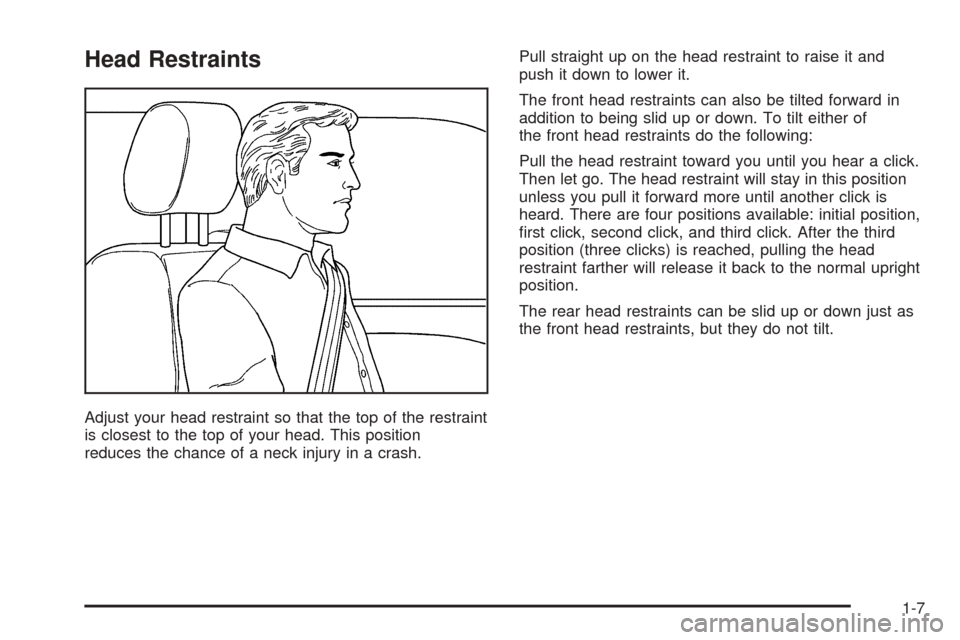
Adjust your head restraint so that the top of the restraint
is closest to the top of your head. This position
reduces the chance of a neck injury in a crash.Pull straight up on the head restraint to raise it and
push it down to lower it.
The front head restraints can also be tilted forward in
addition to being slid up or down. To tilt either of
the front head restraints do the following:
Pull the head restraint toward you until you hear a click.
Then let go. The head restraint will stay in this position
unless you pull it forward more until another click is
heard. There are four positions available: initial position,
�rst click, second click, and third click. After the third
position (three clicks) is reached, pulling the head
restraint farther will release it back to the normal upright
position.
The rear head restraints can be slid up or down just as
the front head restraints, but they do not tilt.
1-7
Page 14 of 470
Rear Seats
Rear Seat Operation
Entering or Exiting the Third Row Seats
Escalade:To enter the third row seat, you must fold
the second row seat down following the instructions later
in this section. See “Folding the Seatback” under
60/40 Split Bench Seat on page 1-10. To exit the
third row seat with no assistance, do the following:
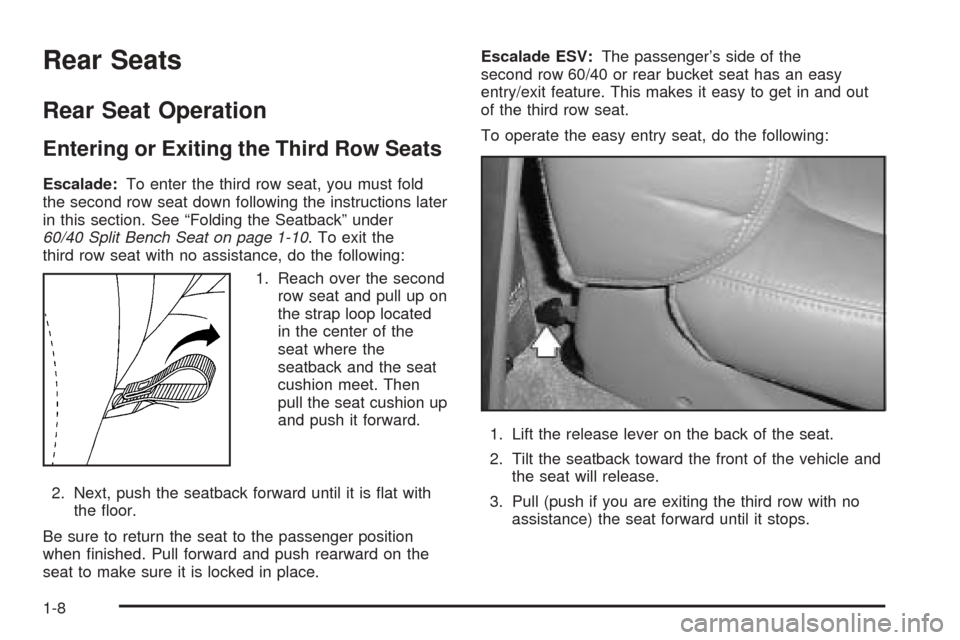
1. Reach over the second
row seat and pull up on
the strap loop located
in the center of the
seat where the
seatback and the seat
cushion meet. Then
pull the seat cushion up
and push it forward.
2. Next, push the seatback forward until it is �at with
the �oor.
Be sure to return the seat to the passenger position
when �nished. Pull forward and push rearward on the
seat to make sure it is locked in place.Escalade ESV:The passenger’s side of the
second row 60/40 or rear bucket seat has an easy
entry/exit feature. This makes it easy to get in and out
of the third row seat.
To operate the easy entry seat, do the following:
1. Lift the release lever on the back of the seat.
2. Tilt the seatback toward the front of the vehicle and
the seat will release.
3. Pull (push if you are exiting the third row with no
assistance) the seat forward until it stops.
1-8
Page 21 of 470
Returning the Seat(s) to an Upright
Position
{CAUTION:
If the seatback is not locked, it could move
forward in a sudden stop or crash. That could
cause injury to the person sitting there. Always
press rearward on the seatback to be sure it is
locked.
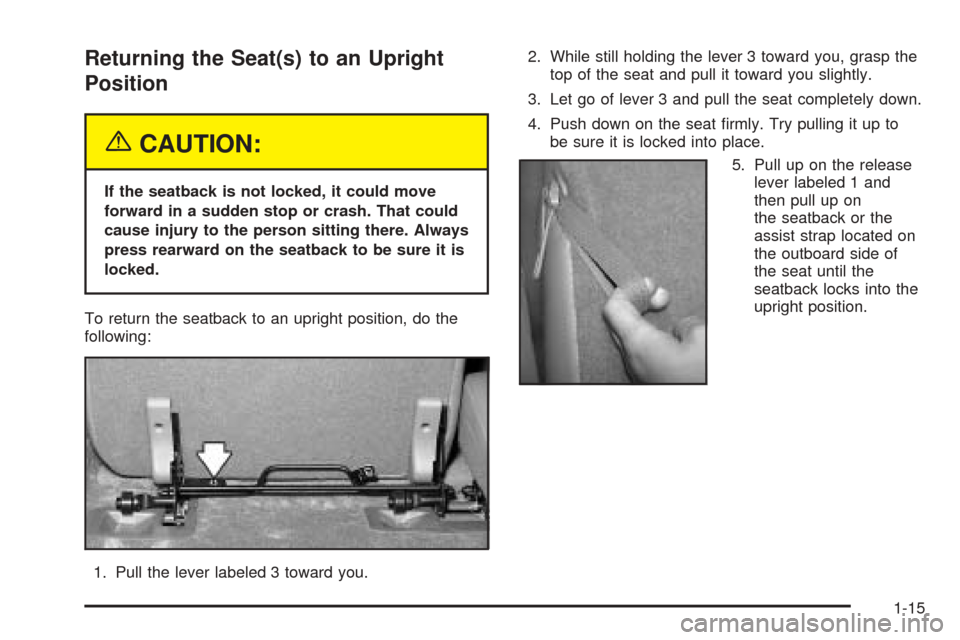
To return the seatback to an upright position, do the
following:
1. Pull the lever labeled 3 toward you.2. While still holding the lever 3 toward you, grasp the
top of the seat and pull it toward you slightly.
3. Let go of lever 3 and pull the seat completely down.
4. Push down on the seat �rmly. Try pulling it up to
be sure it is locked into place.
5. Pull up on the release
lever labeled 1 and
then pull up on
the seatback or the
assist strap located on
the outboard side of
the seat until the
seatback locks into the
upright position.
1-15
Page 27 of 470
Returning the Seat to an Upright
Position
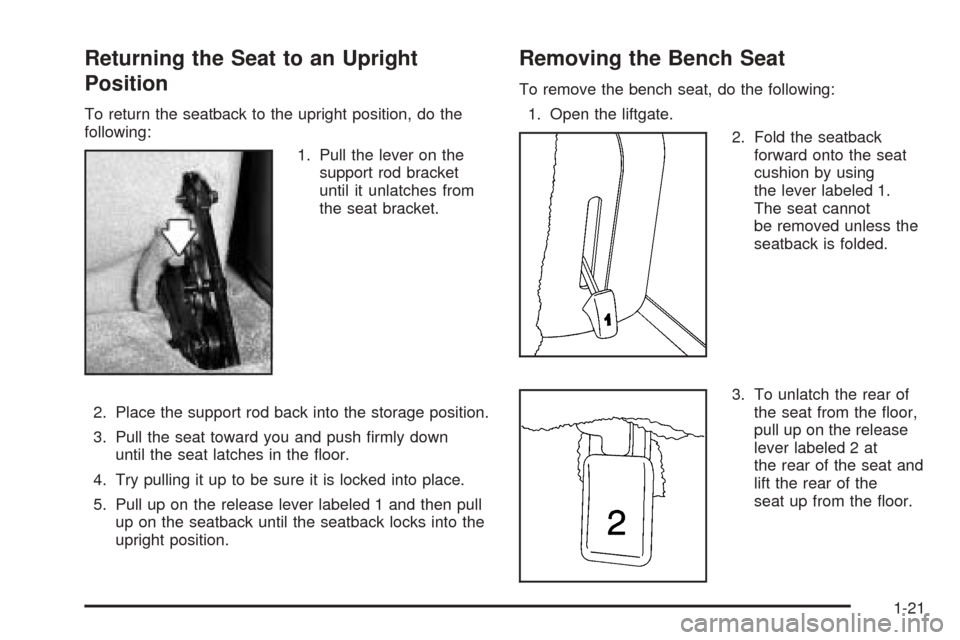
To return the seatback to the upright position, do the
following:
1. Pull the lever on the
support rod bracket
until it unlatches from
the seat bracket.
2. Place the support rod back into the storage position.
3. Pull the seat toward you and push �rmly down
until the seat latches in the �oor.
4. Try pulling it up to be sure it is locked into place.
5. Pull up on the release lever labeled 1 and then pull
up on the seatback until the seatback locks into the
upright position.
Removing the Bench Seat
To remove the bench seat, do the following:
1. Open the liftgate.
2. Fold the seatback
forward onto the seat
cushion by using
the lever labeled 1.
The seat cannot
be removed unless the
seatback is folded.
3. To unlatch the rear of
the seat from the �oor,
pull up on the release
lever labeled 2 at
the rear of the seat and
lift the rear of the
seat up from the �oor.
1-21
Page 54 of 470
{CAUTION:
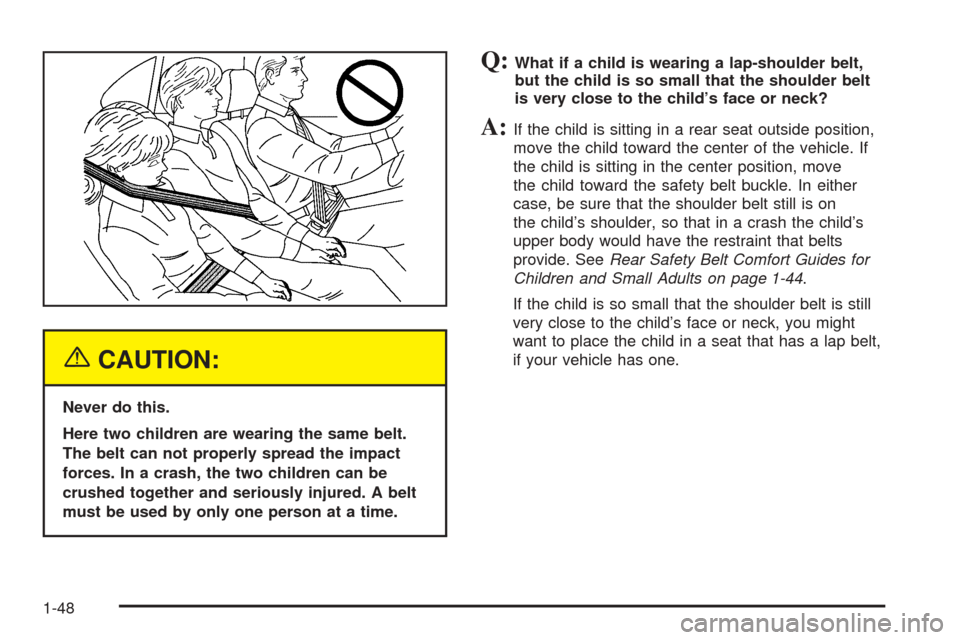
Never do this.
Here two children are wearing the same belt.
The belt can not properly spread the impact
forces. In a crash, the two children can be
crushed together and seriously injured. A belt
must be used by only one person at a time.
Q:What if a child is wearing a lap-shoulder belt,
but the child is so small that the shoulder belt
is very close to the child’s face or neck?
A:If the child is sitting in a rear seat outside position,
move the child toward the center of the vehicle. If
the child is sitting in the center position, move
the child toward the safety belt buckle. In either
case, be sure that the shoulder belt still is on
the child’s shoulder, so that in a crash the child’s
upper body would have the restraint that belts
provide. SeeRear Safety Belt Comfort Guides for
Children and Small Adults on page 1-44.
If the child is so small that the shoulder belt is still
very close to the child’s face or neck, you might
want to place the child in a seat that has a lap belt,
if your vehicle has one.
1-48
Page 59 of 470
{CAUTION:
The body structure of a young child is quite
unlike that of an adult or older child, for whom
the safety belts are designed. A young child’s
hip bones are still so small that the vehicle’s
regular safety belt may not remain low on the
hip bones, as it should. Instead, it may settle
up around the child’s abdomen. In a crash, the
belt would apply force on a body area that is
unprotected by any bony structure. This alone
could cause serious or fatal injuries. Young
children always should be secured in
appropriate child restraints.
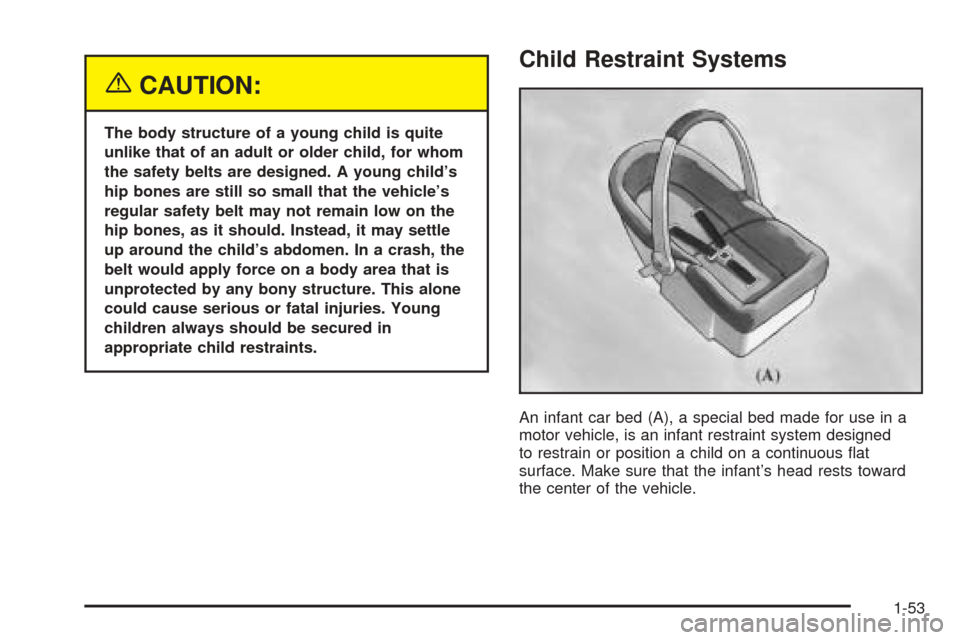
Child Restraint Systems
An infant car bed (A), a special bed made for use in a
motor vehicle, is an infant restraint system designed
to restrain or position a child on a continuous �at
surface. Make sure that the infant’s head rests toward
the center of the vehicle.
1-53
Page 83 of 470
What Makes an Airbag In�ate?
In an impact of sufficient severity, the airbag sensing
system detects that the vehicle is in a crash. For
both frontal and side impact airbags, the sensing system
triggers a release of gas from the in�ator, which
in�ates the airbag. The in�ator, the airbag and related
hardware are all part of the airbag modules. Frontal
airbag modules are located inside the steering wheel
and instrument panel. For side impact airbags, the
airbag modules are located in the seatback closest to
the driver’s and/or right front passenger’s door.
How Does an Airbag Restrain?
In moderate to severe frontal or near frontal collisions,
even belted occupants can contact the steering wheel or
the instrument panel. In moderate to severe side
collisions, even belted occupants can contact the inside
of the vehicle. The airbag supplements the protection
provided by safety belts. Airbags distribute the force of
the impact more evenly over the occupant’s upper
body, stopping the occupant more gradually. But the
frontal airbags would not help you in many types
of collisions, including rollovers, rear impacts, and many
side impacts, primarily because an occupant’s motion
is not toward the airbag. Side impact airbags would not
help you in many types of collisions, including frontal
or near frontal collisions, rollovers, and rear impacts,
primarily because an occupant’s motion is not toward
those airbags. Airbags should never be regarded
as anything more than a supplement to safety belts, and
then only in moderate to severe frontal or near-frontal
collisions for the driver’s and right front passenger’s
frontal airbags, and only in moderate to severe
side collisions for vehicles with a driver’s and right front
passenger’s side impact airbag.
1-77
Page 89 of 470
{CAUTION:
If the airbag readiness light in the instrument
panel cluster ever comes on and stays on, it
means that something may be wrong with the
airbag system. If this ever happens, have the
CAUTION: (Continued)
CAUTION: (Continued)
vehicle serviced promptly, because an
adult-size person sitting in the right front
passenger’s seat may not have the protection
of the frontal airbag. SeeAirbag Readiness
Light on page 3-34for more on this, including
important safety information.
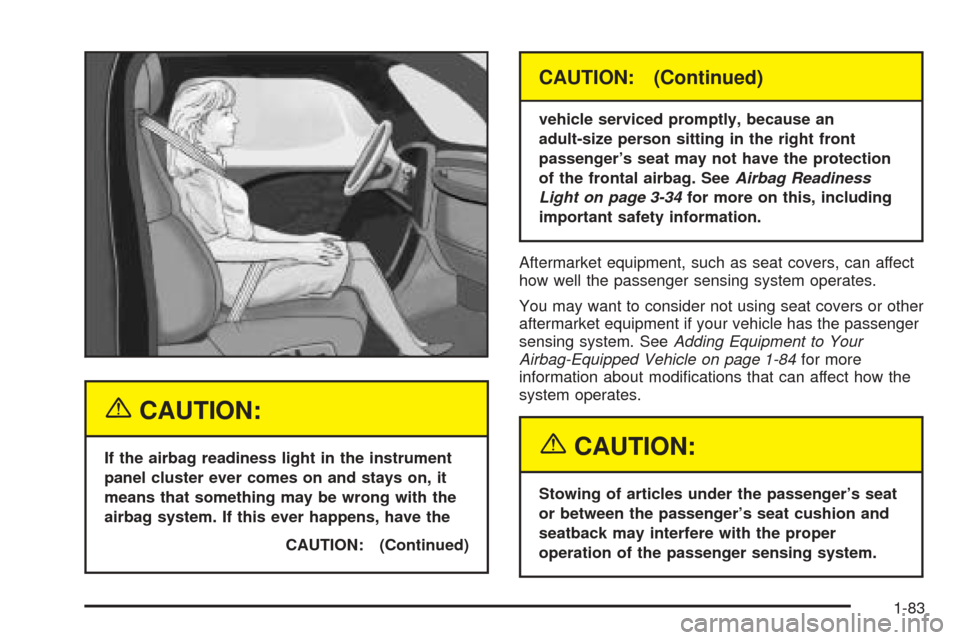
Aftermarket equipment, such as seat covers, can affect
how well the passenger sensing system operates.
You may want to consider not using seat covers or other
aftermarket equipment if your vehicle has the passenger
sensing system. SeeAdding Equipment to Your
Airbag-Equipped Vehicle on page 1-84for more
information about modi�cations that can affect how the
system operates.
{CAUTION:
Stowing of articles under the passenger’s seat
or between the passenger’s seat cushion and
seatback may interfere with the proper
operation of the passenger sensing system.
1-83