tow CADILLAC ESCALADE ESV 2010 User Guide
[x] Cancel search | Manufacturer: CADILLAC, Model Year: 2010, Model line: ESCALADE ESV, Model: CADILLAC ESCALADE ESV 2010Pages: 620, PDF Size: 7.4 MB
Page 54 of 620
Black plate (22,1)Cadillac Escalade/Escalade ESV Owner Manual - 2010
Folding the Seatback(s) Notice: Folding a rear seat with the safety belts still
fastened may cause damage to the seat or the
safety belts. Always unbuckle the safety belts and
return them to their normal stowed position before
folding a rear seat.
To fold the seatback, do the following:
1. Open the liftgate to access the controls for
the seat.
2. Remove all items on the seat cushion.
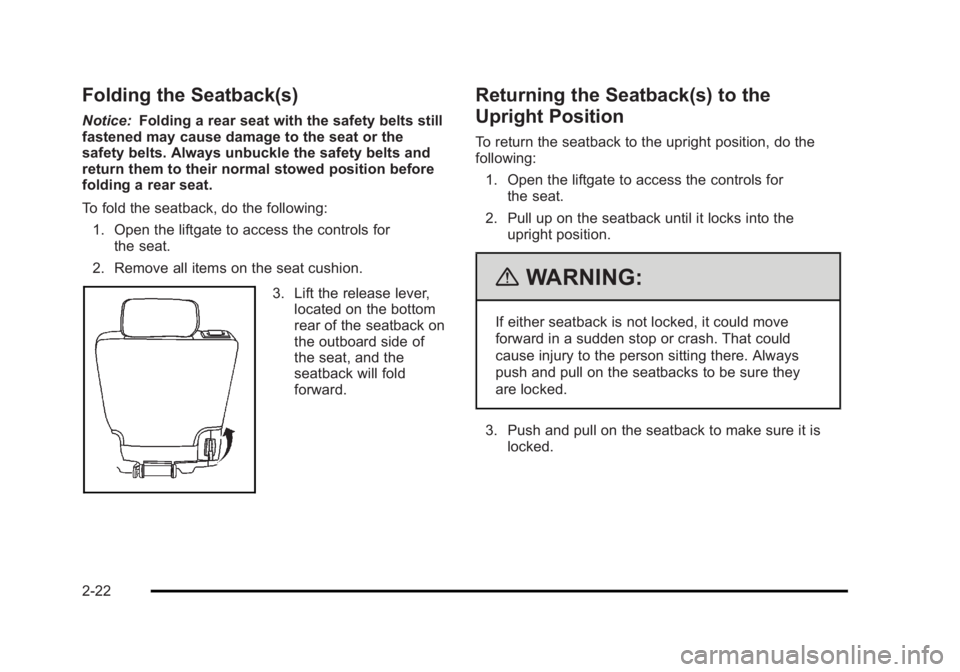
3. Lift the release lever,
located on the bottom
rear of the seatback on
the outboard side of
the seat, and the
seatback will fold
forward. Returning the Seatback(s) to the
Upright Position To return the seatback to the upright position, do the
following:
1. Open the liftgate to access the controls for
the seat.
2. Pull up on the seatback until it locks into the
upright position.
{ WARNING: If either seatback is not locked, it could move
forward in a sudden stop or crash. That could
cause injury to the person sitting there. Always
push and pull on the seatbacks to be sure they
are locked.
3. Push and pull on the seatback to make sure it is
locked.
2-22
Page 74 of 620

Black plate (42,1)Cadillac Escalade/Escalade ESV Owner Manual - 2010
To unlatch the belt, push the button on the buckle. The
belt should return to its stowed position.
Before a door is closed, be sure the safety belt is out of
the way. If a door is slammed against a safety belt,
damage can occur to both the belt and the vehicle. Shoulder Belt Height Adjuster The vehicle has a shoulder belt height adjuster for the
driver and right front passenger positions.
Adjust the height so that the shoulder portion of the belt
is centered on the shoulder. The belt should be away
from the face and neck, but not falling off the shoulder.
Improper shoulder belt height adjustment could reduce
the effectiveness of the safety belt in a crash.
Squeeze the buttons (A)
on the sides of the height
adjuster and move the
height adjuster to the
desired position.
2-42
Page 97 of 620

Black plate (65,1)Cadillac Escalade/Escalade ESV Owner Manual - 2010
Notice: Do not let the LATCH attachments rub
against the vehicle ’ s safety belts. This may damage
these parts. If necessary, move buckled safety belts
to avoid rubbing the LATCH attachments.
Do not fold the empty rear seat with a safety belt
buckled. This could damage the safety belt or the
seat. Unbuckle and return the safety belt to its
stowed position, before folding the seat.
1. Attach and tighten the lower attachments to the
lower anchors. If the child restraint does not have
lower attachments or the desired seating position
does not have lower anchors, secure the child
restraint with the top tether and the safety belts.
Refer to your child restraint manufacturer
instructions and the instructions in this manual.
1. 1. Find the lower anchors for the desired
seating position.
1. 2. Put the child restraint on the seat.
1. 3. Attach and tighten the lower attachments on
the child restraint to the lower anchors. 2. If the child restraint manufacturer recommends that
the top tether be attached, attach and tighten the
top tether to the top tether anchor, if the vehicle
has one. Refer to the child restraint instructions
and the following steps:
2. 1. Find the top tether anchor.
2. 2. Route, attach and tighten the top tether
according to your child restraint instructions
and the following instructions:
If the position you are
using does not have a
headrest or head restraint
and you are using a
single tether, route the
tether over the seatback.
2-65
Page 102 of 620
Black plate (70,1)Cadillac Escalade/Escalade ESV Owner Manual - 2010
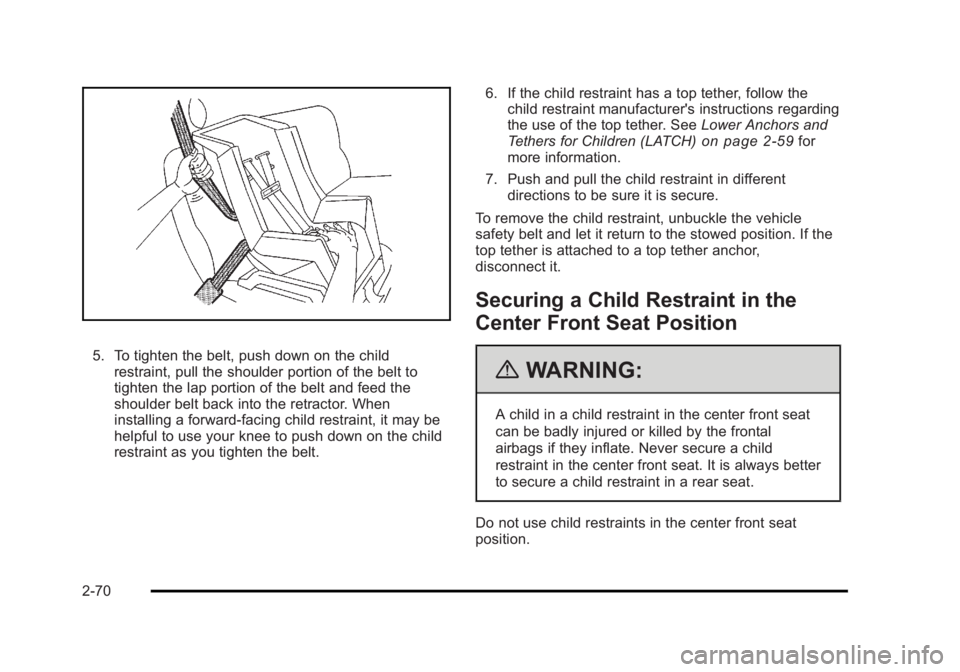
5. To tighten the belt, push down on the child
restraint, pull the shoulder portion of the belt to
tighten the lap portion of the belt and feed the
shoulder belt back into the retractor. When
installing a forward-facing child restraint, it may be
helpful to use your knee to push down on the child
restraint as you tighten the belt. 6. If the child restraint has a top tether, follow the
child restraint manufacturer's instructions regarding
the use of the top tether. See Lower Anchors and
Tethers for Children (LATCH)
on page 2 ‑ 59 for
more information.
7. Push and pull the child restraint in different
directions to be sure it is secure.
To remove the child restraint, unbuckle the vehicle
safety belt and let it return to the stowed position. If the
top tether is attached to a top tether anchor,
disconnect it.
Securing a Child Restraint in the
Center Front Seat Position
{ WARNING: A child in a child restraint in the center front seat
can be badly injured or killed by the frontal
airbags if they inflate. Never secure a child
restraint in the center front seat. It is always better
to secure a child restraint in a rear seat.
Do not use child restraints in the center front seat
position.
2-70
Page 106 of 620
Black plate (74,1)Cadillac Escalade/Escalade ESV Owner Manual - 2010
If the vehicle is equipped with the passenger sensing
system, and when the passenger sensing system has
turned off the right front passenger frontal airbag, the off
indicator in the passenger airbag status indicator should
light and stay lit when you start the vehicle. See
Passenger Airbag Status Indicator on page 4 ‑ 31 .
If a child restraint has been installed and the on
indicator is lit, see “ If the On Indicator is Lit for a Child
Restraint ” under Passenger Sensing System
on
page 2 ‑ 84 for more information.
To remove the child restraint, unbuckle the vehicle
safety belt and let it return to the stowed position.
Airbag System The vehicle has the following airbags: .
A frontal airbag for the driver. .
A frontal airbag for the right front passenger. .
A roof-rail airbag for the driver and passenger
directly behind the driver. .
A roof-rail airbag for the right front passenger and
the person seated directly behind that passenger. The vehicle may have the following airbags: .
A seat ‐ mounted side impact airbag for the driver. .
A seat ‐ mounted side impact airbag for the right
front passenger. .
If the vehicle has a third row seat, it will have a
third row roof-rail airbag.
All of the airbags in the vehicle will have the word
AIRBAG embossed in the trim or on an attached label
near the deployment opening.
For frontal airbags, the word AIRBAG will appear on the
middle part of the steering wheel for the driver and on
the instrument panel for the right front passenger.
With seat ‐ mounted side impact airbags, the word
AIRBAG will appear on the side of the seatback closest
to the door.
With roof-rail airbags, the word AIRBAG will appear
along the headliner or trim.
Airbags are designed to supplement the protection
provided by safety belts. Even though today's airbags
are also designed to help reduce the risk of injury from
the force of an inflating bag, all airbags must inflate very
quickly to do their job.
2-74
Page 114 of 620

Black plate (82,1)Cadillac Escalade/Escalade ESV Owner Manual - 2010
Rollover capable roof-rail airbags are designed to
help contain the head and chest of occupants in the
outboard seating positions in the first, second, and third
rows, if equipped with a third row seat. The rollover
capable roof-rail airbags are designed to help reduce
the risk of full or partial ejection in rollover events,
although no system can prevent all such ejections.
But airbags would not help in many types of collisions,
primarily because the occupant's motion is not toward
those airbags. See When Should an Airbag Inflate?
on
page 2 ‑ 80 for more information.
Airbags should never be regarded as anything more
than a supplement to safety belts.
What Will You See After an Airbag
Inflates? After the frontal airbags and seat-mounted side impact
airbags inflate, they quickly deflate, so quickly that
some people may not even realize an airbag inflated.
Roof-rail airbags may still be at least partially inflated for
some time after they deploy. Some components of the
airbag module may be hot for several minutes. For
location of the airbag modules, see What Makes an
Airbag Inflate? on page 2 ‑ 81 . The parts of the airbag that come into contact with you
may be warm, but not too hot to touch. There may be
some smoke and dust coming from the vents in the
deflated airbags. Airbag inflation does not prevent the
driver from seeing out of the windshield or being able to
steer the vehicle, nor does it prevent people from
leaving the vehicle.
{ WARNING: When an airbag inflates, there may be dust in the
air. This dust could cause breathing problems for
people with a history of asthma or other breathing
trouble. To avoid this, everyone in the vehicle
should get out as soon as it is safe to do so.
If you have breathing problems but cannot get out
of the vehicle after an airbag inflates, then get
fresh air by opening a window or a door. If you
experience breathing problems following an airbag
deployment, you should seek medical attention.
2-82
Page 121 of 620

Black plate (89,1)Cadillac Escalade/Escalade ESV Owner Manual - 2010
We recommend that you not use seat covers or other
aftermarket equipment except when approved by GM
for your specific vehicle. See Adding Equipment to Your
Airbag-Equipped Vehicle
on page 2 ‑ 90 for more
information about modifications that can affect how the
system operates.
The on indicator may be lit if an object, such as a
briefcase, handbag, grocery bag, laptop or other
electronic device, is put on an unoccupied seat.
If this is not desired remove the object from the seat.
{ WARNING: Stowing of articles under the passenger seat or
between the passenger seat cushion and
seatback may interfere with the proper operation
of the passenger sensing system. Servicing Your Airbag-Equipped
Vehicle Airbags affect how the vehicle should be serviced.
There are parts of the airbag system in several places
around the vehicle. Your dealer and the service manual
have information about servicing the vehicle and the
airbag system. To purchase a service manual, see
Service Publications Ordering Information on
page 9 ‑ 18 .
{ WARNING: For up to 10 seconds after the ignition is turned off
and the battery is disconnected, an airbag can still
inflate during improper service. You can be injured
if you are close to an airbag when it inflates. Avoid
yellow connectors. They are probably part of the
airbag system. Be sure to follow proper service
procedures, and make sure the person performing
work for you is qualified to do so.
2-89
Page 125 of 620
Black plate (1,1)Cadillac Escalade/Escalade ESV Owner Manual - 2010
Section 3 Features and ControlsKeys . . . . . . . . . . . . . . . . . . . . . . . . . . . . . . . . . . . . . . . . . . . . . . . . 3-3
Remote Keyless Entry (RKE) System . . . . . . . . . . . 3-4
Remote Keyless Entry (RKE) System
Operation . . . . . . . . . . . . . . . . . . . . . . . . . . . . . . . . . . . . . 3-4
Remote Vehicle Start . . . . . . . . . . . . . . . . . . . . . . . . . . . 3-7
Doors and Locks . . . . . . . . . . . . . . . . . . . . . . . . . . . . . . . . . 3-10
Door Locks . . . . . . . . . . . . . . . . . . . . . . . . . . . . . . . . . . . . 3-10
Power Door Locks . . . . . . . . . . . . . . . . . . . . . . . . . . . . . 3-10
Delayed Locking . . . . . . . . . . . . . . . . . . . . . . . . . . . . . . . 3-11
Programmable Automatic Door Locks . . . . . . . . . . 3-11
Rear Door Security Locks . . . . . . . . . . . . . . . . . . . . . . 3-11
Lockout Protection . . . . . . . . . . . . . . . . . . . . . . . . . . . . . 3-12
Liftgate/Liftglass . . . . . . . . . . . . . . . . . . . . . . . . . . . . . . . 3-12
Power Liftgate . . . . . . . . . . . . . . . . . . . . . . . . . . . . . . . . . 3-14
Power Assist Steps . . . . . . . . . . . . . . . . . . . . . . . . . . . . 3-17
Windows . . . . . . . . . . . . . . . . . . . . . . . . . . . . . . . . . . . . . . . . . . 3-18
Power Windows . . . . . . . . . . . . . . . . . . . . . . . . . . . . . . . 3-19
Sun Visors . . . . . . . . . . . . . . . . . . . . . . . . . . . . . . . . . . . . . 3-21 Theft-Deterrent Systems . . . . . . . . . . . . . . . . . . . . . . . . . 3-22
Content Theft-Deterrent . . . . . . . . . . . . . . . . . . . . . . . . 3-22
PASS-Key ®
III+ Electronic Immobilizer . . . . . . . . . 3-24
PASS-Key ®
III+ Electronic Immobilizer
Operation . . . . . . . . . . . . . . . . . . . . . . . . . . . . . . . . . . . . 3-24
Starting and Operating Your Vehicle . . . . . . . . . . . . 3-26
New Vehicle Break-In . . . . . . . . . . . . . . . . . . . . . . . . . . 3-26
Ignition Positions . . . . . . . . . . . . . . . . . . . . . . . . . . . . . . 3-27
Retained Accessory Power (RAP) . . . . . . . . . . . . . 3-28
Starting the Engine . . . . . . . . . . . . . . . . . . . . . . . . . . . . 3-29
Adjustable Throttle and Brake Pedal . . . . . . . . . . . 3-30
Engine Coolant Heater . . . . . . . . . . . . . . . . . . . . . . . . . 3-31
Active Fuel Management ™ . . . . . . . . . . . . . . . . . . . . 3-32
Automatic Transmission Operation . . . . . . . . . . . . . 3-32
Tow/Haul Mode . . . . . . . . . . . . . . . . . . . . . . . . . . . . . . . . 3-36
Parking Brake . . . . . . . . . . . . . . . . . . . . . . . . . . . . . . . . . 3-38
Shifting Into Park . . . . . . . . . . . . . . . . . . . . . . . . . . . . . . 3-39
Shifting Out of Park . . . . . . . . . . . . . . . . . . . . . . . . . . . . 3-40
Parking Over Things That Burn . . . . . . . . . . . . . . . . 3-41
Engine Exhaust . . . . . . . . . . . . . . . . . . . . . . . . . . . . . . . . 3-41
Running the Vehicle While Parked . . . . . . . . . . . . . 3-42
3-1
Page 150 of 620
Black plate (26,1)Cadillac Escalade/Escalade ESV Owner Manual - 2010
Starting and Operating Your
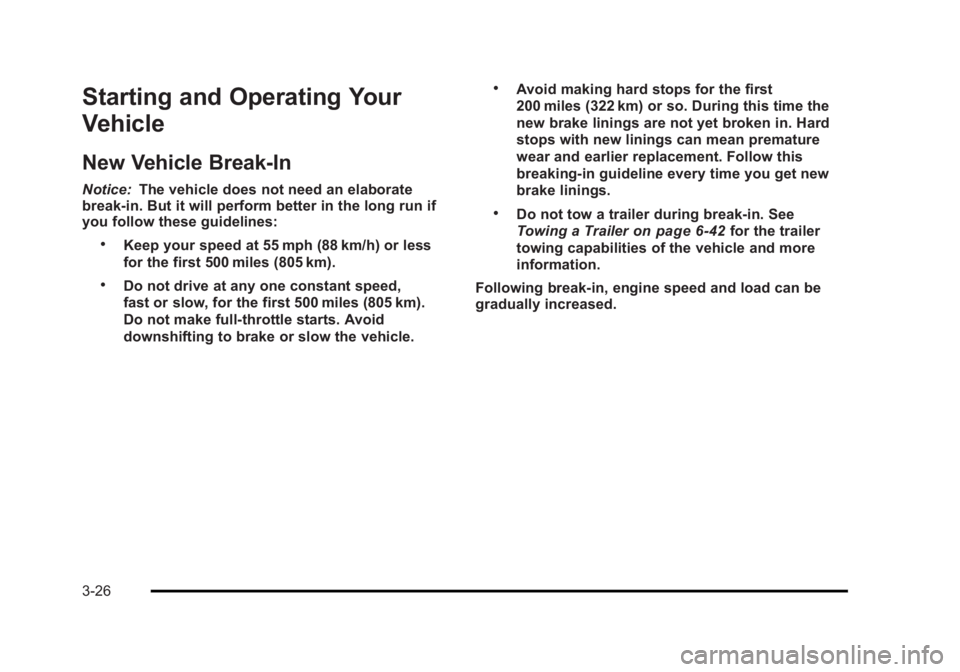
Vehicle New Vehicle Break-In Notice: The vehicle does not need an elaborate
break-in. But it will perform better in the long run if
you follow these guidelines: .
Keep your speed at 55 mph (88 km/h) or less
for the first 500 miles (805 km). .
Do not drive at any one constant speed,
fast or slow, for the first 500 miles (805 km).
Do not make full-throttle starts. Avoid
downshifting to brake or slow the vehicle. .
Avoid making hard stops for the first
200 miles (322 km) or so. During this time the
new brake linings are not yet broken in. Hard
stops with new linings can mean premature
wear and earlier replacement. Follow this
breaking-in guideline every time you get new
brake linings. .
Do not tow a trailer during break-in. See
Towing a Trailer
on page 6 ‑ 42 for the trailer
towing capabilities of the vehicle and more
information.
Following break ‐ in, engine speed and load can be
gradually increased.
3-26
Page 152 of 620

Black plate (28,1)Cadillac Escalade/Escalade ESV Owner Manual - 2010
The steering may bind with the wheels turned off center.
If this happens, move the steering wheel from right to
left while turning the key to ACC/ACCESSORY. If this
doesn't work, then the vehicle needs service.
Notice: Using a tool to force the key to turn in the
ignition could cause damage to the switch or break
the key. Use the correct key, make sure it is all the
way in, and turn it only with your hand. If the key
cannot be turned by hand, see your dealer.
B (ACC/ACCESSORY): This position lets things like
the radio and the windshield wipers operate while the
engine is off. Use this position if the vehicle must be
pushed or towed.
C (ON/RUN): This position can be used to operate the
electrical accessories and to display some instrument
panel cluster warning and indicator lights. The switch
stays in this position when the engine is running. The
transmission is also unlocked in this position on
automatic transmission vehicles.
If you leave the key in the ACC/ACCESSORY or
ON/RUN position with the engine off, the battery could
be drained. You may not be able to start the vehicle if
the battery is allowed to drain for an extended period
of time. D (START): This is the position that starts the engine.
When the engine starts, release the key. The ignition
switch returns to ON/RUN for driving.
A warning tone will sound when the driver door is
opened, the ignition is in ACC/ACCESSORY or
LOCK/OFF and the key is in the ignition.
Retained Accessory Power (RAP) The following vehicle accessories can be used for up to
10 minutes after the engine is turned off: .
Audio System .
Power Windows .
OnStar ®
System (if equipped) .
Sunroof (if equipped)
These features work when the key is in ON/RUN or
ACC/ACCESSORY. Once the key is turned from
ON/RUN to LOCK/OFF, the windows and sunroof
continue to work up to 10 minutes until any door is
opened. The radio continues to work for up to
10 minutes or until the driver door is opened.
3-28