buttons CADILLAC ESCALADE ESV 2010 Service Manual
[x] Cancel search | Manufacturer: CADILLAC, Model Year: 2010, Model line: ESCALADE ESV, Model: CADILLAC ESCALADE ESV 2010Pages: 620, PDF Size: 7.4 MB
Page 318 of 620

Black plate (16,1)Cadillac Escalade/Escalade ESV Owner Manual - 2010
Handling the DVD Map Disc When handling the DVD map disc, be careful of the
following: .
Handle the disc very carefully to avoid
contamination or flaws. Signals may not read out
properly if the disc gets contaminated or flawed. .
If the disc gets soiled, use a soft cloth to gently
wipe it out from the center of the disc to the
outside. Do not use photographic record cleaner,
solvents, or other cleaners. .
Do not use the disc to rest on while writing or
drawing using any writing utensil or attach a seal to
any of the sides or the disc. .
Do not keep the disc in direct sunlight, high
temperatures, or humidity. .
After using the disc, place it back into the
original case. Map Adjustments The system lets you adjust the scale of view on the
map. Also, as you drive, the map scrolls automatically
based on the direction of travel.
Map Scales + / − (Zoom In/Zoom Out): Touch the zoom in or out
screen buttons or the scale on the bar to change the
level of map detail. The scale appears on the screen
once the zoom in or zoom out screen buttons are
selected. The system adjusts the map accordingly.
The scale of a map can range from 1/32 mi. (50 m) to
256 mi. (400 km). To change English or metric, see DIC
Operation and Displays
on page 4 ‑ 42 for more
information.
5-16
Page 323 of 620
Black plate (21,1)Cadillac Escalade/Escalade ESV Owner Manual - 2010
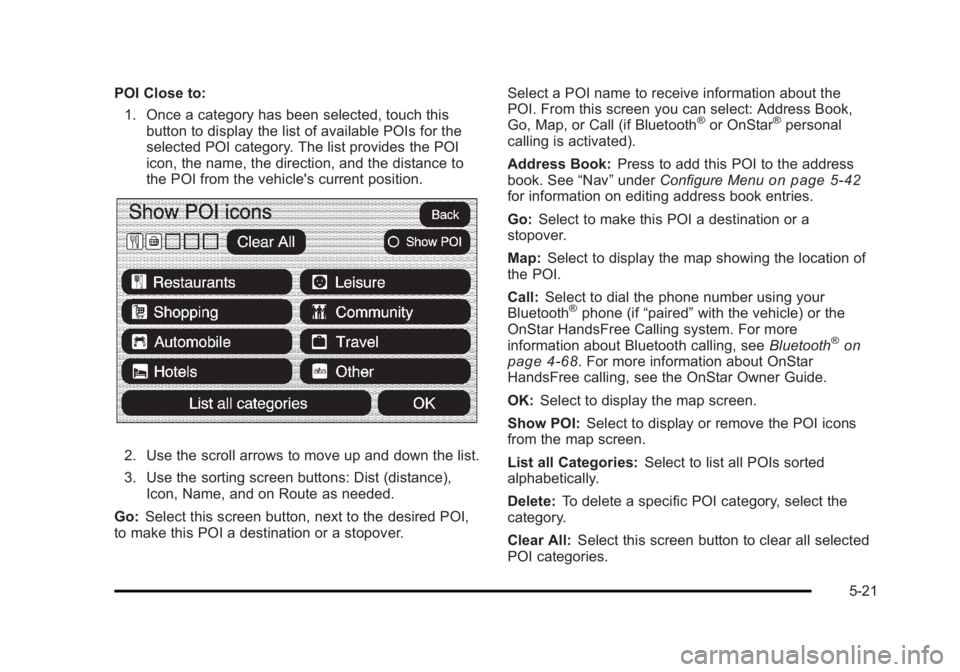
POI Close to:
1. Once a category has been selected, touch this
button to display the list of available POIs for the
selected POI category. The list provides the POI
icon, the name, the direction, and the distance to
the POI from the vehicle's current position.
2. Use the scroll arrows to move up and down the list.
3. Use the sorting screen buttons: Dist (distance),
Icon, Name, and on Route as needed.
Go: Select this screen button, next to the desired POI,
to make this POI a destination or a stopover. Select a POI name to receive information about the
POI. From this screen you can select: Address Book,
Go, Map, or Call (if Bluetooth ®
or OnStar ®
personal
calling is activated).
Address Book: Press to add this POI to the address
book. See “ Nav ” under Configure Menu
on page 5 ‑ 42
for information on editing address book entries.
Go: Select to make this POI a destination or a
stopover.
Map: Select to display the map showing the location of
the POI.
Call: Select to dial the phone number using your
Bluetooth ®
phone (if “ paired ” with the vehicle) or the
OnStar HandsFree Calling system. For more
information about Bluetooth calling, see Bluetooth ®
on
page 4 ‑ 68 . For more information about OnStar
HandsFree calling, see the OnStar Owner Guide.
OK: Select to display the map screen.
Show POI: Select to display or remove the POI icons
from the map screen.
List all Categories: Select to list all POIs sorted
alphabetically.
Delete: To delete a specific POI category, select the
category.
Clear All: Select this screen button to clear all selected
POI categories.
5-21
Page 333 of 620
Black plate (31,1)Cadillac Escalade/Escalade ESV Owner Manual - 2010
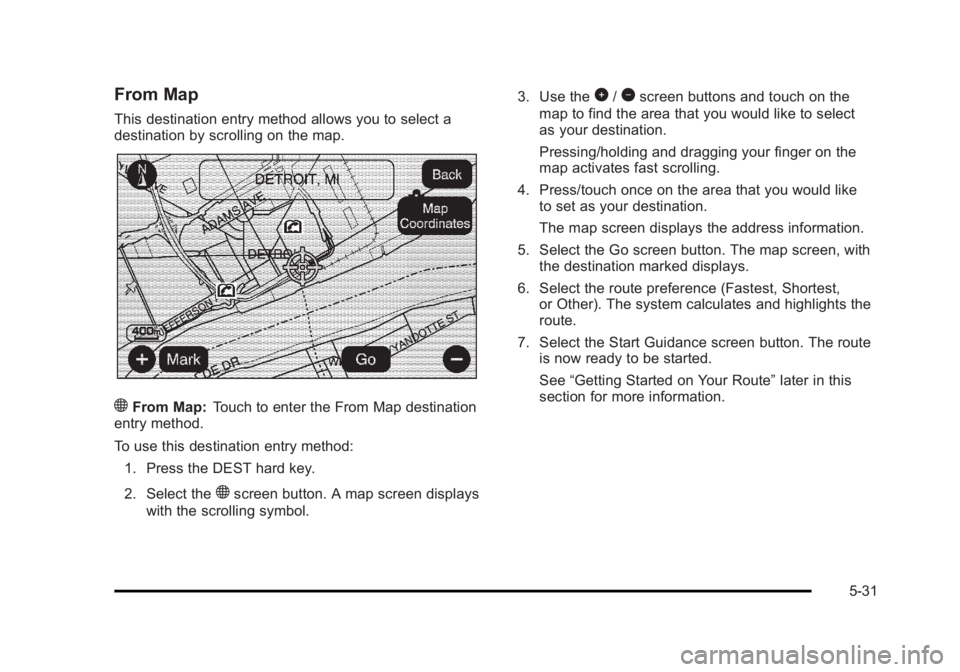
From Map This destination entry method allows you to select a
destination by scrolling on the map.
) From Map: Touch to enter the From Map destination
entry method.
To use this destination entry method:
1. Press the DEST hard key.
2. Select the
) screen button. A map screen displays
with the scrolling symbol. 3. Use the
0 /
1 screen buttons and touch on the
map to find the area that you would like to select
as your destination.
Pressing/holding and dragging your finger on the
map activates fast scrolling.
4. Press/touch once on the area that you would like
to set as your destination.
The map screen displays the address information.
5. Select the Go screen button. The map screen, with
the destination marked displays.
6. Select the route preference (Fastest, Shortest,
or Other). The system calculates and highlights the
route.
7. Select the Start Guidance screen button. The route
is now ready to be started.
See “ Getting Started on Your Route ” later in this
section for more information.
5-31
Page 335 of 620
Black plate (33,1)Cadillac Escalade/Escalade ESV Owner Manual - 2010
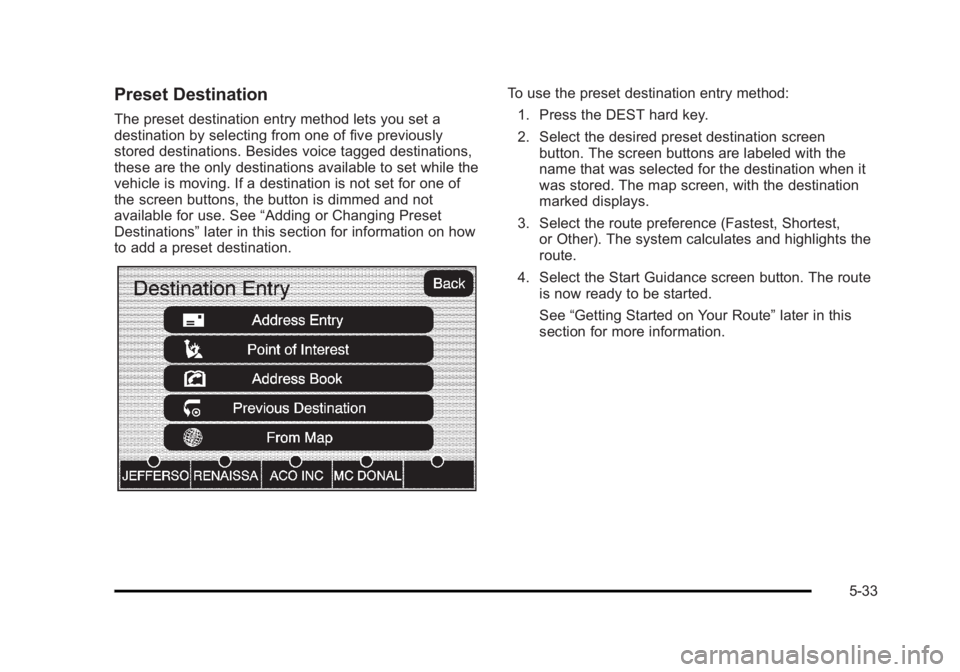
Preset Destination The preset destination entry method lets you set a
destination by selecting from one of five previously
stored destinations. Besides voice tagged destinations,
these are the only destinations available to set while the
vehicle is moving. If a destination is not set for one of
the screen buttons, the button is dimmed and not
available for use. See “ Adding or Changing Preset
Destinations ” later in this section for information on how
to add a preset destination. To use the preset destination entry method:
1. Press the DEST hard key.
2. Select the desired preset destination screen
button. The screen buttons are labeled with the
name that was selected for the destination when it
was stored. The map screen, with the destination
marked displays.
3. Select the route preference (Fastest, Shortest,
or Other). The system calculates and highlights the
route.
4. Select the Start Guidance screen button. The route
is now ready to be started.
See “ Getting Started on Your Route ” later in this
section for more information.
5-33
Page 336 of 620
Black plate (34,1)Cadillac Escalade/Escalade ESV Owner Manual - 2010
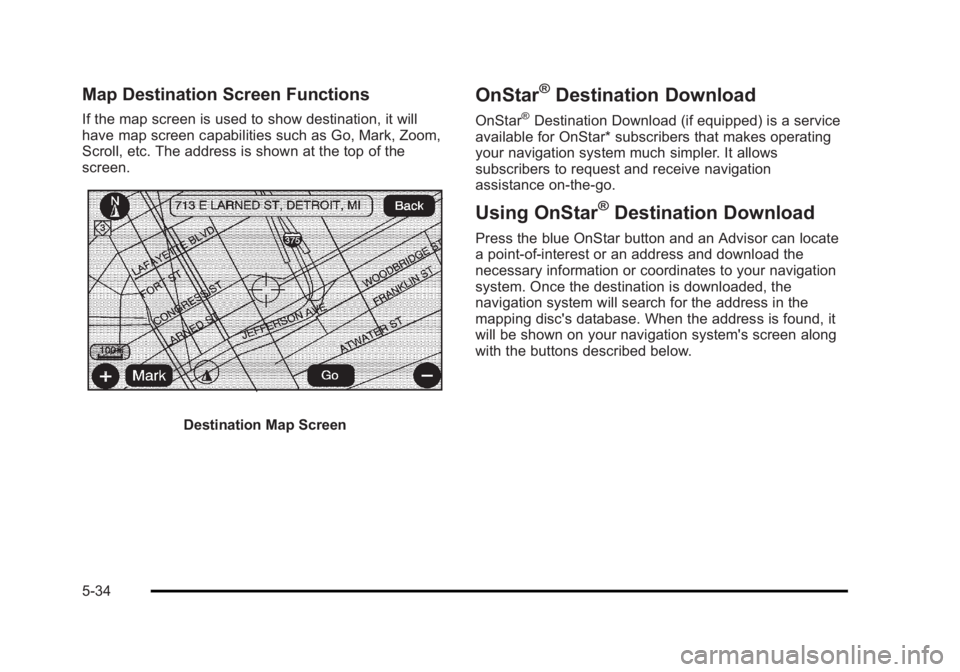
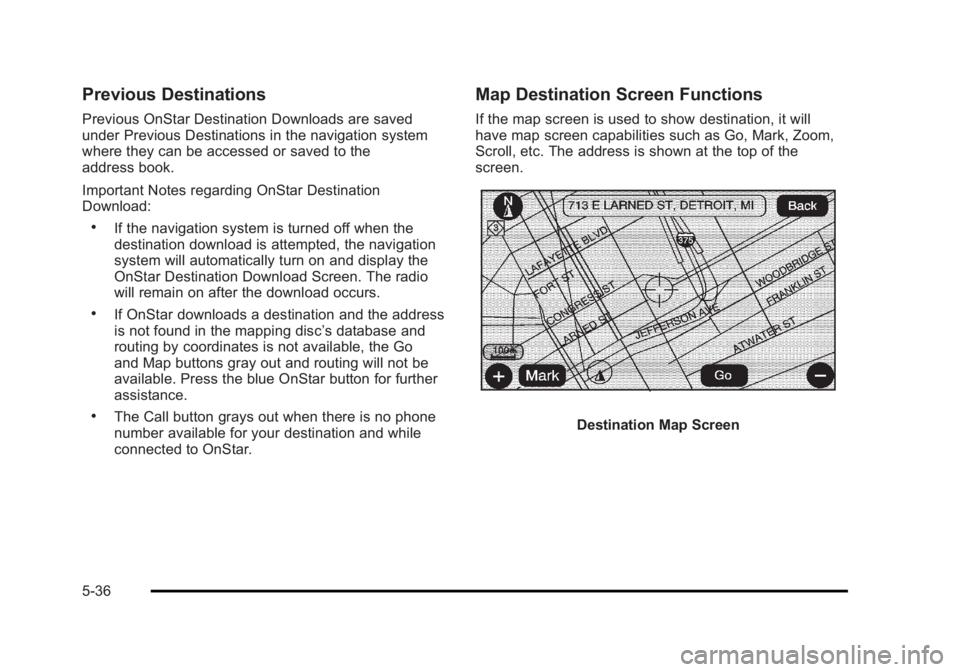
Map Destination Screen Functions If the map screen is used to show destination, it will
have map screen capabilities such as Go, Mark, Zoom,
Scroll, etc. The address is shown at the top of the
screen.
Destination Map Screen OnStar ®
Destination Download OnStar ®
Destination Download (if equipped) is a service
available for OnStar* subscribers that makes operating
your navigation system much simpler. It allows
subscribers to request and receive navigation
assistance on-the-go.
Using OnStar ®
Destination Download Press the blue OnStar button and an Advisor can locate
a point-of-interest or an address and download the
necessary information or coordinates to your navigation
system. Once the destination is downloaded, the
navigation system will search for the address in the
mapping disc's database. When the address is found, it
will be shown on your navigation system's screen along
with the buttons described below.
5-34
Page 338 of 620
Black plate (36,1)Cadillac Escalade/Escalade ESV Owner Manual - 2010
Previous Destinations Previous OnStar Destination Downloads are saved
under Previous Destinations in the navigation system
where they can be accessed or saved to the
address book.
Important Notes regarding OnStar Destination
Download: .
If the navigation system is turned off when the
destination download is attempted, the navigation
system will automatically turn on and display the
OnStar Destination Download Screen. The radio
will remain on after the download occurs. .
If OnStar downloads a destination and the address
is not found in the mapping disc ’ s database and
routing by coordinates is not available, the Go
and Map buttons gray out and routing will not be
available. Press the blue OnStar button for further
assistance. .
The Call button grays out when there is no phone
number available for your destination and while
connected to OnStar. Map Destination Screen Functions If the map screen is used to show destination, it will
have map screen capabilities such as Go, Mark, Zoom,
Scroll, etc. The address is shown at the top of the
screen.
Destination Map Screen
5-36
Page 343 of 620
Black plate (41,1)Cadillac Escalade/Escalade ESV Owner Manual - 2010
Adding or Changing Preset
Destinations This feature allows additions or changes one of five
preset destinations. When a destination has been
added as a preset destination, it is available to select
from the Destination Entry screen. See “ Preset
Destination ” previously for information on how to select
a preset destination as a final destination.
To store the current vehicle position as a preset
destination:
1. Select the Mark screen button from the map
screen to add the current vehicle position to the
address book. The Address Book screen appears.
2. Select the Name screen button. An alpha-keyboard
displays. Enter the name. Press the OK screen
button then the Back screen button to return to the
address book information screen.
3. Press and hold one of the buttons at the bottom of
the screen until the name appears in that preset
destination screen button. It is now available to
select from the Destination Entry screen. To store an address book entry as a preset destination:
1. Select the CONFIG hard key.
2. Select the Nav screen button or press the CONFIG
key until Nav is selected or touch the Nav screen
button.
3. Select the Edit/View screen button.
4. Select the address book entry to be stored as the
preset destination. Select the Name screen button
to add a name, if needed.
5. Press and hold one of the buttons at the bottom of
the screen until the name appears in that preset
destination screen button. It is now available to
select from the Destination Entry screen.
5-41
Page 345 of 620
Black plate (43,1)Cadillac Escalade/Escalade ESV Owner Manual - 2010
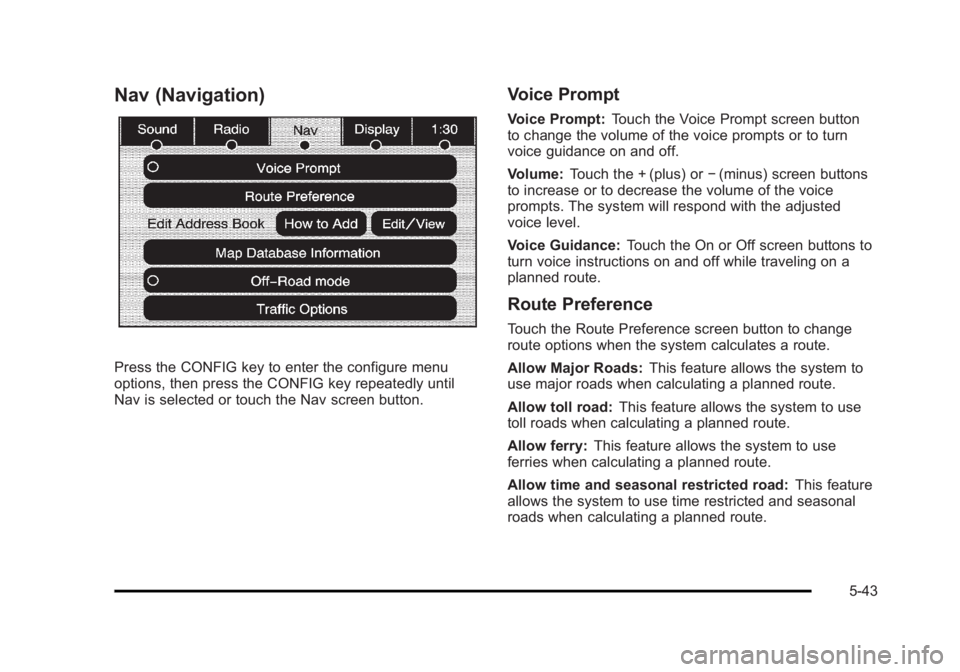
Nav (Navigation)
Press the CONFIG key to enter the configure menu
options, then press the CONFIG key repeatedly until
Nav is selected or touch the Nav screen button. Voice Prompt Voice Prompt: Touch the Voice Prompt screen button
to change the volume of the voice prompts or to turn
voice guidance on and off.
Volume: Touch the + (plus) or − (minus) screen buttons
to increase or to decrease the volume of the voice
prompts. The system will respond with the adjusted
voice level.
Voice Guidance: Touch the On or Off screen buttons to
turn voice instructions on and off while traveling on a
planned route.
Route Preference Touch the Route Preference screen button to change
route options when the system calculates a route.
Allow Major Roads: This feature allows the system to
use major roads when calculating a planned route.
Allow toll road: This feature allows the system to use
toll roads when calculating a planned route.
Allow ferry: This feature allows the system to use
ferries when calculating a planned route.
Allow time and seasonal restricted road: This feature
allows the system to use time restricted and seasonal
roads when calculating a planned route.
5-43
Page 353 of 620

Black plate (51,1)Cadillac Escalade/Escalade ESV Owner Manual - 2010
Show Traffic ICONS: Select to display traffic icons on
the map screen. This function allows which traffic
information displays.
Traffic Flow Status — This touch screen button is used
to enable or disable the green, yellow, red and orange
arrows shown beside the roads and used to show the
traffic flow or extent of a traffic event. .
Black indicates a closed road segment .
Red indicates significantly impaired traffic flow with
average speed of less than 25 mph. .
Yellow indicates slightly impaired traffic flow with
average speed between 25 and 45 mph. .
Green indicates normal traffic flow with average
speed above 45 mph. .
Orange indicates construction.
Traffic flow data arrows display on the map when scaled
up to eight miles.
Closed Road, Traffic Delays, Incidents, and
Advisories — These four touch screen buttons are
used to select the traffic event ICONS that appear on
the map screens.
Alert for Approaching Traffic Events: When On, if an
approaching traffic event is within the alert range, one of
two traffic alert pop-up screens display: .
With no route planned, while on expressways,
Approaching Traffic Event without Avoid screen
displays. .
With route planned, Traffic Event on Route screen
displays.
If the Alert for Approaching Traffic Events is Off, the
alert pop-up screen does not display.
5-51
Page 356 of 620

Black plate (54,1)Cadillac Escalade/Escalade ESV Owner Manual - 2010
Detailed Traffic Event Screens
Traffic Event Screen
The detailed Traffic Event screens are used to display
additional details of a traffic event condition. This
screen may display if: .
Scrolling to an event on the map and then
pressing INFO. .
Selecting a traffic event listed on the Traffic Event
List screen.
The Traffic Event screen may display when approaching
a traffic event. Back, Map, More, and Avoid These buttons have common functions across all three
Detailed Traffic Event screens.
Back: Press to return to the previous screen.
Map: If available, press to display the related traffic
event on the map.
Map Traffic Event Icon with Back Screen
More: Press to display more of the traffic event
description, if the whole event does not fit in the given
display.
5-54