ESP CADILLAC ESCALADE ESV 2011 User Guide
[x] Cancel search | Manufacturer: CADILLAC, Model Year: 2011, Model line: ESCALADE ESV, Model: CADILLAC ESCALADE ESV 2011Pages: 548, PDF Size: 8.45 MB
Page 211 of 548
Black plate (9,1)Cadillac Escalade/Escalade ESV Owner Manual - 2011
Infotainment System 7-9Using Your Stored Preset
Destinations These destinations are available for
selection while driving.
1. Press
O to turn the system on.
2. A caution may appear. Press OK
to proceed.
3. Press DEST.
4. Select one of the available
preset destination screen
buttons. A map screen, with the
destination marked appears.
5. Select the route preference for
Fastest, Shortest, or Other. The
system calculates and highlights
the route.
6. Press Start Guidance. The route
is now ready to be started.
See “ Preset Destination ” under
Destination on page 7 ‑ 69 for more
information. Canceling Guidance Guidance is canceled once the final
destination is reached. To cancel
guidance prior to arrival at the final
destination:
1. Press DEST.
2. Press Cancel Guidance.
3. Press OK to confirm.
Guidance Volume Adjust the volume of voice guidance
prompts:
1. Press CONFIG to enter the
menu options, then press
CONFIG again, repeatedly until
Nav is selected or press the Nav
screen button. 2. Press Voice Prompt.
3. Press + or – screen buttons to
increase or to decrease the
volume of the voice prompts.
The system responds with the
adjusted voice level.
See “ Voice Prompt ” under
Configure Menu on page 7 ‑ 83 for
more information.
Cleaning the Display Screen Use a soft clean cotton cloth
dampened with clean water.
Page 219 of 548

Black plate (17,1)Cadillac Escalade/Escalade ESV Owner Manual - 2011
Infotainment System 7-17XM Theftlocked: The XM receiver
may have previously been in
another vehicle. For security
purposes, XM receivers cannot be
swapped between vehicles. If this
message is received after having
your vehicle serviced, check with
your dealer.
XM Radio ID: If tuned to channel 0,
this message will alternate with the
XM Radio eight digit radio ID label.
This label is needed to activate the
service.
Unknown: If this message is
received when tuned to channel 0,
there may be a receiver fault.
Consult with your dealer.
Check XM Receiver: If this
message does not clear within a
short period of time, the receiver
may have a fault. Consult with your
dealer.
No Subscription Please Renew:
The XM subscription needs to be
reactivated. Contact XM at
www.xmradio.com or call
1-800-929-2100. Radio Reception Frequency interference and static
can occur during normal radio
reception if items such as cell phone
chargers, vehicle convenience
accessories, and external electronic
devices are plugged into the
accessory power outlet. If there is
interference or static, unplug the
item from the accessory power
outlet.
AM The range for most AM stations is
greater than for FM, especially at
night. The longer range can cause
station frequencies to interfere with
each other. For better radio
reception, most AM radio stations
boost the power levels during the
day, and then reduce these levels
during the night. Static can also
occur when things like storms and
power lines interfere with radio
reception. When this happens, try
reducing the treble on the radio. FM Stereo FM signals only reach about
16 to 65 km (10 to 40 mi). Although
the radio has a built-in electronic
circuit that automatically works to
reduce interference, some static
can occur, especially around tall
buildings or hills, causing the sound
to fade in and out.
XM ™ Satellite Radio Service XM Satellite Radio Service gives
digital radio reception from coast to
coast in the 48 contiguous United
States, and in Canada. Just as
with FM, tall buildings or hills can
interfere with satellite radio signals,
causing the sound to fade in and
out. In addition, traveling or standing
under heavy foliage, bridges,
garages, or tunnels may cause loss
of the XM signal for a period of time.
Page 225 of 548

Black plate (23,1)Cadillac Escalade/Escalade ESV Owner Manual - 2011
Infotainment System 7-23Search: Press to display the
search screen. Select Title or
Chapter Search for DVD video and
Group or Track for DVD audio. The
keyboard allows you to type in the
title/chapter/group/track number that
you would like to watch or listen to.
This button does not work when the
DVD is stopped.
Setup: Press to display the
DVD Setup screen. This button
is only available when the DVD
is not playing. The DVD Setup
screen allows you to change the
brightness, contrast, and mode,
change the viewing on the monitor
and to change the initial settings;
language, parental level, and
aspect.
! (Brightness): Press the up or
down screen arrows to increase or
decrease the brightness of the
navigation screen.
_ (Contrast): Press the up or
down screen arrows to increase or
decrease the contrast of the
navigation screen. Auto (Automatic): Press so the
system can automatically adjust
the navigation screen background
depending on exterior lighting
conditions.
Night: Press to make the
navigation screen background
brighten.
Day: Press to make the navigation
screen background darken.
Monitor: From the DVD Setup
screen, press to adjust the viewing
angle of the DVD on the navigation
screen. This is not available on all
DVDs. This button is not available
for DVD audio
Press
e to close the screen in from
the left and right sides.
Press
J to fill the screen on the
left and right sides.
Press
d to fill the screen on the
top and bottom.
Settings: From the DVD Setup
screen, press to change the
default audio, subtitle, and menu languages, parental level, audio,
and to view the aspect of the DVD.
These settings are not available on
all DVDs. This button is not
available for DVD audio.
Audio Language: Press English,
Francais, Espanol, Italiano,
or Deutsch to change the default
language that the DVD player uses
for each disc. The audio language
must be available on the disc. The
audio language may vary for
each DVD.
Page 226 of 548

Black plate (24,1)Cadillac Escalade/Escalade ESV Owner Manual - 2011
7-24 Infotainment System Subtitle Language: Press English,
Francais, Espanol, Italiano,
or Deutsch to change the default
language of the subtitles that the
DVD player uses for each disc. The
subtitle language must be available
on the disc. The subtitle language
may vary for each DVD.
Menu Language: Press English,
Francais, Espanol, Italiano,
or Deutsch to change the default
language of the DVD video menus.
The menu language must be
available on the disc. The menu
language may vary for each DVD.
Parental Level: Press to change
the rating level to only allow the
play of DVDs with a certain rating.
The rating selection is 1 through 8,
with 1 Kids Safe being a G rating.
If the 1 is selected, any DVD with a
rating above G will not be able to be
viewed without entering a password. When the parental level is first
entered a keyboard will appear
on the display and a four-digit
password will need to be created.
Type in a password that you
will be able to remember. Once
the password is created, you can
then select a rating level.
If you would like to change the
rating level, press the Parental
Level button, then press the
Password button. Type in the
password and then change the
rating level.
If the password has been forgotten,
contact your dealer.
This may not be available on
all DVDs.
Aspect: Press to change the
aspect ratio of the DVD. This may
not be available on all DVDs. y (Next Track/Chapter): Press to
go to the next track or chapter. This
button may not work when the DVD
is playing the copyright information
or the previews.
z (Previous Track/Chapter):
1. Press to return to the start of the
current track or chapter.
2. Press again to go to the
previous track or chapter. This
button may not work when the
DVD is playing the copyright
information or the previews.
w (Tuning Knob):
1. Turn counterclockwise one notch
to go to the start of the current
chapter/track, turn it again to go
to the previous chapter/track.
2. Turn clockwise to go to the next
chapter/track.
Page 286 of 548
Black plate (84,1)Cadillac Escalade/Escalade ESV Owner Manual - 2011
7-84 Infotainment System Sound Press CONFIG to enter the
configure menu options, then press
CONFIG again, repeatedly until
Sound is selected or press the
Sound screen button to make
speaker and DSP (Digital Signal
Processing) adjustments. See
“ Sound Menu ” under, AM-FM Radio
on page 7 ‑ 10 for more information.
Radio Press CONFIG to enter the
configure menu options, then press
CONFIG again, repeatedly until
Radio is selected or press the Radio
screen button to make changes for
radio information displayed, preset
pages, XM (if equipped) categories,
and Bose AudioPilot. See “ Radio
Menu ” under, AM-FM Radio on
page 7 ‑ 10 for more information. Nav (Navigation)
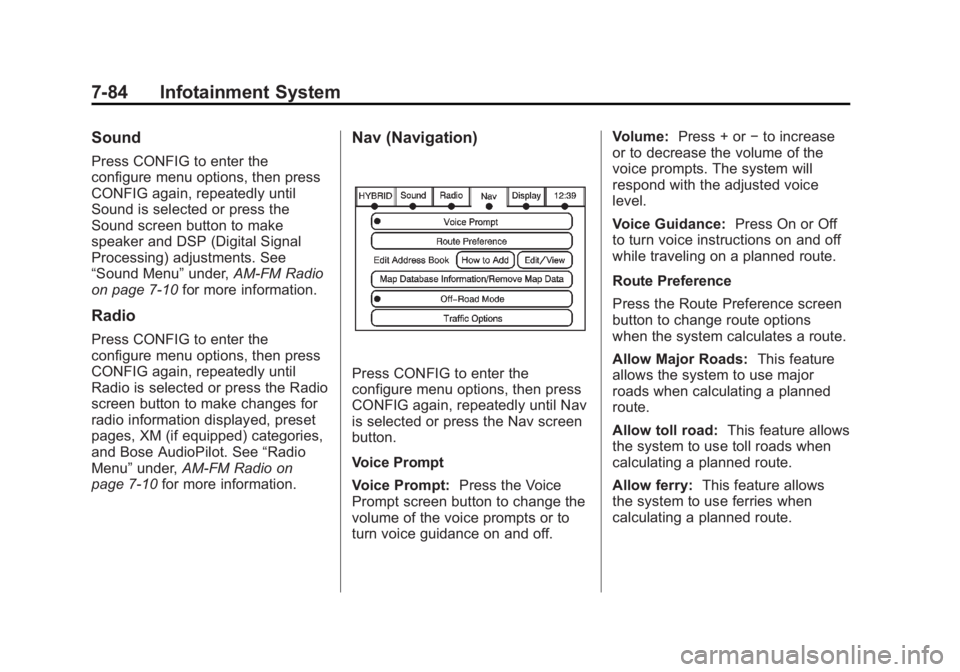
Press CONFIG to enter the
configure menu options, then press
CONFIG again, repeatedly until Nav
is selected or press the Nav screen
button.
Voice Prompt
Voice Prompt: Press the Voice
Prompt screen button to change the
volume of the voice prompts or to
turn voice guidance on and off. Volume: Press + or − to increase
or to decrease the volume of the
voice prompts. The system will
respond with the adjusted voice
level.
Voice Guidance: Press On or Off
to turn voice instructions on and off
while traveling on a planned route.
Route Preference
Press the Route Preference screen
button to change route options
when the system calculates a route.
Allow Major Roads: This feature
allows the system to use major
roads when calculating a planned
route.
Allow toll road: This feature allows
the system to use toll roads when
calculating a planned route.
Allow ferry: This feature allows
the system to use ferries when
calculating a planned route.
Page 288 of 548
Black plate (86,1)Cadillac Escalade/Escalade ESV Owner Manual - 2011
7-86 Infotainment System To add a voice tag to an address
book entry:
1. Press CONFIG.
2. Press the Nav screen button.
3. Press Edit/View Address Book.
4. Press Add Voice Tag.
5. The system will ask for you to
state the name. You will have
four seconds to state the name.
The system will respond back
with the name and prompt
you to repeat the name for
confirmation.
To delete an address book entry:
1. Press CONFIG.
2. Press the Nav screen button.
3. Press Edit/View Address Book. 4. Select the address book entry to
delete.
5. Press Delete to delete the
address book entry.
6. A confirmation pop-up will
display. Press OK to delete;
press Cancel to cancel the
operation.
To delete the entire address book:
1. Press CONFIG.
2. Press the Nav screen button.
3. Press Edit/View Address Book.
4. A list of all the address book
entries will display. Press and
hold Clear All.
5. A confirmation pop-up will
display. Press OK to delete;
press Cancel to cancel the
operation. Map Database Information
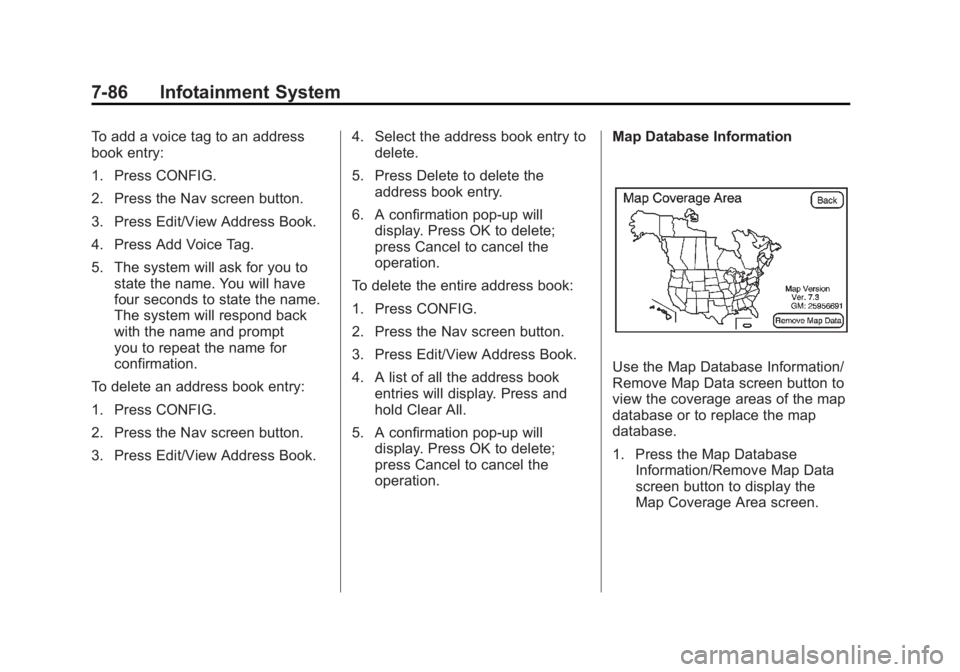
Use the Map Database Information/
Remove Map Data screen button to
view the coverage areas of the map
database or to replace the map
database.
1. Press the Map Database
Information/Remove Map Data
screen button to display the
Map Coverage Area screen.
Page 303 of 548
Black plate (101,1)Cadillac Escalade/Escalade ESV Owner Manual - 2011
Infotainment System 7-101.
Background noise may
cause voice commands to
be misunderstood, including
airflow noise from wind. .
To use the voice recognition
system, the map DVD must be
loaded and the navigation
system must be on.
This system is able to recognize
commands in three different
languages. The system only
recognizes commands based on
the language selected from the
Driver Information Center (DIC).
See Driver Information Center (DIC)
on page 5 ‑ 26 for more information.
Voice Recognition Commands The following list shows all of the
voice commands available for the
navigation system with a brief
description of each. The commands
are listed with the optional words
in brackets. To use the voice
commands, refer to the instructions
listed previously. Voice Tag Commands
The following are voice tag
commands that can be accessed
by clearly stating the commands
exactly as they are written. There
are up to 40 voice tag entries for
destinations.
Navigation go to [destination],
navigation select: These
commands instruct the system to
select a destination saved under the
voice tag you have stored. The
system prompts for a destination
name then waits for you to state
the name.
If not currently driving on a route,
the system automatically creates the
voice tag destination as the final
destination. If driving on a route, the
system automatically creates the
voice tag destination as a stopover.
Up to three stopovers can be
created. Storing Voice Tags
From the address book entry
information page, press the Add
Voice tag screen button. The
system responds “ Name Please? ”
and you will have four seconds to
record a name. The system asks for
confirmation of the name before
saving it as a voice tag.
Navigation Help
Navigation Help: This command
instructs the system to assist with
navigation commands.
Display Commands
Use the following display commands
to set the display mode.
Display [set] day [mode]: Sets the
display to daytime mode.
Display [set] night [mode]: Sets
the display to night mode.
Display [set] auto [mode]: Sets
the display to automatic mode. The
system changes between day and
night mode automatically.
Page 306 of 548
Black plate (104,1)Cadillac Escalade/Escalade ESV Owner Manual - 2011
7-104 Infotainment System When to Speak: A short tone
sounds after the system responds
indicating when it is waiting for a
voice command. Wait until the tone
and then speak.
How to Speak: Speak clearly in a
calm and natural voice.
Audio System When using the in ‐ vehicle Bluetooth
system, sound comes through the
vehicle's front audio system
speakers and overrides the audio
system. Use the audio system
volume knob, during a call, to
change the volume level. The
adjusted volume level remains in
memory for later calls. To prevent
missed calls, a minimum volume
level is used if the volume is turned
down too low. Bluetooth Controls Use the buttons located on the
steering wheel to operate the
in ‐ vehicle Bluetooth system. See
Steering Wheel Controls on
page 5 ‑ 3 for more information.
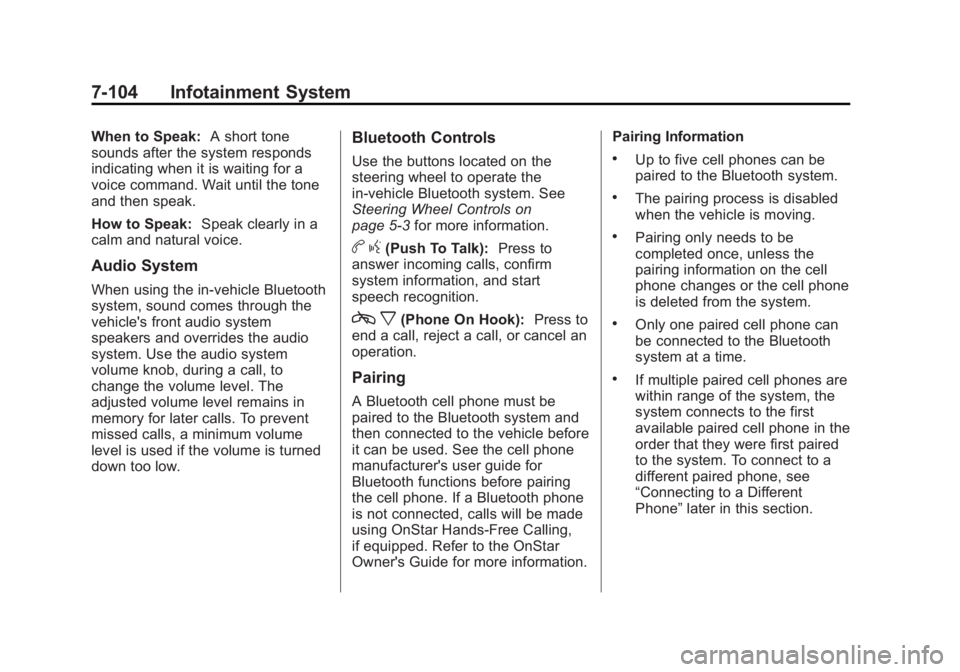
b g (Push To Talk): Press to
answer incoming calls, confirm
system information, and start
speech recognition.
c x (Phone On Hook): Press to
end a call, reject a call, or cancel an
operation.
Pairing A Bluetooth cell phone must be
paired to the Bluetooth system and
then connected to the vehicle before
it can be used. See the cell phone
manufacturer's user guide for
Bluetooth functions before pairing
the cell phone. If a Bluetooth phone
is not connected, calls will be made
using OnStar Hands ‐ Free Calling,
if equipped. Refer to the OnStar
Owner's Guide for more information. Pairing Information .
Up to five cell phones can be
paired to the Bluetooth system. .
The pairing process is disabled
when the vehicle is moving. .
Pairing only needs to be
completed once, unless the
pairing information on the cell
phone changes or the cell phone
is deleted from the system. .
Only one paired cell phone can
be connected to the Bluetooth
system at a time. .
If multiple paired cell phones are
within range of the system, the
system connects to the first
available paired cell phone in the
order that they were first paired
to the system. To connect to a
different paired phone, see
“ Connecting to a Different
Phone ” later in this section.
Page 307 of 548
Black plate (105,1)Cadillac Escalade/Escalade ESV Owner Manual - 2011
Infotainment System 7-105Pairing a Phone
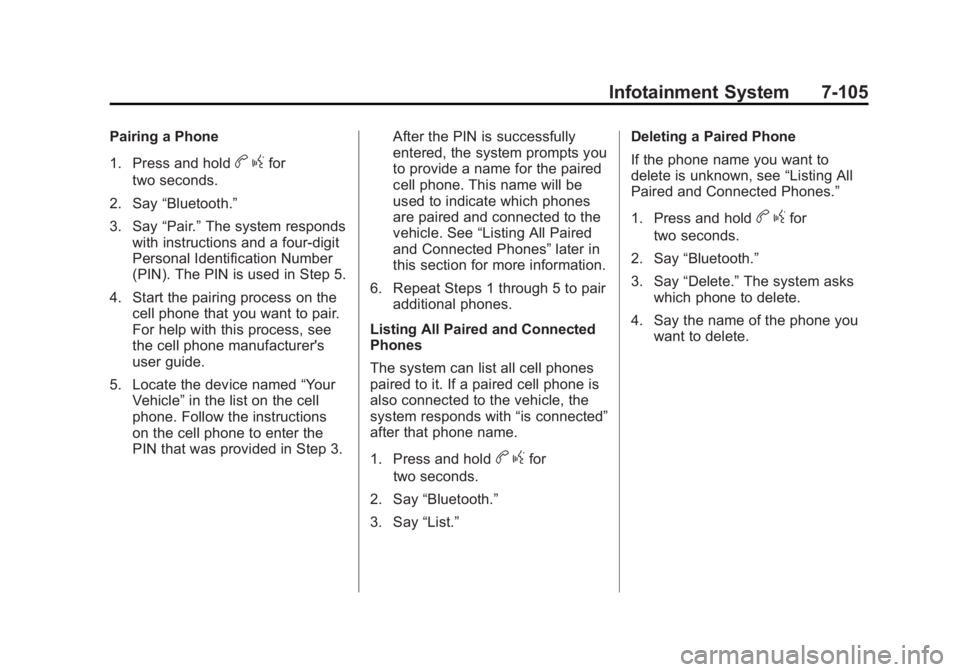
1. Press and hold
b g for
two seconds.
2. Say “ Bluetooth. ”
3. Say “ Pair. ” The system responds
with instructions and a four ‐ digit
Personal Identification Number
(PIN). The PIN is used in Step 5.
4. Start the pairing process on the
cell phone that you want to pair.
For help with this process, see
the cell phone manufacturer's
user guide.
5. Locate the device named “ Your
Vehicle ” in the list on the cell
phone. Follow the instructions
on the cell phone to enter the
PIN that was provided in Step 3. After the PIN is successfully
entered, the system prompts you
to provide a name for the paired
cell phone. This name will be
used to indicate which phones
are paired and connected to the
vehicle. See “ Listing All Paired
and Connected Phones ” later in
this section for more information.
6. Repeat Steps 1 through 5 to pair
additional phones.
Listing All Paired and Connected
Phones
The system can list all cell phones
paired to it. If a paired cell phone is
also connected to the vehicle, the
system responds with “ is connected ”
after that phone name.
1. Press and hold
b g for
two seconds.
2. Say “ Bluetooth. ”
3. Say “ List. ” Deleting a Paired Phone
If the phone name you want to
delete is unknown, see “ Listing All
Paired and Connected Phones. ”
1. Press and hold
b g for
two seconds.
2. Say “ Bluetooth. ”
3. Say “ Delete. ” The system asks
which phone to delete.
4. Say the name of the phone you
want to delete.
Page 308 of 548

Black plate (106,1)Cadillac Escalade/Escalade ESV Owner Manual - 2011
7-106 Infotainment System Connecting to a Different Phone
To connect to a different cell phone,
the Bluetooth system looks for the
next available cell phone in the
order in which all the available cell
phones were paired. Depending on
which cell phone you want to
connect to, you may have to use
this command several times.
1. Press and hold
b g for
two seconds.
2. Say “ Bluetooth. ”
3. Say “ Change phone. ”.
If another cell phone is
found, the response will be
“
connected. ”.
If another cell phone is not
found, the original phone
remains connected. Storing and Deleting Phone
Numbers The system can store up to
30 phone numbers as name tags
in the Hands ‐ Free Directory that is
shared between the Bluetooth and
OnStar systems, if equipped.
The following commands are used
to delete and store phone numbers.
Store: This command will store
a phone number, or a group of
numbers as a name tag.
Digit Store: This command allows
a phone number to be stored as a
name tag by entering the digits one
at a time.
Delete: This command is used to
delete individual name tags.
Delete All Name Tags: This
command deletes all stored name
tags in the Hands ‐ Free Calling
Directory and the OnStar
Turn ‐ by ‐ Turn Destinations
Directory, if equipped. Using the “ Store ” Command
1. Press and hold
b g for
two seconds.
2. Say “ Store. ”
3. Say the phone number or group
of numbers you want to store all
at once with no pauses, then
follow the directions given by the
system to save a name tag for
this number.
Using the “ Digit Store ” Command
If an unwanted number is
recognized by the system, say
“ Clear ” at any time to clear the
last number.
To hear all of the numbers
recognized by the system, say
“ Verify ” at any time.
1. Press and hold
b g for
two seconds.
2. Say “ Digit Store. ”