tow CADILLAC ESCALADE ESV 2012 Workshop Manual
[x] Cancel search | Manufacturer: CADILLAC, Model Year: 2012, Model line: ESCALADE ESV, Model: CADILLAC ESCALADE ESV 2012Pages: 538, PDF Size: 8.42 MB
Page 362 of 538
Black plate (62,1)Cadillac Escalade/Escalade ESV Owner Manual - 2012 - 2nd CRC - 11/29/11
9-62 Driving and Operating The following information has many
time-tested, important trailering tips
and safety rules. Many of these are
important for your safety and that of
your passengers. So please read
this section carefully before pulling a
trailer.
Weight of the Trailer How heavy can a trailer safely be?
It depends on how the rig is used.
Speed, altitude, road grades,
outside temperature and how much
the vehicle is used to pull a trailer
are all important. It can depend on any special equipment on the
vehicle, and the amount of tongue
weight the vehicle can carry. See
“ Weight of the Trailer Tongue ” later
in this section for more information.
Trailer weight rating (TWR) is
calculated assuming the tow vehicle
has only the driver but all required
trailering equipment. Weight of
additional optional equipment,
passengers and cargo in the tow
vehicle must be subtracted from the
trailer weight rating.
Page 363 of 538

Black plate (63,1)Cadillac Escalade/Escalade ESV Owner Manual - 2012 - 2nd CRC - 11/29/11
Driving and Operating 9-63Use the following chart to determine how much the vehicle can weigh, based upon the vehicle model and options.
Vehicle Axle Ratio Maximum Trailer Weight GCWR*
Escalade 2WD 6.2L V8 3.42 3 765 kg (8,300 lbs) 6 350 kg (14,000 lbs)
Escalade AWD 6.2L V8 3.42 3 674 kg (8,100 lbs) 6 350 kg (14,000 lbs)
Escalade ESV 2WD 6.2L V8 3.42 3 629 kg (8,000 lbs) 6 350 kg (14,000 lbs)
Escalade ESV AWD 6.2L V8 3.42 3 493 kg (7,700 lbs) 6 350 kg (14,000 lbs)
*The Gross Combination Weight Rating ™ (GCWR) is the total allowable weight of the completely loaded vehicle
and trailer including any passengers, cargo, equipment and conversions. The GCWR for the vehicle should not be
exceeded.
Ask your dealer for trailering
information or advice, or write us at
our Customer Assistance Offices.
See Customer Assistance Offices
(U.S. and Canada) on page 13 ‑ 4 or
Customer Assistance Offices
(Mexico) on page 13 ‑ 5 for more
information.
Weight of the Trailer Tongue
The tongue load (A) of any trailer is
very important because it is also
part of the vehicle weight. The
Gross Vehicle Weight (GVW) includes the curb weight of the
vehicle, any cargo carried in it, and
the people who will be riding in the
vehicle as well as trailer tongue
weight. Vehicle options, equipment,
passengers and cargo in the vehicle
reduce the amount of tongue weight
the vehicle can carry, which will also
reduce the trailer weight the vehicle
can tow. See Vehicle Load Limits on
page 9 ‑ 16 for more information
about the vehicle's maximum load
capacity.
Page 364 of 538

Black plate (64,1)Cadillac Escalade/Escalade ESV Owner Manual - 2012 - 2nd CRC - 11/29/11
9-64 Driving and Operating Trailer tongue weight (A) should be 10 percent to 15 percent and fifth wheel
or gooseneck kingpin weight should be 15 to 25 percent of the loaded trailer
weight (B) up to the maximums for vehicle series and hitch type.
Vehicle Series Hitch Type Maximum Tongue
Weight
1500 Weight Carrying 272 kg (600 lbs)
1500 Weight Distributing 499 kg (1,100 lbs)
Do not exceed the maximum
allowable tongue weight for the
vehicle. Choose the shortest hitch
extension that will position the hitch
ball closest to the vehicle. This will
help reduce the effect of trailer
tongue weight on the rear axle.
Trailering may be limited by the
vehicle's ability to carry tongue
weight. Tongue or kingpin weight
cannot cause the vehicle to exceed
the GVWR (Gross Vehicle Weight
Rating) or the RGAWR (Rear Gross
Axle Weight Rating). See “ Total
Weight on the Vehicle's Tires ” later
in this section for more information. After loading the trailer, weigh the
trailer and then the tongue,
separately, to see if the weights are
proper. If they are not, adjustments
might be made by moving some
items around in the trailer.
Total Weight on the Vehicle's
Tires
Be sure the vehicle's tires are
inflated to the inflation pressures
found on the Certification label on
the driver door or see Vehicle Load
Limits on page 9 ‑ 16 for more
information. Make sure not to
exceed the GVWR limit for the vehicle, or the RGAWR, with the tow
vehicle and trailer fully loaded for
the trip including the weight of the
trailer tongue. If using a weight
distributing hitch, make sure not to
exceed the RGAWR before applying
the weight distribution spring bars.
Weight of the Trailering
Combination It is important that the combination
of the tow vehicle and trailer does
not exceed any of its weight
ratings — GCWR, GVWR, RGAWR,
Trailer Weight Rating or Tongue
Weight. The only way to be sure it is
not exceeding any of these ratings
is to weigh the tow vehicle and
trailer combination, fully loaded for
the trip, getting individual weights
for each of these items.
Page 365 of 538
Black plate (65,1)Cadillac Escalade/Escalade ESV Owner Manual - 2012 - 2nd CRC - 11/29/11
Driving and Operating 9-65
Towing Equipment Hitches The correct hitch equipment helps
maintain combination control. Many
trailers can be towed with a weight
carrying hitch which simply features
a coupler latched to the hitch ball,
or a tow eye latched to a pintle
hook. Other trailers may require a
weight distributing hitch that uses
spring bars to distribute the trailer
tongue weight among the two
vehicle and trailer axles. See
“ Weight of the Trailer Tongue ” in
Trailer Towing on page 9 ‑ 61 for
rating limits with various hitch types.
If a step-bumper hitch will be used,
the bumper could be damaged in
sharp turns. Make sure there
is ample room when turning to avoid
contact between the trailer and the
bumper. Consider using sway controls with
any trailer. Ask a trailering
professional about sway controls or
refer to the trailer manufacturer's
recommendations and instructions.
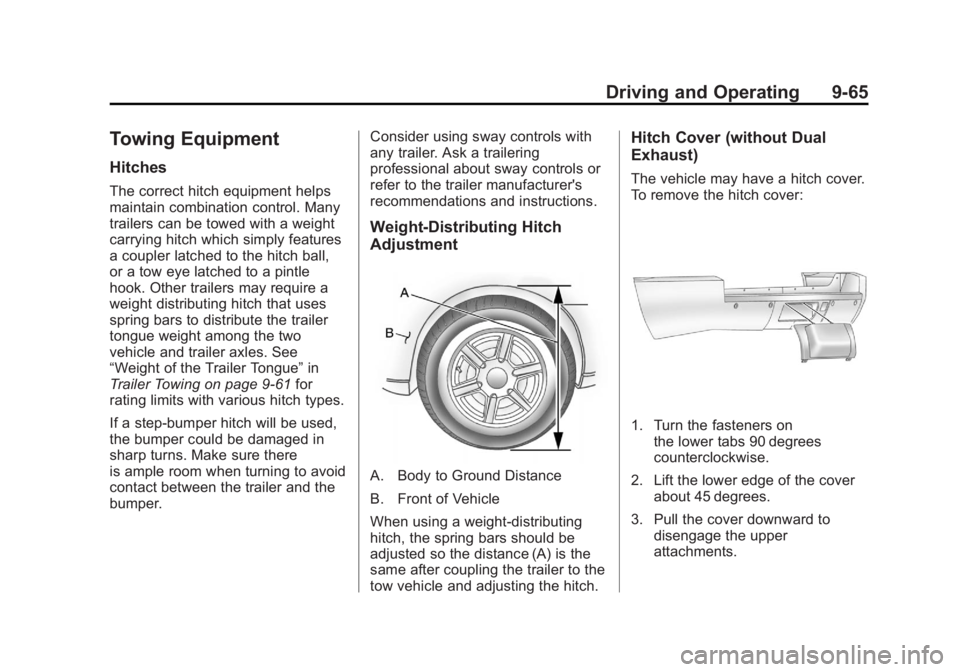
Weight ‐ Distributing Hitch
Adjustment
A. Body to Ground Distance
B. Front of Vehicle
When using a weight-distributing
hitch, the spring bars should be
adjusted so the distance (A) is the
same after coupling the trailer to the
tow vehicle and adjusting the hitch. Hitch Cover (without Dual
Exhaust) The vehicle may have a hitch cover.
To remove the hitch cover:
1. Turn the fasteners on
the lower tabs 90 degrees
counterclockwise.
2. Lift the lower edge of the cover
about 45 degrees.
3. Pull the cover downward to
disengage the upper
attachments.
Page 367 of 538

Black plate (67,1)Cadillac Escalade/Escalade ESV Owner Manual - 2012 - 2nd CRC - 11/29/11
Driving and Operating 9-67Trailer Brakes A loaded trailer that weighs more
than 900 kg (2,000 lbs) needs to
have its own brake system that is
adequate for the weight of the
trailer. Be sure to read and follow
the instructions for the trailer brakes
so they are installed, adjusted and
maintained properly.
Do not tap into the vehicle's
hydraulic system. Trailer Wiring Harness Heavy-Duty Trailer Wiring Harness
Package
The vehicle has a seven-pin
universal heavy-duty trailer
connector attached to the rear
bumper beam next to the integrated
trailer hitch. The seven-wire harness contains
the following trailer circuits: .
Yellow: Left Stop/Turn Signal .
Dark Green: Right Stop/Turn
Signal .
Brown: Taillamps .
White: Ground .
Light Green: Back-up Lamps .
Red: Battery Feed* .
Dark Blue: Trailer Brake*
*The fuses for these two circuits are
installed in the underhood electrical
center, but the wires are not
connected. They should be
connected by your dealer or a
qualified service center.
If charging a remote (non-vehicle)
battery, press the tow/haul mode
button located at the end of the shift
lever. This will boost the vehicle
system voltage and properly charge
the battery. If the trailer is too light
for tow/haul mode, turn on the
Page 368 of 538
Black plate (68,1)Cadillac Escalade/Escalade ESV Owner Manual - 2012 - 2nd CRC - 11/29/11
9-68 Driving and Operating headlamps as a second way to
boost the vehicle system and
charge the battery.
Electric Brake Control Wiring
Provisions These wiring provisions are
included with the vehicle as part of
the trailer wiring package. These
provisions are for an electric brake
controller. The instrument panel
contains blunt cut wires near the
data link connector for the trailer
brake controller. The harness
contains the following wires: .
Dark Blue: Brake Signal to
Trailer Connector .
Red/Black: Battery .
Light Blue/White: Brake Switch .
White: Ground
It should be installed by your dealer
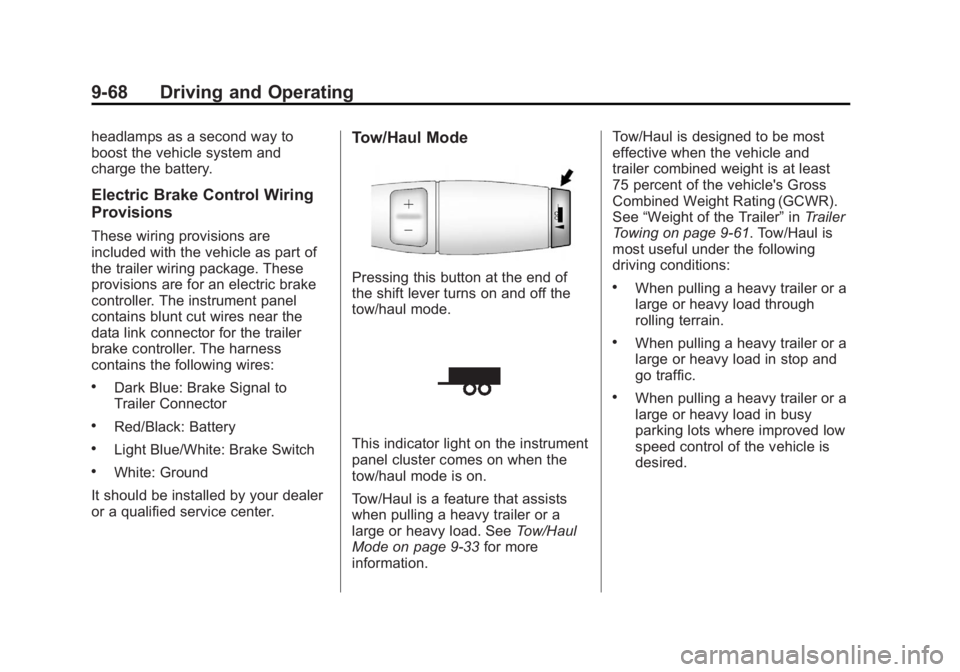
or a qualified service center. Tow/Haul Mode
Pressing this button at the end of
the shift lever turns on and off the
tow/haul mode.
This indicator light on the instrument
panel cluster comes on when the
tow/haul mode is on.
Tow/Haul is a feature that assists
when pulling a heavy trailer or a
large or heavy load. See Tow/Haul
Mode on page 9 ‑ 33 for more
information. Tow/Haul is designed to be most
effective when the vehicle and
trailer combined weight is at least
75 percent of the vehicle's Gross
Combined Weight Rating (GCWR).
See “ Weight of the Trailer ” in Trailer
Towing on page 9 ‑ 61 . Tow/Haul is
most useful under the following
driving conditions: .
When pulling a heavy trailer or a
large or heavy load through
rolling terrain. .
When pulling a heavy trailer or a
large or heavy load in stop and
go traffic. .
When pulling a heavy trailer or a
large or heavy load in busy
parking lots where improved low
speed control of the vehicle is
desired.
Page 369 of 538
Black plate (69,1)Cadillac Escalade/Escalade ESV Owner Manual - 2012 - 2nd CRC - 11/29/11
Driving and Operating 9-69Operating the vehicle in Tow/Haul
when lightly loaded or with no trailer
at all will not cause damage.
However, there is no benefit to the
selection of Tow/Haul when the
vehicle is unloaded. Such a
selection when unloaded may result
in unpleasant engine and
transmission driving characteristics
and reduced fuel economy. Tow/
Haul is recommended only when
pulling a heavy trailer or a large or
heavy load. Trailer Sway
Control (TSC) Non-hybrid vehicles with StabiliTrak
have a Trailer Sway Control (TSC)
feature. If the vehicle is towing a
trailer and the system detects that
the trailer is swaying, the vehicle
brakes are applied without the driver
pressing the brake pedal. The TCS/
StabiliTrak warning light will flash on
the instrument panel cluster to notify
the driver to reduce speed. If the
trailer continues to sway, StabiliTrak
will reduce engine torque to help
slow the vehicle. See StabiliTrak ®
System on page 9 ‑ 37 for more
information.
Adding non ‐ dealer accessories can
affect the vehicle performance. See
Accessories and Modifications on
page 10 ‑ 3 for more information.Conversions and
Add-Ons Add-On Electrical
Equipment Notice: Do not add anything
electrical to the vehicle unless
you check with your dealer first.
Some electrical equipment can
damage the vehicle and the
damage would not be covered by
the vehicle's warranty. Some
add-on electrical equipment can
keep other components from
working as they should.
Add-on equipment can drain the
vehicle's 12 ‐ volt battery, even if the
vehicle is not operating.
The vehicle has an airbag system.
Before attempting to add anything
electrical to the vehicle, see
Servicing the Airbag-Equipped
Vehicle on page 3 ‑ 38 and Adding
Equipment to the Airbag-Equipped
Vehicle on page 3 ‑ 38 .
Page 372 of 538

Black plate (2,1)Cadillac Escalade/Escalade ESV Owner Manual - 2012 - 2nd CRC - 11/29/11
10-2 Vehicle Care Wheels and Tires Tires . . . . . . . . . . . . . . . . . . . . . . . . 10-46
Tire Sidewall Labeling . . . . . . 10-47
Tire Designations . . . . . . . . . . . 10-48
Tire Terminology and
Definitions . . . . . . . . . . . . . . . . 10-49
Tire Pressure . . . . . . . . . . . . . . . 10-52
Tire Pressure for High-Speed
Operation . . . . . . . . . . . . . . . . . 10-53
Tire Pressure Monitor
System . . . . . . . . . . . . . . . . . . . 10-53
Tire Pressure Monitor
Operation . . . . . . . . . . . . . . . . . 10-55
Tire Inspection . . . . . . . . . . . . . . 10-57
Tire Rotation . . . . . . . . . . . . . . . 10-58
When It Is Time for New
Tires . . . . . . . . . . . . . . . . . . . . . . 10-59
Buying New Tires . . . . . . . . . . . 10-60
Different Size Tires and
Wheels . . . . . . . . . . . . . . . . . . . 10-62
Uniform Tire Quality
Grading . . . . . . . . . . . . . . . . . . . 10-62
Wheel Alignment and Tire
Balance . . . . . . . . . . . . . . . . . . . 10-64 Wheel Replacement . . . . . . . . 10-64
Tire Chains . . . . . . . . . . . . . . . . . 10-65
If a Tire Goes Flat . . . . . . . . . . 10-65
Tire Sealant and
Compressor Kit . . . . . . . . . . . 10-67
Storing the Tire Sealant and
Compressor Kit . . . . . . . . . . . 10-73
Tire Changing . . . . . . . . . . . . . . 10-74
Secondary Latch System . . . 10-85
Full-Size Spare Tire . . . . . . . . 10-87
Jump Starting Jump Starting . . . . . . . . . . . . . . 10-88
Towing Towing the Vehicle . . . . . . . . . 10-93
Recreational Vehicle
Towing . . . . . . . . . . . . . . . . . . . . 10-93
Appearance Care Exterior Care . . . . . . . . . . . . . . . 10-96
Interior Care . . . . . . . . . . . . . . . . 10-99
Floor Mats . . . . . . . . . . . . . . . . 10-102 General Information For service and parts needs, visit
your dealer. You will receive
genuine GM parts and GM-trained
and supported service people.
Genuine GM parts have one of
these marks:
Page 378 of 538

Black plate (8,1)Cadillac Escalade/Escalade ESV Owner Manual - 2012 - 2nd CRC - 11/29/11
10-8 Vehicle Care Checking Engine Oil It is a good idea to check the engine
oil level at each fuel fill. In order to
get an accurate reading, the vehicle
must be on level ground. The
engine oil dipstick handle is a yellow
loop. See Engine Compartment
Overview on page 10 ‑ 6 for the
location of the engine oil dipstick.
Obtaining an accurate oil level
reading is essential:
1. If the engine has been running
recently, turn off the engine and
allow several minutes for the oil
to drain back into the oil pan.
Checking the oil level too soon
after engine shutoff will not
provide an accurate oil level
reading.
2. Pull out the dipstick and clean it
with a paper towel or cloth, then
push it back in all the way.
Remove it again, keeping the tip
down, and check the level. When to Add Engine Oil
If the oil is below the cross-hatched
area at the tip of the dipstick, add
1 L (1 qt) of the recommended oil
and then recheck the level. See
“ Selecting the Right Engine Oil ” in
this section for an explanation of
what kind of oil to use. For engine
oil crankcase capacity, see
Capacities and Specifications on
page 12 ‑ 2 .
Notice: Do not add too much oil.
Oil levels above or below the
acceptable operating range
shown on the dipstick are harmful
to the engine. If you find that you
have an oil level above the
operating range, i.e., the engine
has so much oil that the oil level
gets above the cross-hatched area that shows the proper
operating range, the engine could
be damaged. You should drain
out the excess oil or limit driving
of the vehicle and seek a service
professional to remove the
excess amount of oil.
See Engine Compartment Overview
on page 10 ‑ 6 for the location of the
engine oil fill cap.
Add enough oil to put the level
somewhere in the proper operating
range. Push the dipstick all the way
back in when through.
Selecting the Right Engine Oil Selecting the right engine oil
depends on both the proper oil
specification and viscosity grade.
See Recommended Fluids and
Lubricants on page 11 ‑ 13 .
Specification
Use and ask for licensed engine oils
with the dexos1 ™ approved
certification mark. Engine oils
meeting the requirements for the
vehicle should have the dexos1
Page 380 of 538
Black plate (10,1)Cadillac Escalade/Escalade ESV Owner Manual - 2012 - 2nd CRC - 11/29/11
10-10 Vehicle Care indicated can vary considerably. For
the oil life system to work properly,
the system must be reset every time
the oil is changed.
When the system has calculated
that oil life has been diminished, it
indicates that an oil change is
necessary. A CHANGE ENGINE
OIL SOON message comes on. See
Engine Oil Messages on page 5 ‑ 31 .
Change the oil as soon as possible
within the next 1 000 km (600 mi).
It is possible that, if driving under
the best conditions, the oil life
system might indicate that an oil
change is not necessary for up to a
year. The engine oil and filter must
be changed at least once a year
and, at this time, the system must
be reset. Your dealer has trained
service people who will perform this
work and reset the system. It is also
important to check the oil regularly
over the course of an oil drain
interval and keep it at the proper
level. If the system is ever reset
accidentally, the oil must be
changed at 5 000 km (3,000 mi)
since the last oil change.
Remember to reset the oil life
system whenever the oil is changed.
How to Reset the Engine Oil
Life System Reset the system whenever the
engine oil is changed so that the
system can calculate the next
engine oil change. Always reset the
engine oil life to 100% after every oil
change. It will not reset itself. To
reset the system:
1. Display OIL LIFE REMAINING
on the DIC.
2. Press and hold the SET/RESET
button on the DIC for more than
five seconds. The oil life will
change to 100%.
If the CHANGE ENGINE OIL SOON
message comes back on when the
vehicle is started, the engine oil life
system has not reset. Repeat the
procedure. Automatic Transmission
Fluid When to Check and Change
Automatic Transmission Fluid It is usually not necessary to
check the transmission fluid level.
The only reason for fluid loss is a
transmission leak or overheating the
transmission. If a small leak is
suspected, then use the following
checking procedures to check the
fluid level. However, if there is a
large leak, then it may be necessary
to have the vehicle towed to a
dealer and have it repaired before
driving the vehicle further.
Notice: Use of the incorrect
automatic transmission fluid may
damage the vehicle, and the
damages may not be covered by
the vehicle warranty. Always use
the automatic transmission fluid
listed in Recommended Fluids
and Lubricants on page 11 ‑ 13 .