maintenance schedule CADILLAC ESCALADE ESV 2012 Owners Manual
[x] Cancel search | Manufacturer: CADILLAC, Model Year: 2012, Model line: ESCALADE ESV, Model: CADILLAC ESCALADE ESV 2012Pages: 538, PDF Size: 8.42 MB
Page 2 of 538

Black plate (2,1)Cadillac Escalade/Escalade ESV Owner Manual - 2012 - 2nd CRC - 11/29/11
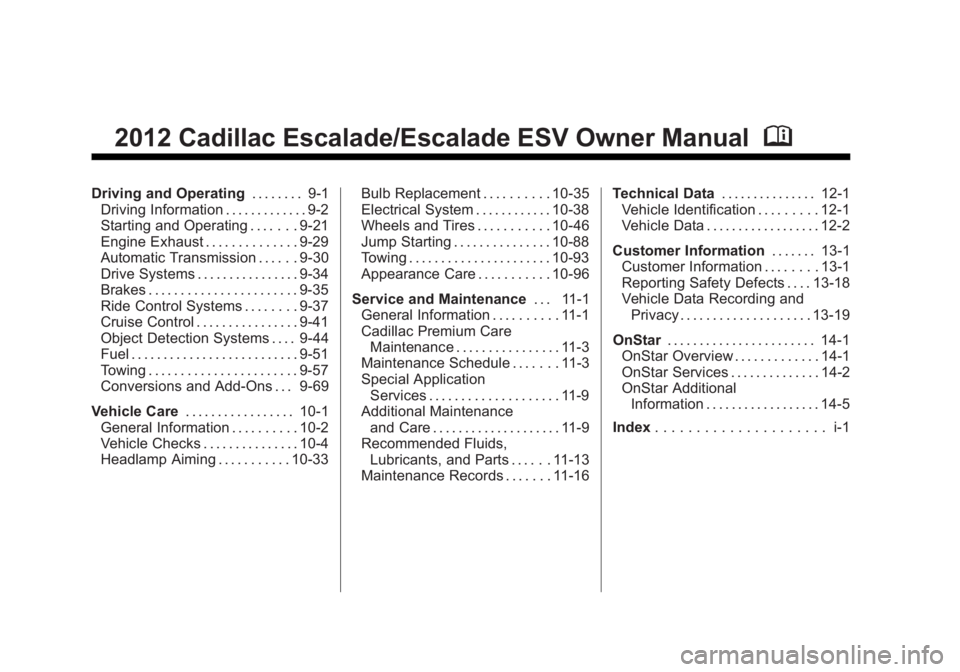
2012 Cadillac Escalade/Escalade ESV Owner Manual MDriving and Operating . . . . . . . . 9-1
Driving Information . . . . . . . . . . . . . 9-2
Starting and Operating . . . . . . . 9-21
Engine Exhaust . . . . . . . . . . . . . . 9-29
Automatic Transmission . . . . . . 9-30
Drive Systems . . . . . . . . . . . . . . . . 9-34
Brakes . . . . . . . . . . . . . . . . . . . . . . . 9-35
Ride Control Systems . . . . . . . . 9-37
Cruise Control . . . . . . . . . . . . . . . . 9-41
Object Detection Systems . . . . 9-44
Fuel . . . . . . . . . . . . . . . . . . . . . . . . . . 9-51
Towing . . . . . . . . . . . . . . . . . . . . . . . 9-57
Conversions and Add-Ons . . . 9-69
Vehicle Care . . . . . . . . . . . . . . . . . 10-1
General Information . . . . . . . . . . 10-2
Vehicle Checks . . . . . . . . . . . . . . . 10-4
Headlamp Aiming . . . . . . . . . . . 10-33 Bulb Replacement . . . . . . . . . . 10-35
Electrical System . . . . . . . . . . . . 10-38
Wheels and Tires . . . . . . . . . . . 10-46
Jump Starting . . . . . . . . . . . . . . . 10-88
Towing . . . . . . . . . . . . . . . . . . . . . . 10-93
Appearance Care . . . . . . . . . . . 10-96
Service and Maintenance . . . 11-1
General Information . . . . . . . . . . 11-1
Cadillac Premium Care
Maintenance . . . . . . . . . . . . . . . . 11-3
Maintenance Schedule . . . . . . . 11-3
Special Application
Services . . . . . . . . . . . . . . . . . . . . 11-9
Additional Maintenance
and Care . . . . . . . . . . . . . . . . . . . . 11-9
Recommended Fluids,
Lubricants, and Parts . . . . . . 11-13
Maintenance Records . . . . . . . 11-16 Technical Data . . . . . . . . . . . . . . . 12-1
Vehicle Identification . . . . . . . . . 12-1
Vehicle Data . . . . . . . . . . . . . . . . . . 12-2
Customer Information . . . . . . . 13-1
Customer Information . . . . . . . . 13-1
Reporting Safety Defects . . . . 13-18
Vehicle Data Recording and
Privacy . . . . . . . . . . . . . . . . . . . . 13-19
OnStar . . . . . . . . . . . . . . . . . . . . . . . 14-1
OnStar Overview . . . . . . . . . . . . . 14-1
OnStar Services . . . . . . . . . . . . . . 14-2
OnStar Additional
Information . . . . . . . . . . . . . . . . . . 14-5
Index . . . . . . . . . . . . . . . . . . . . . i-1
Page 31 of 538

Black plate (25,1)Cadillac Escalade/Escalade ESV Owner Manual - 2012 - 2nd CRC - 11/29/11
In Brief 1-25
Engine Oil Life System The engine oil life system calculates
engine oil life based on vehicle use
and displays a DIC message when
it is necessary to change the engine
oil and filter. The oil life system
should be reset to 100% only
following an oil change.
Resetting the Oil Life System
1. Display OIL LIFE REMAINING
on the DIC.
2. Press and hold the SET/RESET
button on the DIC for more than
five seconds. The oil life will
change to 100%.
See Engine Oil Life System on
page 10 ‑ 9 . Fuel E85 (85% Ethanol) Vehicles that have a FlexFuel badge
and a yellow fuel cap can use either
unleaded gasoline or ethanol fuel
containing up to 85% ethanol (E85).
See Fuel E85 (85% Ethanol) on
page 9 ‑ 54 . For all other vehicles,
use only the unleaded gasoline
described under Recommended
Fuel on page 9 ‑ 52 .
Driving for Better Fuel
Economy Driving habits can affect fuel
mileage. Here are some driving tips
to get the best fuel economy
possible. .
Avoid fast starts and accelerate
smoothly. .
Brake gradually and avoid
abrupt stops. .
Avoid idling the engine for long
periods of time. .
When road and weather
conditions are appropriate,
use cruise control. .
Always follow posted speed
limits or drive more slowly when
conditions require. .
Keep vehicle tires properly
inflated. .
Combine several trips into a
single trip. .
Replace the vehicle's tires with
the same TPC Spec number
molded into the tire's sidewall
near the size. .
Follow recommended scheduled
maintenance.
Page 94 of 538

Black plate (40,1)Cadillac Escalade/Escalade ESV Owner Manual - 2012 - 2nd CRC - 11/29/11
3-40 Seats and Restraints
Airbag System Check The airbag system does not need
regularly scheduled maintenance or
replacement. Make sure the airbag
readiness light is working. See
Airbag Readiness Light on
page 5 ‑ 14 .
Notice: If an airbag covering is
damaged, opened, or broken, the
airbag may not work properly. Do
not open or break the airbag
coverings. If there are any
opened or broken airbag covers,
have the airbag covering and/or
airbag module replaced. For the
location of the airbags, see
Where Are the Airbags? on
page 3 ‑ 27 . See your dealer for
service. Replacing Airbag System
Parts after a Crash
{ WARNINGA crash can damage the airbag
systems in the vehicle.
A damaged airbag system may
not work properly and may not
protect you and your
passenger(s) in a crash, resulting
in serious injury or even death. To
help make sure the airbag
systems are working properly
after a crash, have them
inspected and any necessary
replacements made as soon as
possible. If an airbag inflates, you will need to
replace airbag system parts. See
your dealer for service.
If the airbag readiness light stays on
after the vehicle is started or comes
on when you are driving, the airbag
system may not work properly. Have
the vehicle serviced right away. See
Airbag Readiness Light on
page 5 ‑ 14 .
Page 142 of 538

Black plate (22,1)Cadillac Escalade/Escalade ESV Owner Manual - 2012 - 2nd CRC - 11/29/11
5-22 Instruments and Controls
Engine Oil Pressure Light Notice: Lack of proper engine oil
maintenance can damage the
engine. Driving with the engine
oil low can also damage the
engine. The repairs would not be
covered by the vehicle warranty.
Check the oil level as soon as
possible. Add oil if required, but
if the oil level is within the
operating range and the oil
pressure is still low, have the
vehicle serviced. Always follow
the maintenance schedule for
changing engine oil.
This light comes on briefly while
starting the engine. If it does not,
have the vehicle serviced by your
dealer. If the system is working
normally the indicator light then
goes off. If the light comes on and stays on, it
means that oil is not flowing through
the engine properly. The vehicle
could be low on oil and it might
have some other system problem.
If the vehicle is a hybrid, see the
hybrid supplement for more
information.
Security Light
The security light should come on
briefly as the engine is started. If the
system is working normally, the
indicator light turns off. If it does not
come on, have the vehicle serviced
by your dealer.
If the light stays on and the engine
does not start, there could be a
problem with the theft-deterrent
system. This light is also used to indicate
the status of the anti-theft alarm
system when the ignition is turned
off. The light will flash rapidly if the
alarm system is arming and one or
more of the monitored entry points
is not closed. The light will stay on if
the alarm is arming and all entry
points are closed.
For information regarding this light
and the vehicle's security system,
see Anti-theft Alarm System on
page 2 ‑ 13 .
High-Beam On Light
This light comes on when the
high-beam headlamps are in use.
See Headlamp High/Low-Beam
Changer on page 6 ‑ 5 for more
information.
Page 147 of 538

Black plate (27,1)Cadillac Escalade/Escalade ESV Owner Manual - 2012 - 2nd CRC - 11/29/11
Instruments and Controls 5-27engine oil life system monitoring the
oil life, additional maintenance is
recommended in the Maintenance
Schedule in this manual. See
Maintenance Schedule on
page 11 ‑ 3 for more information.
Remember, you must reset the OIL
LIFE display yourself after each oil
change. It will not reset itself. Also,
be careful not to reset the OIL LIFE
display accidentally at any time
other than when the oil has just
been changed. It cannot be reset
accurately until the next oil change.
To reset the engine oil life system,
see Engine Oil Life System on
page 10 ‑ 9 .
Side Blind Zone Alert
If your vehicle has the Side Blind
Zone Alert (SBZA) system, this
display allows the system to be
turned on or off. Once in this
display, press the set/reset button
to select between ON or OFF. If you choose ON, the system will
be turned on. If you choose OFF,
the system will be turned off. When
the SBZA system is turned off, the
DIC will display the SIDE BLIND
ZONE ALERT SYSTEM OFF
message as a reminder that the
system has been turned off. See
Object Detection System Messages
on page 5 ‑ 33 and Side Blind Zone
Alert (SBZA) on page 9 ‑ 45 for more
information.
Units
Press the vehicle information button
until UNITS displays. This display
allows you to select between metric
or English units of measurement.
Once in this display, press the
set/reset button to select between
ENGLISH or METRIC units.
All of the vehicle information will
then be displayed in the unit of
measurement selected. Tire Pressure
On vehicles with the Tire Pressure
Monitor System (TPMS), the
pressure for each tire can be
viewed in the DIC. The tire pressure
will be shown in either pounds
kilopascals (kPa) or per square
inch (psi). Press the vehicle
information button until the DIC
displays FRONT TIRES kPa (PSI)
LEFT ## RIGHT ##. Press the
vehicle information button again
until the DIC displays REAR
TIRES kPa (PSI) LEFT ##
RIGHT ##.
If a low tire pressure condition is
detected by the system while
driving, a message advising you to
add air to a specific tire will appear
in the display. See Tire Pressure on
page 10 ‑ 52 and Tire Messages on
page 5 ‑ 36 for more information.
If the tire pressure display shows
dashes instead of a value, there
may be a problem with your vehicle.
If this consistently occurs, see your
dealer for service.
Page 151 of 538

Black plate (31,1)Cadillac Escalade/Escalade ESV Owner Manual - 2012 - 2nd CRC - 11/29/11
Instruments and Controls 5-31If this message continues to appear,
have the system repaired by your
dealer as soon as possible to avoid
damage to the engine.
ENGINE OVERHEATED
IDLE ENGINE This message displays when the
engine coolant temperature is too
hot. Stop and allow the vehicle to
idle until it cools down. See Engine
Coolant Temperature Gauge on
page 5 ‑ 13 .
See Overheated Engine Protection
Operating Mode on page 10 ‑ 22 for
information on driving to a safe
place in an emergency.
ENGINE OVERHEATED
STOP ENGINE
This message displays and a chime
sounds if the engine cooling system
reaches unsafe temperatures for
operation. Stop and turn off the
vehicle as soon as it is safe to
do so to avoid severe damage. This message clears when the
engine has cooled to a safe
operating temperature.
Engine Oil Messages CHANGE ENGINE OIL SOON This message displays when the
engine oil needs to be changed.
When you change the engine oil, be
sure to reset the CHANGE ENGINE
OIL SOON message. See Engine
Oil Life System on page 10 ‑ 9 for
information on how to reset the
message. See Engine Oil on
page 10 ‑ 7 and Maintenance
Schedule on page 11 ‑ 3 for more
information.
ENGINE OIL HOT IDLE
ENGINE
This message displays when the
engine oil becomes hotter than the
normal operating temperature. Stop
and allow the vehicle to idle until it
cools down. See Engine Coolant
Temperature Gauge on page 5 ‑ 13 .OIL PRESSURE LOW
STOP ENGINE Notice: If you drive the vehicle
while the engine oil pressure is
low, severe engine damage
may occur. If a low oil pressure
warning appears on the Driver
Information Center (DIC), stop
the vehicle as soon as possible.
Do not drive the vehicle until the
cause of the low oil pressure is
corrected. See Engine Oil on
page 10 ‑ 7 for more information.
This message displays if low oil
pressure levels occur. Stop the
vehicle as soon as safely possible
and do not operate it until the cause
of the low oil pressure has been
corrected. Check the oil as soon
as possible and have the vehicle
serviced by your dealer. See Engine
Oil on page 10 ‑ 7 .
Page 311 of 538

Black plate (11,1)Cadillac Escalade/Escalade ESV Owner Manual - 2012 - 2nd CRC - 11/29/11
Driving and Operating 9-11Check the body structure, steering,
suspension, wheels, tires, and
exhaust system for damage and
check the fuel lines and cooling
system for any leakage.
More frequent maintenance service
is required. Refer to the
Maintenance Schedule on
page 11 ‑ 3 for more information.
Driving on Wet Roads Rain and wet roads can reduce
vehicle traction and affect your
ability to stop and accelerate.
Always drive slower in these types
of driving conditions and avoid
driving through large puddles and
deep ‐ standing or flowing water.
{ WARNING
Wet brakes can cause crashes.
They might not work as well in a
quick stop and could cause
pulling to one side. You could
lose control of the vehicle.
(Continued) WARNING (Continued) After driving through a large
puddle of water or a car/vehicle
wash, lightly apply the brake
pedal until the brakes work
normally.
Flowing or rushing water creates
strong forces. Driving through
flowing water could cause the
vehicle to be carried away. If this
happens, you and other vehicle
occupants could drown. Do not
ignore police warnings and be
very cautious about trying to drive
through flowing water.
Hydroplaning
Hydroplaning is dangerous. Water
can build up under the vehicle's
tires so they actually ride on the
water. This can happen if the road is
wet enough and you are going fast
enough. When the vehicle is
hydroplaning, it has little or no
contact with the road. There is no hard and fast rule about
hydroplaning. The best advice is to
slow down when the road is wet.
Other Rainy Weather Tips Besides slowing down, other wet
weather driving tips include: .
Allow extra following distance. .
Pass with caution. .
Keep windshield wiping
equipment in good shape. .
Keep the windshield washer fluid
reservoir filled. .
Have good tires with proper
tread depth. See Tires on
page 10 ‑ 46 . .
Turn off cruise control.
Page 361 of 538

Black plate (61,1)Cadillac Escalade/Escalade ESV Owner Manual - 2012 - 2nd CRC - 11/29/11
Driving and Operating 9-614. Release the parking brake.
5. Let up on the brake pedal.
6. Drive slowly until the trailer is
clear of the chocks.
7. Stop and have someone pick up
and store the chocks.
Maintenance When Trailer
Towing The vehicle needs service more
often when pulling a trailer. See the
Maintenance Schedule for more
information. Things that are
especially important in trailer
operation are automatic
transmission fluid, engine oil, axle
lubricant, belts, cooling system and
brake system. It is a good idea to
inspect these before and during
the trip.
Check periodically to see that all
hitch nuts and bolts are tight. Trailer Towing If the vehicle is a hybrid, see the
hybrid supplement for more
information.
Do not tow a trailer during break ‐ in.
See New Vehicle Break-In on
page 9 ‑ 21 for more information.
{ WARNINGThe driver can lose control when
pulling a trailer if the correct
equipment is not used or the
vehicle is not driven properly. For
example, if the trailer is too
heavy, the brakes may not work
well — or even at all. The driver
and passengers could be
seriously injured. The vehicle may
also be damaged; the resulting
repairs would not be covered by
the vehicle warranty. Pull a trailer
only if all the steps in this section
have been followed. Ask your
(Continued) WARNING (Continued) dealer for advice and information
about towing a trailer with the
vehicle.
Notice: Pulling a trailer
improperly can damage the
vehicle and result in costly
repairs not covered by the vehicle
warranty. To pull a trailer
correctly, follow the advice in this
section and see your dealer for
important information about
towing a trailer with the vehicle.
To identify the trailering capacity of
the vehicle, read the information in
“ Weight of the Trailer ” that appears
later in this section.
Trailering is different than just
driving the vehicle by itself.
Trailering means changes in
handling, acceleration, braking,
durability and fuel economy.
Successful, safe trailering takes
correct equipment, and it has to be
used properly.
Page 381 of 538

Black plate (11,1)Cadillac Escalade/Escalade ESV Owner Manual - 2012 - 2nd CRC - 11/29/11
Vehicle Care 10-11Change the fluid and filter at the
scheduled maintenance intervals
listed in Maintenance Schedule on
page 11 ‑ 3 . Be sure to use the
transmission fluid listed in
Recommended Fluids and
Lubricants on page 11 ‑ 13 .
How to Check Automatic
Transmission Fluid Notice: Too much or too little
fluid can damage the
transmission. Too much can
mean that some of the fluid could
come out and fall on hot engine
parts or exhaust system parts,
starting a fire. Too little fluid
could cause the transmission to
overheat. Be sure to get an
accurate reading if checking the
transmission fluid. Before checking the fluid level,
prepare the vehicle as follows:
1. Start the engine and park the
vehicle on a level surface. Keep
the engine running.
2. Apply the parking brake and
place the shift lever in P (Park).
3. With your foot on the brake
pedal, move the shift lever
through each gear range,
pausing for about three seconds
in each range. Then, move the
shift lever back to P (Park).
4. Allow the engine to idle
(500 – 800 rpm) for at least
one minute. Slowly release the
brake pedal.
5. Keep the engine running and
press the Trip/Fuel button or trip
odometer reset stem until
TRANS TEMP (Transmission
Temperature) displays on the
Driver Information Center (DIC). 6. Using the TRANS TEMP
reading, determine and perform
the appropriate check
procedure. If the TRANS TEMP
reading is not within the required
temperature ranges, allow the
vehicle to cool, or operate the
vehicle until the appropriate
transmission fluid temperature is
reached.
Cold Check Procedure
Use this procedure only as a
reference to determine if the
transmission has enough fluid to be
operated safely until a hot check
procedure can be made. The hot
check procedure is the most
accurate method to check the fluid
level. Perform the hot check
procedure at the first opportunity.
Use this cold check procedure to
check fluid level when the
transmission temperature is
between 27°C and 32°C
(80°F and 90°F).
Page 383 of 538

Black plate (13,1)Cadillac Escalade/Escalade ESV Owner Manual - 2012 - 2nd CRC - 11/29/11
Vehicle Care 10-13See Engine Compartment
Overview on page 10 ‑ 6 for more
information.
2. Flip the handle up and then pull
out the dipstick and wipe it with
a clean rag or paper towel.
3. Install the dipstick by pushing it
back in all the way, wait
three seconds, and then pull it
back out again.
4. Check both sides of the dipstick
and read the lower level. Repeat
the check procedure to verify the
reading.
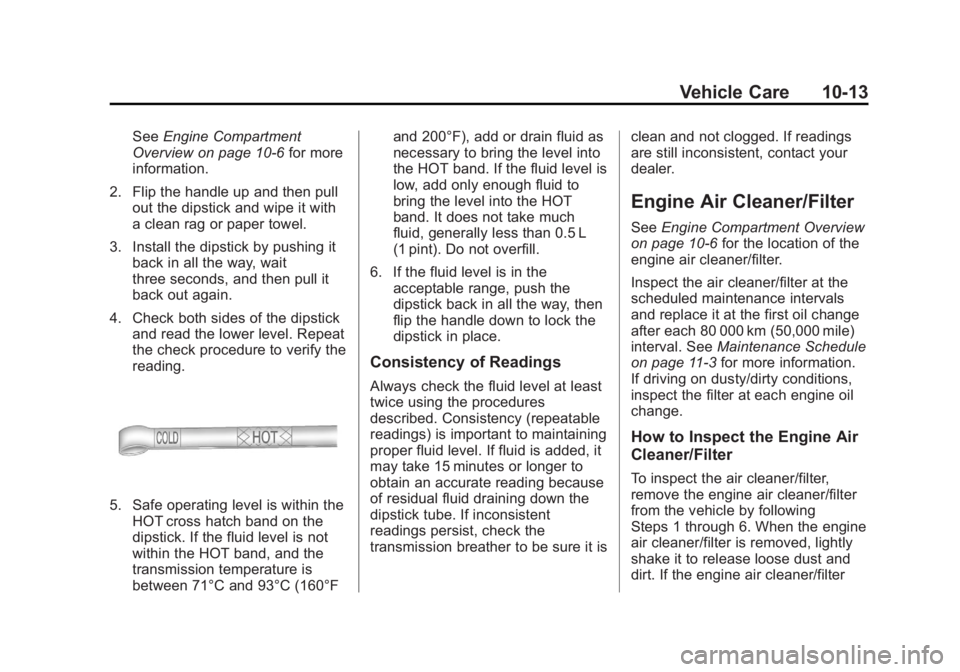
5. Safe operating level is within the
HOT cross hatch band on the
dipstick. If the fluid level is not
within the HOT band, and the
transmission temperature is
between 71°C and 93°C (160°F and 200°F), add or drain fluid as
necessary to bring the level into
the HOT band. If the fluid level is
low, add only enough fluid to
bring the level into the HOT
band. It does not take much
fluid, generally less than 0.5 L
(1 pint). Do not overfill.
6. If the fluid level is in the
acceptable range, push the
dipstick back in all the way, then
flip the handle down to lock the
dipstick in place.
Consistency of Readings Always check the fluid level at least
twice using the procedures
described. Consistency (repeatable
readings) is important to maintaining
proper fluid level. If fluid is added, it
may take 15 minutes or longer to
obtain an accurate reading because
of residual fluid draining down the
dipstick tube. If inconsistent
readings persist, check the
transmission breather to be sure it is clean and not clogged. If readings
are still inconsistent, contact your
dealer.
Engine Air Cleaner/Filter See Engine Compartment Overview
on page 10 ‑ 6 for the location of the
engine air cleaner/filter.
Inspect the air cleaner/filter at the
scheduled maintenance intervals
and replace it at the first oil change
after each 80 000 km (50,000 mile)
interval. See Maintenance Schedule
on page 11 ‑ 3 for more information.
If driving on dusty/dirty conditions,
inspect the filter at each engine oil
change.
How to Inspect the Engine Air
Cleaner/Filter
To inspect the air cleaner/filter,
remove the engine air cleaner/filter
from the vehicle by following
Steps 1 through 6. When the engine
air cleaner/filter is removed, lightly
shake it to release loose dust and
dirt. If the engine air cleaner/filter